You want to monetize a blog for 2024!
Yay!
When I started a mom blog my twins were still babies. I’m so glad I started even though I felt I had no time as a new mom. Finding the time to blog meant that I had to work when everyone was sleeping.
So, if you’re a new mom or you have little ones, you can still learn how to start a mom blog in 2024 and learn how to monetize a blog. The fist step is having a blog plan that you can go by and take action with.
I don’t know about you, but ever since I became a mom, my memory hasn’t been the best. My twins are five years old but I still say I have mom brain!
It’s true!
That’s why I rely on setting up blogging goals and planning out my blog so that I know how I’ll grow my blog traffic, email list and income.
This didn’t happen overnight; I had to work hard on my blog and spend time on it to see any amount of income. With Twins Mommy, once I had my focus plan in place, I generated $2,000 in three months. From there, my blog income grew more each month.
And I want to help you – new blogger friend! – to get started on how to make money with a blog.
For many new bloggers it’s a challenge to figure out what to focus on for their blog.
Do you focus on SEO? Pinterest? Email? Facebook? YouTube? Guest Posting? What do you focus on first? The list can go on and on.
Knowing exactly what to focus on in the first three months can help you achieve your income goal when you start a mom blog.
Do the work it takes, be consistent with blogging and above all, stick to your blog plan and you’ll be able to generate income from blogging too!
This three month blog plan is an overview to help new bloggers grow their blog up and up!
If you want to start your own mom blog that makes money, make sure to sign up to my free course that helps you start a mom blog!
How to Monetize a Blog When You Start a Blog
Blog Plan – Month 1

The first month is starting your blog off right!
And the best part is, you don’t have to spend days and days getting your blog up and running. From what I figured as a brand new blogger, seven hours to do these blog tasks should be sufficient.
Of course, this doesn’t count your blog education in understanding blogging terms and services/products.
To inspire you to start a blog I want you to truly know that blogging has changed my life in so many ways.
I’m able to take care of my twins, nurture and play with them, and make money by doing something I truly love!
And, the best part about starting your blog is the that you can monetize a blog!
Just think about it – when your mom was your age, there was no internet, no Pinterest, Twitter or even cell phones!
If your mom wanted to learn how to start a mom blog, she’d have to get a business license, fill out forms, and invest a lot of money to get it going.
For only a few dollars a month blogging for money can start making an impact!
I found that so amazing!
1. Start Your Blog
To help you start your blog, make sure to check out my step-by-step tutorial.
This is the first step to starting a profitable blog.
Here are some guidelines to consider when starting a profitable blog:
- Figure out your blog’s name: I suggest you use a keyword that’s related to your niche topic, your name or something that encompasses your personality and writing. Examples: startabusiness, beavirtualassistent, mommyness, victoriawhite, midlifemom.
- Discover your blog niche topic: Make sure it’s a topic you can write about for years to come, that you enjoy writing about, has the potential to make income, and that you have some knowledge about it (or want to learn more about that topic). When I started Twins Mommy, I wanted to share tips for other work at home moms doing the same thing I was!
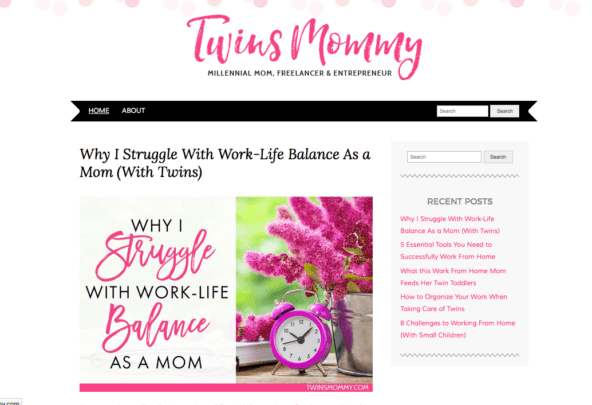
- For your WordPress theme, you can use a free version to start off with. That’s what I did in the beginning. And when you’re ready, you can invest in a paid theme. I used the free version of the Adelle WordPress theme and was happy with it. Here is what my site looked like when I first started Twins Mommy. I wanted something cute and mom-friendly.
You can also use the Unwind theme for WordPress or the Astra theme for WordPress. I started using that for a demo site of mine and love that it’s customizable. You can have different fonts and layout your blog in different ways.
Here is what the Unwind Theme looks like on my demo site:
Here’s what the Astra theme looks like on another demo site of mine:
2. Create Your Blog’s Logo
Your blog’s logo is what will identify you from other blogs. People will come to know your blog by your logo.
Personally, I don’t make my logos fancy with icons and shadows.
I like to keep my logo simple because I don’t want it to deter from my blog posts (or email signup forms).

All my logos for my sites are text based. This means I use a fancy font to create my logo.
To help you out I have a post and a free video to show you how to create a logo using Canva.
Some guidelines when creating your logo:
- Find an easy to read font for your logo. Going too script can make it difficult to read.
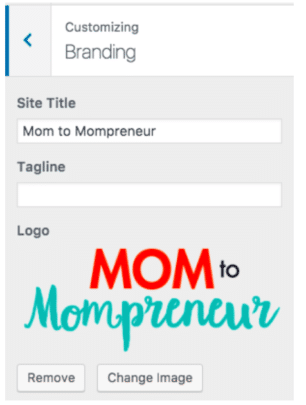
- If your blog name doesn’t tell people what you blog about (like mine does with Twins Mommy), consider putting a tagline in. My tagline was helping moms become mompreneurs. Since I’ve had Twins Mommy for over a year now, I decided to remove the tagline and update my logo with a new font.
- Work on changing the size, spacing, boldness and placement of your fonts. Here is an examples of that:
When you have your new site, it’s easy to place your logo on your homepage.
Log into your WordPress account.
Go to Appearance > Customize.
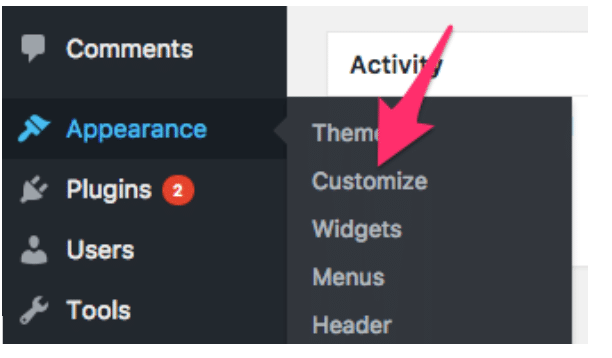
From there go to Branding and click on Change Image to add your new logo.
3. Set Up Your Pinterest Profile & Blog
Go ahead and set up your Pinterest account for your mom blog if you haven’t already. But wait?
How will this help with blog monetization?
Pinterest is a traffic driver for your mom blog. With more traffic you’ll be able to help you learn how to make more money blogging. And Pinterest is the fastest way to do this!
It’s free to set up an account and you can make it business too (to add more tools like analytics).
When setting up your account, make sure to add your website and verify it. This will get analytics with click-through from Pinterest to your site.
Here are some tips to setting up your profile/bio:
1. Use Keywords in Your Title and Description
To get your Pinterest noticed by other pinners (and from Pinterest itself), you need to let everyone know what your profile is about.
Pinterest doesn’t know what your mom blog is about. So, help them with putting keywords in your titles from your niche topic.
Note that your title can only be 30 characters long. There is hack to have a longer title if you use your mobile to change your title (but it may not always work).
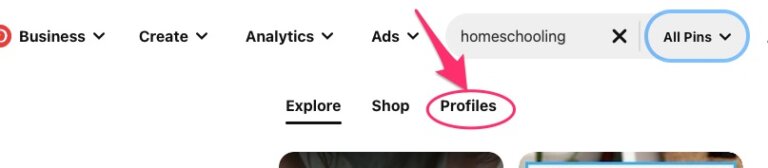
For example, if you have a homeschool blog, some keywords are:
- Homeschool room
- Homeschool organization
- Homeschool schedule
- Homeschool preschool
- Homeschool curriculum
So, when thinking of your title, you don’t only want to put your name and website’s name; rather, also place keywords.
Here is what mine looks like:
To find these keywords, search your niche (homeschool) in Pinterest and see the suggested terms.
2. Create Board Topics to Attract Pinners
Pinterest and pinners aren’t too sure what your profile is about. To help them understand your Pinterest profile, create board topics within your niche and that will attract other pinners.
For our fictional homeschool profile, you can use the same keywords you found originally as board topics. You can expand that search to include learning topics, developmental topics, free resources and printables.
You can expand further to include topics you think your audience would like: budgeting, frugal living, special needs, DIY art and more.
To get inspiration, you can search for your keyword in Pinterest and click on “people.”
Find a top pinner with that niche topic and check out their profile. Look at their board topics and use that as inspiration for your board titles.
3. Fill Out Your Board Descriptions
I can betcha that 90% of pinners do NOT fill out their board descriptions. But, you know what?
Pinterest promotes boards in your smart feed. If you want your board to be featured in the smart feed, use descriptive keywords for your board topics.
Now, it’s time to make your blog shareable. This means setting up sharing buttons and a Pinterest widget.
For that I have a post with several videos to help you do that! Check it out!
4. Join Affiliate Programs
One of the easiest ways on how to monetize a blog in 2024 is to start affiliate marketing.
This means you can promote a product on your blog and use a special link. When a reader clicks on that link and buys what you are promoting, you get a commission.
This is a percent of the price of the product. Each affiliate program has different rules and regulations for promoting their affiliates. For example, Amazon Associates doesn’t allow marketing their links in email.
So make sure to research each affiliate program. Personally, I like to go to the tool or service business and see if they have an affiliate program.
For example, in Google I would search for, “ConvertKit affiliate program.” From there I would read about their program and see if it’s a good fit.
Above all, when doing affiliate marketing, get to know the product you are promoting. I suggest using products first, and if you think it helped you, then it will probably help your audience.
For example, when I started Tailwind, I did not promote my affiliate link until I knew it helped me with my blog traffic and brand recognition.
Here are 7 affiliate programs for ways to monetize a blog
- ShareASale – offers pay-per-sale, pay-per-lead, and pay-per-click programs, with a minimum payout of $50. They have a lot of blogger-friendly merchants like Tailwind, PicMonkey and OptinMonster.
- Amazon – Amazon Associates program is easy to join and use, allows you to choose from over one million products to advertise and will give you up to 10% commission on qualifying purchases. Commissions can be small, but if someone doesn’t buy from your link, but still buys from Amazon, you get that commission from the product they ended up buying.
- Creative Market – is an online marketplace community where you can purchase digital design products such as WordPress themes, photography, fonts, and more. Creative Market offers a 10% referral commission for every new customer you bring to their site. With this affiliate program, you will earn 10% on every purchase a person makes for an entire year.
- VigLink – VigLink works by converting your existing links into affiliate links. This means you don’t have to sign up for individual affiliate programs. For example, if you’re a beauty blogger and link to a mascara you use, VigLink will turn that into an affiliate link. This is best for food bloggers and beauty bloggers.
- CJ Affiliate by Conversant – CJ Affiliate is one of the largest affiliate programs around. The platform isn’t that user-friendly so take the time to understand it. With CJ Affiliate, you can choose your minimum payout, with $50 being the absolute minimum.
- Teachable – Teachable is a place to host your digital product like a course, or eBook. You can even use Teachable to host a free course or lead magnet like a guide or video workshop.
- PicMonkey – PicMonkey is an image editing tool for your graphics. You can use it to create Pin graphics or blog posts or your printables.
5. Your About Page & Resource Page
When people start visiting your blog, you want to let them know the blogger behind what they are reading. You can do that with your About page.
Your About page is the most popular page on your website. Bloggers want to know the blogger behind your posts.
So, show them with a nice family picture or headshot of you!
Invite them with your warm smile and friendly and engaging copy. One thing I like to make sure I do is introduce myself and let new readers know my name.
Many bloggers on their About pages don’t identify themselves! By the time I finish their blurb, I have no clue what their name is!
You About page should also include:
- Why you started your blog
- Who you are and why you are experienced in your niche topic
- Popular posts and income generating posts (that you will eventually write)
- An email opt-in form (which you will eventually have)
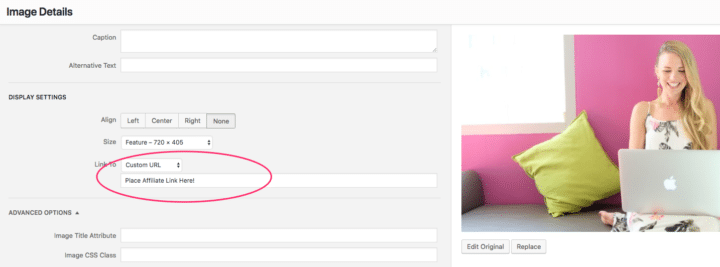
Similarly, you can help readers with their questions by having a resource page. Those affiliate programs you signed up for can be put to good use.
Promote those affiliates on your resource page. Check out mine to see how I did that.
Make sure to add your affiliate link in your blurb and in your image (so that when someone moves over the image, a link shows up).
6. Creating Your First Blog Post
For your first month as a new mom blogger, you might have a bunch of great ideas to blog about.
That’s great! The more blog posts you publish the quicker you’ll get noticed. But, don’t worry if you only publish one or two posts the first month.
When I started Twins Mommy, I started with one post. That’s it!
For your post you might have no idea what to blog about. Here are some ideas to help you get started:
- Why you started this blog
- Your plan for your new blog
- 5 quick tips to help your potential reader (ex: 5 Quick Ways to Get Your Newborn to Sleep)
- Mistakes to avoid (7 Knitting Mistakes You’re Probably Making)
- Your blogging goals
Your first post can be about anything! Mine was time saving tips for work at home mom when you’re sick.
Trust me when I say, not a lot of bloggers will read your first post. So don’t dwell on it. For your next post or your third or fourth post, I want you to write a foundational type of post.
What does this mean?
It’s a post that identifies with your niche. For example, if you blog about homeschooling, your foundational post would be something like, The Ultimate Guide to Getting Started Homeschooling for Stay At Home Moms.
Essentially, these are guides that can help your readers.
They can also be a type of resource post. For example, my first foundational post for Twins Mommy was a tools post for work at home moms. It has over 5k shares and is still popular on Pinterest.
Some help with your first foundational post is to think of doing a how-to or tutorial based type of post. This type of blog post template will be used later for your income generating posts, i.e. your affiliate posts.
And doing this can help you make money blogging.
Blog Plan – Month 2
Month two of your mom blog plan is all about building blog traffic so that you can start to monetize a blog! The tasks for this month total around 10 hours.
1. Join Pinterest and Facebook Groups
There’s been a lot of talk about if Pinterest groups are as good for driving traffic as before.
Pinterest has stated that they are going to de-prioritize group boards, meaning they may not show up in the smart feeds. However, I still use group boards for some of my Pinterest profiles and they are driving tons of traffic!
So try it out and see!
No one knows your blog exists so it’s your job to get in front of as many people as possible and let them know about your wonderful blog!
And the best way (and most efficient way) is to join Facebook groups and Pinterest groups.
If you haven’t already, make sure to start a Facebook profile (and if you are an eager beaver, also set up a business page for your blog. Here’s my Facebook page for an example. I would love it if you Liked my page!)
What are these groups?
Pinterest groups are collaborative boards. They have multiple contributors pinning to that board.
It’s hosted on one pinner’s profile and if that profile has a large following, their group board will have a large following.
This means that whenever you pin to that group board with a lot of followers, it has the potential to be seen by their massive followers.
How do you join?
Read the group’s instructions. If a group board doesn’t have anything, follow the group leader, visit their blog and contact them (if they don’t have a contact page, use social media and contact them on Twitter or Facebook) asking to join their group.
To get you started, I have compiled a list of over 60+ Facebook and Pinterest groups.
Make sure to follow the rules for pinning, but for big boards, the owners probably aren’t in their group board every day so proceed with caution!
2. Create Beautiful Pin Graphics
Pinterest is a visual platform and will totally help you get traffic to your new blog. The way to grow your traffic and start making money blogging is having a beautiful and inviting pin graphic.
Since starting Twins Mommy I’ve evolved my pin graphic look.
And it’s still changing even today!
To help you get started on creating a great looking pin, I have a free video tutorial using Canva.
Some guidelines to follow:
- Avoid using faces on your pins. This looks a bit more like a magazine ad.
- Stick to red tones, but do play around. One of my best pins has green font!
- Create a lot of white space. Play around with that as well. Since Pinterest has been changing the look of the smart feed, having pins with more on them can attract more clicks than those that are more white. So play around.
- Use one main script (fancy) font as your brand identifier. Again, play around with this as well. Some great pins have two script fonts and other bloggers use different script fonts each time they make a pin.
- Use big fonts since most people view Pinterest from their mobile phone (something I’m still working on!!)
3. Automate Your Pinning
One thing I wish I did sooner was start automating my pins. When you pin more and when you pin consistently, Pinterest rewards you (whether it’s manual pinning or automated pinning).
Pinterest likes when you are using their platform frequently. They show and recommend your pins and boards more to new pinners.
When I started Tailwind my reach, traffic and followers grew immensely.
What’s great about Tailwind (well, there are a lot of great things) are their board lists. Simply create a list of boards and group boards and when it’s time to pin, you click on that list and Tailwind pins to all of the boards on that list.
This saves me hours a week!
I can schedule my pins to go to my 100+ boards in a matter of minutes.
If you’re interested in starting Tailwind, click here to get your first 100 pins free.
Check out my video on how to use Tailwind to start pinning.
Here are some posts to help you out:
- How I Managed to Gain 4.8k Pinterest Followers With Little Effort
- How Tailwind Skyrocketed My Traffic, List and Income
4. Start Guest Posting and Podcasting
You’re still new to the blogging world. In the second month, the best way to get start growing is to start reaching out and connecting.
The first part of that is reaching out. I want you to start guest posting or podcasting. There are other blogs – ones that are more bigger than yours and have more traffic than yours – that open up their blog to guest posters.
You write a post, you get an author bio and they publish it on their blog. Huffington Post is a great example.
HuffPo is seen by millions and if you post on their blog, your post can be seen by many!
While it may be hard to land a guest post spot on Scary Mommy, there are other less popular – but still bigger than your blog – that accept guest posts.
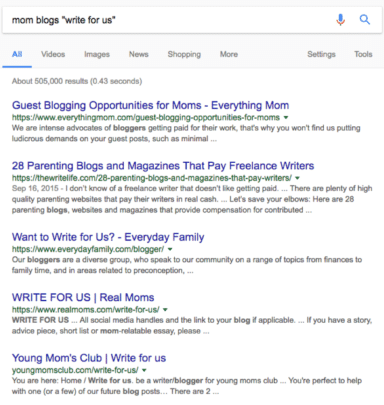
You can run a Google search to see hundreds of blogs that accept guest posts in your niche.
Search for ” (your niche topic) + write for us.” Here is my result for mom blogs.
Click on one that you are interested in and see how to guest post for them.
You can also search on Facebook during collaboration threads. These threads have bloggers asking to collaborate on anything from course lessons to podcasts to guest blogs.
The Mom to Mompreneur Facebook Group has many mom bloggers that have podcasts or guest contributors.
When you guest post (or podcast), make sure you give the best tips in your niche topic. This is because that post will be seen by more people on their blog than on your blog, so make it good!
Finally, when you guest post remember to optimize your author bio. This is a little blurb on who you are, your blog and what you can offer. I like to link to a lead magnet, services page or social media profile in my author bio. So make this count!
5. Start Connecting
While a big chunk of your blog plan for month 3 will be on social media, you can start connecting with other bloggers in your niche by joining their email list, commenting on their posts and following them on social media.
Learn from them, ask them questions and get to know the bloggers in your niche! I’ve met many bloggers since starting Twins Mommy and am amazed by how far they’ve gone since knowing them!
It’s awesome to see someone’s journey and succeeding! So start opening up and getting to know other bloggers!
6. Create More Income Generating Posts
This is a big month for content writing.
It’s also the time to start to monetize a blog the right way.
If you want to reach your goal of $2,000 by the end of month three, you’re going to need to put out more income generating posts.
These can be sponsored posts or affiliate posts.
Either way, make these posts highly valuable and full of great tips. The best affiliate posts have a lot of “free” content to help someone move from point A to point B and then a small portion of “paid” content (your affiliate product).
Based on your affiliate product or products, you can do a round-up of favorites, a tutorial based post showing how to work your affiliate product or a how-to type of post showing how to achieve a certain outcome using your affiliate product.
Here are some examples with affiliate products in mind:
- 35 Best Gifts For Your Mother-in-Law (round-up)
- How to Create a Free Email Course Using ConvertKit (tutorial)
- The Best Nursing Covers for First Time Breastfeeding Moms (review)
I suggest for month two to put out at least two affiliate types of post. These posts should also have multiple pins and shared across social media as a way to convert your posts to income so you can star making money blogging. Month three we will dive into more promotional strategies.
Blog Plan – Month 3
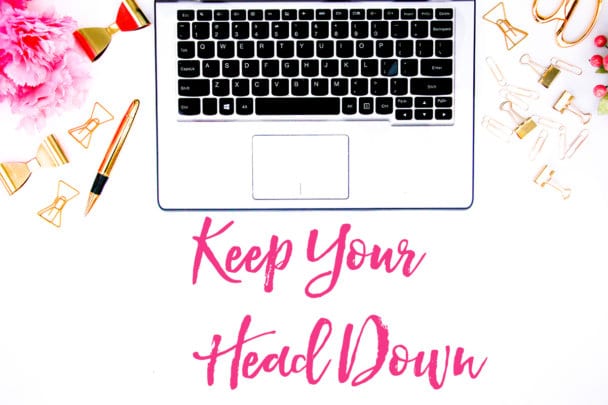
As each month goes by, you’ll be spending more and more time on your blog. For month three expect to spend 13+ hours on your blog. It’s time to keep your head down and blog away!
1. Start an Email List
In month three, I want you to start an email list. Some bloggers want you to start an email list BEFORE you start a blog.
Others want you to start alongside of starting your blog the first month.
So why am I telling you to wait? Wait until month three?
I want you to get a feel and experience first with blogging and creating income generating content before you have subscribers.
Having an email list is almost like having another blog.
Email has its own content strategy and creation and to couple that with your new blog, as well as learning how to use your email service provider, you’ll burnt out and never want to blog again!
You might end up failing if you start an email list in the first month (i.e. not email your list or dedicate time to growing your list).
As a new blogger, you have a TON on your plate that waiting to start an email list is a strategic move. I blogged for a month before I started my email list. But, Twins Mommy isn’t my first blog. It’s my second and I had two years under my belt as being a blogger.
If you don’t have that experience, wait until month three to start an email list. The next question comes, well do I use ConvertKit or MailChimp or some other email service provider?
I personally have used ConvertKit, MailChimp, and Drip.
I found that ConvertKit is the easiest email service provider for new bloggers. It’s easy to set up and understand.
And mamas! To monetize your blog, your email list is critical. It what will help you with making money with a blog for sure!
2. Find a Freebie Idea to Grow Your Email List
After you start your email list, the next part is creating an incentive to get people to sign up to your email list.
When a reader comes to your blog to read your post, you can capture their attention with a freebie or lead magnet.
This is your offering to them.
It can be a:
- Checklist
- eBook
- Planner
- Workbook
- Video
- Course
- Webinar
- Video series
- Guide
There are a lot of different ideas you can create for your lead magnet. Look at your audience you want to attract and figure out if they would like a workbook or checklist. The easiest, though, is a checklist and that’s what I offered first on my blog.
Generally, lead magnets should be a quick win. This means the person can take your freebie and implement it easily.
To help you out I have a post on 42 freebie ideas to help you discover that ultimate freebie idea!
3. Create Your Email Freebie
Now that you have an idea of what you want to create, next comes formatting your freebie.
If it’s an email course, you need to set up the sequence in ConvertKit.
Here is an email course for Twins Mommy in ConvertKit:
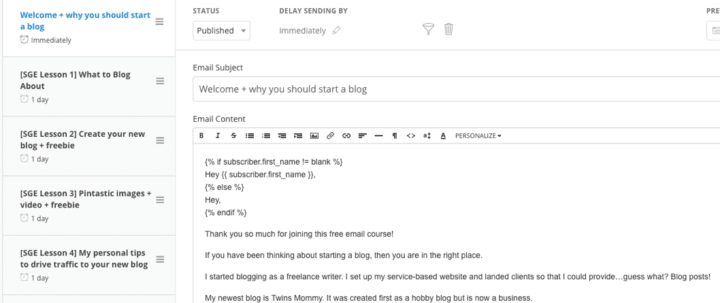
Each email is a lesson. It’s sent every day for six days. Once you have something to offer your list (like a course or eBook), you can pitch your product at the end of your email course.
4. Create Your First Email
Sending your first email might seem scary! But, it doesn’t have to be. I suggest you do a series of emails, like a welcome email or welcome series to introduce who you are, what your blog is about and what you are going to email them.
Now, if this seems like something you want to wait to do, you can start sending weekly newsletters to your group.
For some help, here are some email ideas to get you started.
While you can email your list as much or as less frequent as you want, the only rule is: be consistent.
If you decide to email weekly, then email weekly. If it’s every day, then email every day.
You set the schedule and teach your list how often they hear from you.
For Twins Mommy I like to give exclusive tips just for my subscribers. I’ve lately been giving my subscribers blogging tips, Pinterest tips and business tips.
5. Promoting Your Posts
You’ve created foundational posts and affiliate posts to make money blogging. You’ve also spent time creating pin-worthy graphics to promote on Pinterest.
In the second month you signed up to Facebook groups and Pinterest groups. Now, it’s time to create a promotion strategy.
Work on optimizing your pin description with relevant keywords. At this time, you can put several keywords in your description.
Here’s an example of one of my descriptions:
Pregnancy tips for brand new moms! If you just became pregnant, here are 32 things you need to do after becoming pregnant. Learn what you need as a new mom and more pregnancy tips to help you through this journey.
As you can see, you can fill your description with keywords, but make it sound non-spammy.
You can easily find these keywords by plugging them into the search bar on Pinterest and seeing the suggested terms. You can dig deeper by clicking on the tiles underneath the search term to get more keywords.
Next, you need to pin these to relevant boards. If your affiliate post is on best gifts for moms, post on parent boards, mom boards, stay-at-home mom boards, mompreneur boards, mom blogger boards etc..
Make sure to FIRST pin to a relevant board that belongs to you. From there you can schedule it to Tailwind or send it to a group board or another board of yours.
The more boards you can pin that affiliate post to means more people will see it.
Facebook works a little different. I suggest you post on your page your affiliate posts, but don’t over do it.
At most, post to your Facebook page (promotional things) up to 3 times a day.
You can post to Facebook groups as well, but I find I get the most traffic from Pinterest. So play around.
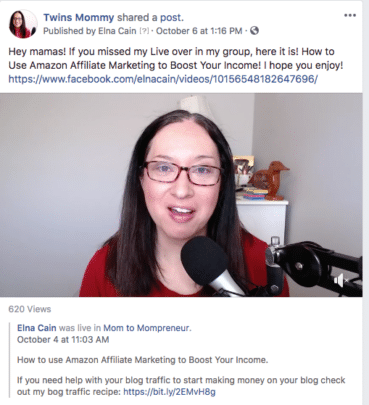
You might want to also play around with video content. Do a Facebook Live and mention your freebie or link to that in the comments.
How to Monetize a Blog for Moms!
There you go! The first 3 months down pat!
With these tasks you should start growing your blog traffic and understand blogging as a way to build your income. This plan is aggressive and it’s okay if you don’t complete this in three months.
But, if you follow this and work on your blog every day, you will see growth! I promise you this mama!
Now, it’s your turn – tell me in the comments your blog plan for 2024! I want to hear it!


28 Comments