You have an amateur blog.
You start a blog and then all of a sudden, you feel like you have to play catch up.
You have to learn all about blogging, SEO, Pinterest, Facebook, marketing, email and more. But, how can you when you’ve only been blogging for 24 days?
When I started my amateur blog, I was fortunate to have my husband help me with the design and development of my blog. He also helped me figure out things I wanted to know quickly.
I’m forever grateful for that. And that’s why I like sharing blogging, traffic and money tips to all of you!
So, learning how to make your blog look professional even if you’ve only been blogging for a short time is possible. There are certain things – many are little things – that can instantly make you look like you’ve been blogging for years.
Want to know what they are?
Okay!
How to Make Your Blog Look Professional
1. Get a Gravatar
A Gravatar is a globally recognized Avatar that follows you online.
It shows a headshot of you (or logo of your brand or whatever you want to show) when you comment on blogs, in forums and when you sometimes sign up to services like email service providers.
To help you create a Gravatar, check out my super easy tutorial! And please subscribe to my YouTube Channel!
https://www.youtube.com/watch?v=NbFFsJ5jwgU
2. Use a Pretty WordPress Theme
Look –
I’m sorry to say, but people judge blogs by how they look.
Sure, you can get a pass, if you have amazing blog posts and you’ve been blogging for years, so you know your stuff.
But, for most of us, and especially for amateur blogs, how your blog theme looks and functions will help you look like a pro even if you’re new.
There is only one WordPress theme that I feel are “pretty” and functional – Unwind.
Here is what Unwind looks like on one of my demo blogs.
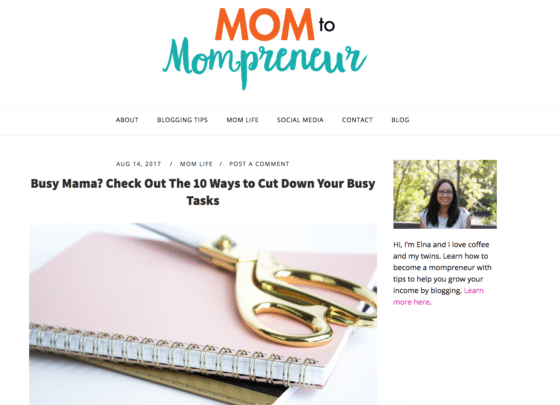
This theme you can customize easily – fonts, where the menu is placed, where the logo is placed, link color and more. As you can see, I customized it to look similar to the Twins Mommy set up.
Astra is another popular free WordPress theme that you can make look pretty and professional.
3. A Favicon & Logo
One easy way to learn how to make your blog look professional for free is with some branding.
These branding elements are your favicon and logo.
A favicon is a brand icon that is placed in the browser next to your blog name in the browser.
![]()
For WordPress, the size of your favicon is 512px by 512px.
Along with your favicon, you need a logo. I personally make all my logos using various fonts. You can make both your favicon and logo in Canva or PicMonkey (you can get a free 7-day trial to test it) or Photoshop.
For more help on creating your logo, check out my video!
https://www.youtube.com/watch?v=_Z3AShsHNdo
4. Have a Self-Hosted Website
For many new bloggers, they don’t want to invest in a blog so early in case they don’t enjoy blogging. This makes total sense, but what if you do enjoy blogging and now you want to create a business out of your blog?
You can’t create a business on a free platform like WordPress.com or Blogger.
Third party platforms own your content and limit what you can and cannot do on your blog. So, to make that leap into having a legit blog where you can monetize your site, create products and start an email list, you should move your blog to a self-hosted website.
This means your free website URL > yourblogname.wordpress.com is now > yourblogname.com
Nice, eh?
So how do you learn how to make your WordPress blog look professional?
Find a New Self Hosted Service
The one I recommend is SiteGround.
They can help you every step of the way and have amazing features that you can learn more about here.
Export Your Content from WordPress.com
Now you need to move all the posts and content from your WordPress.com site to your new WordPress.org site (your .com site). To do this, you need to login to your WordPress.com blog.
From there, look for tools> Export. Choose “all content” and click the button to export.

Import Your Content on Your New Self-Hosted Blog
Now go to your new blog and login (yourblog.com/wp-admin). From there, go to tools>import>WordPress. Choose the file you just exported and click on the “upload file and import” box and there ya go!
Now you have a self-hosted blog 🙂
5. Write Share-Worthy Blog Posts
Okay.
Blogs are filled with content.
This content needs to attract your ideal reader so that you can grow your blog traffic and eventually make money. You do this with writing engaging blog posts that solve a problem and speak to your ideal reader.
For more help check out these guides:
- Blogging Basics: How to Write a Blog Post that Gets A Ton of Comments
- How to Make Your Blog Sweet and Sticky (So People Devour It)
- Ultimate Mom Blog Guide to Finding Endless Blog Post Topics
Besides the engaging way you write, the other best thing you can do to get more shares is to format your post for readers online. Reading online content is totally different than reading a newspaper or a book.
The content width (how wide a blog post is) is usually short, so one sentence can take up 3 lines. That’s why you see a lot of one-sentence paragraphs in blog posts.
This is to account for the content width.
Some blogs, though, have a longer content width and they can get away with having 3 or 4 sentences in a paragraph. The best way to see if this works is to always check your blog post using the preview method in the backend of WordPress.
So write your post (or copy and paste it) and then check it in preview.

6. Get Out of the Sandbox
Now, look – Google doesn’t know much about your blog yet.
So the more content you have on your amateur blog, the easier Google will index your blog and relate it to your topics.
If you have a new blog, Google will put you in the “sandbox.” This means:
Google Sandbox is generally used for websites which are newly launched and then arouse the suspicion of Google, usually by adding a large amount of new content in a very short period of time. This appears to Google as spam; and the Sandbox is essentially a spam filter which watches for suspicious activity, reasoning that a site which adds enormous numbers of new posts, pages and content instantly is probably filling itself with duplicate content or engaging in search engine spamming.
Effect of sandbox
When your site is put into the Google Sandbox, your site is still indexed and crawled, but you will be set aside when it comes to actual Google searches. Until you make it out of the Sandbox, you won’t show up in Google’s search results.
When I started Twins Mommy, I published two posts a week for six months.
This created more pages on my site and helped get my posts on Google, so I can start ranking – and two of my posts from the first six months of blogging now rank #1 on Google for their respective topics.
But, for my established freelance writing blog, I only post once a week or sometimes once a month.
Content can slow down, and my traffic still grows because Google has already indexed my blog and knows the type of content I produce.
And since I’ve optimized my blog for the topic of freelance writing, any new posts I publish has the ability to rank in Google.
For now, though, realize that if you just started a blog, it’s a good idea to have a lot of content on your blog.
That’s why creating content before you launch can be a good strategy for new bloggers as it will help you (having more opportunity for ranking) once you are out of the Google Sandbox.
How Do You Get Out of the Sandbox Sooner?
Google can keep your blog in the sandbox from 1-6 months of starting your blog. So, for six months your blog may not be shown on Google when people search for your content.
So, how do you get out of there sooner?
The biggest factor is links.
If big blog sites link to your blog right away, Google sees trust much faster and puts your blog out of the sandbox to “play with the big guys.”
And, this goes back to having a lot of content for other blogs to see it, for you to promote it and for others to link to it.
My suggestion is to publish two posts a week for the first three to six months or more for your new blog.
But, if life gets in the way, that’s okay.
Another easy trick you can do is to bulk your fresh content. For more information, you can check out how I grew to 62,000 pageviews doing this one hack.
So, the rule of blogging is – if you’re new, you have to create more content than if you’ve been blogging for a while.
Think of an amateur blog as a baby in a way. As newborns and little ones, they eat every few hours. But, as adults, we can go five or more hours without having to eat.
So, a new blog is like a newborn that needs blog posts every week while an established blog is like an adult that can go weeks without blog content.
7. Create a Pin Template
Pinterest is the BEST platform for bloggers to drive traffic to their site.
Pinterest favors content creators because they bring new fresh content daily. And you can use this to your advantage by leveraging that platform to attract followers and click-throughs.
And the easiest way to start doing that is to make sure you have a great pin image.
I personally like having a template to make your pins more cohesive. While it is advantageous to have your pins look differently, it doesn’t hurt to have a basic template.
It doesn’t have to be hard either! Check this guide for creating a free Pin template using Google Slides!
And check out my Pinterest Masterclass where I share with you how to create a clickable pin!
How to Make Your Blog Look Professional (Even If You’re a New Blogger)
There ya go! Seven tips to help any new amateur blogger LOOK like a PRO! I know blogging is a brand new world and it’s very overwhelming. I hope this guide will help you (when you’re ready to tackle it) appear like you know it all!
Over to you – did I miss anything? What would you add to this list?
Please Pin me!



60 Comments