Figuring out how to post on Pinterest can seem confusing when you’re completely new to using Pinterest for the first time.
I know for me when I jumped on Instagram, I had a big learning curve to learn all the different ways to use Instagram for my business.
The same is true for Pinterest for bloggers. I use Pinterest as a way to grow my blog traffic and subscribers.
I started using Pinterest when I started blogging on Twins Mommy.
I wanted to find a new way to promote my blog posts because before I had Twins Mommy, I had my freelance writing blog, and I didn’t use social media to share my content – I didn’t have to for my business.
And Pinterest was it….and it still is in 2023.
In the first quarter of 2021, there were approximately 448 million monthly users on Pinterest pinning away.
More and more people are using Pinterest not just for entertainment or to pass boredom but also as a way to buy products.
Up to 85% of Pinners have bought something while scrolling on the Pin feed.
This means it’s a goldmine for bloggers to gain traffic, subscribers and customers!
To help you out on how to post on Pinterest, here are four easy ways.
Simple Ways to Share Your Posts on Pinterest
I have four Pinterest profiles! Oh, yes, I do!
One for this blog, one for Smart Mom Ideas, one for Imperfectly Perfect Mama, and one for my freelance writing site.
I do have one for another niche site I own, but I stopped that project a while back and haven’t touched it since.
Overall, I do a lot of pinning and Pinterest management, so knowing how to post on Pinterest quickly and easily is something I do every day. Let’s go over simple ways so you can start pinning today.
From Your Blog
A great way to grow your blog traffic is to enable social sharing buttons. But, if you want to focus your efforts on Pinterest traffic, I would also get the Save button.
This populates a Save button on top of your pin images like this:
This is a much easier option for many scrollers than waiting until the end of the post to share your pin.
To get the Pinterest Save button, just grab the WordPress plugin and have it enabled for your pin images.
On the Pinterest Platform
An easy way to create fresh new alternate pins is to make them on the Pinterest platform.
You can’t design the pins on Pinterest, but you can upload your pin image and create the headline, URL, and additional information.
This is my preferred method when I’m creating fresh pins.
Go to your Pinterest profile, and on the left-hand side is a drop-down menu under Create.
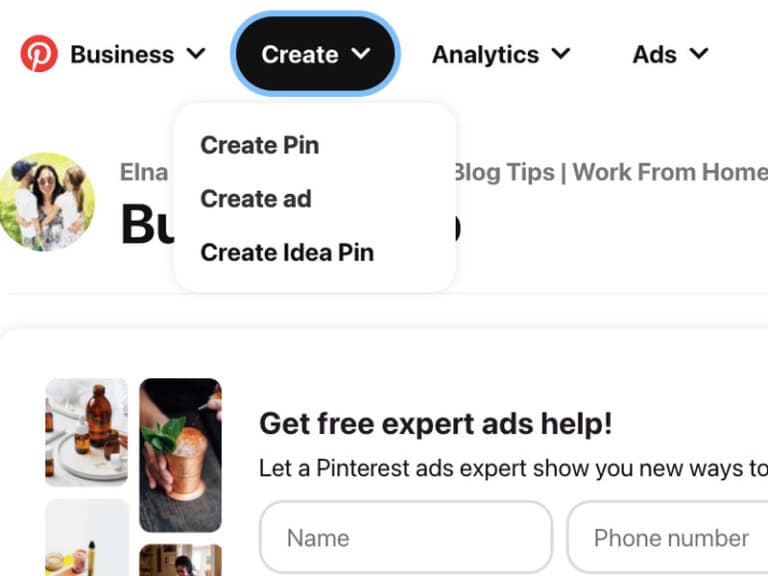
Click on Create Pin and upload your pin image.
I create all my fresh pins on Canva.
I like to use Pin templates to make the process go faster.
If you need help with creating pinnable Pins, check out my 52 Stylized Canva Pin Templates.
Once you create your pin, download it to your computer and drag it to the Pinterest platform.
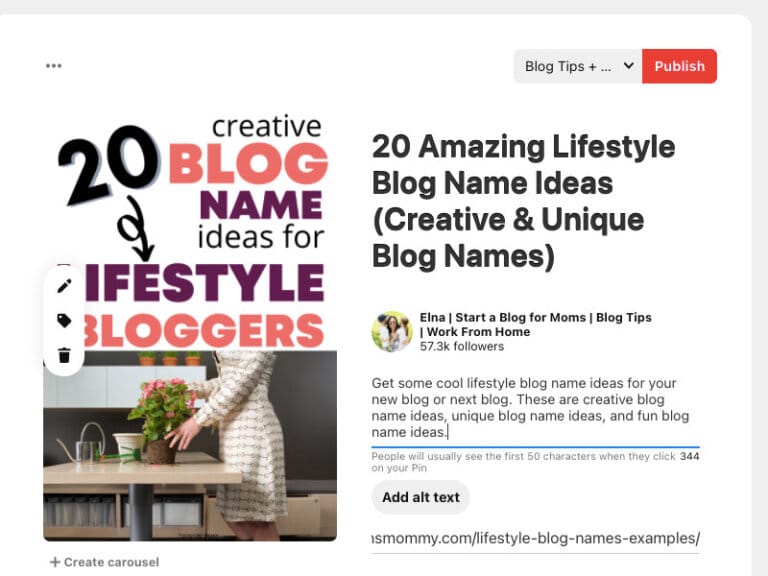
Once finished, save your pin to one of your boards, and you are done!
I can pin up to 8 pins using this method in under 20 minutes.
On the Pinterest Platform (Another Way)
There is another way to use the Pinterest platform to help you post on Pinterest. It’s using the “from website” function.

For some reason, I didn’t know about this option until recently.
Maybe this tab has always been here, I’m not sure, but it makes pinning easy and a great way to post on Pinterest when you’re a new blogger.
Simply toggle to that section, enter any URL that goes to a blog post, and start pinning.
It’s best to pin “pin style” pins rather than rectangular or short pins.
Here’s my result for a Smart Mom’s Idea post.
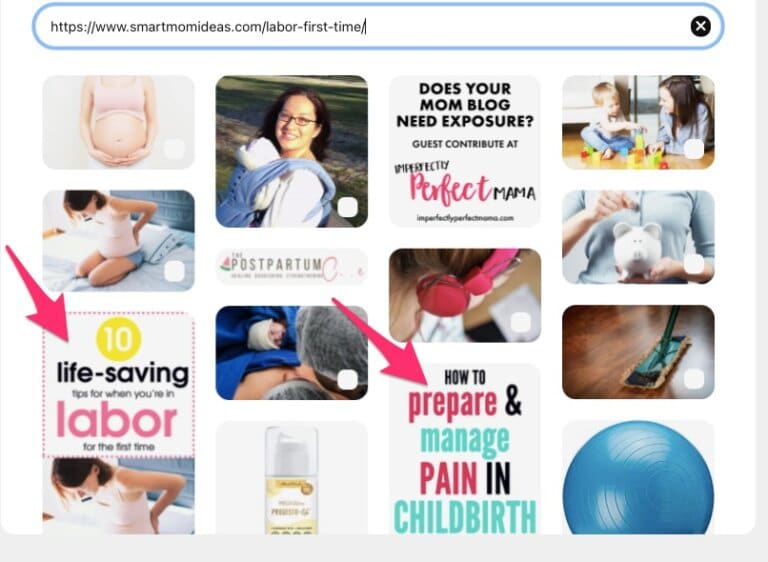
If a blog post has a lot of pins, then this is a good method.
For a while, I was posting two pins per each blog post but stopped doing that and am just creating fresh pins “on the go.”
But, as a new pinner, this might be an easier option if you publish multiple pins per blog post or you want to save pins from another blogger who has multiple pins on their post.
Use a Schedule to Automate Your Pinning Process
Look –
I’m a busy mom, freelance writer, and course creator.
I have over 7 blogs, two email lists, two Facebook groups, multiple Facebook pages and am on social media.
I can’t be bothered to pin 25 times a day.
Instead, I use PinGenerator to automate my entire pin strategy and to help me post on Pinterest more consistently.
The one thing Pinterest looks at in a pinner is if they are consistent. Do they share pins regularly or share a few times one day and stop posting on Pinterest for the entire month?
When you’re consistently posting on Pinterest, Pinterest knows you’re an active user, and active users get shared more and are prioritized from the Pinterest algorithm.
Best Pinterest Practices When You Post on Pinterest
To be successful on Pinterest as a new blogger, let’s check out some of the best practices when you start posting on Pinterest for the first time.
Share the Best Pin Size
Over the years, Pinterest has optimized different sizes of pins – long (giraffe-sized) pins, truncated pins, square pins, and more recently, video pins and Idea pins.
For a brand new blogger, though, I want you to focus on the optimized pin size – 2:3 ratio.
This means you can go with either:
- 564 x 856 pixels
- 1,000 x 1,500 pixels
I only use the 1,000 x 1,500 pixel size for my pins, and this seems to do well on the platform.
Failing to Follow the Pinterest Community Guidelines
A devastating Pinterest mistake many make is not following the Pinterest community guidelines developed by Pinterest.
The guideline specifically tells you what they WON’T share on Pinterest (or prioritize on the platform).
This includes breastfeeding content, using the word “ivory” and other things.
While it’s okay to create breastfeeding content and post that on Pinterest, the algorithm won’t pick up your pins and distribute them if kids view them by accident.
And, this can hurt your success on Pinterest.
Have Several Boards on the Same Topic
A great way to distribute pins on your profile is to have similar board topics.
I share blog tips, blog post tips, making money blogging tips and much more. So, on my Pinterest profile, I create multiple boards around these topics.
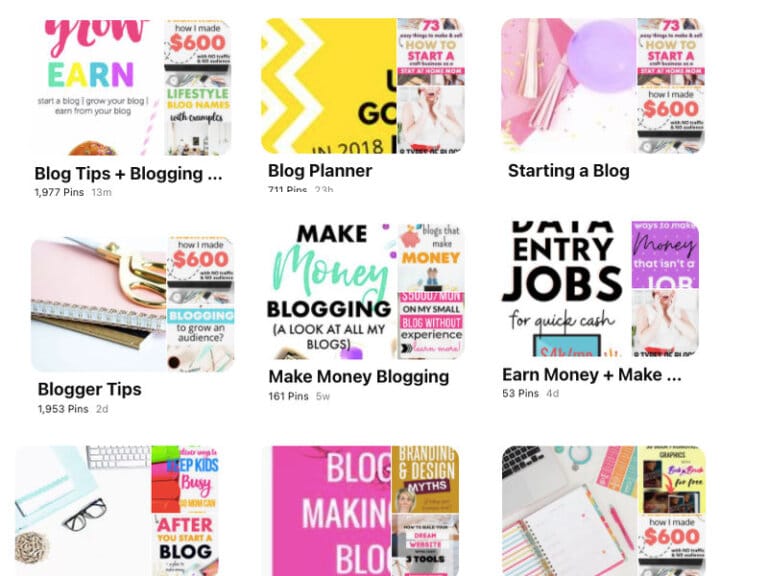
When you do this, you can pin the same pin to multiple different boards.
So, how do you find different board name titles? Just search on Pinterest and look at the suggested ideas that populate from your search term.
For example, if I search kid activities, I get a lot of global topics:
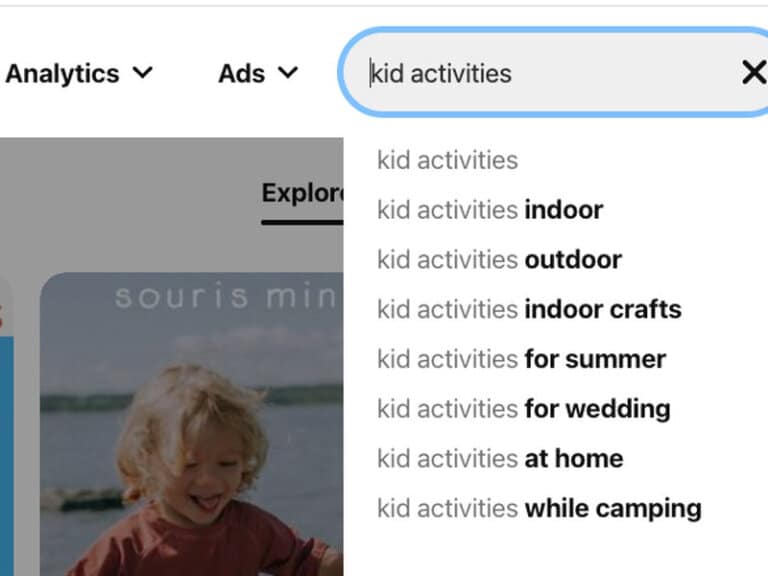
This can start some of your board topics like:
- Indoor kid activities
- Outdoor kid activities
- Kid activities while camping
In my course Ready Set Blog for Traffic, I share more optimized ways to name your boards so that pinners find your pins and boards and grow your traffic and profile.
Know that Pinterest Favors Fresh Content
For a while now, Pinterest has made it known that they prefer fresh new content.
While the best form of fresh content is a NEW blog post and a NEW pin, it’s okay to create fresh pins from old blog posts.
Another level of this is the images you use. Since many bloggers use free stock photos (which is still a great way to have a cohesive and brandable blog), many pinners are sourcing their images for free as well.
So, with your free stock images, just make sure to angle the images differently and zoom in or zoom out so that your pins look different even though they are from the same image.
Here’s what I mean:
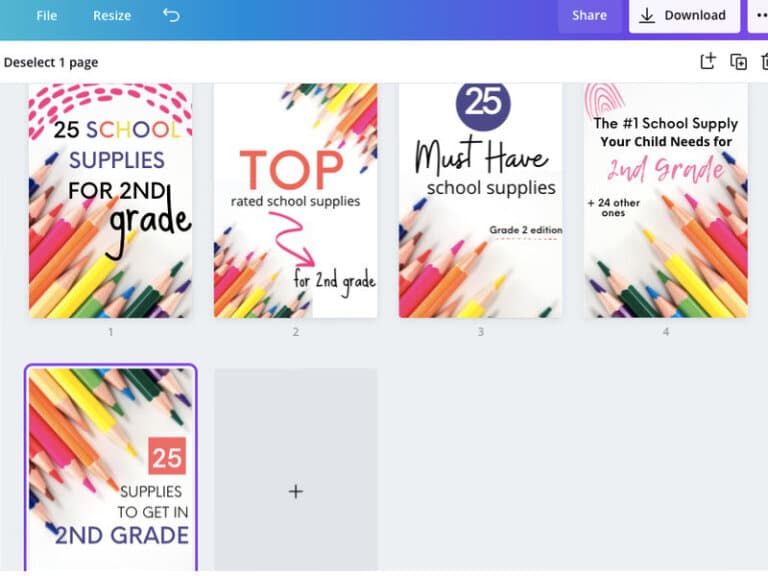
While I used the same photo of colored pencils, I was able to create five new fresh pins.
I zoomed in, changed the angle, flipped it around, changed the headline, used different fonts and added arrows and other elements to each of my pins.
And with my stylized pin templates, you can do this much quicker like I did here.
Consider Creating Two Pins For Each Blog Post
As I mentioned in this post, for a while I was creating two new pins for each new blog post I published.
I found this was a great way to pin more and grow my followers and traffic. If you have the time, go ahead and create two pins for each blog post, then when you publish your post, pin the first pin to a board.
Then, wait a day or two before pinning the second pin to a board. Afterward, you can schedule both pins using Tailwind!
Learning How to Post on Pinterest – The Easy Way
I hope you learned how to post on Pinterest with these methods. I prefer creating my pins using the Pinterest platform, but I will pin from my blog every now and then.
What is your preferred method to post on Pinterest? Tell me in the comments!
And, don’t forget to pin me!


2 Comments