So you started a blog and now the work really starts!
One of the things you’ll quickly learn when setting up your blog is that a page builder can turn your hobby blog into a professional-looking website.
One popular – and free – page builder is Elementor.
Now if you’re afraid to try a robust page builder, don’t be!
Last summer I started using Elementor to build websites and found it incredibly fluid and easy to use!
So, if you’re interested in using Elementor to create a beautiful blog, I’ve got Chelsy of Motherhood & Mayhem dish out her tech knowledge and show us the way with Elementor!
Don’t forget to check out her tutorials on using Gutenberg for WordPress and her easy CSS hacks!
Why Should You Use Elementor?
Are you ready to take more control of your site’s look and feel?
Oh, and without touching a lick of code?
Back in the day, I learned how to use HTML and CSS to fully customize my sites to my liking – all the while wondering, “Why can’t I just drag-and-drop this stuff?”
Well, now you can!
As much as I enjoy coding, because I obviously love a good challenge, I have since switched to using drag-and-drop programs to create and design my sites.
Not only is it vastly easier, but it’s also a lot of fun!
One of the more popular options for user-friendly web design programs is Elementor. It allows you to design your site in real-time, add elements, move them around and style them.
Plus, there are some great pre-made templates to get you started!
If you want to get started, here is your super-easy guide on how to use Elementor:
How to Use Elementor

Installing Elementor
First thing’s first in this Elementor tutorial – you need to get Elementor installed on your WordPress! There are two ways to do this:
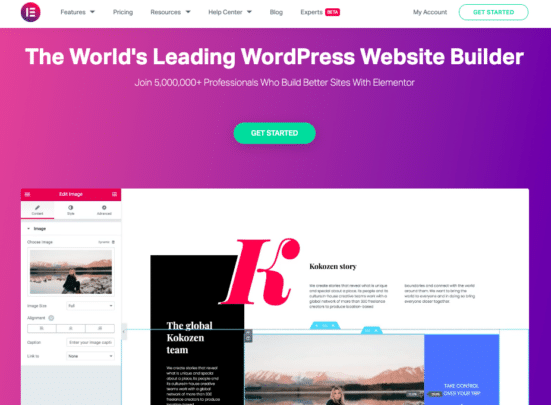
Install from Elementor.com
Go to the Elementor homepage and click “Get Started.” You’ll have to create a free account before you can get your download.
The site will ask you a series of questions about how you plan on using Elementor – all of which you can skip.
Eventually, you will be asked if you have a WordPress website or not and given two options.
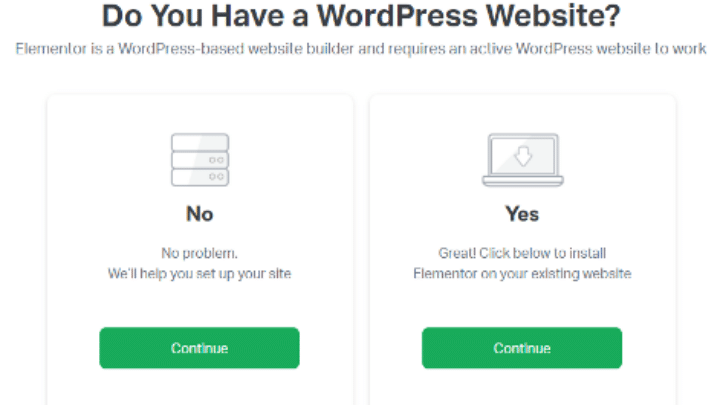
If you choose no, Elementor will walk you through the process of setting up a site. If you choose yes, enter your site’s URL to start the Elementor installation process.
A new tab will pop up with information about Elementor – just click the “Install Now” button at the bottom of the screen.
You’ll be brought to your site’s dashboard – click on “Activate Plugin.”
Done!
Pro Tip: I would recommend this route since you will need an Elementor account to access their pre-made templates.
Install From Your WordPress Dashboard
Alternatively, you can install Elementor directly from your WordPress site.
On the left-hand side menu of your dashboard, hover over “Plugins” and click “Add New.”
In the search box, type in “Elementor Website Builder” and click “Install Now.”

After the installation, click “Activate”.
Easy!
Using Elementor
Elementor features intuitive design features, so you can learn the basics of the Elementor editor in only a few minutes!
Elementor’s Settings
You can access settings by clicking on the “Elementor” link in the left-hand menu of your WordPress dashboard.
There’s not a whole lot you need to do with Elementor’s settings.
You can change who has access to the editor (contributors, subscribers, authors, editors, etc.) as well as disable Elementor’s fonts and colors so your creations inherit these styles from your current theme.
There’s a getting started link as well as a help section here as well.
Elementor Editor
To use the editing features, click the “Edit with Elementor” button when you are creating a new page or post.
![]()
If you’re using the Gutenberg editor, you’ll find it at the top right-hand side of your screen. If you’re using the Classic editor, it’ll appear below the “Add Title” box.
Doing so will take you to an entirely new page – this is the Elementor editor and it will open the world to new design possibilities!
On your left-hand side, you’ll find Elementor’s drag-and-drop elements that can be, well, dragged and dropped into your site.
Make sure to scroll through the check them out – there are some really basic elements like text and images, but some really cool ones like progress bars and star ratings.
Keep in mind that, if you are using the free version of Elementor, you will be limited as to what you can use.
But that doesn’t mean you can’t build a really cool landing page or about me page!
Sections, Columns and Widgets
The Elementor editor consists of three blocks: columns, widgets and sections.
Sections are the largest building blocks, where you can add groups of columns. Then, you can throw some widgets into those columns.
Look for a box that says “Drag widget here” with a big plus sign and a white folder. This is a section.
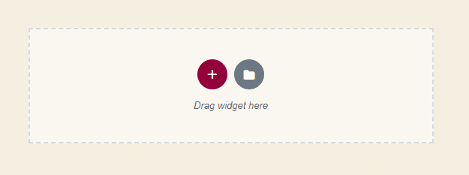
If you click on the plus-sign button, you can choose the structure for this section. The white folder will allow you to choose from pre-made templates provided by Elementor.
When you hover over each template, you’ll notice that it either says “Go Pro” or “Insert.” While most you can only access if you pay for the pro package, there are quite a few freebies that include:
- Landing pages
- About pages
- Service pages
- Home pages
- Contact pages
- Services
- Products
- Coming soon pages
- Maintenance pages
There are also a few free block templates you can choose from as well. Just click on the “Blocks” tab at the top of the Library window.
When you find one you like, click the “Insert” link and you can begin to customize the site using the Elementor editor.
Other Features
Before I continue on with this Elementor tutorial and show you how to build a page, I want to point out some other useful features found in the editor:
- Site Settings: Click on the hamburger (the three vertical lines) at the top left-hand corner of your screen. Here, you can change site settings such as colors, fonts, header styles, buttons styles and more!
- Page Settings: At the bottom of the editor box, click on the little gear. Here you can change the title of the page, the featured image and the page layout.
- History: Along the bottom, there is also a little click icon. You can use this to view your editing history and revert back to previous revisions (under the “Revisions” tab).
- Responsive Mode: Next to the history button is an icon that looks like a cell phone. Click it to see what your design would look like on a mobile phone, tablet and desktop.
- Preview: The last icon along the bottom is a little eye that lets you preview your design before publishing. You can also choose to save your page as a draft here as well.
- If you want to exit the Elementor editor, click on the hamburger and select “Exit to Dashboard”. Be careful! You could lose any unsaved progress.
So, that’s the grand tour.
Are you ready to build a page?
Building Your First Page

Let’s have some fun building an “About Me” page!
Your About Me page is one of the most visited pages of your blog and it’s a fun way to share what your blog is about.
Remember that Elementor is not a WordPress theme itself and will piggy-back off whatever theme you currently have active.
For the sake of this Elementor tutorial, I’m going to use WP’s 2020 theme.

Getting Started
To start page building, start at your WordPress dashboard, hover over “Pages” on the left-hand side and click “Add New”.
Give your page a title and then click the “Edit with Elementor” button.
FYI, once you create a page, you can access the editor directly from the list of pages by clicking the “Edit with Elementor” link under the page title.
This saves you a whole step and perhaps at least one minute of your time which, as mommy bloggers, we can use all the time–saving hacks we can get!
So now we’re in the Elementor editor and can start dragging and dropping some elements on our page!
Add a Template
Click on the white folder in the section block and search for “personal” then insert the “About – Personal – page” template.
You’ll be asked to connect to the template library. If you have already signed up for an Elementor account, a new tab will pop up allowing you to connect (if you’re already signed in).
If not, you’ll have to create an account.
Click the “Connect” button.
This bit is a little cumbersome – but good thing we saved that extra minute earlier!
You’ll get a screen confirming that you are connected. Now, you have to go back to Elementor, save your page as a draft and exit.
Click the “Edit with Elementor” to get back to your design.
Go back to the white folder, re-search the template and click “Insert”.
Okay, we’re back on track!
Customizing Elements
Now we have our template applied. You’ll notice it looks a bit squishy so we’re going to start by fixing that.
Right-click the group of six dots on the section you want to edit. On the left, the editor has switched to “Edit Section”.
Look for the switch labeled “Stretch Section” and click it on. This will stretch the section to the full width of the page and un-squish it.
Repeat this for other squishy sections.
Now, you can basically click around the page and edit the information.
For example, clicking on a block of text will allow you to insert your own text in the editor box to the left.
If you click on an image, you can edit that to the left as well.
When you click on any element, you can use the tabs along the top of the content editor, such as style and advanced, to play around with CSS elements – without having to touch CSS!
Adding and Moving Widgets
Look for the “Drag widget here” box at the bottom of your page to add more elements to your design!
Because you can only add a list of blog posts through the pro version, let’s jimmy-rig our own.
Click the plus sign and choose the four-column structure (so we can do two blog posts side-by-side). Don’t forget to stretch the section.
In the right-hand column, add an image from the list of widgets – this will be our featured image.
Add your featured image. If the image is too big, you can change this under the “Image Size” drop-down menu.
For the title, drag over a text widget. You can style the text right in the box as well as make the title linked to the article.
Add a single-column section and drag over a heading and type in something like, “From My Blog”. You can use the “style” tab to change the heading’s color.
You can then move that section by clicking and holding on the six-dots and dragging it up above your blog posts.
You can use the above steps to add all kinds of sections to your page!
Spacing Your Sections
But, yuck, there’s an awful lot of space between that heading and the blog posts.
If you go into the section editor and click the “Advanced” tab, you can use margins and padding to change the spacing between elements.
First, click the little chain-link button to the right of the margin and padding fields to prevent the numbers you enter from affecting the entire space around the element.
To give you a little CSS crash course: margins are the space around the element while padding is the space within the element.
So if we want to lessen the space between two elements, we’ll want to change the margins.
For our example, let’s reduce the bottom margin of the heading to bring the blog posts up closer.
Using the little arrow buttons in the “bottom” box, click the down one – you’ll see the blog posts scooch their way up.
I ended up using -100 for the bottom margin.
Ah, much better.
So that’s basically Elementor in a nutshell!
I wanted to keep this Elementor tutorial easy, just as the title of this article implies – but learning how to use Elementor is just a matter of playing around and having fun!
Elementor: Free Versus Paid
So you probably noticed that many really cool features of Elementor are reserved for those who pay for the pro version.
Is it worth it?
Well, that all depends on where you are in your blogging career.
As a newbie blogger starting out, the free version provides more than enough options and templates to get you started on creating stunning pages for your site!
And, for some, these basic features will continue to be more than enough.
However, if you find Elementor is very limiting and are craving more control over the look of your site, it may be worth it to pay for the pro version.
For one personal site, the cost is only $49 per year and gives you perks such as:
- 50+ widgets
- 300+ templates
- 10+ full websites
- Form builder
- WooCommerce builder
- Popup builder
While you can certainly access things like popup builders and form builders through other means, having them integrated into your site design through Elementor is definitely a time-saver.
Whether or not you want to pay for Elementor’s advanced features is purely a personal choice.
The free version offers enough to get you started and the paid version is a great value for those yearning more.
Easy, Right?
The more you get playing with Elementor, the easier it will become to create some nifty looking pages – even if you’re only using the free features!
And, if you were to learn some CSS coding, imagine how much further you can take your site. 🙂
Happy web designing!


Leave a Reply