Blogging is hard! Maybe you’ve thought of the following when starting your blog:
I just don’t like how my blog looks and I have no idea how to change it without messing up my blog!
What your blog looks like is important, but figuring out how to change fonts or create fun round images on your site looks hard!
I know it is for me!
Luckily, I know a mom blogger that loves tinkering with coding and customizing blogs.
Her name is Chelsy of Mama Needs Coffee and today she will share with us some amazing and easy CSS hacks just for mom bloggers!
What is CSS?
CSS stands for Cascading Style Sheet and is a coding language that allows you to take the reigns when it comes to designing and sprucing up your blog.
Think about your website and the words, images, colors and layout you see on your screen.
The words, or content, it determined by the HTML coding whereas the look and placement are controlled by CSS.
Let’s look at this site, Twins Mommy, for example this article.
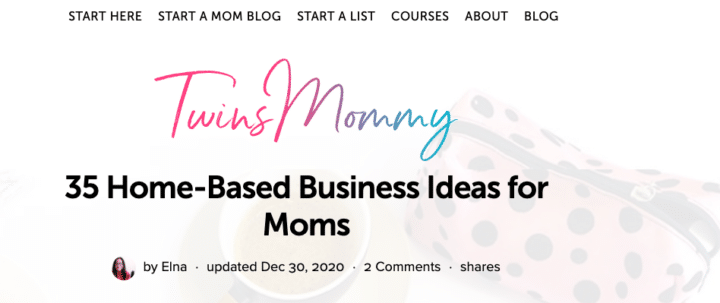
The logo, article title, author, date, etc. all exist in the HTML code. The fact that they are placed overtop the featured image happens in CSS.
I know that CSS can be a mysterious and confusing aspect of web design for many mom bloggers.
But never fear!
I’m going to walk you through how to use CSS and coding hacks to spice up your blog to create a unique look and experience for your readers.
Without going too deep into the minutiae of CSS coding, we’re going to look at how to safely access your blog’s CSS and how to simply copy and paste CSS codes to add some flair to your blog.
Ready to get started?
How to Access Your Blog’s CSS
You don’t need a degree in coding to make simple changes to your blog’s CSS!
In fact, you don’t even need to touch your site’s stylesheet (style.css) which is where all of your CSS code is stored.
This is great news because messing up the stylesheet can really do a lot of damage to your site.
Instead, we’re going to use WordPress’s Customizer to add CSS code that will ultimately not affect the stylesheet file – it will simply “overwrite” it in a way that’s easy to change and reverse.
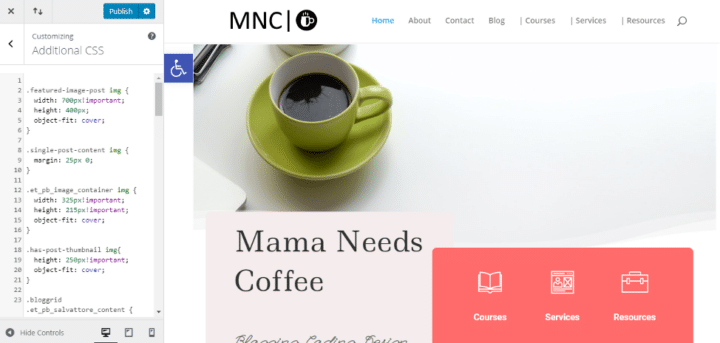
Start by looking at the lefthand side of your WordPress dashboard for the “Appearance” link. Hover over it and click on “Customize.”
This feature allows you to make changes to many aspects of your site and see the results in real-time!
For now, we’re going to focus on adding additional CSS, so scroll down to where it says “Additional CSS.”
If this is your first time using the CSS portion of the customizer, you may get a message about using this section that you can just ignore.
On the lefthand side, there’s a textbox with each line numbered starting at 1.
This is where you can add CSS code.
You’ll see the real-time changes in the preview box on the right but nothing is set in stone until you click the blue “Publish” button at the top.
Easy peasy!
What if My Changes Don’t Work?
Now, not all changes in the Customizer are going to reflect in the preview window.
This is because the browser first looks to the style.css file for the rules and sometimes your CSS doesn’t override that.
So if you’re not noticing changes in real-time, simply add !important directly after the value of each CSS property.
For example, to override a font size change, you may need to use:
p {font-size: 24pt!important;}
This tells the browser, “Hey, I know the site’s code is stored in the style.css file and that’s where you look first, but I want you to pay attention to this code instead.”
This is how we can make changes to the CSS without touching the original code, meaning that if you mess up here you can simply delete what you’ve added and everything goes back to normal!
Simple Coding Hacks to Spruce Up Your Blog
Grab Some Google Fonts
I’ve been playing around with coding and web design since I was a teenager and, let me tell you, there was not a lot of variety back then when it came to fonts.
Remember Comic Sans? I think anyone who used the internet in the early 2000s remembers Comic Sans.
Luckily, we are no longer bound by boring “web-safe” fonts to gussy up our blogs – with Google Fonts, the possibilities are endless!
However, it does take some coding know-how to add these fonts to your site – but it’s super easy!
You can check out my instructions here on how to choose a font and install it on your blog.
Once you have added the font or fonts to your coding, you can use the Customizer to apply the fonts to various aspects of your blog included your headings and paragraphs.
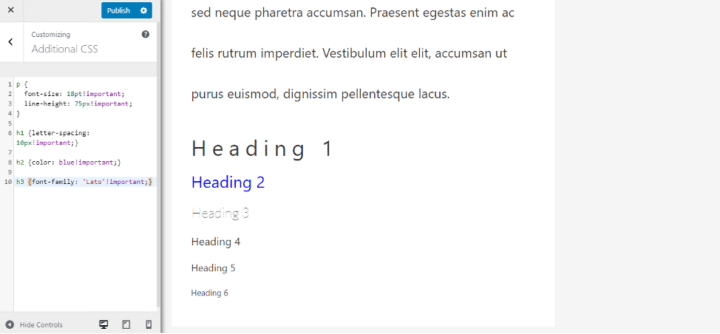
Customize Your Headings and Paragraphs
Apart from changing the font, you can also use CSS to customize any text on your blog including the size, color, line-height and letter-spacing.
When it comes to your headings and paragraphs, each of these aspects of content is labeled as follows:
- p = paragraph
- h1 = level 1 headings
- And so on…
So we’re going to use these “indicators” so to speak to make changes in the CSS that will affect paragraphs and headings.
We’re also going to use the following properties to tell the browser how we want the content to look:
- {font-size: #pt;}
- {color: COLOR;}
- {line-height: #pt;}
- {letter-spacing: #px;}
You also don’t have to create a new line of CSS code for each property you want to assign to your paragraphs or your headings – you can do it all within one set of {}’s.
So, for example, to change the look of your H1, you may use the following code to change the size and color of the heading as well as add space between the letters:
h1 {font-size: 32pt; color: #808080; letter-spacing: 15px;}
Just make sure you separate each property with a semi-colon.
Here’s how it looks in the Customizer:
Changing the look of your fonts and text is a great way to start playing around with CSS!
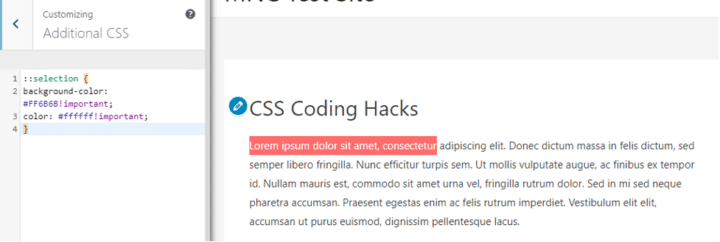
Change the Text Select Color
Wouldn’t it be cool if you could control the text selection color when readers copy and paste information from your blog?
You can!
Simply add this code into the Additional CSS:
::selection {background-color: #013896; color: #f1f1f1;}
The background color is the color of the highlight and the color is the color of the font:
Style Your Quotes
WordPress has a built-in option to stylize a block of text as a quote but it’s, well, kind of boring.
You can play around with your CSS to create something more unique:
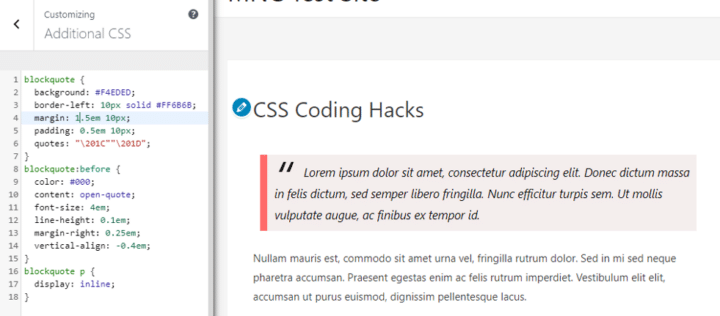
Just add the following code:
blockquote {background: #F4EDED; border-left: 10px solid #FF6B6B; margin: 1.5em 10px; padding: 0.5em 10px; quotes: “\201C””\201D”;}
blockquote:before { color: #000; content: open-quote; font-size: 4em; line-height: 0.1em; margin-right: 0.25em; vertical-align: -0.4em;}
blockquote p { display: inline;}
To customize the look, only touch the following properties:
- background: changes the background color of the quote block
- border-left: you can change the color code next to the # symbol to change the color of the solid line to the left of the quote
- blockquote:before: you can change the color property of the quotation mark
If you’re so inclined to get a more nitty-gritty with CSS, you can do some really awesome stuff with your quotes!
Hide Your Pins in Your Post
Many mom bloggers create multiple pins for each post but they don’t want to display them all for readers to see.
You can use CSS to chose which pins are displayed and which are hidden.
Start by adding the following code to the Additional CSS section:
.pinterest-hidden {display: none;}
Next, when you add the pin images to your post in the post editor, click the “Edit” button and look for the box that says “Image CSS Class”.
In the Gutenberg editor, you’ll find this on the right-hand side under the “Advanced” tab of the image block settings.
In this box, add in:
pinterest-hidden
Simple!
This way you don’t have to add a string of code to each individual image and, even though the pin image is hidden, it will still show up when readers want to pin your content.
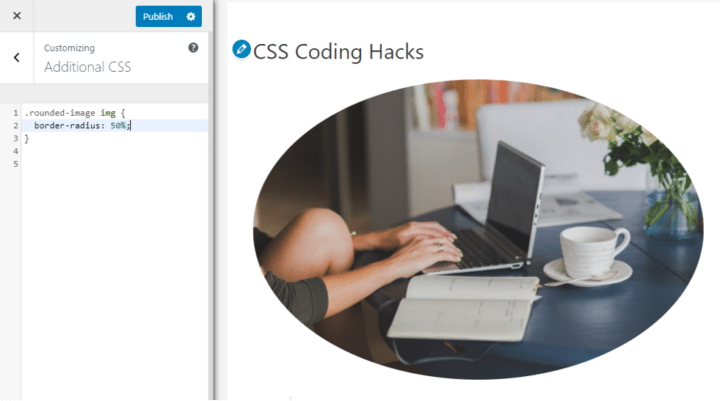
Create a Rounded Image
When it comes to profile pictures and avatars, many mom blogs opt for a more rounded look for the images.
To begin, we’re going to give the image a custom CSS class just like we did for the pin images. Find the “Image CSS Class” box and add the following:
rounded-image
This is going to tell the CSS to only apply rounded corners to the images specified with this tag.
When you add the CSS to create a rounded border, use this code:
.rounded-image img {border-radius: 50%;}
Using 50% will give you an almost perfectly round shape but you can change this percentage, or change it to pixels (25px, for example) to customize the roundness.
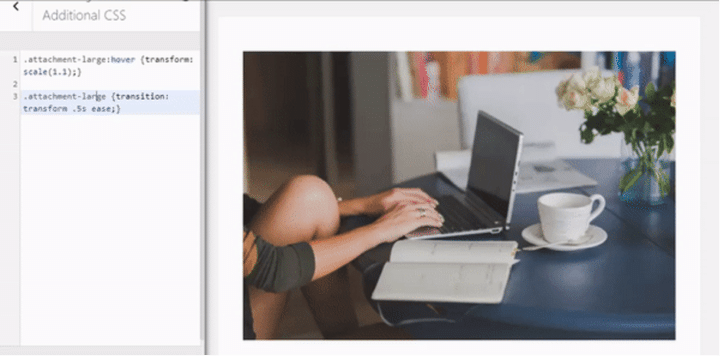
Apply a Zoom on Hover to Your Images
A really neat trick you can use on your images, especially the thumbnail images in your blog feed, is the zoom on hover.
To apply this effect to specific images, use the “Image CSS Class” box to name your images. You can use something like:
hover-zoom-image
And you will add the code using the selector:
.hover-zoom-image:hover {transform: scale(1.1);}
For your thumbnails, you’re going to want to point the CSS to this selector:
.attachment-thumbnail:hover {transform: scale(1.1);}
The 1.5 tells the image to zoom to 110%.
To make the zoom smooth, add in this additional line of code (depending on which image you are targeting):
.attachment-thumbnail {transition: transform .5s ease;}
Or:
.hover-zoom-image {transition: transform .5s ease;}
This makes the zoom less “Bam! In Your Face!”
Change Your Bullets
Bullet lists are a great way to break up post content and make it easier for the reader to absorb the information.
And you can change the appearance of the bullet points!
By using CSS to tell the browser what to put before each list item, the possibilities are endless – especially if you use HTML symbol codes.
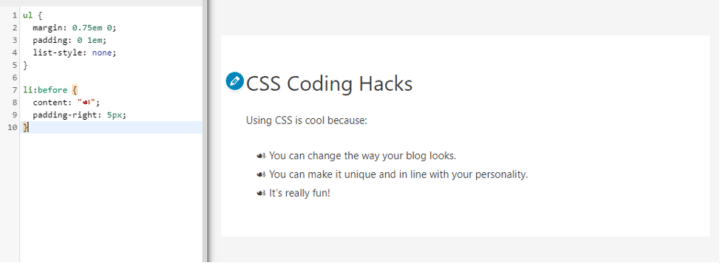
Copy and paste the following code into the Additional CSS box:
ul {margin: 0.75em 0; padding: 0 1em; list-style: none;}
li:before {content: “SYMBOL”; padding-right: 5px;}
Whatever is placed in the quotations where it says SYMBOL is going to appear to the left of your list items.
The “padding-right” property controls how much space there is between the symbol and the list item.
In order to use fancy HTML symbols, visit this site and find the symbol you want. Click on it and copy the symbol from the top of the screen.
Paste this between the quotations in the li:before code.
Don’t Go Overboard with CSS
When my daughter designs a house in The Sims, the result is always a hot mess of color and texture.
Why? Because she can.
Just because you can use CSS to add neat effects and customize your content, doesn’t mean you should do too much.
Remember that the point of sprucing up your mommy blog is to create a unique experience for your reader – without making that experience difficult or frustrating.
That being said, there’s nothing wrong with playing around with CSS to get the look you want!
I personally love spending my spare time playing with code because, yes, I am that cool.
And I hope you will find yourself enjoying it too! These simple coding hacks are easy to implement and can really make a positive impact on the look and feel of your blog.
Happy coding!
 My name is Chelsy and I am a single mother, blogger and freelance writer. I know how chaotic #momlife can be but I believe there is balance to be found in every mother’s life. You can find me blogging at Mama Needs Coffee and Motherhood+Mayhem or building blanket forts in my living room.


8 Comments