So, about a week ago my husband tells me, “it’s official. We are all on Gutenberg.”
See, since the beginning we have always used the Classic WordPress plugin to resort to the original WordPress editor when you write a blog post.
But, we can’t be fuddy-duddy’s and avoid anything new. After all, my word for 2021 is “new.”
So I’m learning how to use Gutenberg for the first time.
And if you recently started a blog, you are probably on the same journey as I am! So to help me out (and you too!), I have my wonderful mom blogger friend, Chelsy, of Motherhood & Mayhem, dish out her tech knowledge with us again.
I loved her post on using CSS hacks and today she is sharing her simple tips on using Gutenberg for 2021!
What is Gutenberg?
Gutenberg is a progressive block-based editor that replaced the original classic WordPress editor in 2018.
Every new installation of WordPress automatically defaults post and page creation to the Gutenberg system.
With Gutenberg, content is added to a post by using individual “blocks” within one larger content area.
If you were well-versed in the Classic Block version of WordPress, you probably asked yourself, “Why did this have to change?”
Or, if you were like me and not a huge fan of change, you may have dropped to your knees, balled your fists at your sides and let out a plaintive, “Whhhhhhhhhhyyyyyyyy?” to the heavens.
But everything must evolve and WordPress had a very good reason to switch things up with the Gutenberg editor – mainly to allow users to create posts and pages with more flexibility.
Plus, with really cool site builders like Elementor and DIVI gaining in popularity, WordPress also wanted to find a way to compete with these drag-and-drop programs by providing the same sort of interface for post and page creation.
Yes, it’s something new to get used to. But, with this WordPress Gutenberg tutorial, you’re going to see just how easy using this block-based editor really is.
Welcome to the Block Party!
So, as I mentioned above, Gutenberg is a block-based editor – meaning that you can add different “blocks” or elements into your page/post.
This gives you more flexibility when it comes to the placement of your content.
Start the old-fashioned way by clicking on “new post” or “new page” in your WordPress dashboard menu.
The first block of your content is always the title. Below that, you can start adding in your content or click the little plus sign to add a different block.
When you are typing out your content, each new paragraph is going to create a new block. This makes it easier to add elements, such as images, in between chunks of text.
Add more blocks by clicking on the little plus sign at the top left-hand side of your screen.
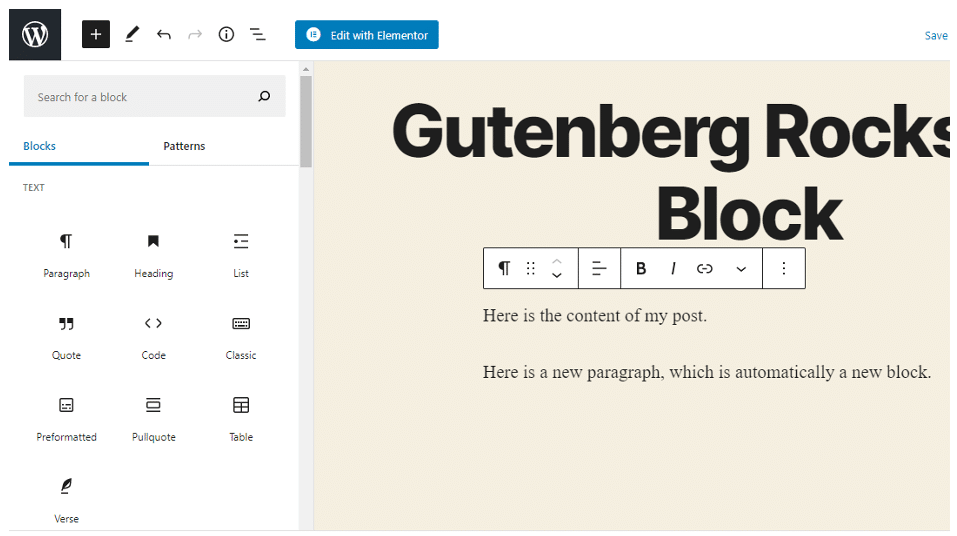
There are so many to choose from! And the best part? All of the basic blocks included with Gutenberg are free!
You can scroll down through the block options or search for what you need.
Adding and Editing Blocks
When you find what you want to include in your content, click on the block in the block menu and it will appear in the content editor.
Once it’s part of your content flow, you can add in your information.
For example, if you choose an image, you’ll get the little box that prompts you to add an image from your gallery or upload one.
Text-based blocks are going to let you write in your information, such as quotes and lists.
Each block comes with a little toolbar that appears when you click on the block. The buttons on the toolbar change depending on the type of block your editing.
You can also change the settings of the block in the menu on the right-hand side of your screen.
(If there is no menu, click the little gear at the top right-hand side next to the “Publish” button.)
To access the block’s setting (despite what kind of block it is), click on the three vertical dots on the toolbar – this will also allow you to delete the block.
On the toolbar as well, look for the up and down arrows. This will allow you to move the block within the content.
Saving and Reusing Blocks
If you’ve created a block you want to use again in a different post or on a different page, such as a custom HTML code or a block of text, Gutenberg allows you to save the block and reuse it somewhere else!
Click on those three vertical dots in the block toolbar and select “Add to Reusable Blocks.”

Enter a name for your block and hit the save button.
To insert a saved block, click on the plus sign to add a block to your content. This time, click on the tab that says “Reusable.”
There’s your block!
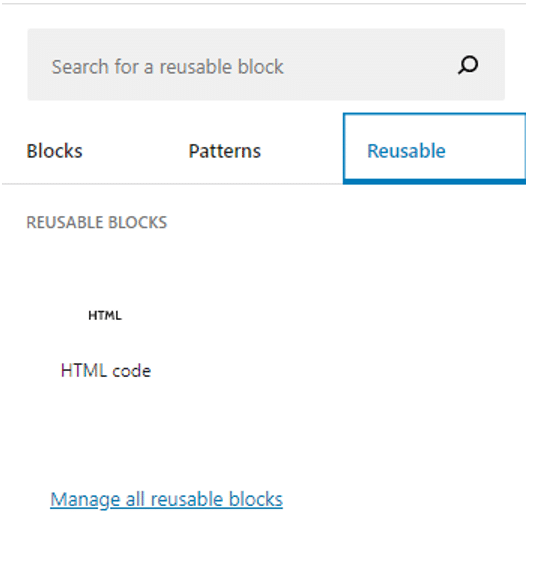
All of your reusable blocks are stored in your WordPress database and you can manage them by clicking the “Manage all reusable blocks” link.
Working With the Basic Blocks
While there are lots and lots of blocks to choose from in the Gutenberg editor, I want to go over the basics of texts and images.
Text and Headings
When you start typing into a text block, the toolbar above the block will allow you to change the block style from paragraph to heading. It’s the backward P thing.
Once you change the text to a heading, H2 appears on the toolbar automatically – but you can click it to change the heading size.
When your text is a heading, you can also change the alignment from wide-width to full-width by clicking on the toolbar button that looks like a big rectangle between two lines.
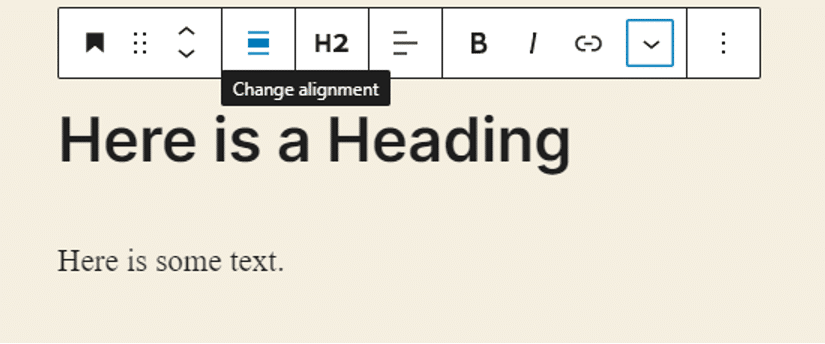
With all text, you can change the style such as bold or italic as well as the alignment (left, right, center).
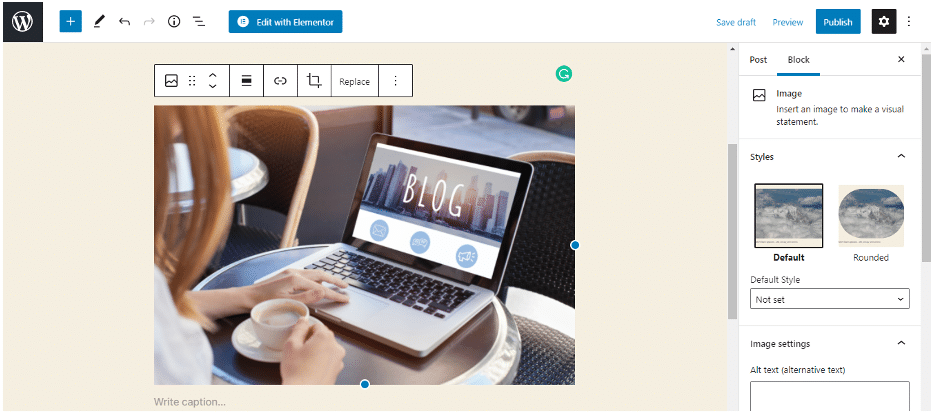
Images
There’s really not a lot to editing an image block. Check out the right-hand menu (click the little gear if it’s not there) to see what you can add and change.
Most notably, you can change your image to have rounded corners!
Otherwise, you can add alternative text and change the image size (which you can also do with the little blue dot that appears when you click on your image).

Create an Author Box
I wanted to show you this nifty trick you can do with the “Media & Text” block, which easily places media and text side-by-side without needing a degree in CSS box models.
You can even save this as a reusable block and easily add it to the end of every post!
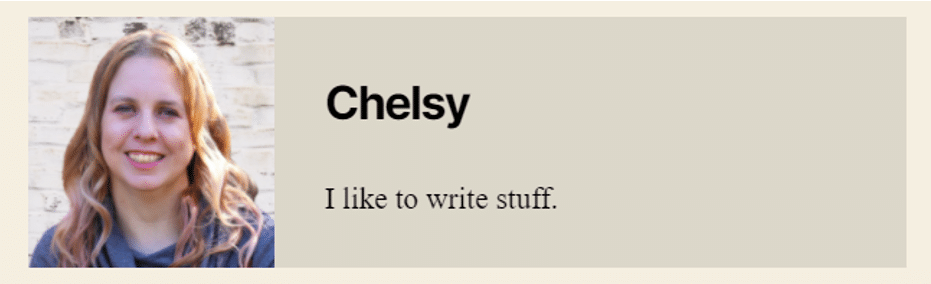
When you add the “Media & Text” block, you can use the block’s toolbar to choose what side you want the image to go on.
You can then further customize your settings in the right-hand menu, such as the text and background colors.
You can also add additional blocks with the text section, like social media buttons or links.
Post Options and Publishing
We’ve gone over blocks and how to add and edit them. Now we need to take a look at your post options and metadata.
On the right-hand side, there should be a settings menu – again, click on the little gear if it’s not there.
There are two tabs at the top of this window. Click the one that says “Post” (or “Document” if you are working on a page).
This will bring up all of the post options we know and love from the classic editor!
Here you can schedule your post, change the permalink, assign a category, add some tags, throw in a featured image and even add a custom excerpt!
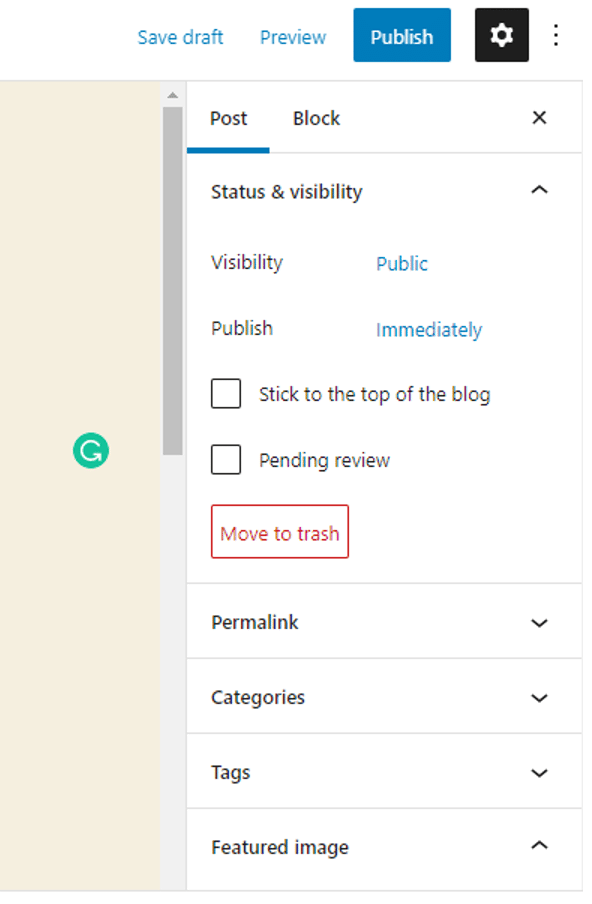
Above the settings window are the buttons to save your post as a draft, preview it or publish it.
(FYI, the “preview” option allows you to check out your post/page on mobile and on a tablet!)
If you click on the three vertical dots to the right of the gear, you get a whole other menu of options! You can change the view, edit the HTML of your content (“code editor”) and access some more tools.
Should you need to exit the Gutenberg editor and go back to your WordPress dashboard, click the big W at the very top left-hand side of your screen.
Make sure you save any changes first!
Gutenberg Layouts
Okay, so now you know how it all works – so let’s take this WordPress Gutenberg tutorial to the next level!
So there’s a bunch of free plugins you can download and install to amplify Gutenberg’s creative powers. The one we’re going to look at is called Genesis Blocks.
Not only does it provide you with more block options, but it also allows you to access pre-made layouts:
To make this happen, go download the Genesis Blocks plugin here.
To install, go to your WordPress dashboard and hover over the “Plugins” link in the left-hand menu then click on “Add New.”
Click on the “Upload Plugin” link next to the “Add Plugin” title. Find your file and install it.
Once installed, click the “Activate” link.
The next time you go to edit a page or post, you’ll have some new blocks to play with!
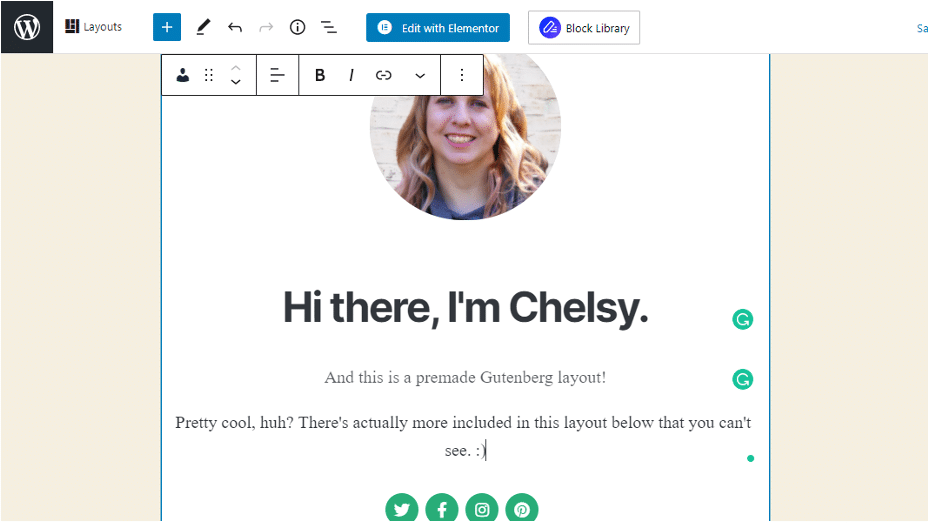
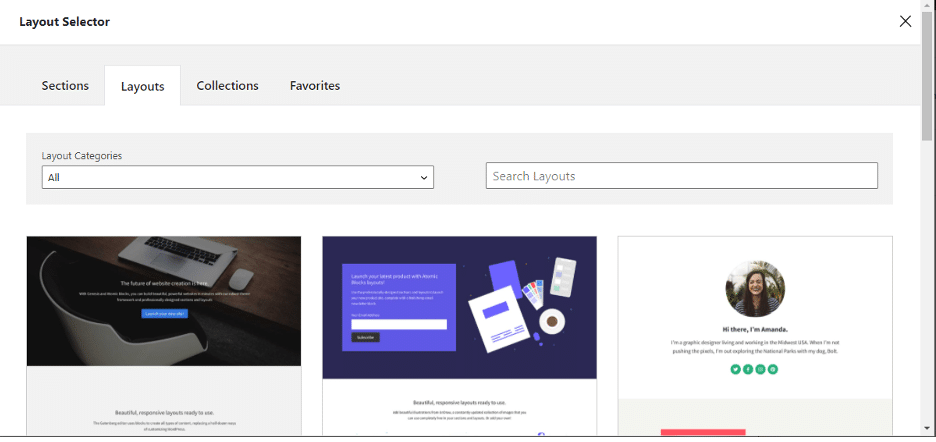
But, to access the layouts, click the new button at the top left-hand side that says “Layouts” – and give it a moment or two to load, then click on the “Layouts” tab.
This will give you a few cool layouts to choose from! If you don’t want a full layout, you can check out the “Sections” tab as well.
And if you want to access the new Genesis blocks, just click the plus sign to add a block and scroll down to the bottom – you’ll see any new blocks there!
Getting Rid of Gutenberg
Yeah, I get it. Gutenberg’s not for everyone.
As excited as I hope you got checking out this WordPress Gutenberg tutorial, sometimes it’s hard to get used to new things when you’re so comfortable with the old.
If that be the case, there are two simple ways you can revert back to the classic WordPress editor:
- Use the “Classic” block. Gutenberg even wants to make ditching their editor easy for you! In the blocks library, you can insert a “Classic” block where you can write in your content the old-fashioned way.
- Download a Plugin. If you just want to go back to the full-on original editor, go to Plugins->Add New in your WP dashboard and search for “disable gutenberg” in the “Search plugins…” box. The plugin you want has a picture of a shovel digging in the dirt (how grim) – click on “Install Now” then “Activate” once it’s ready.
The great thing about these two options is that you can always change your mind if you want to give Gutenberg a try.
Simply “deactivate” the plugin and Gutenberg will make its triumphant return!
Block On, Mamas!
So there you have it – a super easy WordPress Gutenberg tutorial to make new things seem less scary!
Even if you’re still in love with the classic WordPress editor, think of how cool you can make your posts and pages look without having to re-finagle your entire layout.
Gutenberg is one of those things you’ll get the swing of the more you use it – and, if not, you can always bury it with a simple plugin.
How do you feel about Gutenberg? Love it? Hate it?
Share your feelings in the comments!
 My name is Chelsy and I am a single mother, blogger and freelance writer. I know how chaotic #momlife can be but I believe there is balance to be found in every mother’s life. You can find me blogging at Mama Needs Coffee and Motherhood+Mayhem or building blanket forts in my living room.


2 Comments