
I love finding simple Christmas crafts that turn everyday items into something cute and festive.
And if you’re anything like me, you probably have a few wine corks tucked away in a drawer just waiting to be used for a fun DIY project.

Well, Christmas is the perfect time to put those corks to good use!
These wine cork Christmas tree decorations are such a fun way to get creative without spending a ton of money on craft supplies.
I especially love crafts like these because they’re easy enough to make with the kids, but they can also look pretty enough to give as handmade Christmas gifts or even sell at holiday craft fairs!
And with Christmas shopping getting more expensive every year, making a few extra dollars from something you enjoy doing sounds pretty good to me!
So, whether you’re decorating your own Christmas tree, putting together thoughtful homemade gifts, or looking for Christmas crafts to make and sell,
I’ve rounded up some festive wine cork decoration ideas you’ll definitely want to try this holiday season!
Supplies You’ll Need to Make Wine Cork Christmas Decorations
One thing I love about making wine cork Christmas crafts is that you don’t need a ton of expensive supplies to get started!
In fact, you probably already have most of these things tucked away in your craft drawer. And if you don’t, a quick trip to the dollar store should do the trick!
Here are some basic supplies you’ll want to have on hand before making your festive wine cork decorations:
- Wine corks – Save up natural wine corks throughout the year or buy them in bulk if you plan to make decorations to sell.
- Hot glue gun and glue sticks – Perfect for attaching corks together and adding little embellishments.
- Acrylic craft paint – Grab some Christmas colors like red, green, white, gold, and silver.
- Paintbrushes – Small brushes work best for painting cute faces, snowflakes, and other tiny details.
- Twine or ribbon – Use these to hang your finished ornaments on the Christmas tree or add pretty bows.
- Mini pom-poms – Great for making reindeer noses, Santa hats, and other fun Christmas details.
- Googly eyes – These make little snowmen, reindeer, and Christmas characters extra adorable.
- Glitter and sequins – Add a little sparkle to your handmade decorations!
- Felt and fabric scraps – Perfect for creating tiny scarves, hats, and other festive accessories.
- Craft knife and cutting mat – Helpful for cutting corks into smaller pieces or different shapes. This part is best left to adults.
- Mini bells, beads, and buttons – Fun finishing touches that make your Christmas crafts stand out.
You definitely don’t need everything on this list for every project!
I like to gather a few basic supplies first and then add little extras depending on what I’m making.
And if you’re planning to sell your wine cork Christmas ornaments, consider buying your supplies in bulk and making several decorations at once.
It’s a great way to keep your costs down while creating cute handmade Christmas gifts that people will love!
25 Festive Wine Cork Christmas Decorations to Make (for Gifts or to Sell)
Here are 25 festive wine cork Christmas decoration ideas you can try this year!
1. Mini Wine Cork Christmas Tree Ornaments
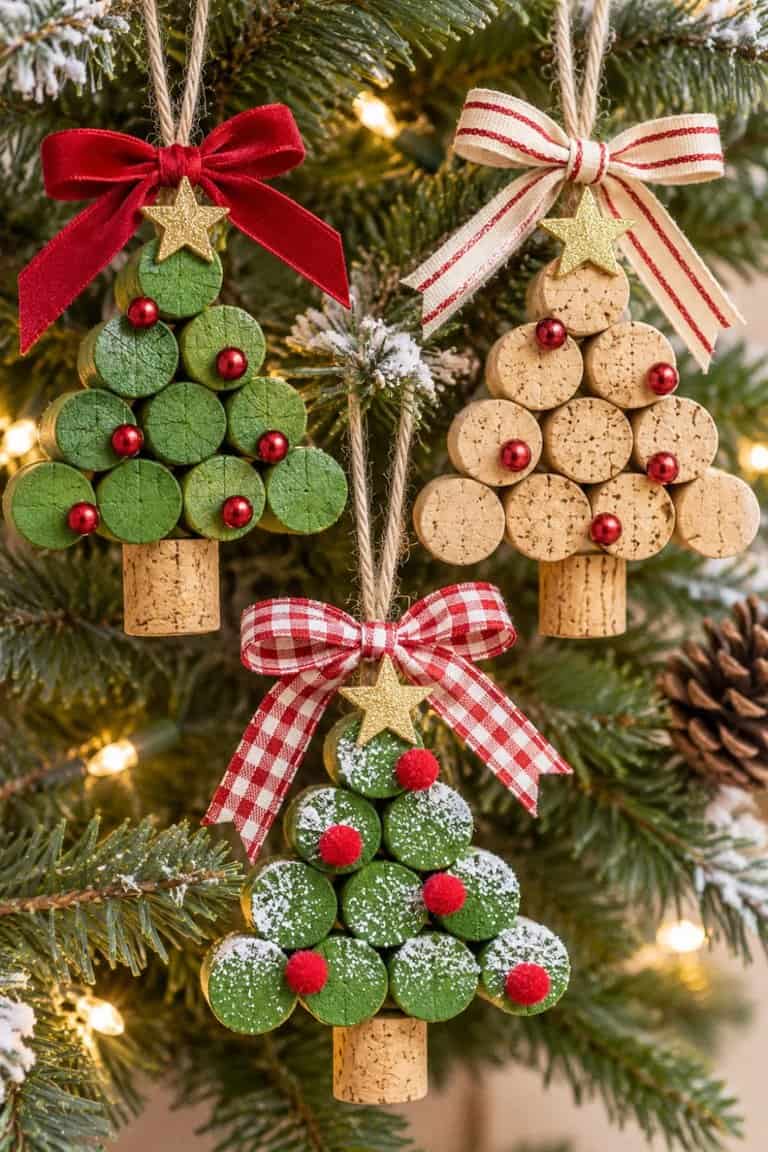
These little Christmas trees are probably one of the easiest wine cork crafts you can make!
Start by gathering six to ten wine corks and arranging them into a triangle shape, with the widest row at the bottom. Use hot glue to secure the corks together, then add one cork underneath for the trunk.
Paint the ends of the corks green, or leave them natural for a more rustic look.
Add tiny red beads, miniature pom-poms, or little gold stars to decorate your tree. Finish with a ribbon loop at the top so you can hang it on your Christmas tree.
I love the idea of making several of these in different colors and packaging them as handmade ornament sets!
2. Adorable Wine Cork Reindeer Ornaments
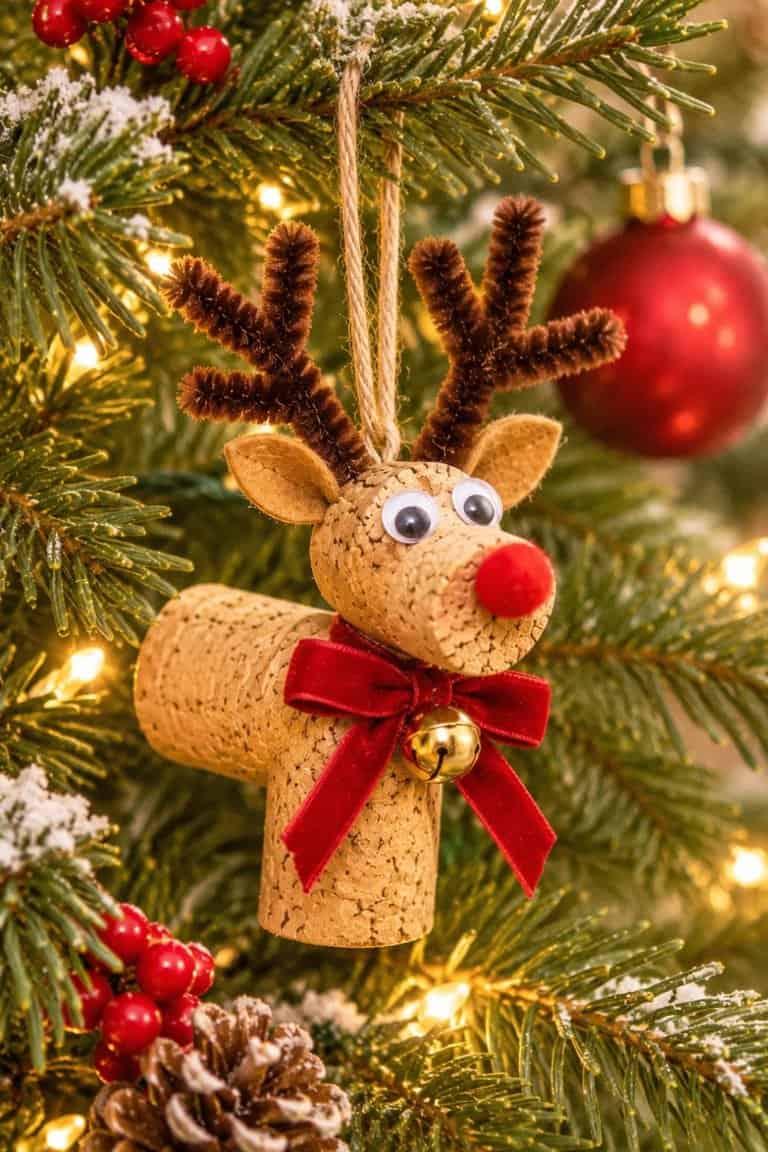
How cute would a little family of wine cork reindeer look hanging on your Christmas tree?
Start with one wine cork for the body and glue a smaller cork piece to the front for the head.
Use brown pipe cleaners to create the antlers and attach them to the top of the head.
Add googly eyes, a tiny red pom-pom nose, and a little ribbon around the neck.
You can even make one reindeer with a bright red nose to look like Rudolph!
Attach a piece of twine to the top for hanging.
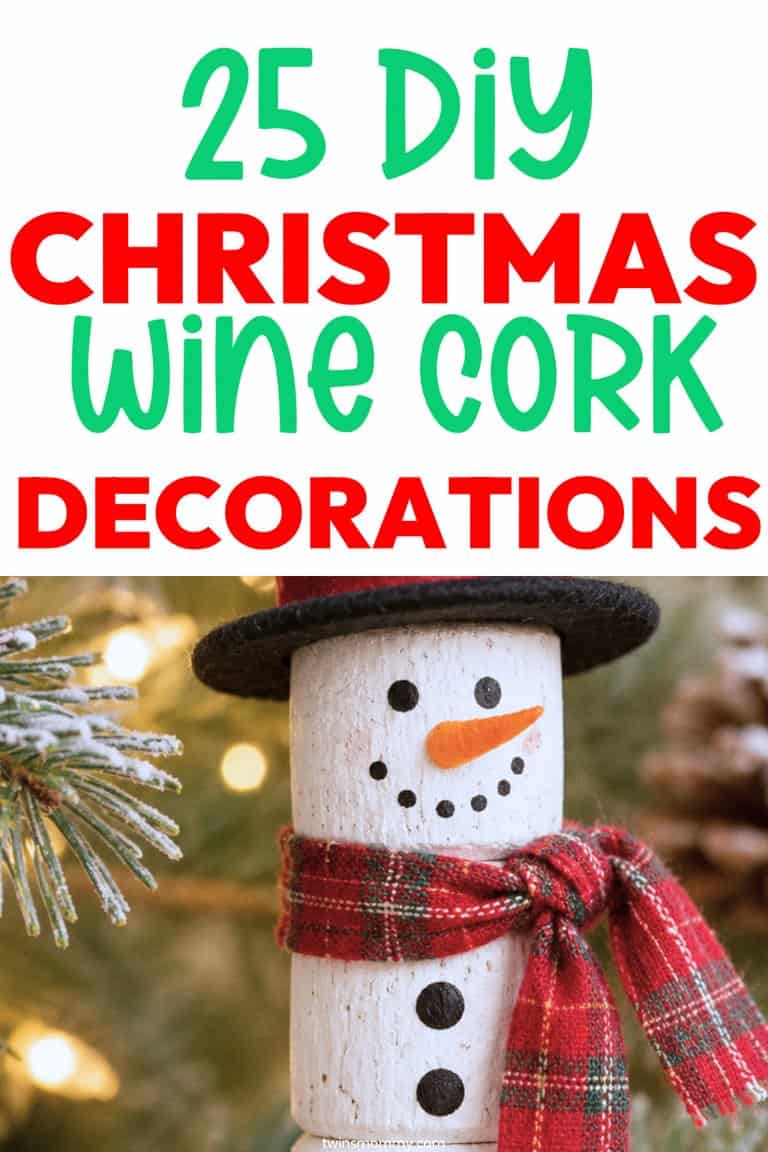
3. Cute Wine Cork Snowman Decorations
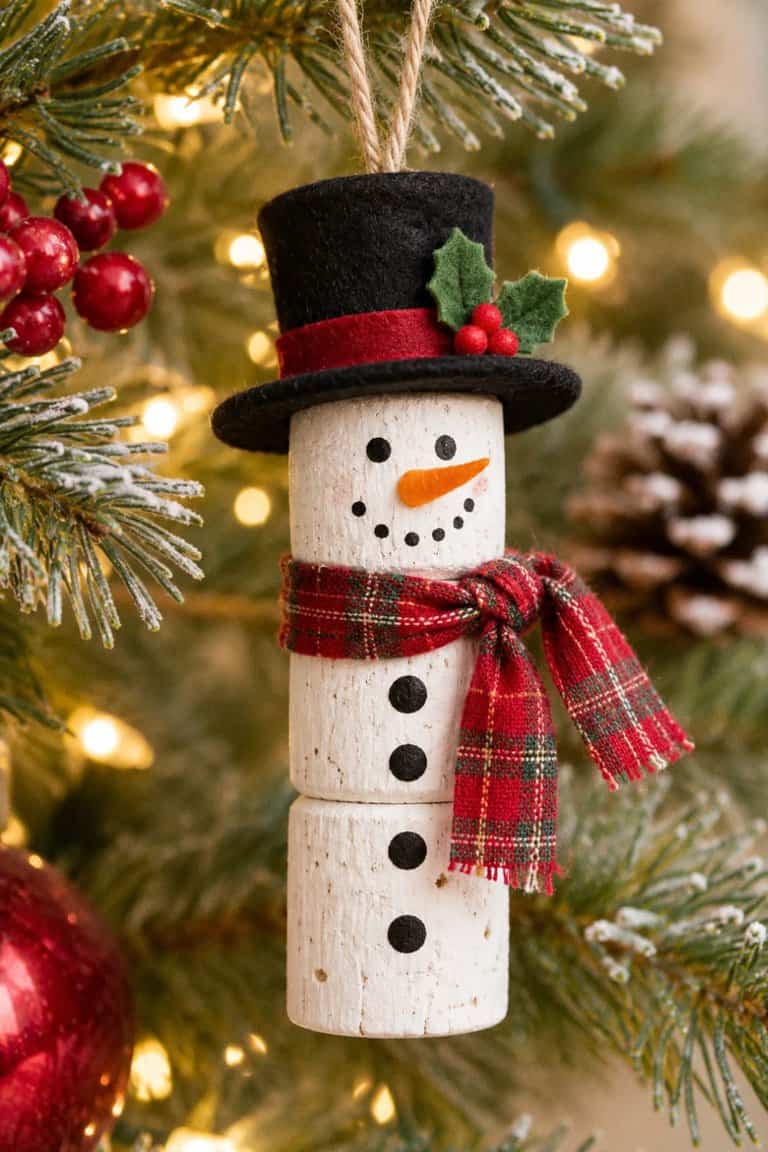
These little snowmen are perfect if you love traditional Christmas decorations with a handmade touch.
Start by painting three wine corks white and gluing them together vertically.
Once the paint dries, use black acrylic paint to add eyes, a mouth, and buttons.
Make a tiny carrot nose using orange felt or paint, then wrap a thin strip of plaid fabric around the snowman’s neck for a scarf.
You can also make a little top hat using black felt.
Add a ribbon loop to hang your snowman on the tree, or make several to display together on a shelf.
4. Gingerbread Wine Cork Ornaments
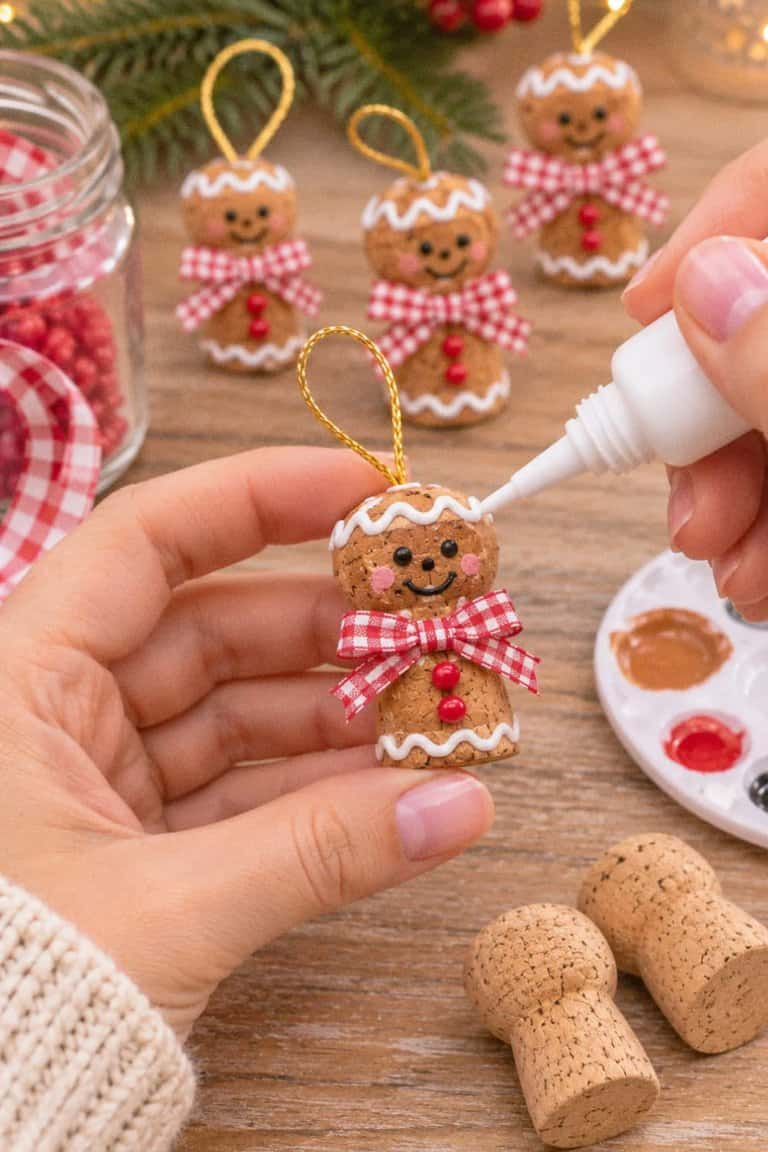
Gingerbread Christmas decorations are so adorable, and you can easily make your own using wine corks!
I would use champagne corks for this craft because their rounded tops make cute little gingerbread characters.
Paint the corks a warm gingerbread brown and let them dry completely.
Use white dimensional paint to create icing details around the edges, then add tiny red buttons and a smiling face.
Tie a small red or pink bow around each one for an extra whimsical look.
These would be so cute on a gingerbread-themed Christmas tree!
5. Rustic Wine Cork Angel Ornaments

If you love vintage-inspired Christmas decorations, these little wine cork angels are such a sweet idea.
Start with a natural wine cork for the angel’s body and glue a small wooden bead on top for the head.
Use white lace, burlap, or folded sheet music to create the wings.
Attach the wings to the back of the cork and add a tiny gold pipe cleaner halo above the head.
You can leave the cork natural or paint it cream for a softer look.
Finish with a thin gold ribbon for hanging.
These would make thoughtful handmade Christmas gifts, too!
6. Wine Cork Snowflake Ornaments
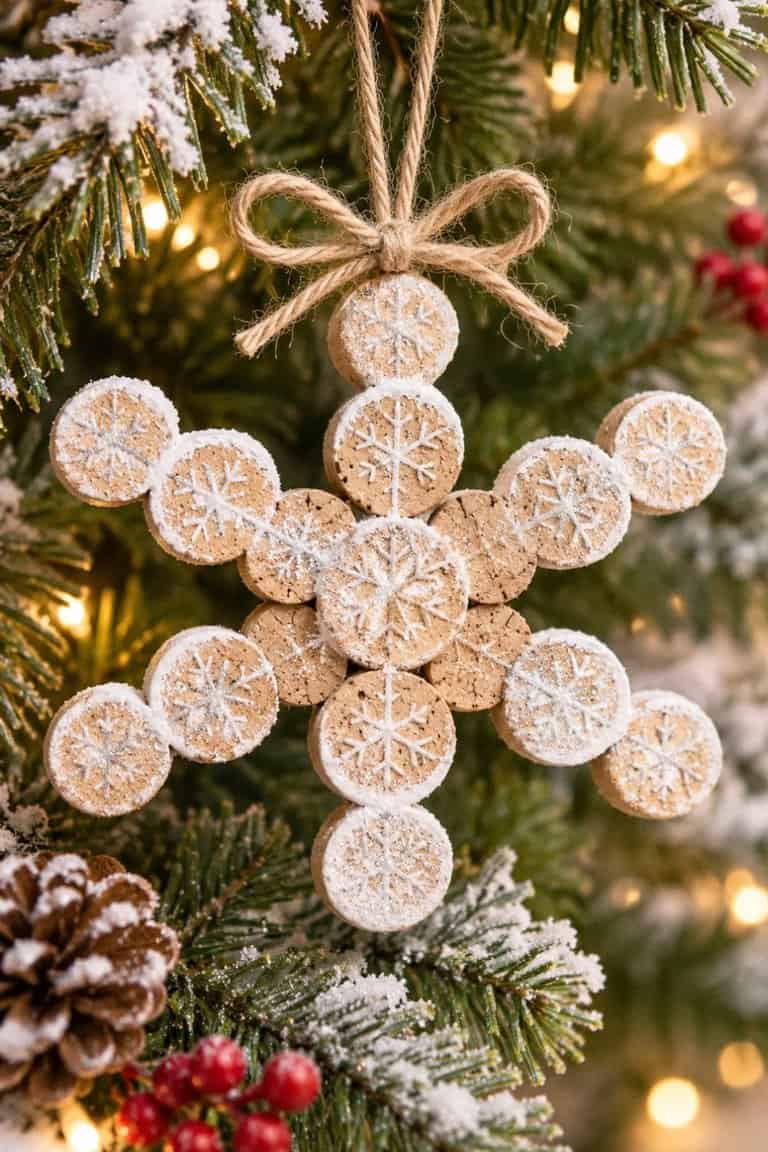
I love how simple and pretty these wine cork snowflakes can look!
Start by carefully slicing several wine corks into equal-sized rounds using a sharp craft knife. This part should be done by an adult.
Arrange the cork slices into a snowflake pattern, starting with one piece in the center and adding more around it.
Once you’re happy with the shape, glue the pieces together.
Paint the edges white or add a little silver glitter for a frosty finish.
Attach a piece of twine to the top and hang your snowflake on the Christmas tree.
You can make larger versions for your windows, too!
7. Mini Wine Cork Wreath Ornaments
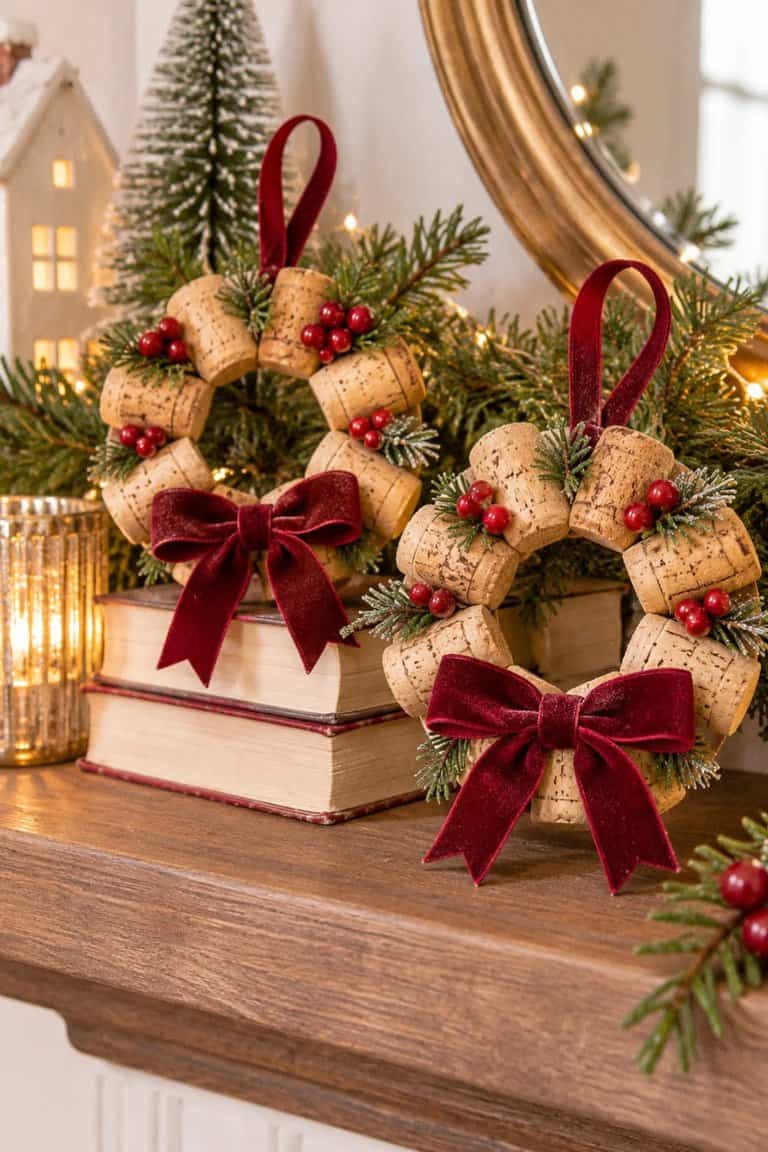
These tiny wreaths are one of my favorite ideas because they look so rustic and festive!
Gather about eight to twelve wine corks and arrange them in a circle, leaving a small opening in the middle.
Glue the corks together, using a cardboard ring behind them if you need extra support.
Tuck little pieces of faux evergreen greenery between the corks and add miniature red berries.
Finish with a beautiful burgundy velvet bow at the bottom.
Add a ribbon loop at the top, and you have an adorable handmade Christmas wreath ornament!
8. Vintage Santa Wine Cork Ornaments

You can’t have Christmas decorations without Santa!
For this craft, start by painting the bottom half of a wine cork red and the top portion a soft peach color for Santa’s face.
Use a little white cotton or faux fur to create his beard.
Make a tiny Santa hat using red felt and attach a white pom-pom to the tip.
Add two little black eyes and a rosy nose.
I think these would look especially cute with slightly different expressions, so every Santa has his own personality!
9. Mini Wine Cork Nutcracker Soldiers
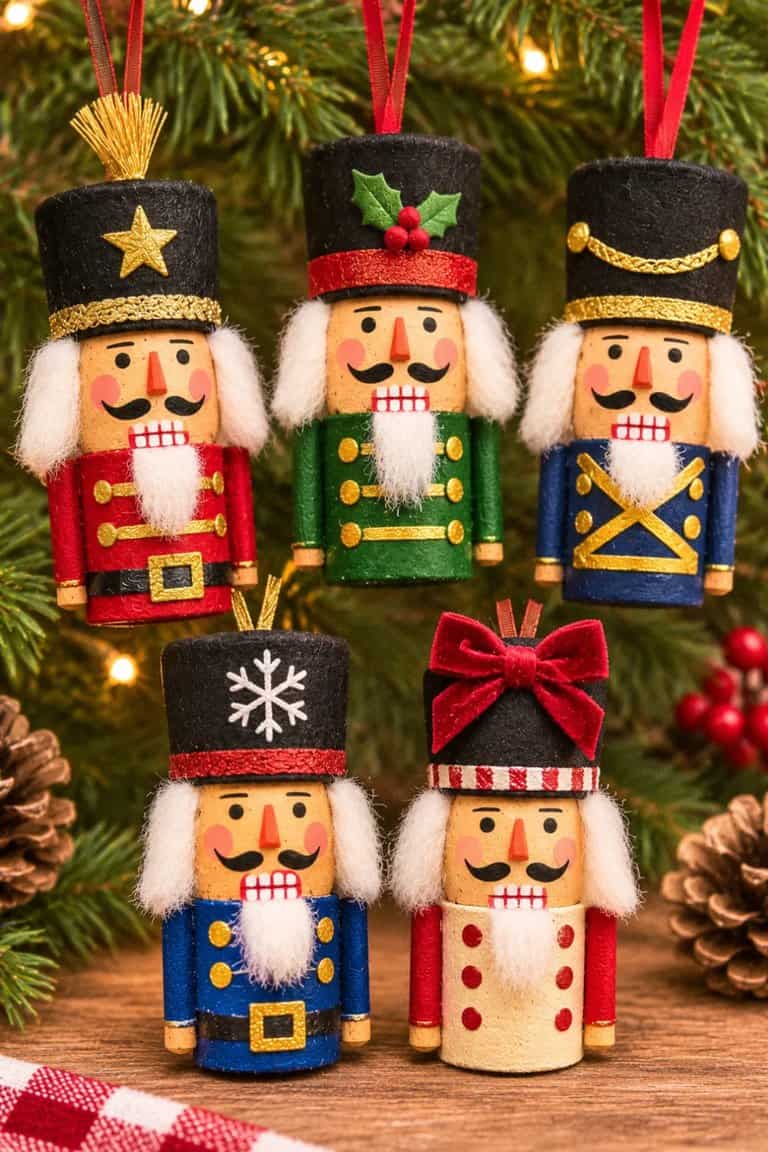
Nutcracker decorations are such a classic Christmas look, and making miniature versions from wine corks is a fun twist!
Start by painting each cork in traditional nutcracker colors like red, navy blue, cream, and gold.
Use a small paintbrush to add a jacket, buttons, belt, and facial details.
Cut a tiny rectangle of black felt, roll it into a cylinder, and glue it to the top for the soldier’s hat.
You can also add little pieces of gold cord for decorative trim.
Attach a ribbon loop to the back to turn your nutcracker into a Christmas tree ornament.
10. Coquette Wine Cork Bow Ornaments
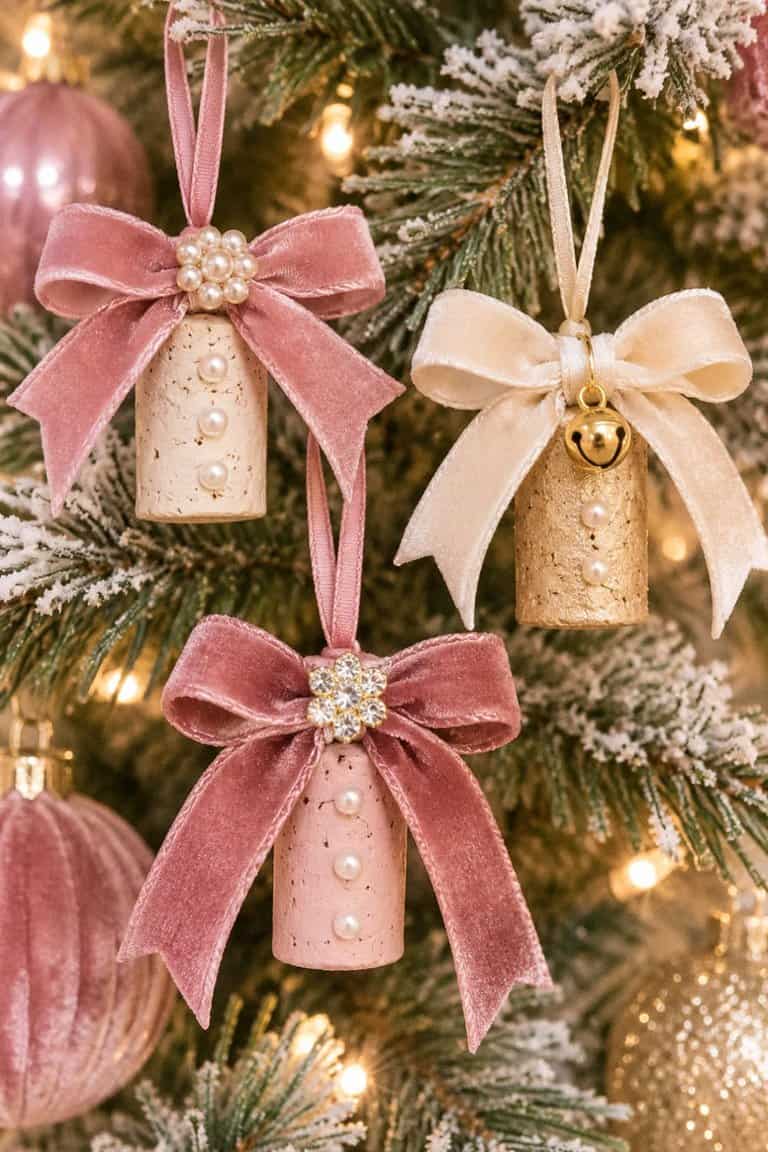
If you love feminine Christmas decorations with pretty ribbons and soft colors, you’ll want to try these!
Start with a natural wine cork and paint it cream, blush pink, or champagne gold.
Wrap a thin piece of velvet ribbon around the middle and tie it into a beautiful bow.
Add tiny pearl beads, miniature gold bells, or a little rhinestone to the center.
For a more dramatic look, use an oversized bow that hangs slightly below the cork.
Attach a matching ribbon loop for hanging.
These would look so pretty on a pink and gold Christmas tree!
11. Gold Glitter Wine Cork Stars
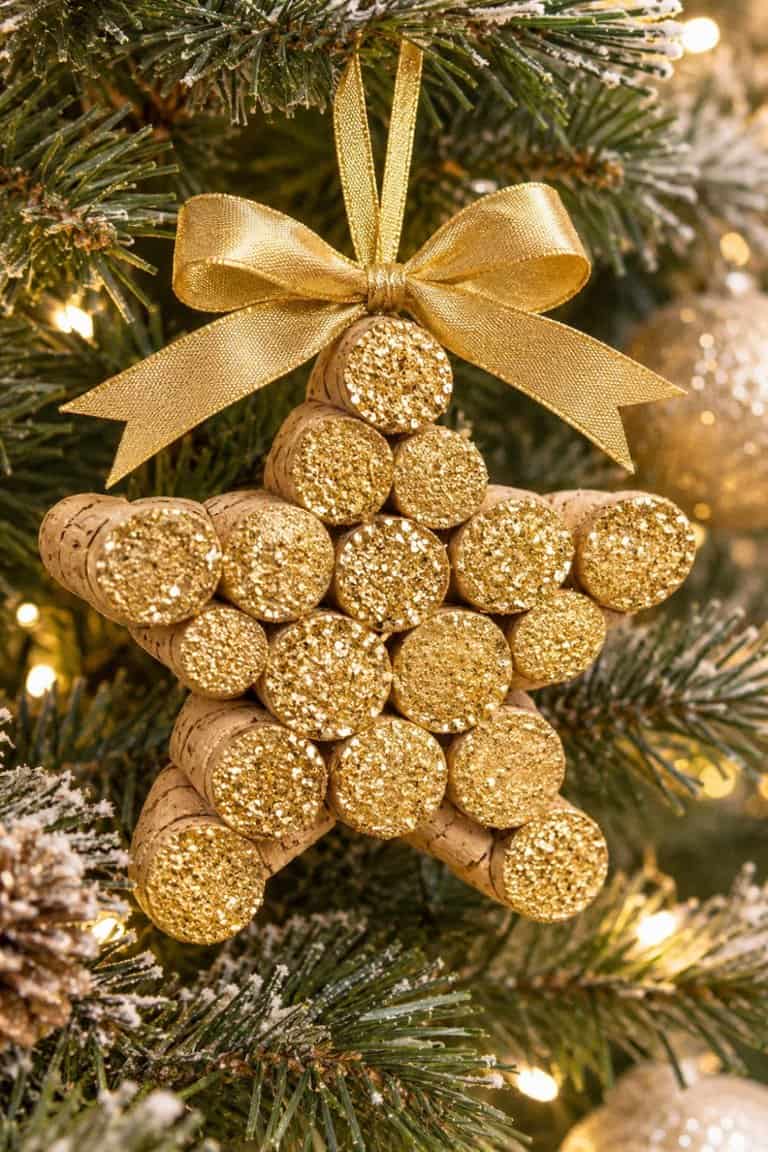
These wine cork stars are perfect for adding a little sparkle to your Christmas decorations.
Start by arranging wine corks into a five-point star shape on a flat surface.
You can use whole corks for a chunky rustic star or sliced cork pieces for a flatter design.
Glue the pieces together, making sure the points are evenly spaced.
Once the glue dries, paint the exposed edges with metallic gold acrylic paint.
Add a little gold glitter while the paint is still wet.
Finish with a gold ribbon for hanging.
12. Little Wine Cork Penguins
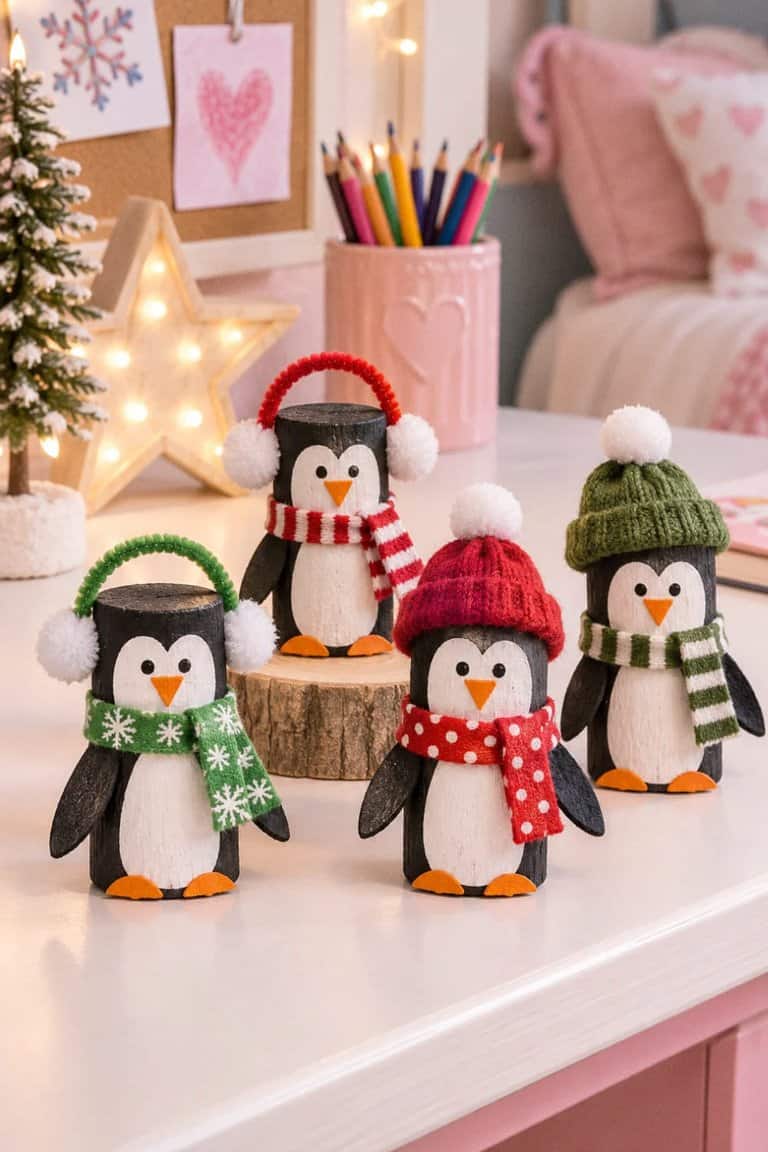
These adorable penguins would be such a fun Christmas craft to make with the kids!
Start by painting a wine cork black, leaving an oval-shaped white section on the front for the penguin’s belly.
Once the paint dries, add two tiny eyes and an orange triangle for the beak.
Cut little flippers from black felt and glue them to the sides.
Wrap a small piece of red or green fabric around the neck for a scarf.
You can also make tiny earmuffs using pipe cleaners and miniature pom-poms.
Add a hanging loop or display your penguins together as a little winter family.
13. Peppermint Candy Wine Cork Ornaments
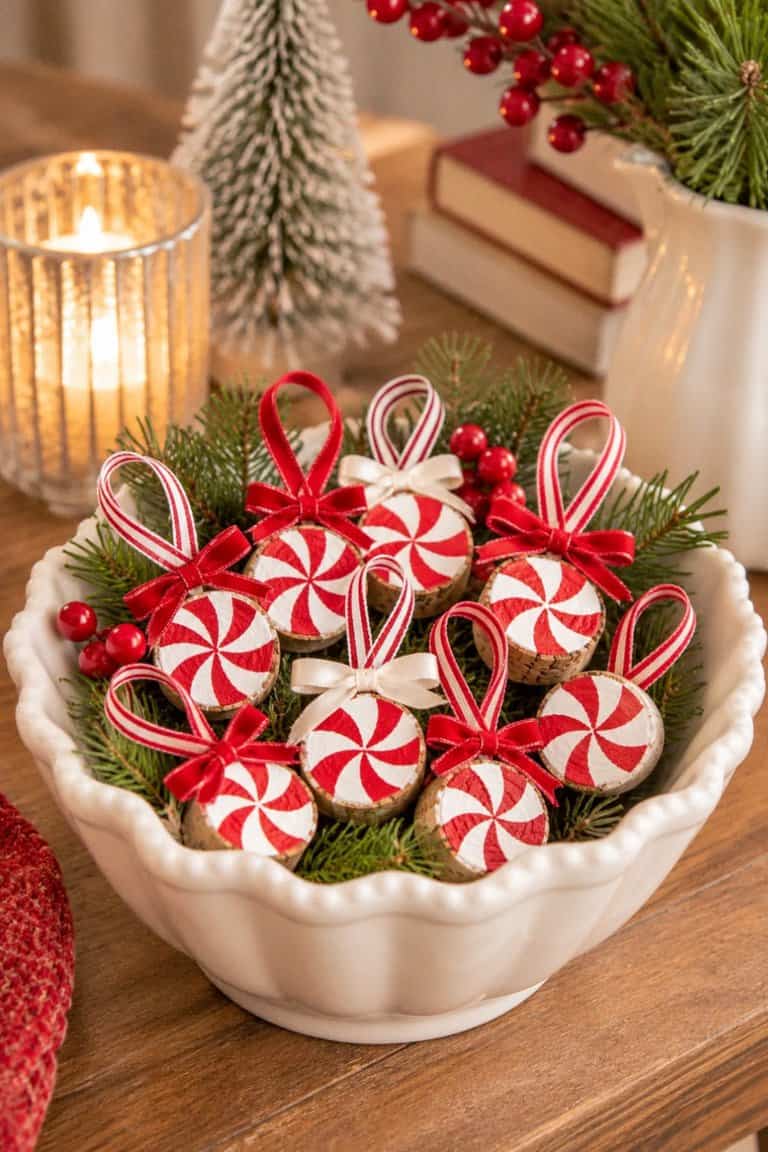
I love peppermint decorations for Christmas because they’re bright, cheerful, and a little whimsical!
For this craft, carefully cut wine corks into thick slices.
Paint each slice white and let it dry.
Use red acrylic paint to create peppermint swirl patterns across the front.
Once everything is dry, add a clear craft sealer for a slightly glossy finish.
Glue a small ribbon loop to the back of each peppermint.
You could also group several peppermint pieces together to create a larger candy-themed ornament!
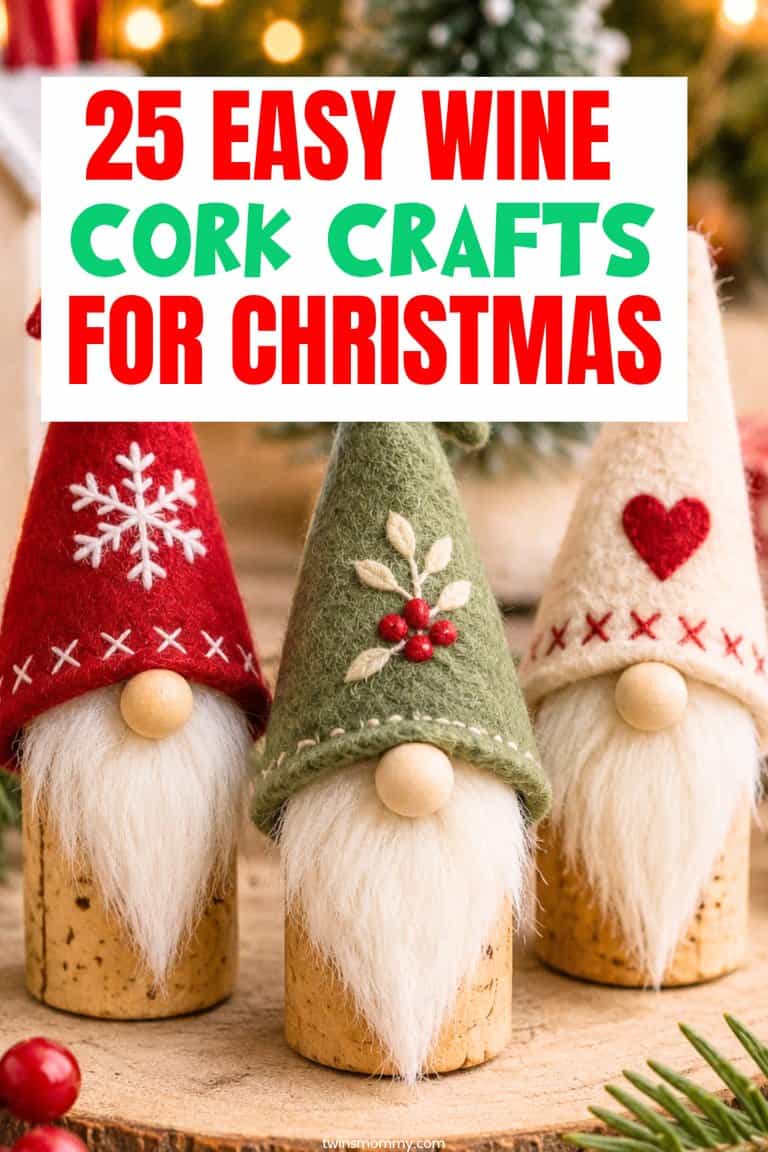
14. Scandinavian Wine Cork Gnomes
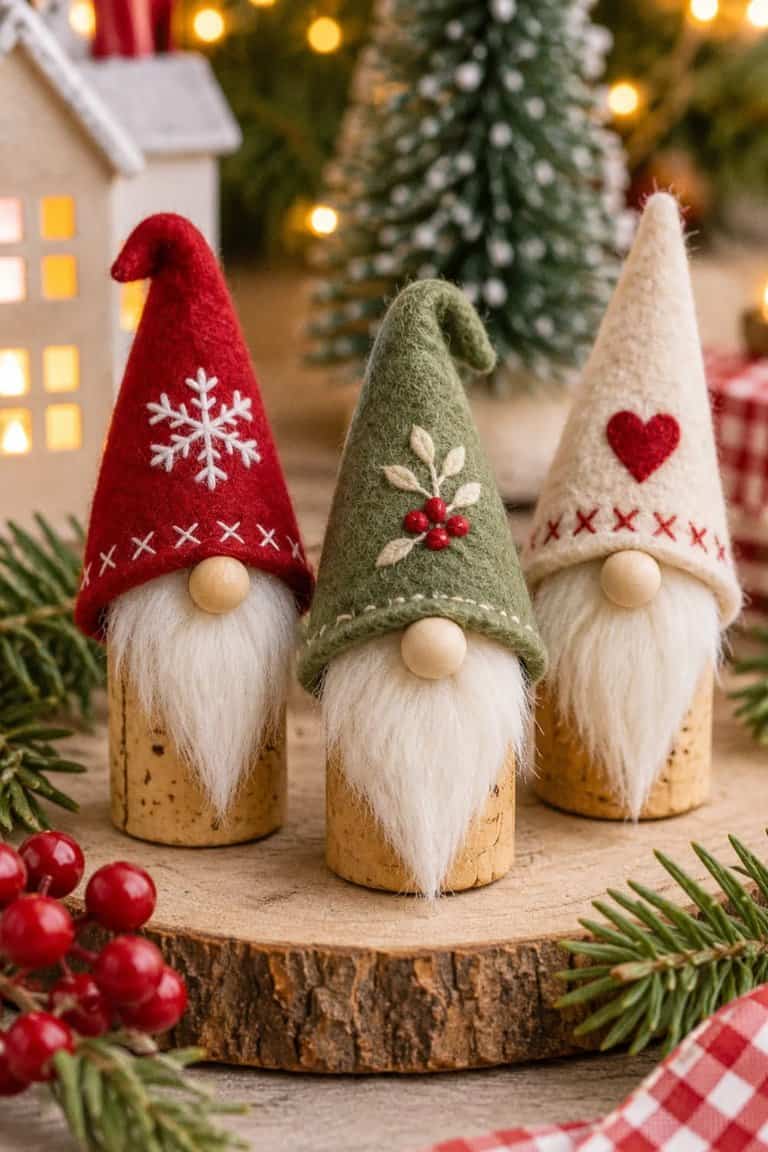
These little Christmas gnomes are perfect if you love cozy, rustic holiday decorations.
And don’t get me started but I love gnomes in my home!
Start with a wine cork for the gnome’s body.
Cut a triangle from red, sage green, or cream felt, then roll and glue it into a tall pointed hat.
Attach the hat to the top of the cork.
Glue a little faux fur underneath the hat to create a fluffy beard, then add a small wooden bead for the nose.
The best part is that you don’t even need to paint a face!
Make a few in different colors and display them together or add ribbon loops to hang them on your tree.
15. Ralph Lauren-Inspired Plaid Cork Ornaments
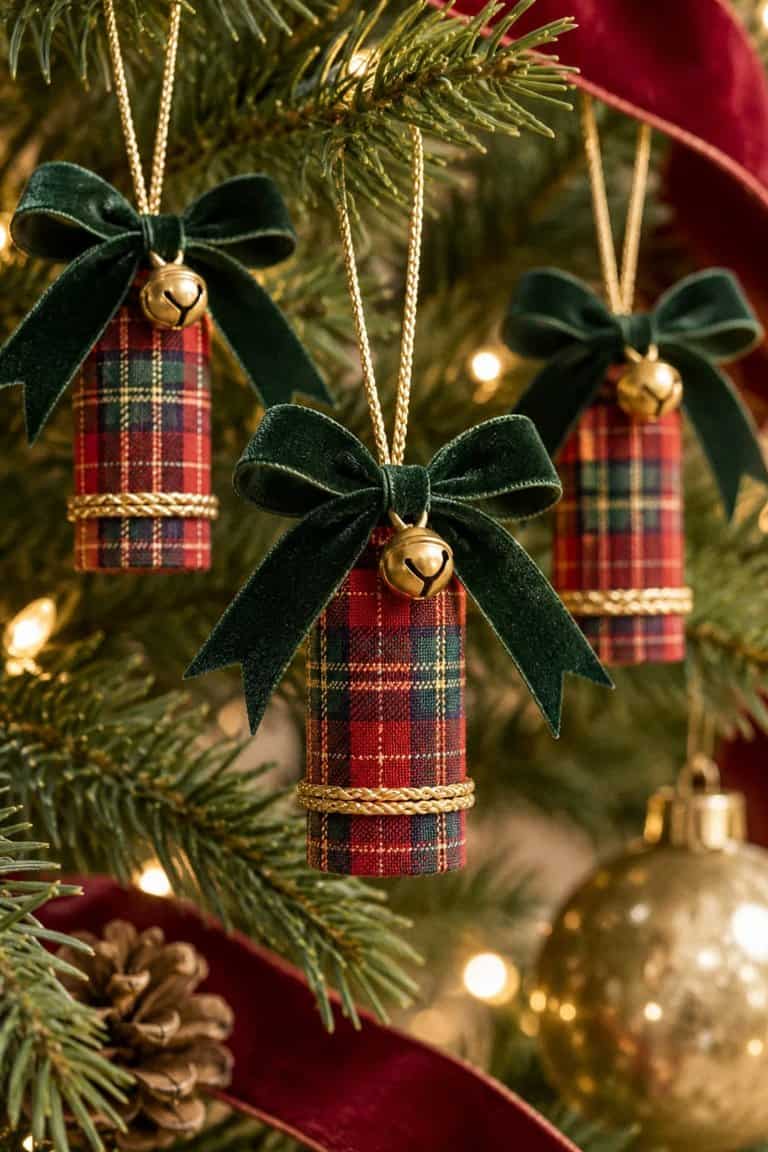
If you’re loving the classic Christmas look with rich reds, forest greens, and beautiful plaid ribbons, these ornaments are perfect!
Start by wrapping a wine cork in a strip of tartan fabric or plaid ribbon.
Secure the fabric with hot glue along the back.
Add a small dark green velvet bow to the top and glue a miniature gold bell underneath.
You can also wrap a thin piece of gold cord around the cork for extra detail.
Finish with a hanging loop.
These would look beautiful mixed with traditional glass ornaments and warm white Christmas lights.
16. Large Tabletop Wine Cork Christmas Tree
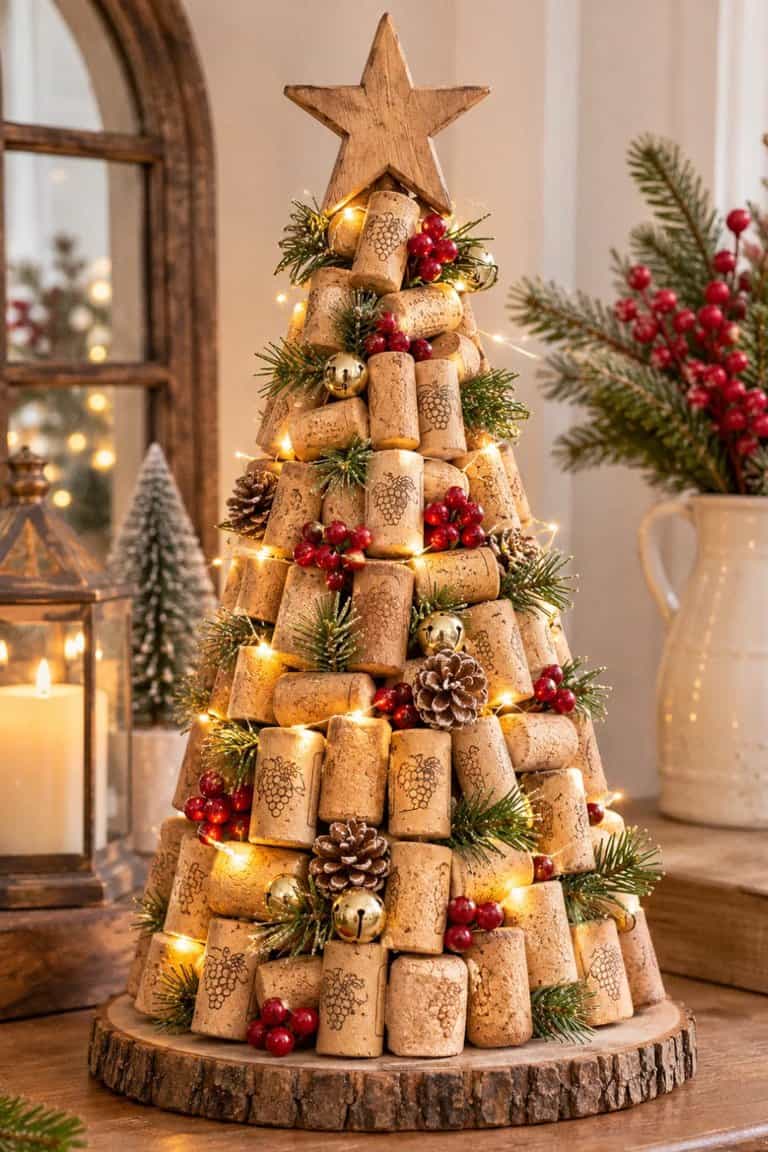
If you have a big collection of wine corks, this is such a fun way to use them!
Start with a sturdy cardboard or foam cone as your base.
Beginning at the bottom, glue wine corks around the cone in rows, working your way toward the top.
You can position the corks horizontally for a textured look or vertically for a more structured tree.
Once the cone is covered, tuck little faux berries, greenery, and miniature ornaments between the corks.
Add a wooden star at the top and wrap battery-operated fairy lights around the tree.
This would make a beautiful Christmas mantel decoration or a larger handmade item to sell at a holiday craft fair!
17. Oversized Wine Cork Christmas Wreath
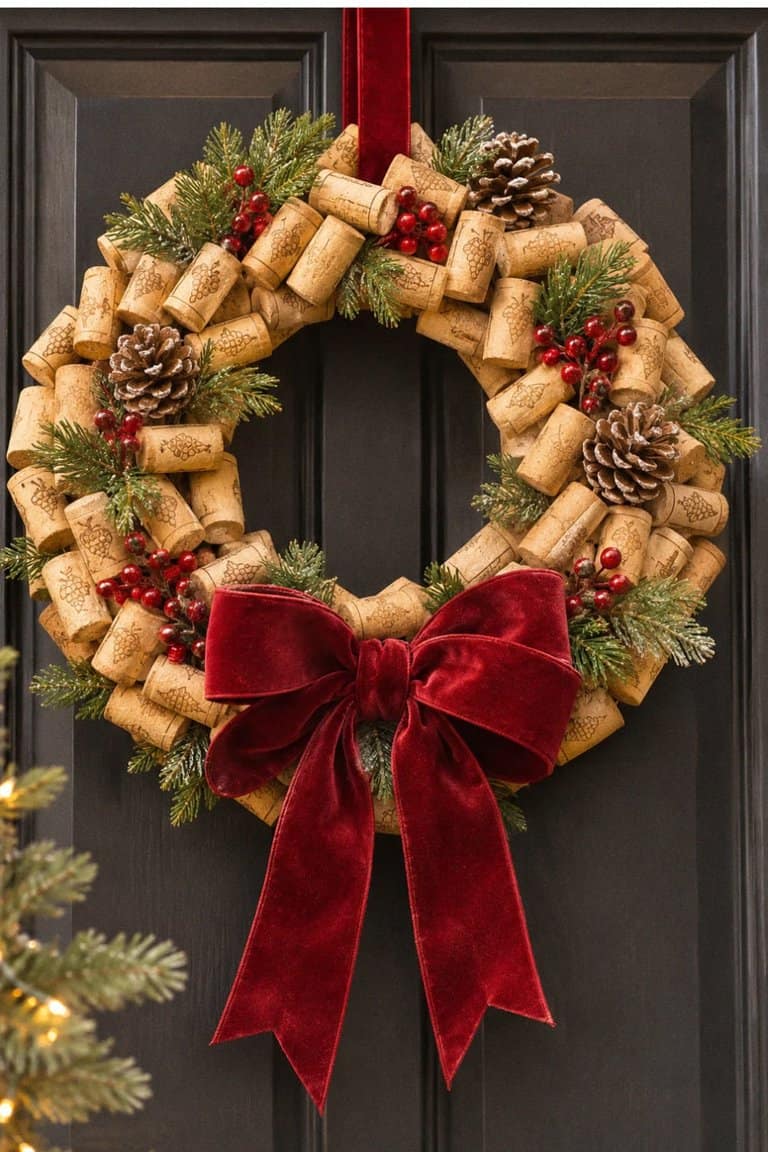
I love the idea of turning wine corks into a big, beautiful Christmas wreath for the front door!
Start with a sturdy wreath form made from foam or wood.
Glue wine corks around the form, alternating their directions to create texture and fill in gaps.
Once the wreath is covered, tuck in faux evergreen branches, pinecones, and red berries.
Add a large velvet bow at the bottom or slightly off to one side.
For a more modern look, keep the decorations minimal and let the natural cork texture stand out.
Use a strong hanging ribbon and display the wreath on a covered porch or indoors.
18. Rustic Wine Cork Christmas Tree Garland
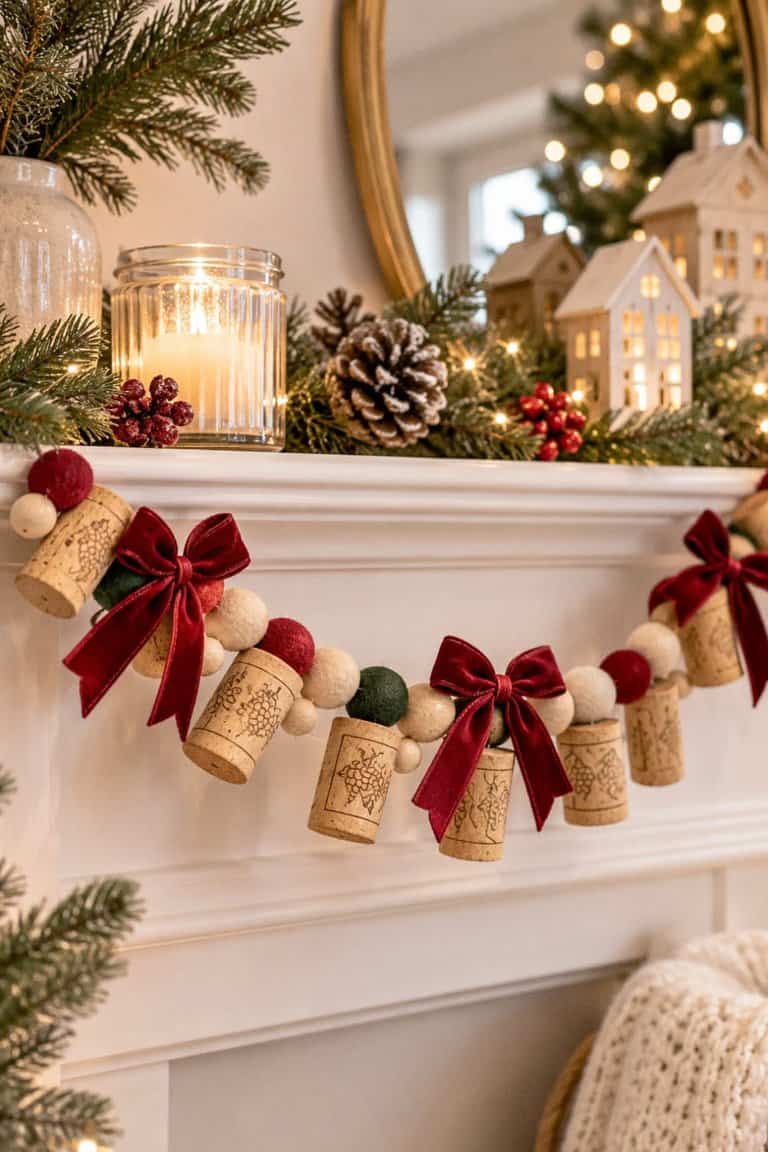
This is such a pretty alternative to traditional Christmas garland!
Start by making small holes through the centers of your wine corks using an appropriate craft drill.
Thread the corks onto sturdy twine, alternating them with wooden beads or small felt balls.
You can use natural corks or paint some of them red, green, and cream.
Every few corks, tie on a small plaid or velvet ribbon bow.
Keep threading until your garland reaches your desired length.
Drape it around your Christmas tree, across a mantel, or along a staircase railing.
19. Mini Wine Cork Christmas Village
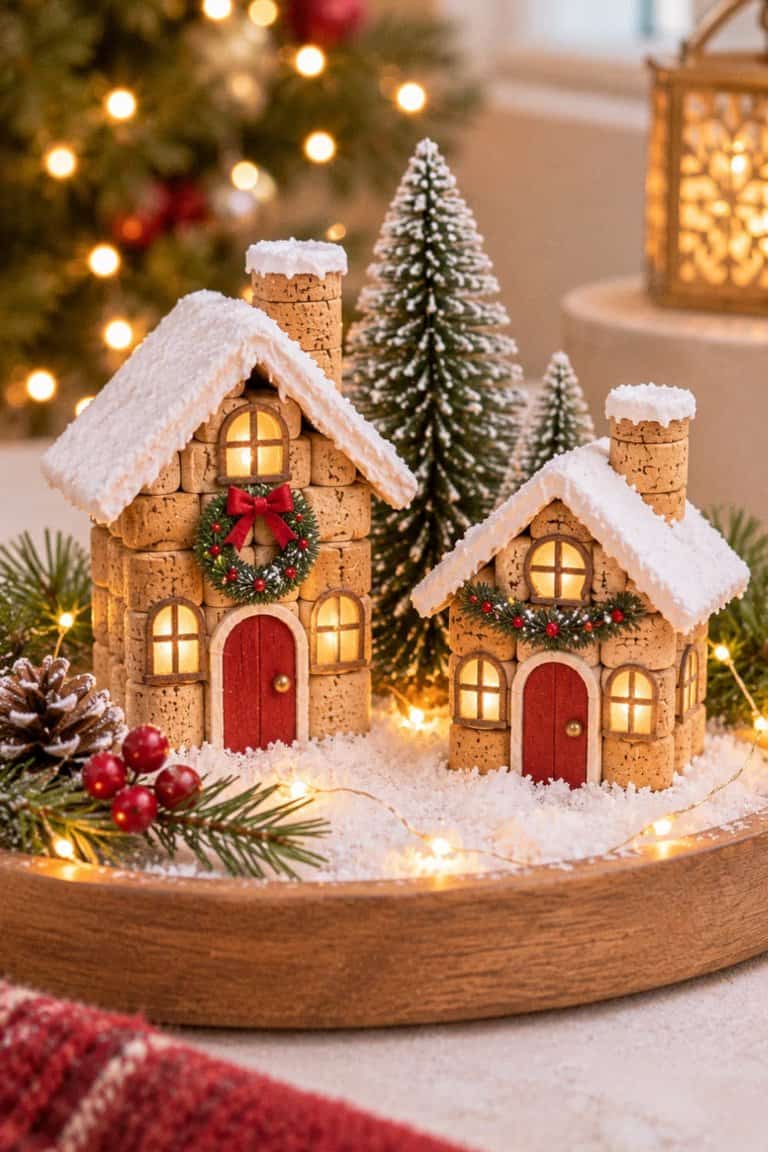
I absolutely love miniature Christmas villages, and making one from wine corks is such a creative idea!
Start by gluing several corks together to form the walls of a little house.
Cut a small roof from cardboard or thin craft wood and glue it on top.
Paint the roof white to look like snow and add tiny windows and doors using acrylic paint.
You can even glue a little cork slice to the front for a wreath.
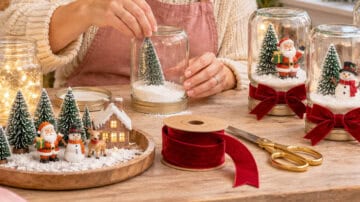
Make three or five houses in different sizes and arrange them on a wooden tray.
Add bottlebrush trees, faux snow, and warm fairy lights to create a cozy Christmas village display.
20. Statement Wine Cork Star Tree Topper
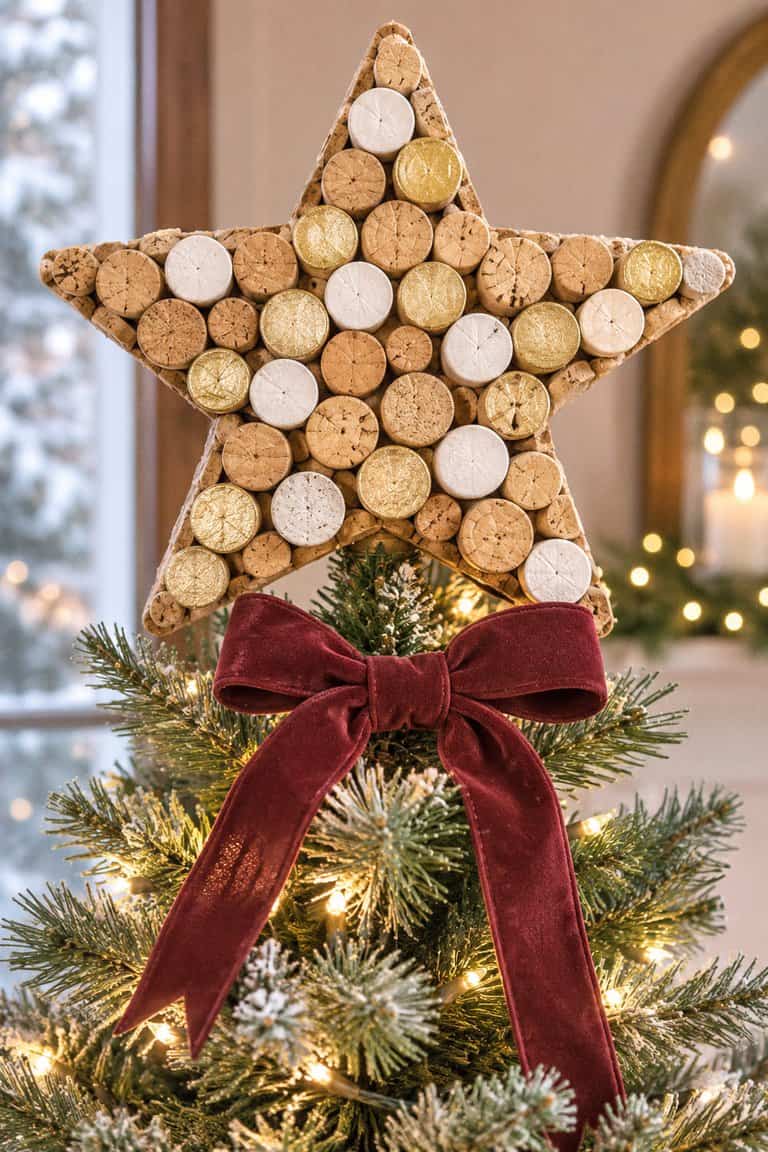
Want something a little different for the top of your Christmas tree this year?
Try making a large star using wine corks!
Start by drawing a five-point star onto a piece of sturdy cardboard or thin wood.
Arrange corks along the outline, gluing them to the backing as you go.
Fill in the middle with additional corks to create a solid, textured star.
Paint some of the cork ends antique gold or white for a festive finish.
Attach a secure tree topper base to the back, making sure the star isn’t too heavy for your tree.
This would look especially beautiful on a rustic or farmhouse-style Christmas tree!
21. Vintage Gold Wine Cork Bell Ornaments
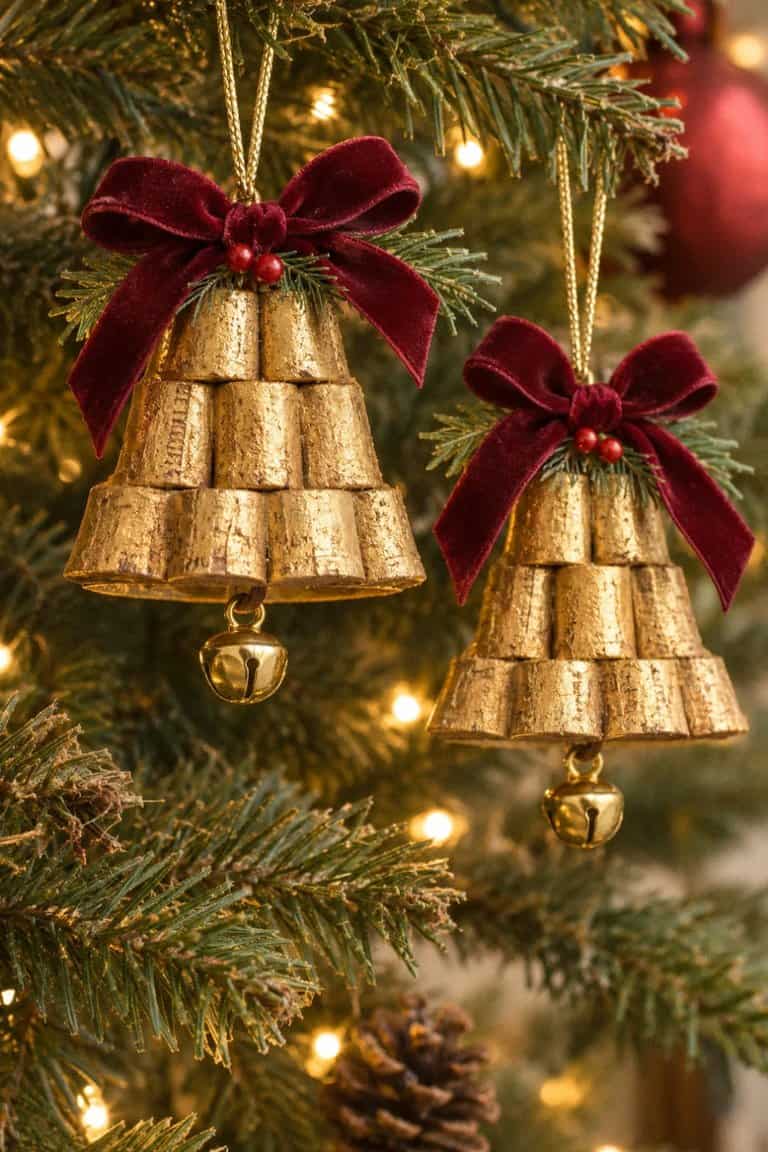
These little gold bells are a fun way to give ordinary wine corks a vintage Christmas makeover.
Start by cutting several corks into shorter pieces and arranging them into a small bell silhouette on a sturdy cardboard backing.
Glue the cork pieces into place and paint everything metallic gold.
Add a tiny jingle bell underneath to represent the clapper.
Tie a burgundy or red velvet bow at the top and attach a gold hanging cord.
You can lightly brush on a darker gold or brown paint to give the ornament an antique finish.
22. Woodland Mushroom Wine Cork Ornaments
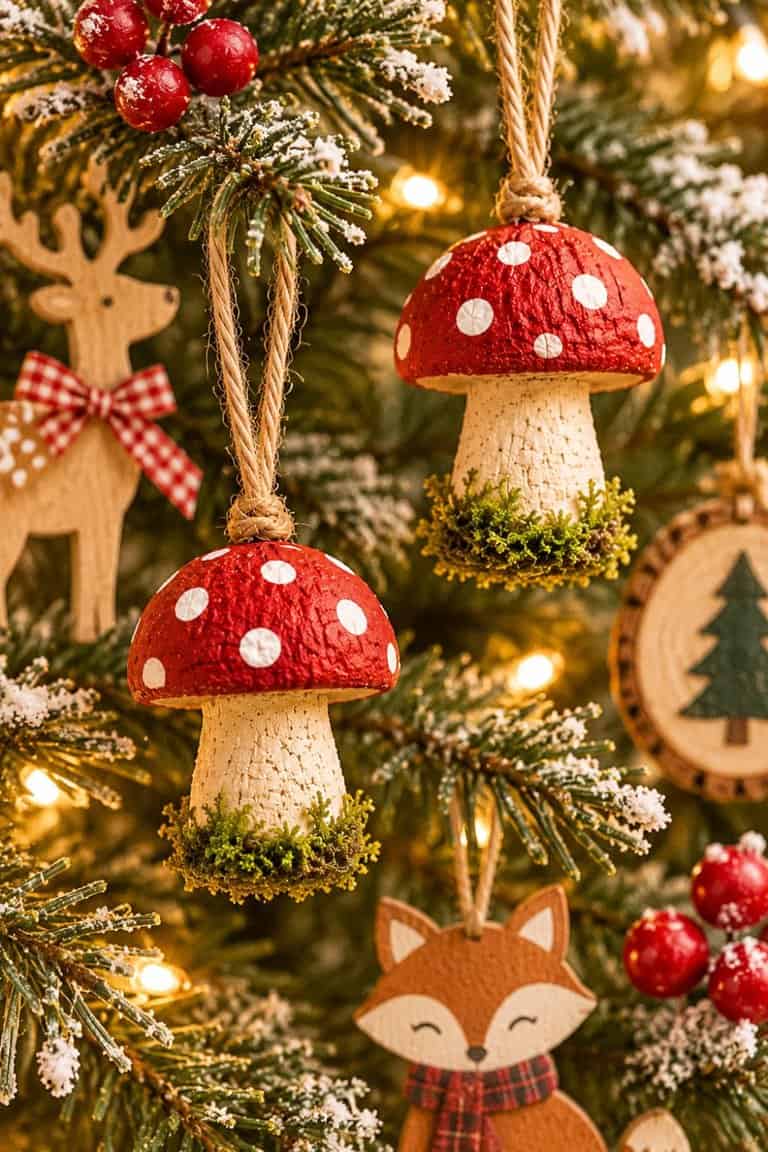
If you love cottagecore Christmas decorations, these little mushrooms are adorable!
Champagne corks work especially well because they already have a rounded mushroom-like shape.
Start by painting the rounded top red and the narrow stem cream or white.
Once the red paint dries, use a small brush to add white polka dots.
Glue a little faux moss around the bottom of the stem for a woodland look.
Attach a small twine loop to the top.
These would look so cute on a Christmas tree decorated with pinecones, wooden ornaments, and woodland animals!
23. Mini Christmas Stocking Cork Ornaments
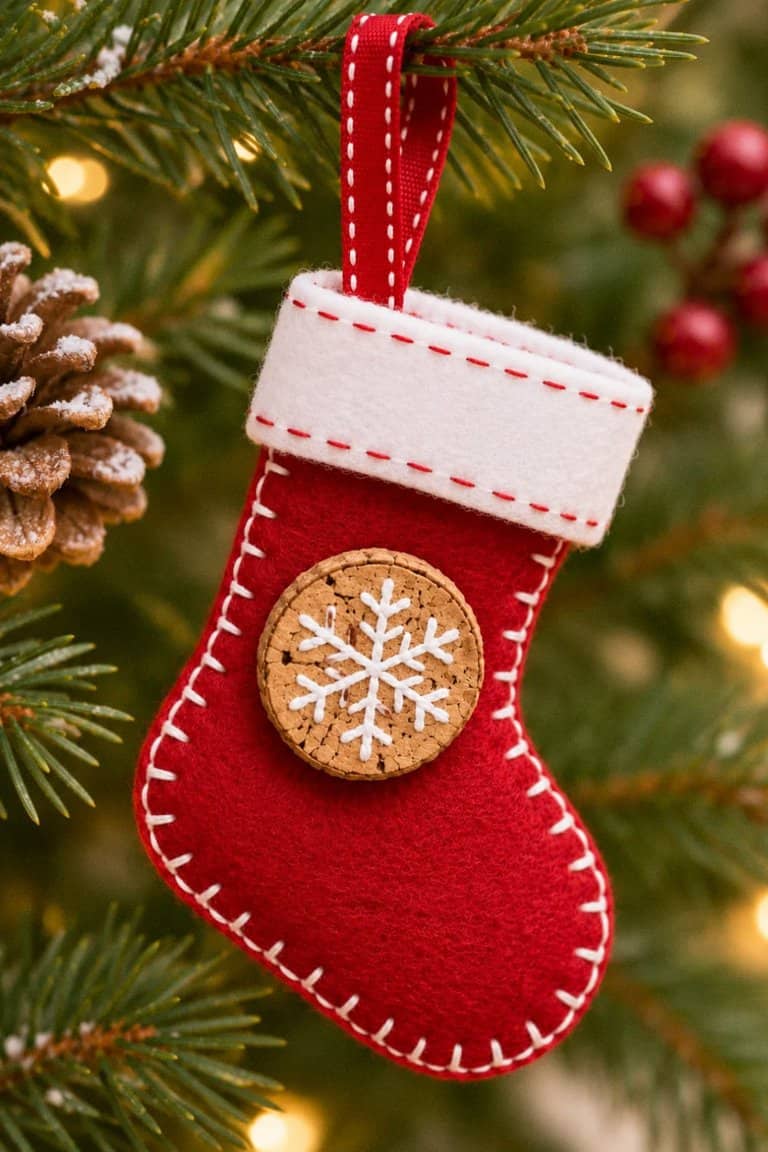
These tiny stockings would make such sweet handmade Christmas gifts!
Start by drawing a small stocking shape onto red or green felt and cutting out two matching pieces.
Glue or sew the edges together, leaving the top open.
Add a white felt cuff and decorate the front with tiny buttons or embroidery.
Cut a wine cork into thin slices and glue one to the front as a rustic embellishment.
You can paint a snowflake, initial, or little Christmas tree on the cork slice.
Finish with a ribbon loop at the top.
For a personalized gift, add someone’s name or initial to the stocking!
24. Large Wine Cork Advent Calendar Tree
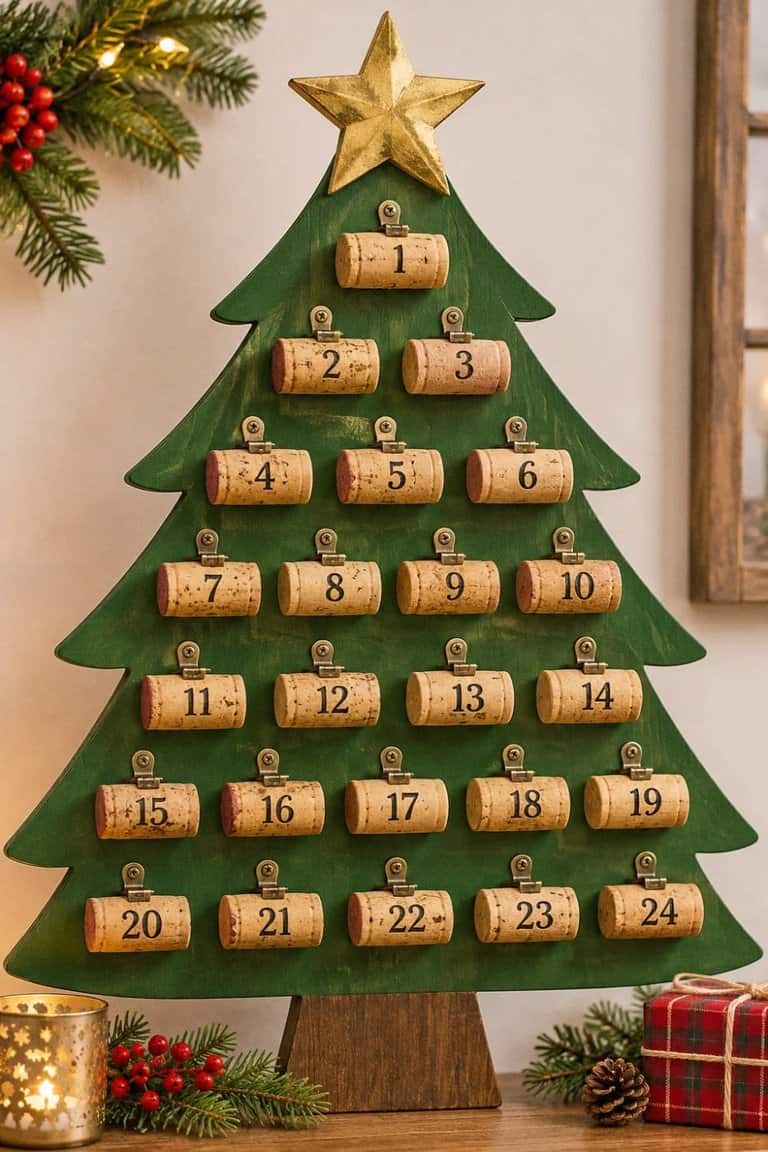
This is such a creative way to count down the days until Christmas!
Start by cutting a large Christmas tree shape from sturdy plywood or thick craft board.
Paint the backing green, white, or leave it natural.
Attach 24 wine corks to the board in rows, using small clips or holders so each cork can be removed.
Number the corks from 1 to 24 using paint or number stickers.
You can attach a tiny rolled-up paper activity, Christmas joke, or holiday message to each cork.
Decorate the edges with faux greenery, miniature bells, and red ribbon.
I love the idea of filling this advent calendar with fun family Christmas activities instead of candy!
25. Wine Cork Christmas Tree Forest Centerpiece
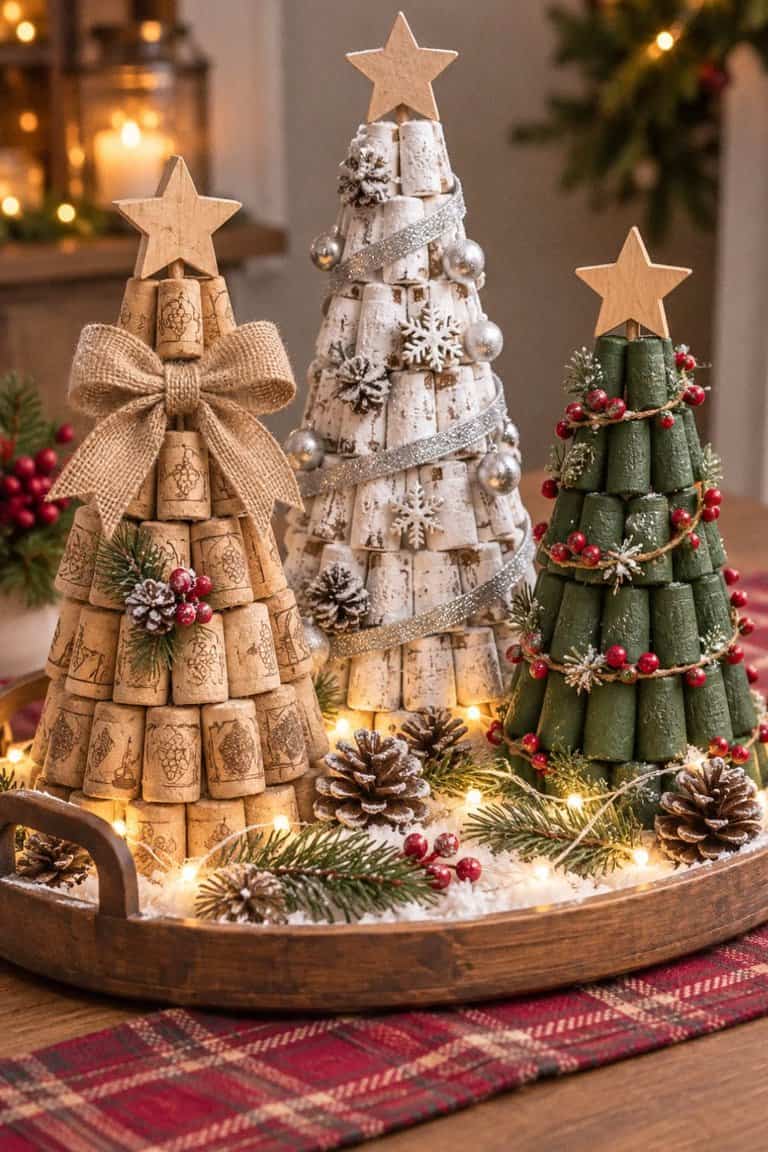
If you want to make a larger Christmas decoration that looks beautiful on a table or mantel, try creating a little forest of wine cork trees!
Start by making three cone-shaped bases in different heights using sturdy cardboard or foam.
Glue wine corks around each cone until the bases are completely covered.
Decorate each tree in a slightly different style.
For example, leave one tree natural with a burlap bow, paint another snowy white with silver accents, and decorate the third with forest green paint and little red berries.
Add a small wooden star to the top of each tree.
Arrange the finished trees on a wooden tray with faux snow, pinecones, and battery-operated fairy lights.
This would make such a beautiful rustic Christmas centerpiece, and you could even sell the trees together as a matching holiday decoration set!

Leave a Reply