
Christmas is my absolute FAVORITE time of year to decorate my home! And while I love the traditional Christmas colors and cozy holiday vibes, this year I want to add a little more whimsy and magic to my Christmas decor!
I’m talking oversized bows, colorful ornaments, playful little Christmas villages, twinkling fairy lights, and decorations that look like they came straight out of a storybook!
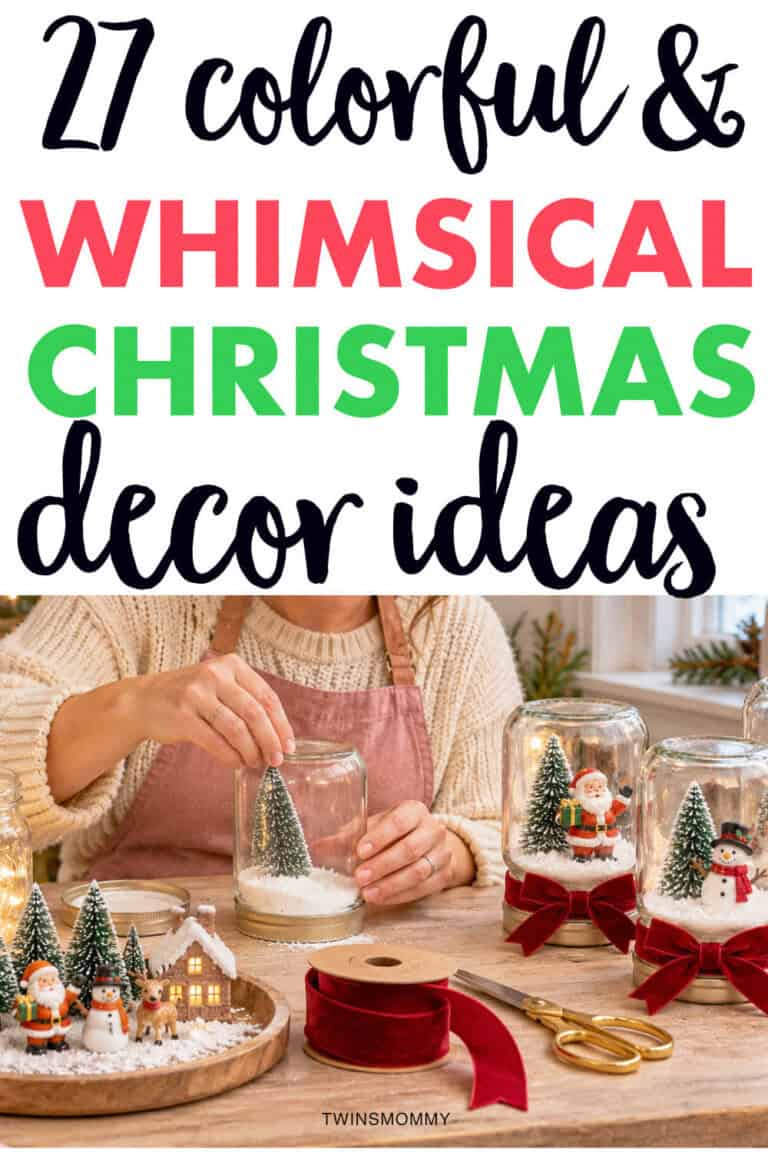
I want my home to feel like a magical Christmas wonderland, but still have that cozy, inviting feeling I love so much.
And the best part? You don’t have to completely redo your holiday decorations to get that whimsical Christmas look!
Sometimes, adding a few unexpected colors, quirky decorations, or fun DIY touches is all it takes.
So, if you’re ready to make your home feel a little more magical this holiday season, here are some whimsical Christmas decor ideas you’ll want to copy immediately!
Things You’ll Need to Create Whimsical Christmas Decor
Before you start turning your home into a magical Christmas wonderland, you’ll want to gather a few fun decorating supplies!
And you don’t have to spend a fortune, either! I love finding affordable Christmas decorations at the dollar store, craft stores, and even thrift shops.
Here are some things you’ll want to have on hand:
- Oversized velvet bows and ribbons – Perfect for Christmas trees, wreaths, garlands, and even kitchen cabinets.
- Colorful Christmas ornaments – Think candy pink, mint green, baby blue, cherry red, and glittery gold.
- Bottle brush Christmas trees – These adorable mini trees are perfect for creating whimsical displays on shelves and mantels.
- Fairy lights and twinkle lights – Nothing says Christmas magic like warm, glowing lights!
- Candy-themed decorations – Oversized candy canes, peppermint swirls, lollipops, and gingerbread houses add a playful to
28 Whimsical Christmas Decor Ideas You’ll Want to Copy Immediately
If there’s one thing I love about decorating for Christmas, it’s finding fun new ways to make my home feel extra magical!
This year, I’m loving all the whimsical Christmas decorations that make you feel like you’ve stepped into a candy shop, a gingerbread village, or even the North Pole!
And you know what? So many of these adorable decorating ideas are things you can make yourself!
Here are 28 whimsical Christmas decor ideas to try this holiday season.
1. Make an Oversized Candy Cane Christmas Wreath
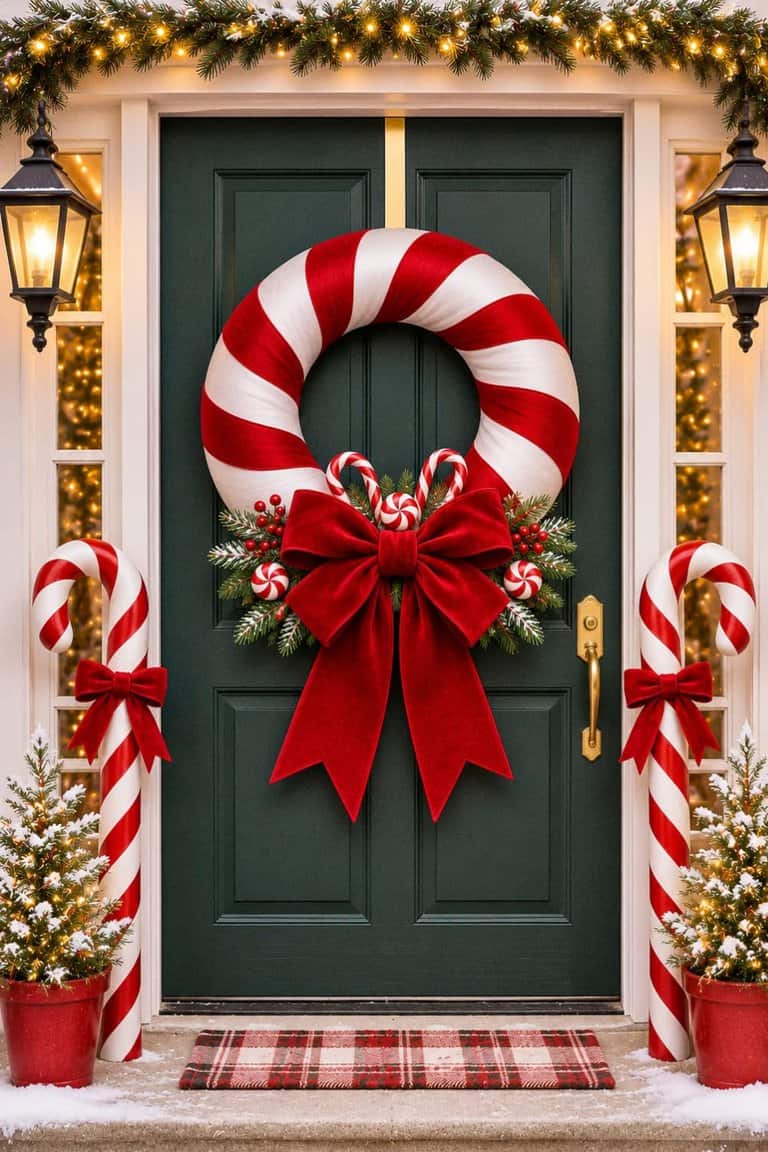
I absolutely LOVE the idea of hanging a giant candy cane wreath on my front door!
Instead of your traditional greenery wreath, this one looks like a big peppermint candy with oversized red and white stripes.
What you’ll need:
- Large foam wreath form
- Wide red and white ribbon
- Hot glue gun
- Oversized velvet bow
- Candy cane ornaments
How to make it:
- Start with a large foam wreath form and wrap it completely in white ribbon, securing the ends with hot glue.
- Take your red ribbon and wrap it diagonally around the wreath, leaving equal spaces between each stripe to create that classic peppermint look.
- Secure the ribbon on the back with glue so everything stays in place.
- Attach a large pink, red, or burgundy velvet bow to the bottom or top of your wreath.
- Add a few miniature candy cane ornaments or peppermint decorations around the bow.
- Hang it on your front door using a sturdy wreath hanger.
For outdoor use, choose weather-resistant materials and protect the wreath from rain and snow.
I think this would look SO cute with matching candy cane decorations on either side of the front door!
2. Decorate a Whimsical Pastel Christmas Tree
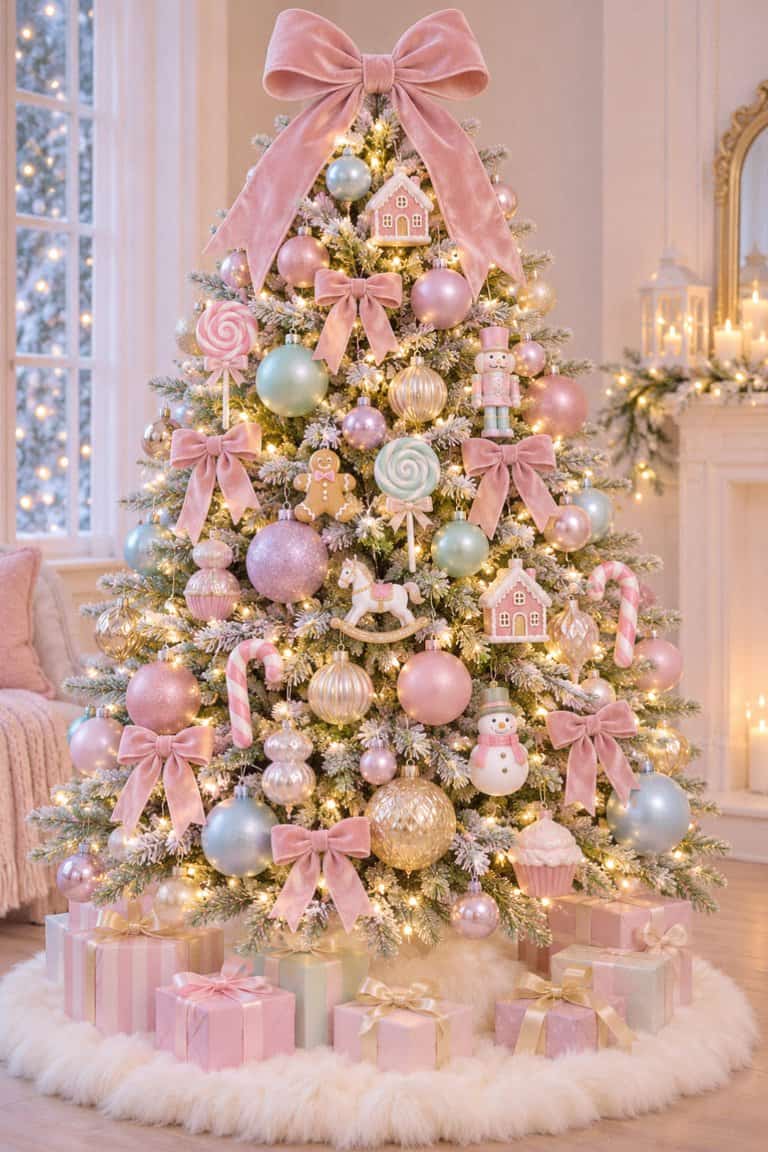
Who says Christmas trees have to be red and green?
I’m loving the pastel Christmas tree trend with soft pinks, mint greens, lavender, champagne gold, and baby blue ornaments!
What you’ll need:
- Artificial Christmas tree
- Pastel ornaments in different sizes
- Velvet ribbon
- Fairy lights
- Candy ornaments
- Star or bow tree topper
How to decorate it:
- Fluff all the branches of your Christmas tree so it looks nice and full.
- Add warm white fairy lights throughout the branches, making sure to tuck some lights deeper into the tree.
- Start decorating with your largest pastel ornaments, spacing them evenly around the tree.
- Fill in the gaps with smaller ornaments, mixing matte, shiny, and glittery finishes.
- Tie small velvet bows directly onto the branches for a sweet coquette-inspired look.
- Add a few candy-shaped ornaments, miniature gingerbread houses, or whimsical characters.
- Finish with an oversized velvet bow or glittery star topper.
For an extra magical touch, use a fluffy white tree skirt to make the bottom look like freshly fallen snow.
3. Create a Giant Velvet Bow Christmas Garland
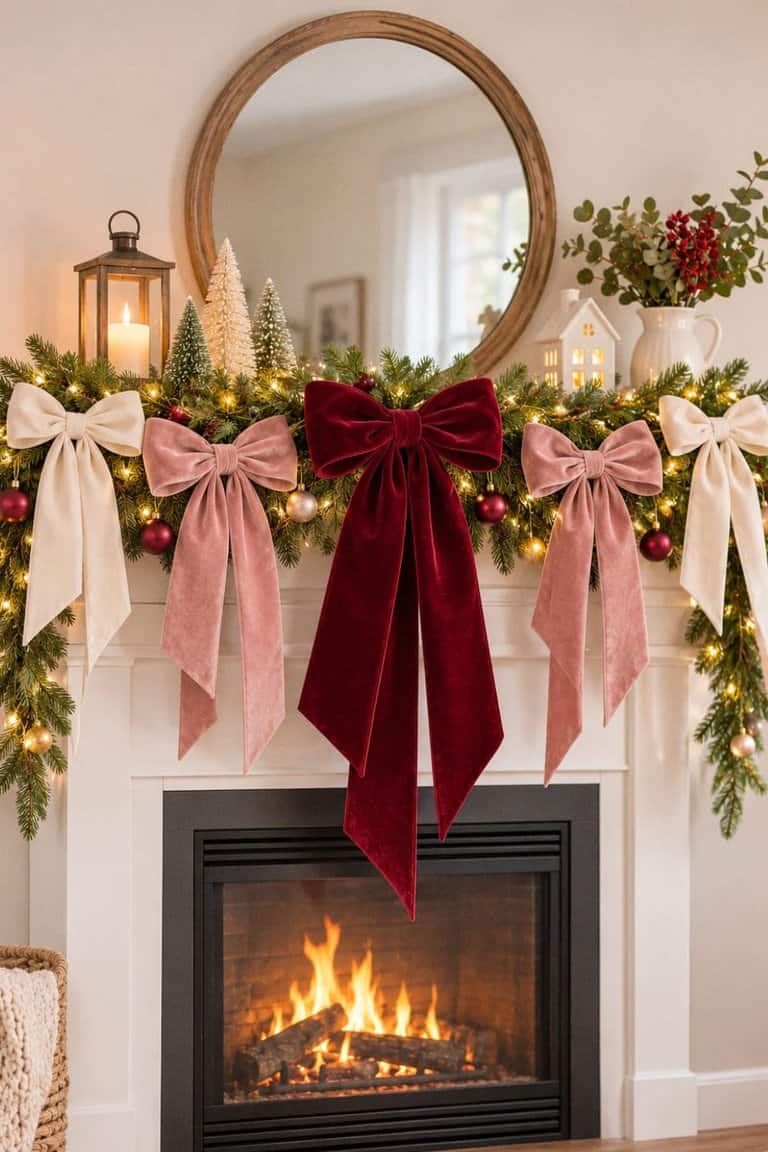
Oversized bows are one of my favorite ways to make Christmas decorations look more feminine and whimsical!
And this DIY is SO easy.
What you’ll need:
- Faux evergreen garland
- Wide velvet ribbon
- Floral wire
- Warm white fairy lights
- Small ornaments
How to make it:
- Start by fluffing your evergreen garland and draping it across your mantel, staircase, or doorway.
- Wrap battery-operated fairy lights around the greenery.
- Cut several long pieces of velvet ribbon and tie them into oversized bows.
- Use floral wire to secure each bow to the garland, spacing them evenly.
- Add small ornaments between the bows for a little sparkle.
- Adjust the ribbon tails so they hang naturally over the greenery.
Try mixing burgundy, dusty pink, and cream velvet bows for a romantic Christmas look!
4. Make a DIY Gingerbread Christmas Village
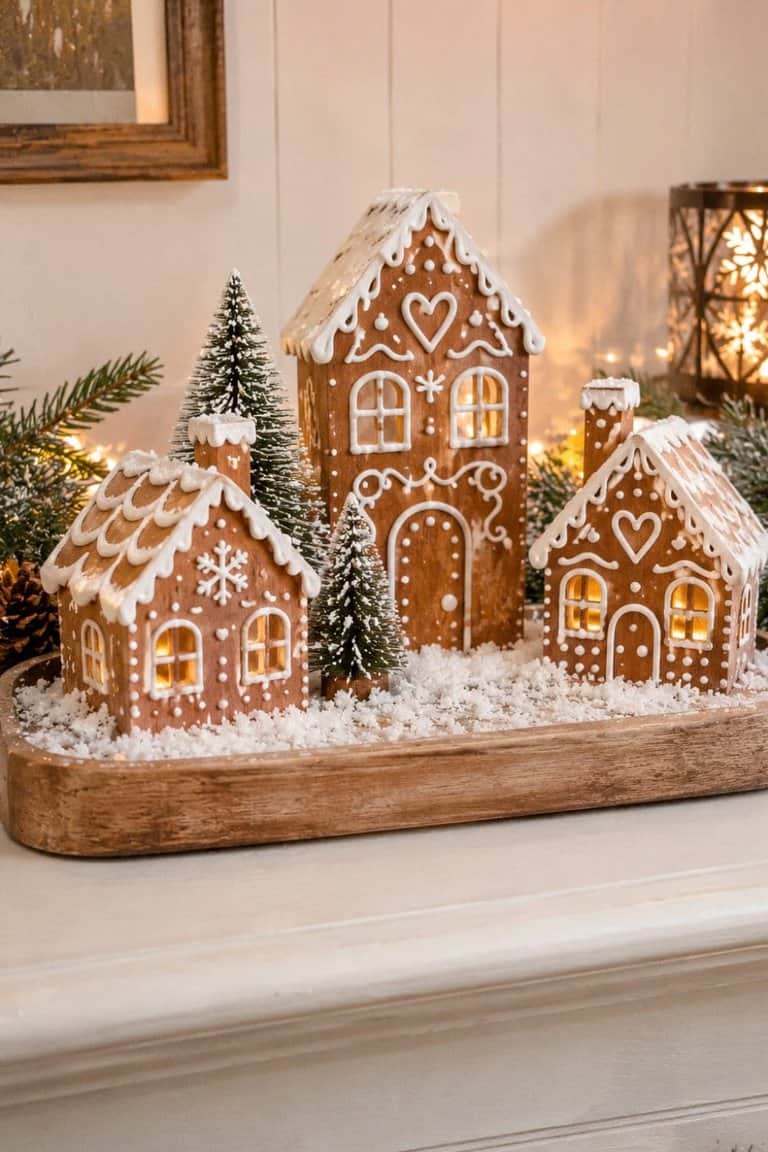
This is one of those Christmas crafts I would LOVE making with my daughter!
Imagine a whole little gingerbread village sitting on your mantel or bookshelf.
What you’ll need:
- Small unfinished wooden houses
- Brown acrylic paint
- White dimensional craft paint
- Mini bottle brush trees
- Faux snow
- Wooden tray
How to make it:
- Paint each wooden house a warm gingerbread brown and let it dry completely.
- Use white dimensional paint to draw icing-like details around the windows, doors, and rooftops.
- Add little painted hearts, candy swirls, or snowflakes to make every house unique.
- Arrange your finished houses on a wooden tray or mantel.
- Place miniature bottle brush trees between the houses.
- Sprinkle faux snow around the bases to create a snowy Christmas village.
- Add battery-operated fairy lights behind the houses for a magical glow.
You can even paint some houses pink or cream for a more whimsical gingerbread village!
5. Make Oversized Peppermint Lollipop Decorations
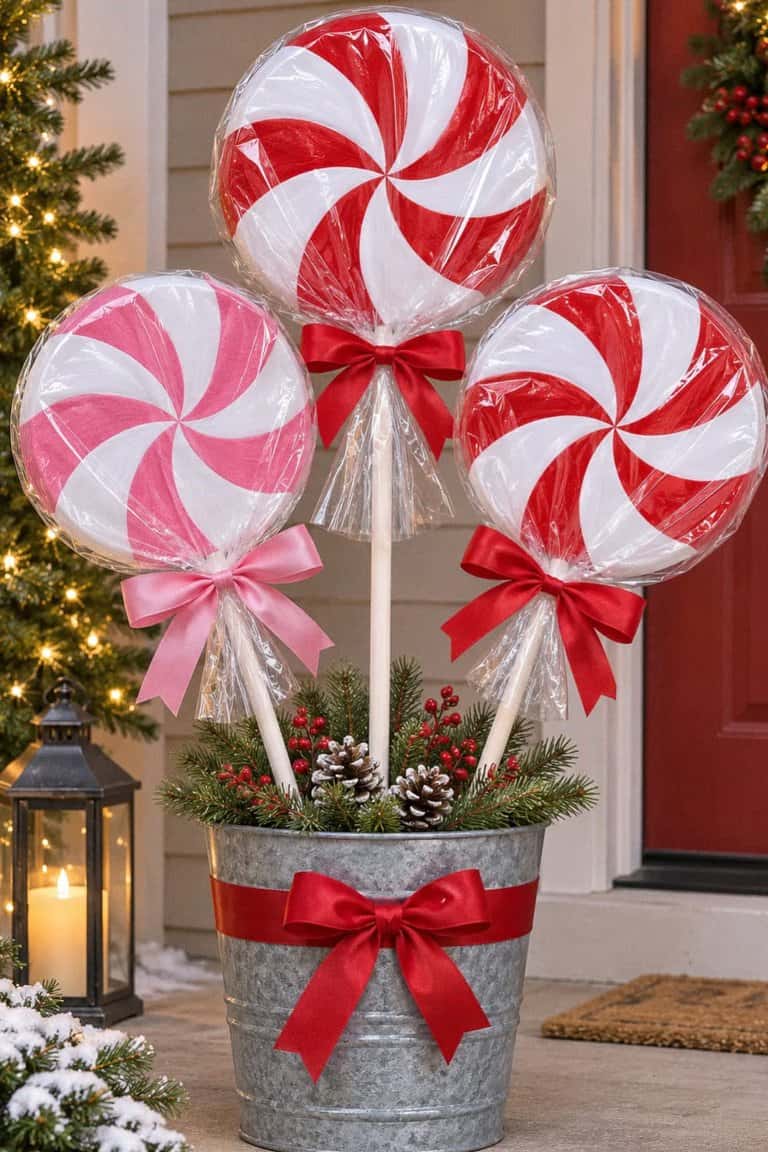
These giant peppermint lollipops look like something straight out of Candyland!
They’re perfect for decorating your porch, Christmas tree, or a festive corner of your home.
What you’ll need:
- Large round foam discs
- Red, pink, and white acrylic paint
- Wooden dowels
- Clear cellophane
- Ribbon
- Craft glue
How to make them:
- Paint each foam disc white and allow it to dry.
- Sketch a peppermint swirl pattern onto the front and back.
- Fill in alternating sections with red or pink paint.
- Once dry, carefully make a hole in the bottom of each foam disc and insert a wooden dowel with foam-safe adhesive.
- Wrap the candy portion in clear cellophane and gather it underneath with ribbon.
- Place your oversized lollipops in a weighted decorative container or secure them to a sturdy display.
For outdoor decorations, skip the cellophane if it won’t withstand your local weather, and use weather-resistant paint and materials.
6. Decorate Your Kitchen Cabinets With Christmas Bows
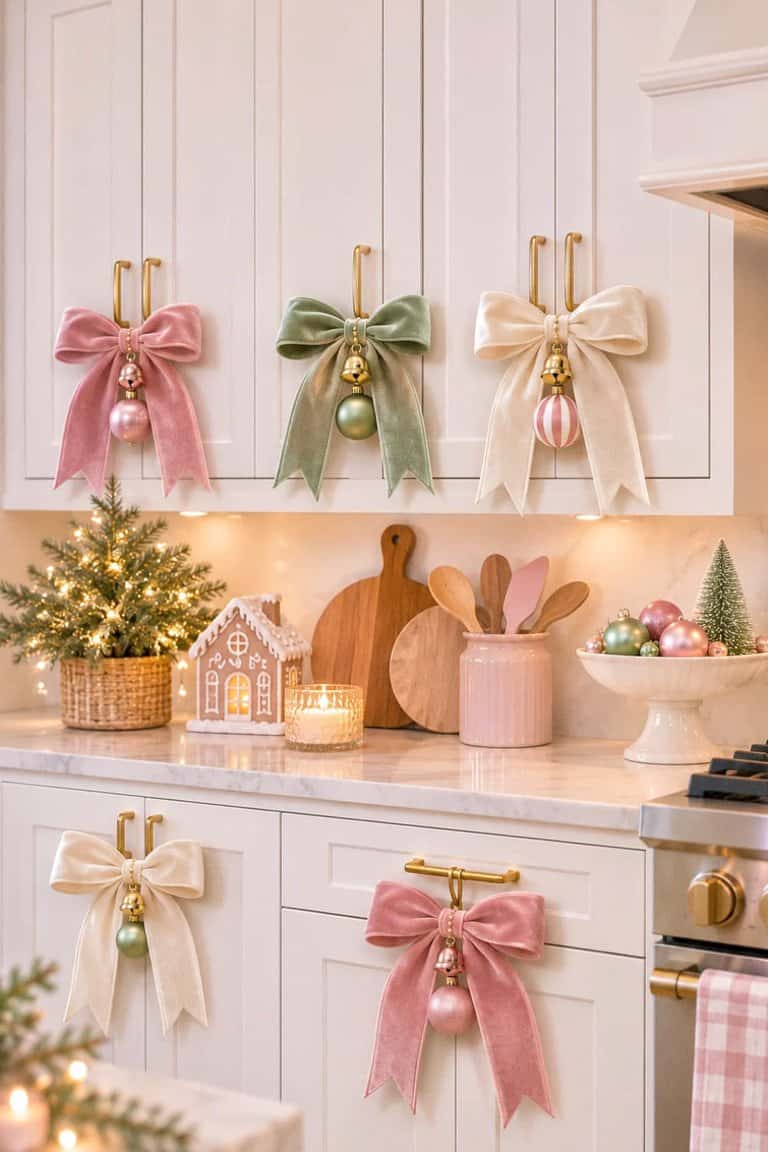
Okay, this might be one of the easiest ways to make your kitchen feel festive without spending much money!
I love the idea of adding little velvet bows to every cabinet handle.
What you’ll need:
- Velvet ribbon
- Scissors
- Removable ribbon ties or floral wire
- Optional mini bells
How to make it:
- Choose one or two ribbon colors that match your Christmas decor or make it more whimiscal feeling.
- Cut equal lengths of ribbon so your bows will be roughly the same size.
- Tie a bow around each cabinet handle or attach a premade bow using a removable tie.
- Trim the tails into pretty V-shaped ends.
- Add tiny bells to a few bows for an extra whimsical detail.
- Repeat across your kitchen cabinets for a coordinated look.
Dusty pink bows would look adorable in a white kitchen, while burgundy velvet would create a cozy vintage Christmas feel.
7. Create a Magical Christmas Mushroom Display
Little red mushrooms with white spots are such a cute addition to whimsical woodland Christmas decor!
And you can make your own using simple craft supplies.
What you’ll need:
- Small wooden mushrooms
- Red, pink, and cream acrylic paint
- Small paintbrushes
- Faux moss
- Mini bottle brush trees
- Decorative tray
How to make it:
- Paint the mushroom stems cream or white.
- Paint the caps muted red, dusty pink, or burgundy.
- Use the end of a small paintbrush to dot white spots across each mushroom cap.
- Allow everything to dry completely.
- Arrange the mushrooms on a tray with faux moss and miniature evergreen trees.
- Add a few pinecones and battery-operated fairy lights.
This would make such a sweet woodland Christmas display for an entryway table or bookshelf!
8. Make a Whimsical Christmas Bow Tree Topper

Instead of using a traditional star, why not top your Christmas tree with a GIANT velvet bow?
It’s such a simple way to make your tree feel romantic and magical.
What you’ll need:
- Extra-wide wired velvet ribbon
- Floral wire
- Scissors
- Tree topper attachment or sturdy floral wire
How to make it:
- Cut a generous length of wired ribbon and create two large loops.
- Pinch the center tightly and secure it with floral wire.
- Make another set of loops if you want an extra-full bow.
- Attach two long ribbon tails to the back.
- Fluff and shape the loops until the bow looks full and balanced.
- Secure the bow to the top of your tree using floral wire, wrapping it around a sturdy branch or central stem.
- Let the long ribbon tails cascade down the front of the tree.
I love the idea of using a huge champagne pink bow with long flowing tails!
9. Create a Whimsical Candy Cane Christmas Mantel
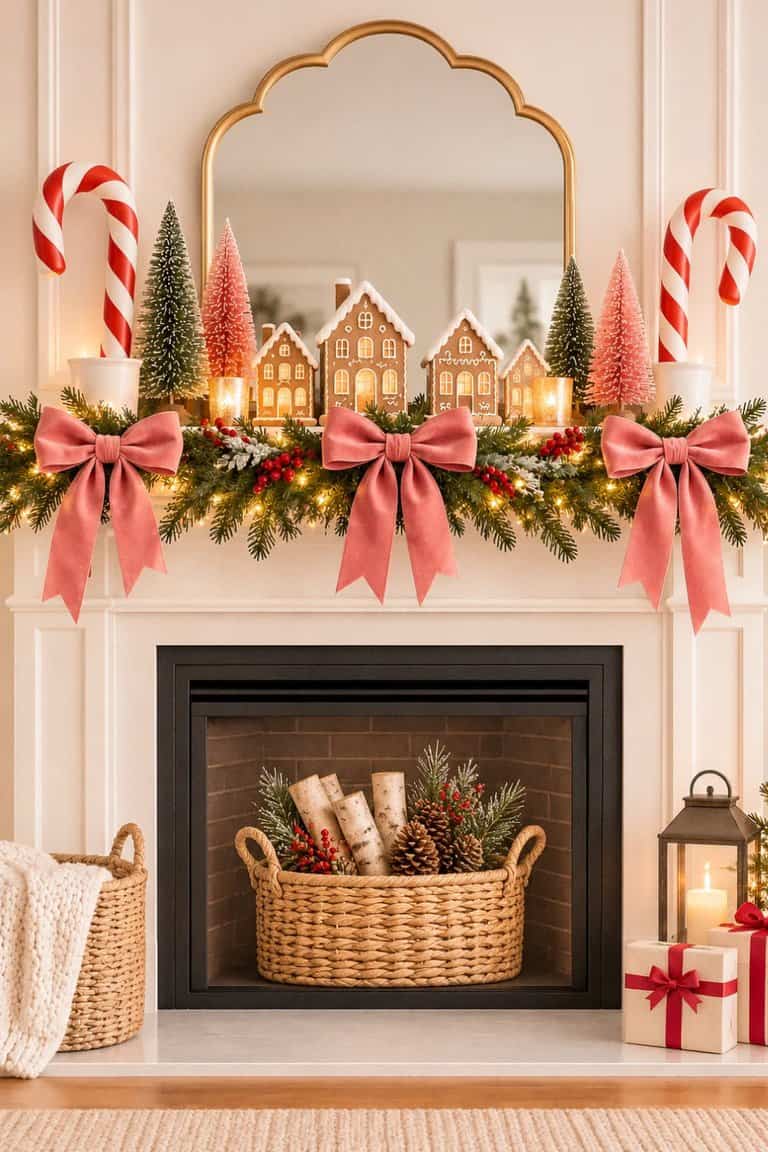
Turn your fireplace mantel into a magical candy-themed Christmas display!
This look combines peppermint decorations, colorful bows, miniature trees, and lots of twinkling lights.
What you’ll need:
- Evergreen garland
- Oversized candy cane decorations
- Peppermint ornaments
- Pink and red ribbon
- Bottle brush trees
- Battery-operated fairy lights
How to decorate it:
- Drape a full evergreen garland across your mantel.
- Weave fairy lights through the greenery.
- Position oversized candy canes at either end of the mantel, securing them so they cannot tip.
- Add peppermint ornaments throughout the garland.
- Tie several large pink or red bows and attach them to the greenery.
- Arrange colorful bottle brush trees along the mantel.
- Finish with a few small gingerbread houses or whimsical figurines.
Keep all decorations well away from the fireplace opening and heat-producing surfaces.
10. Make DIY Pink Nutcracker Decorations
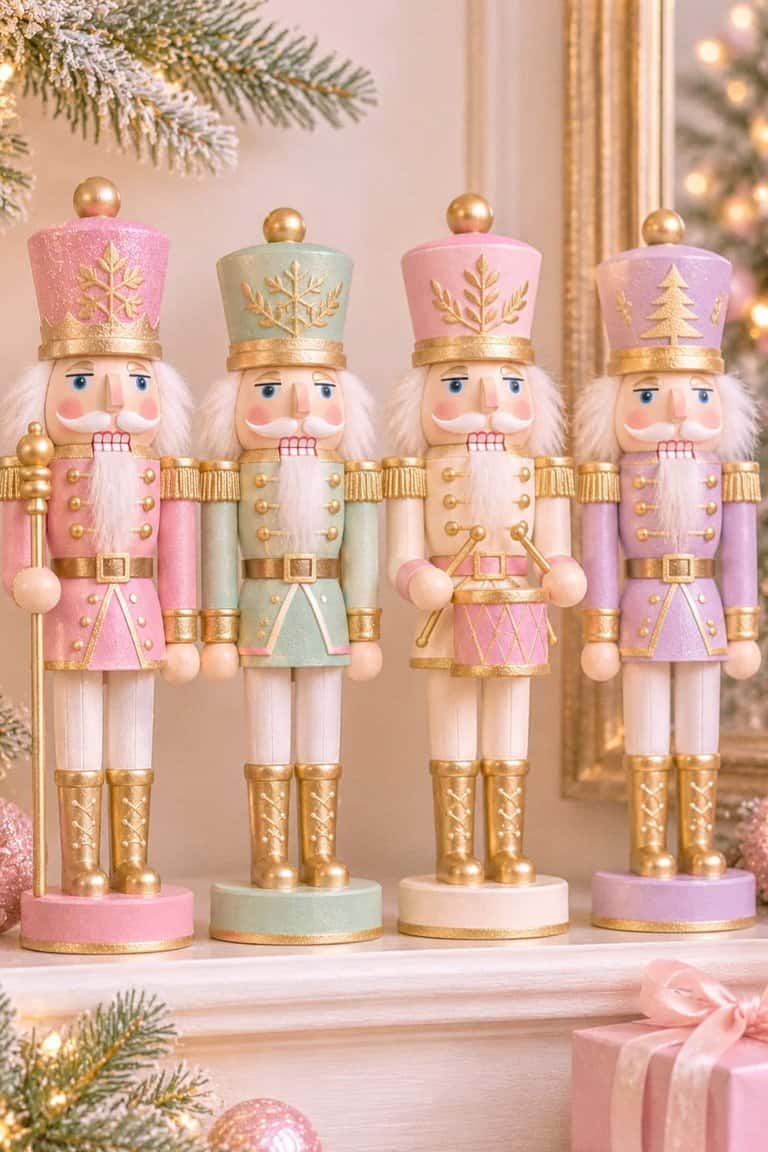
Nutcrackers are such a classic Christmas decoration, but I LOVE the idea of giving them a whimsical pastel makeover!
What you’ll need:
- Unfinished wooden nutcracker figurines
- Pink, mint, cream, and gold acrylic paint
- Small paintbrushes
- Craft sealer
- Optional glitter
How to make them:
- Start with unfinished wooden nutcrackers or lightly sand painted ones suitable for repainting.
- Paint the uniforms pastel pink, mint green, or cream.
- Add gold details to the buttons, hats, belts, and boots.
- Paint tiny rosy cheeks and simple facial details.
- Add a little glitter to the hats if you want extra sparkle.
- Let everything dry and apply a clear craft sealer.
- Display your nutcrackers together on a mantel, bookshelf, or entryway table.
Try making three nutcrackers in different heights for a really cute Christmas arrangement.
11. Create a Whimsical Christmas Window With Paper Stars
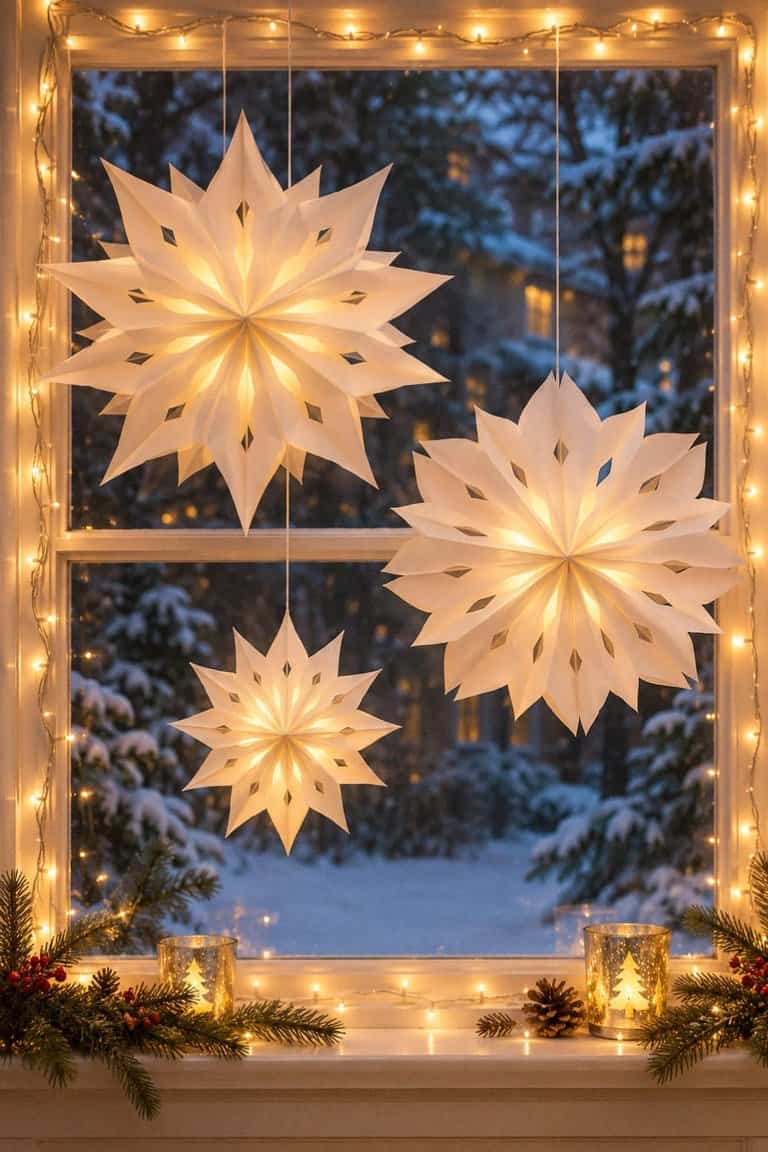
I love Christmas decorations that make a room feel magical without taking up any extra space!
And oversized paper stars hanging in a window are SO pretty.
What you’ll need:
- White or cream paper bags
- Glue stick or hot glue
- Scissors
- Clear fishing line
- Removable window hooks
- Battery-operated fairy lights
How to make them:
- Stack seven to nine paper bags with their openings facing the same direction.
- Apply glue in an upside-down T shape to the front of each bag before stacking the next one.
- Once all the bags are glued together, cut a pointed or rounded design into the closed ends.
- Carefully fan the bags open into a three-dimensional star.
- Glue or clip the first and last bags together.
- Attach clear fishing line and hang the stars at different heights in your window.
- Add battery-operated fairy lights around the window frame.
Use different-sized paper bags to create a mix of large and small snowflake stars.
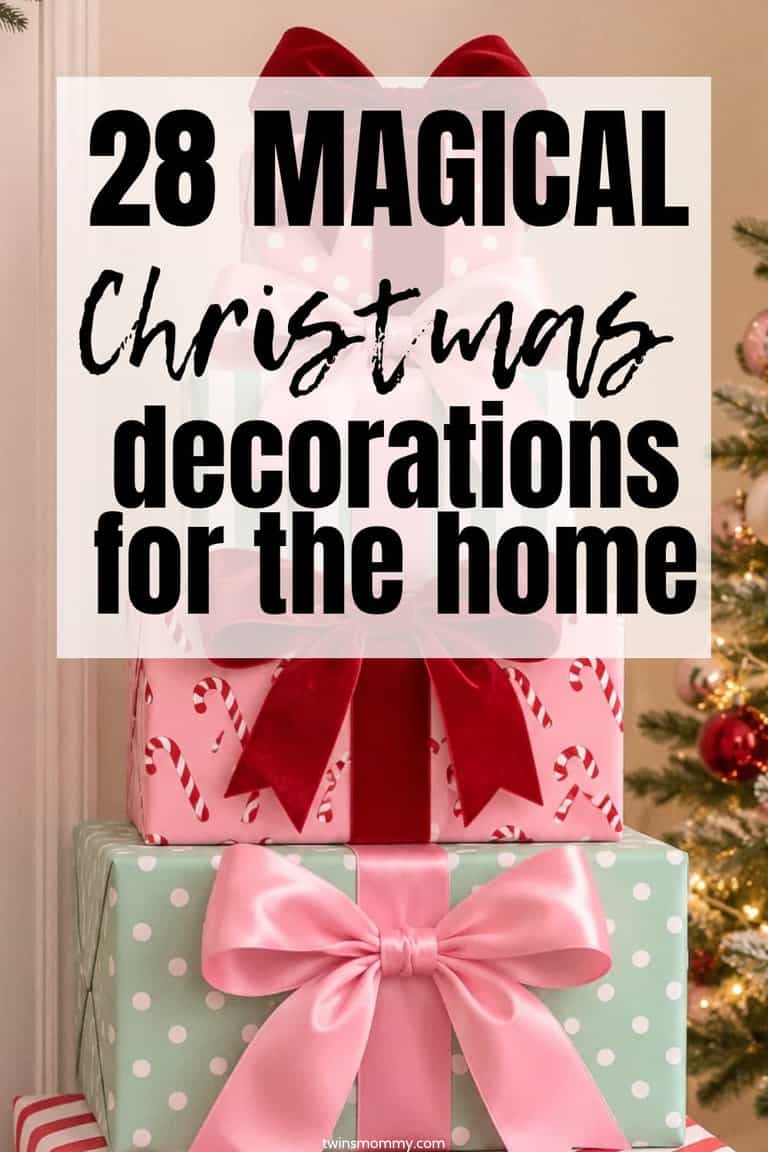
12. Make a Whimsical Christmas Present Stack
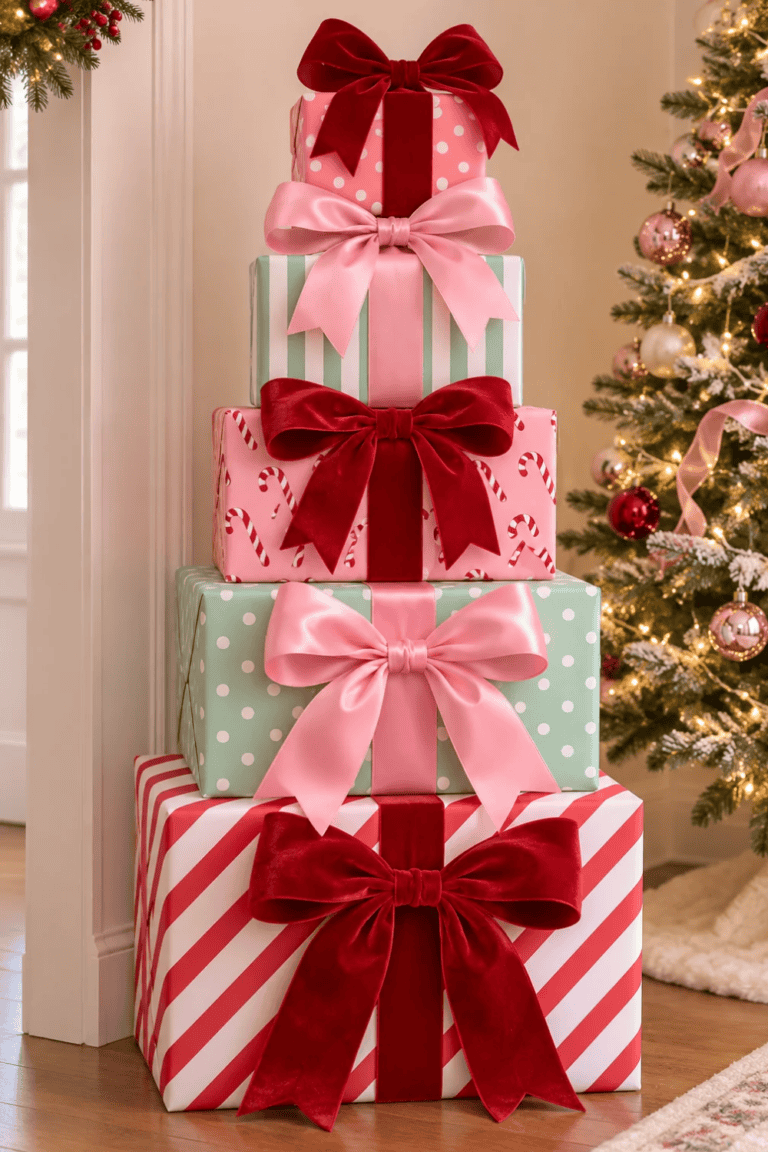
This is such a fun way to decorate an empty corner, entryway, or the space beside your Christmas tree!
What you’ll need:
- Empty cardboard boxes in different sizes
- Colorful wrapping paper
- Wide satin or velvet ribbon
- Double-sided tape
- Oversized bows
How to make it:
- Choose three to five empty boxes in different sizes.
- Wrap each box in playful Christmas paper, such as pastel stripes, candy cane patterns, or pink polka dots.
- Add wide ribbons around each box.
- Tie oversized bows on top.
- Stack the boxes from largest to smallest, keeping the heaviest and widest box on the bottom.
- Secure the boxes together with removable tape or another suitable fastener so they don’t topple.
- Place the stack beside your tree or in a decorative corner.
I think mixing pink, mint green, and red wrapping paper would look absolutely adorable!
13. Create a Mini Christmas Tree Forest
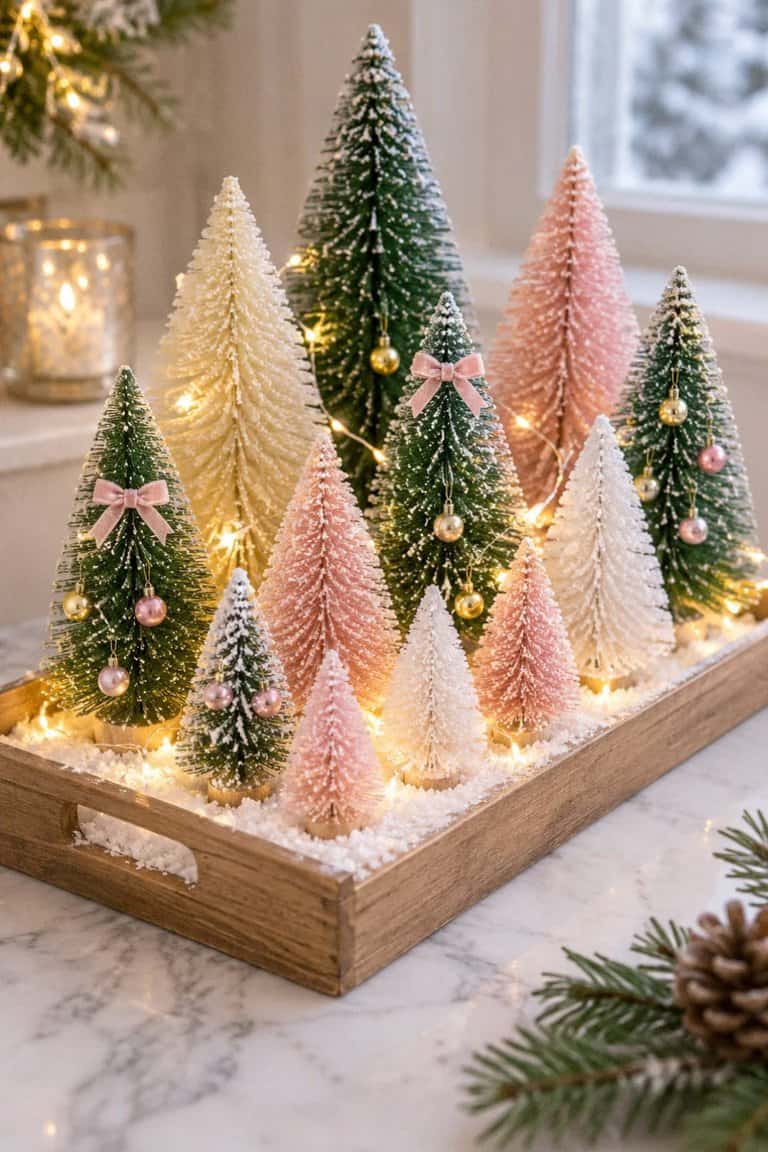
One Christmas tree is cute, but a whole forest of miniature Christmas trees? Even better!
What you’ll need:
- Bottle brush trees in assorted sizes
- Pink, green, cream, and white trees
- Wooden tray
- Faux snow
- Battery-operated fairy lights
- Mini ornaments
How to decorate it:
- Choose bottle brush trees in several heights to create dimension.
- Arrange the tallest trees toward the back of your tray.
- Place medium and smaller trees toward the front.
- Mix pastel pink trees with traditional green and snowy white ones.
- Add tiny ornaments or miniature bows to a few trees.
- Sprinkle faux snow around the bases.
- Tuck battery-operated fairy lights between the trees.
This would look SO magical on a coffee table or living room bookshelf.
14. Make DIY Gingerbread House Christmas Ornaments
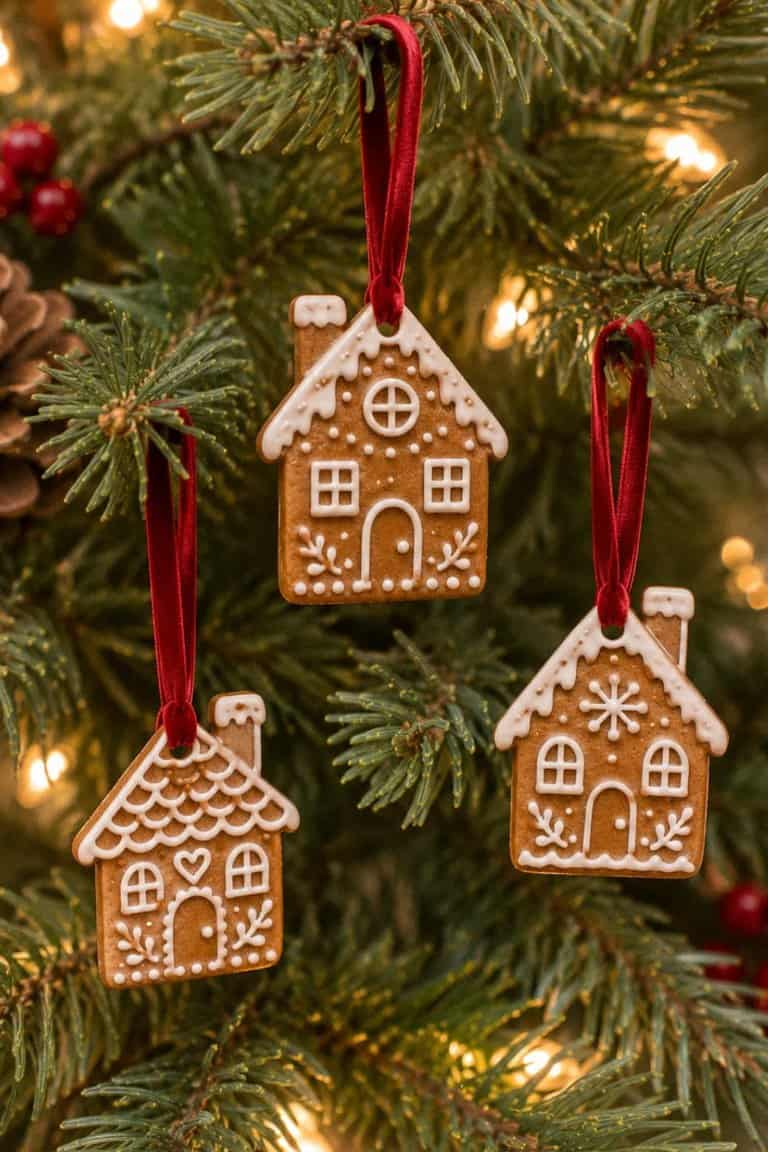
Gingerbread ornaments are perfect if you love that cozy, nostalgic Christmas look!
What you’ll need:
- Air-dry clay
- House-shaped cookie cutters
- Brown acrylic paint
- White dimensional paint
- Twine or velvet ribbon
- Rolling pin
- Straw
How to make them:
- Roll out your air-dry clay to about ¼ inch thick.
- Cut out miniature house shapes using a cookie cutter or paper template.
- Make a small hanging hole near the top of each house with a straw.
- Allow the clay to dry completely according to the package directions, turning pieces if needed.
- Paint the houses gingerbread brown.
- Add white icing-style details around the doors, windows, and rooftops.
- Thread velvet ribbon through the holes and tie loops for hanging.
These would be adorable on a gingerbread-themed Christmas tree!
15. Create a Whimsical Christmas Disco Ball Display
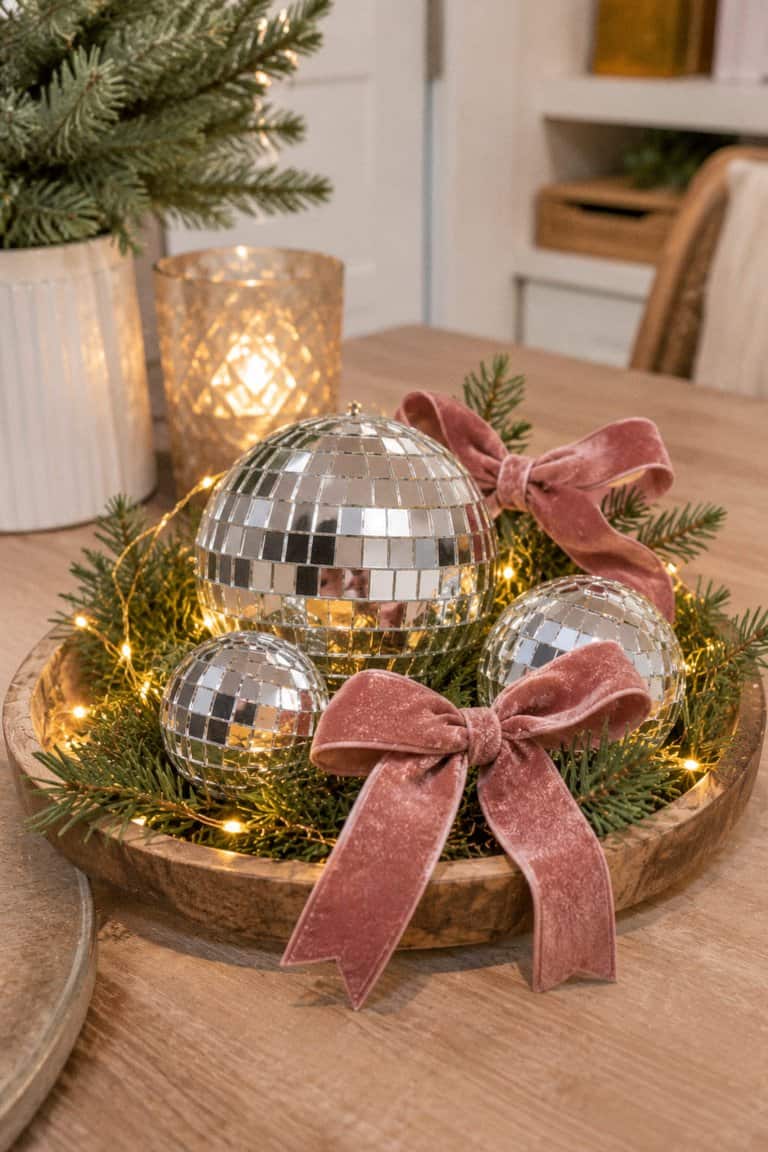
If you love a little sparkle, this is such a fun Christmas decorating idea!
Mixing disco balls with Christmas greenery creates a playful holiday look.
What you’ll need:
- Mini disco ball ornaments
- Evergreen garland
- Velvet bows
- Battery-operated fairy lights
- Decorative tray or bowl
How to decorate it:
- Choose a shallow decorative bowl or tray.
- Add a small ring of faux evergreen greenery around the edges.
- Arrange mini disco balls in different sizes in the center.
- Tuck small velvet bows between the ornaments.
- Add battery-operated fairy lights around the arrangement.
- Place the display on a coffee table, console, or bookshelf.
I love the idea of combining silver disco balls with dusty pink bows and soft greenery!
16. Make a Giant Whimsical Christmas Bow for Your Front Door
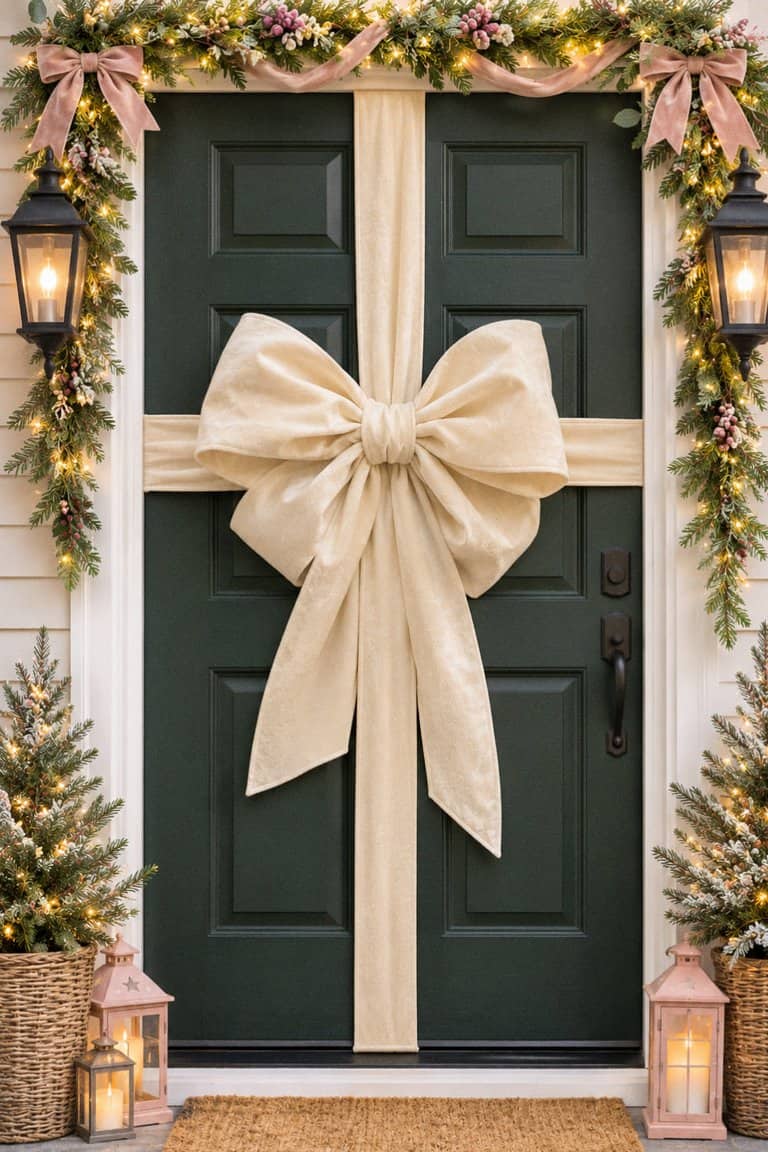
Instead of hanging a traditional wreath, make your front door look like one enormous Christmas present!
What you’ll need:
- Extra-wide weather-resistant ribbon
- Removable outdoor-safe hooks or clips
- Floral wire
- Scissors
- Oversized premade bow or materials to make one
How to make it:
- Measure the height and width of your front door.
- Cut two lengths of wide ribbon, one to run vertically and another horizontally.
- Secure the ribbon to the door using outdoor-safe removable clips or hooks.
- Cross the ribbons in the middle to create a wrapped-present look.
- Make an oversized bow with matching ribbon.
- Attach the bow where the two ribbons meet.
- Fluff the loops and adjust the tails.
Make sure the ribbon doesn’t interfere with the handle, lock, hinges, or safe opening of the door.
A giant burgundy velvet-look bow on a white door would be stunning!
17. Create a Magical Christmas Fairy Light Lantern
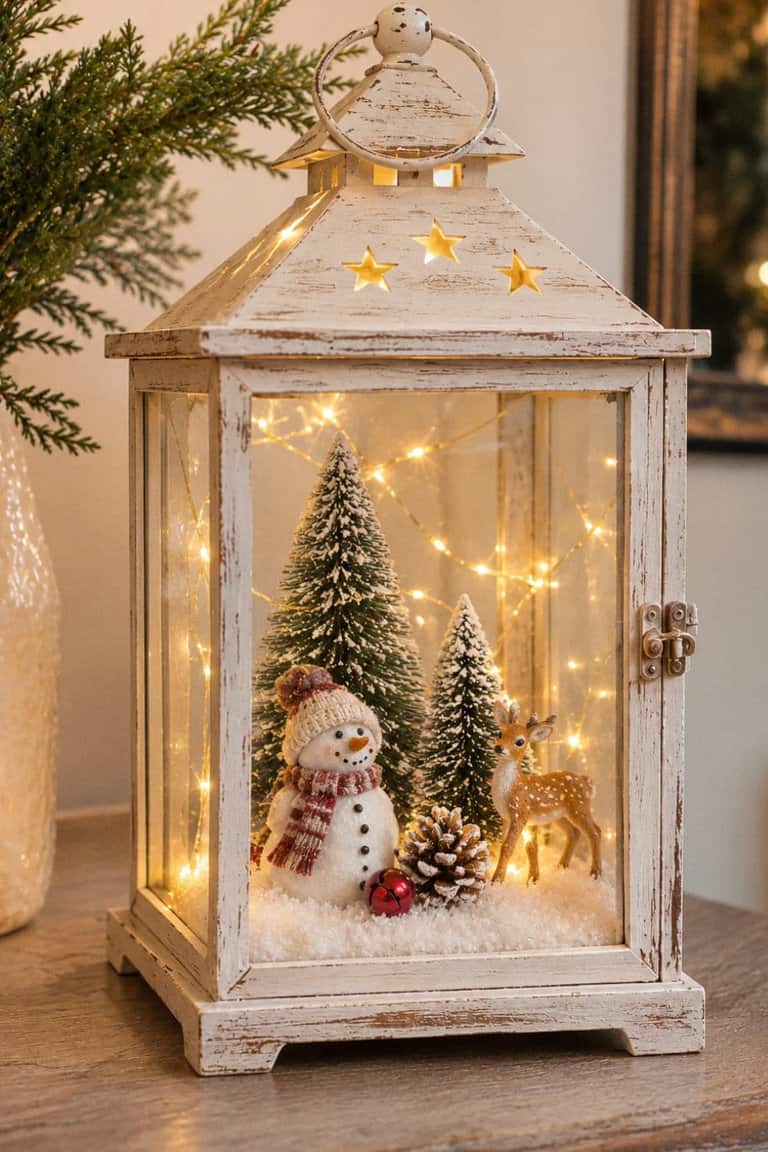
This is one of those easy Christmas decorations that looks so pretty at night!
What you’ll need:
- Large decorative lantern
- Battery-operated fairy lights
- Mini bottle brush trees
- Faux snow
- Small Christmas figurines
How to make it:
- Start with a clean decorative lantern.
- Add a thin layer of faux snow to the bottom.
- Arrange two or three miniature Christmas trees inside.
- Place a tiny deer, snowman, or gingerbread figurine between the trees.
- Carefully tuck battery-operated fairy lights around the display.
- Close the lantern and place it on a side table, entryway bench, or mantel.
Use LED lights only, not real candles.
You could even make a few lanterns with different magical winter scenes!
18. Make a Whimsical Christmas Pom-Pom Garland
Pom-pom garlands are so playful, colorful, and perfect for adding a little Christmas cheer!
What you’ll need:
- Yarn in pink, red, cream, and mint
- Pom-pom maker or cardboard circles
- Scissors
- Large needle
- Strong string or twine
How to make it:
- Wrap yarn around a pom-pom maker until it’s nice and full.
- Tie the center tightly and cut through the loops.
- Fluff the pom-pom and trim any uneven pieces.
- Repeat until you have enough pom-poms for your garland.
- Thread the pom-poms onto a long piece of string using a large needle.
- Space them evenly or group different colors together.
- Hang the finished garland across a mantel, shelf, or doorway.
Try adding little felt stars between the pom-poms for an extra whimsical touch!
19. Decorate a Whimsical Gingerbread Christmas Kitchen
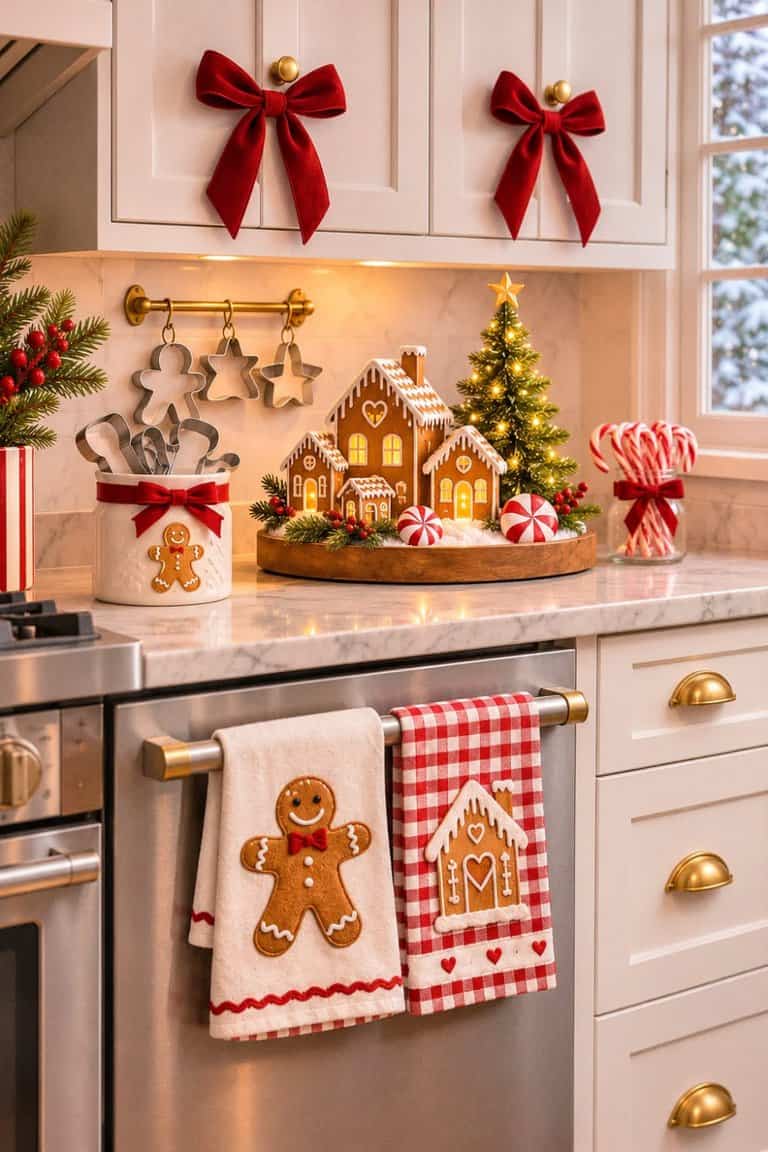
I love the idea of bringing Christmas magic into the kitchen!
A gingerbread-themed kitchen feels cozy, nostalgic, and just a little playful.
What you’ll need:
- Gingerbread-themed dish towels
- Mini wooden gingerbread houses
- Candy cane decorations
- Red or pink ribbon
- Gingerbread cookie cutters
- Small Christmas tree
How to decorate it:
- Start by choosing one kitchen counter or shelf as your main Christmas display area.
- Place a small gingerbread house or mini Christmas village on a decorative tray.
- Add a tiny Christmas tree beside it.
- Tie velvet bows onto nearby cabinet handles.
- Hang gingerbread-themed dish towels from the oven handle.
- Display gingerbread cookie cutters in a decorative jar or on a small hook.
- Add a few peppermint decorations for extra color.
Keep decorative items away from the stovetop, oven vents, and food-preparation areas.
This is such an easy way to make your kitchen feel like a little Christmas bakery!
20. Make Whimsical Clay Christmas Candy Ornaments
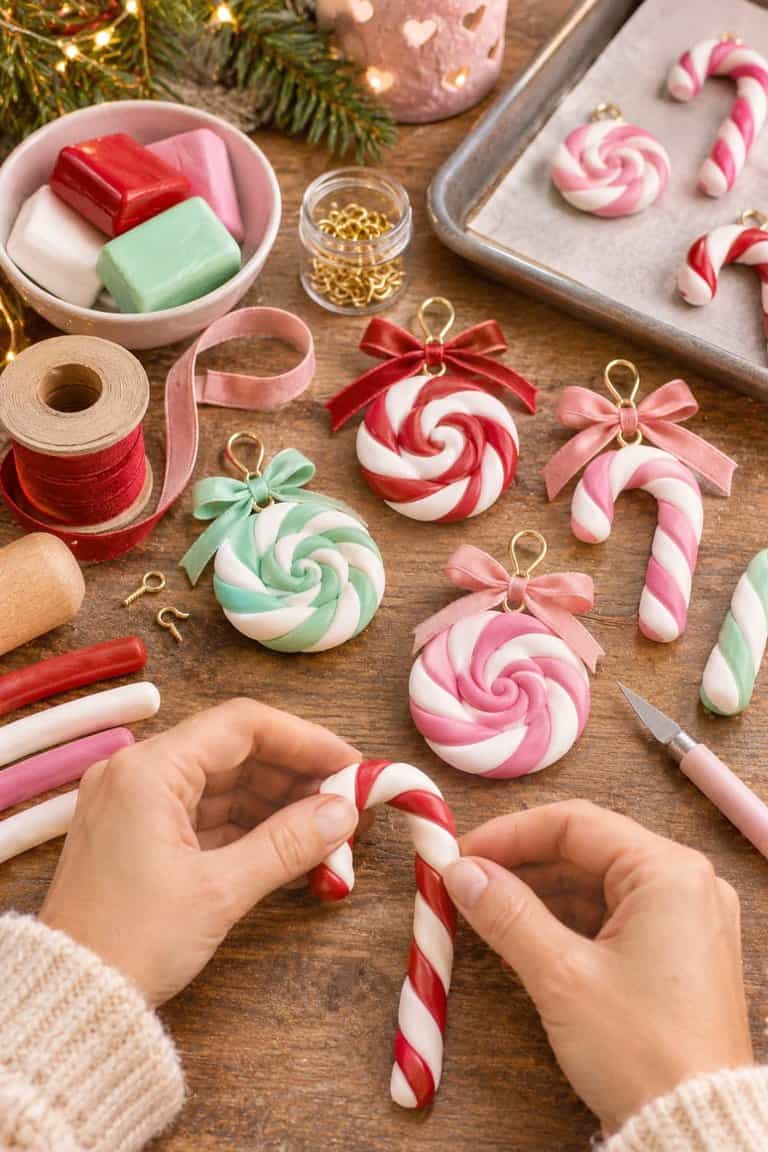
These adorable ornaments look like miniature pieces of candy! My daughter can’t get enough of these Christmas clay creations.
And they’re a fun craft to make with older kids or teens.
What you’ll need:
- Red, pink, white, and mint polymer clay
- Rolling surface
- Clay shaping tools
- Small ornament hooks
- Oven and baking tray
- Optional clear craft glaze
How to make them:
- Roll two thin ropes of clay in contrasting colors, such as pink and white.
- Twist the ropes together to create a candy cane pattern.
- Bend the twisted rope into a candy cane shape or coil it into a peppermint swirl.
- Insert an oven-safe ornament hook or make a hanging hole before baking.
- Bake according to the clay manufacturer’s instructions.
- Allow the ornaments to cool completely.
- Add a clear glaze if desired and attach ribbon for hanging.
Make several different candy shapes for a colorful Christmas tree!
21. Create a Whimsical Christmas Shelf With Tiny Figurines
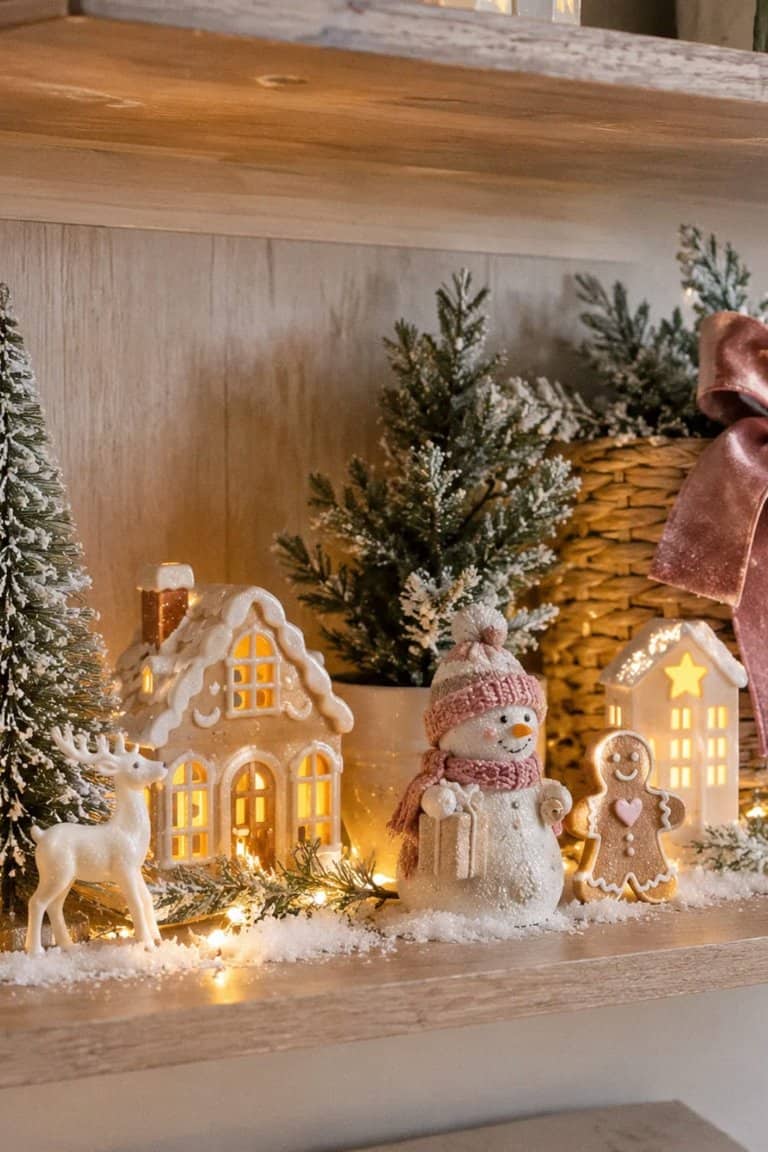
Sometimes the smallest decorations make the biggest difference!
I love decorating shelves with miniature Christmas scenes that feel like little storybook worlds.
What you’ll need:
- Mini Christmas figurines
- Bottle brush trees
- Tiny ceramic houses
- Small velvet bows
- Faux snow
- Battery-operated fairy lights
How to decorate it:
- Clear one or two shelves so you have space to create your Christmas display.
- Place a miniature ceramic house toward the back of each shelf.
- Add tiny Christmas trees on either side.
- Arrange small figurines, such as reindeer, snowmen, or gingerbread people, in front.
- Add a light dusting of faux snow around the decorations.
- Tuck battery-operated fairy lights behind the houses.
- Finish with a small velvet bow tied around a decorative basket or shelf accessory.
Don’t overcrowd the shelves! Leaving a little space makes each whimsical decoration stand out.
22. Make a DIY Christmas Candy Cane Vase
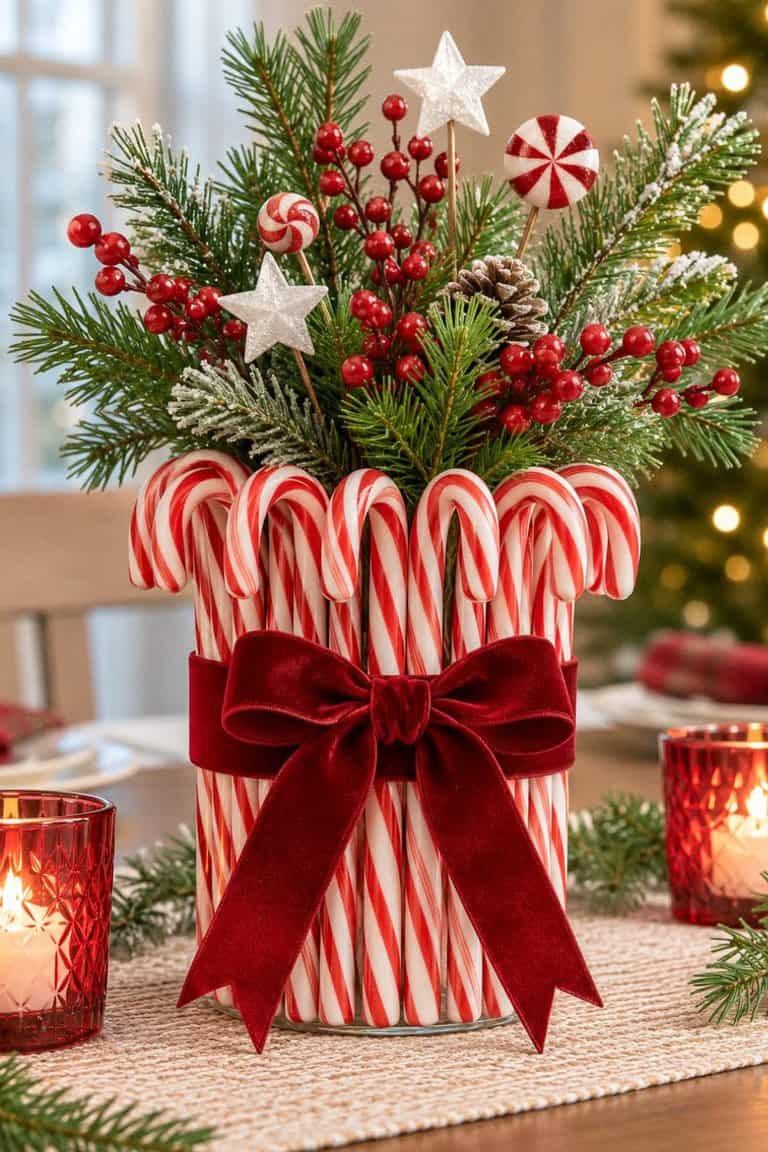
This is such a cute centerpiece idea for a dining table or kitchen island!
What you’ll need:
- Plain glass or plastic vase
- Faux candy cane decorations
- Double-sided craft tape
- Wide velvet ribbon
- Faux evergreen stems
- Pink or red berry picks
How to make it:
- Choose a simple cylindrical vase.
- Arrange faux candy canes vertically around the outside, with the curved tops facing outward.
- Secure them using strong double-sided craft tape or removable adhesive suitable for the vase.
- Wrap a wide velvet ribbon around the center to help hold the candy canes in place.
- Tie the ribbon into a large bow.
- Fill the vase with faux evergreen branches, berry stems, and whimsical Christmas picks.
- Place it in the center of your table.
For a pastel version, use pink and white candy canes with champagne-colored ribbon.
23. Make a Whimsical Christmas Balloon Ornament Display
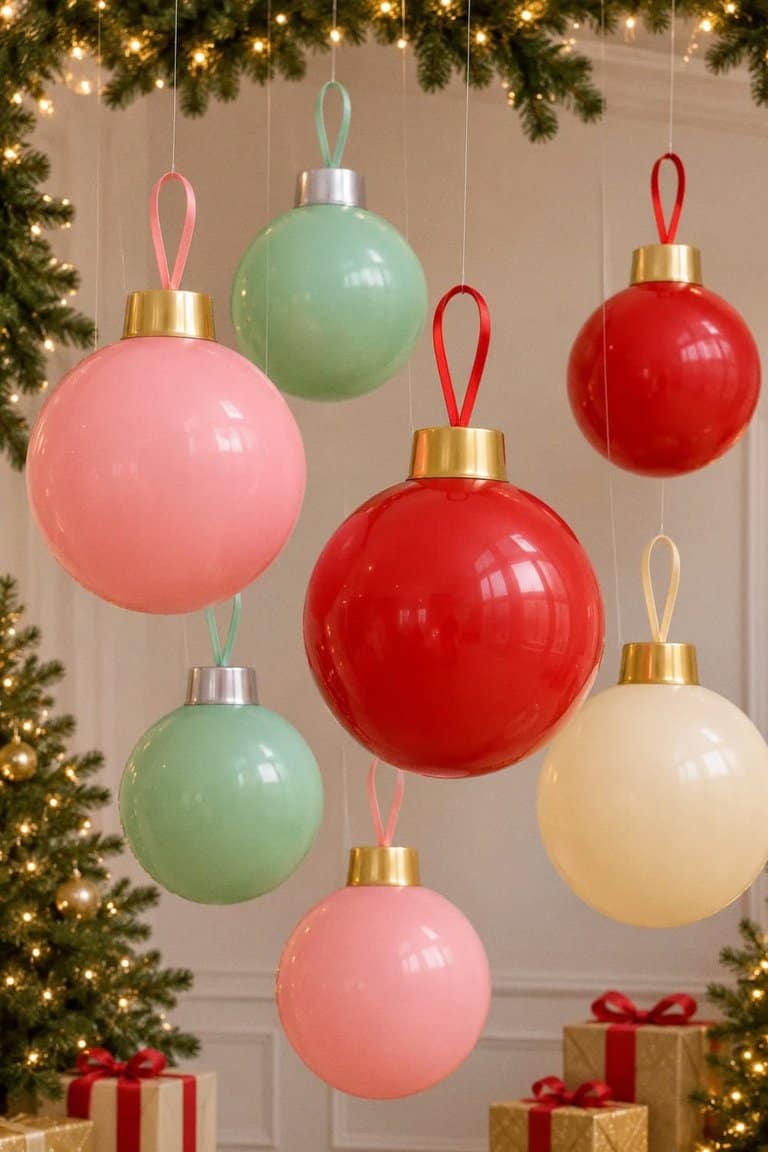
Giant Christmas ornaments are so fun, especially when you want to decorate for a holiday party!
You can even make them using balloons.
What you’ll need:
- Round balloons
- Small lightweight paper cups
- Metallic paint or metallic paper
- Ribbon
- Double-sided tape
- Fishing line
How to make them:
- Inflate several round balloons in Christmas colors like pink, red, mint, and cream.
- Cut lightweight paper cups down to create shallow ornament caps.
- Cover the cups with metallic paper or paint them gold or silver and let them dry.
- Attach a cap carefully to the top of each balloon using balloon-safe tape.
- Make a small loop from ribbon and attach it to the cap.
- Hang the balloons from secure hooks using lightweight fishing line.
- Arrange them at different heights for a playful floating ornament display.
These are temporary indoor decorations, perfect for a Christmas party or holiday photo backdrop.
24. Create a Whimsical Christmas Tablescape With Mini Trees
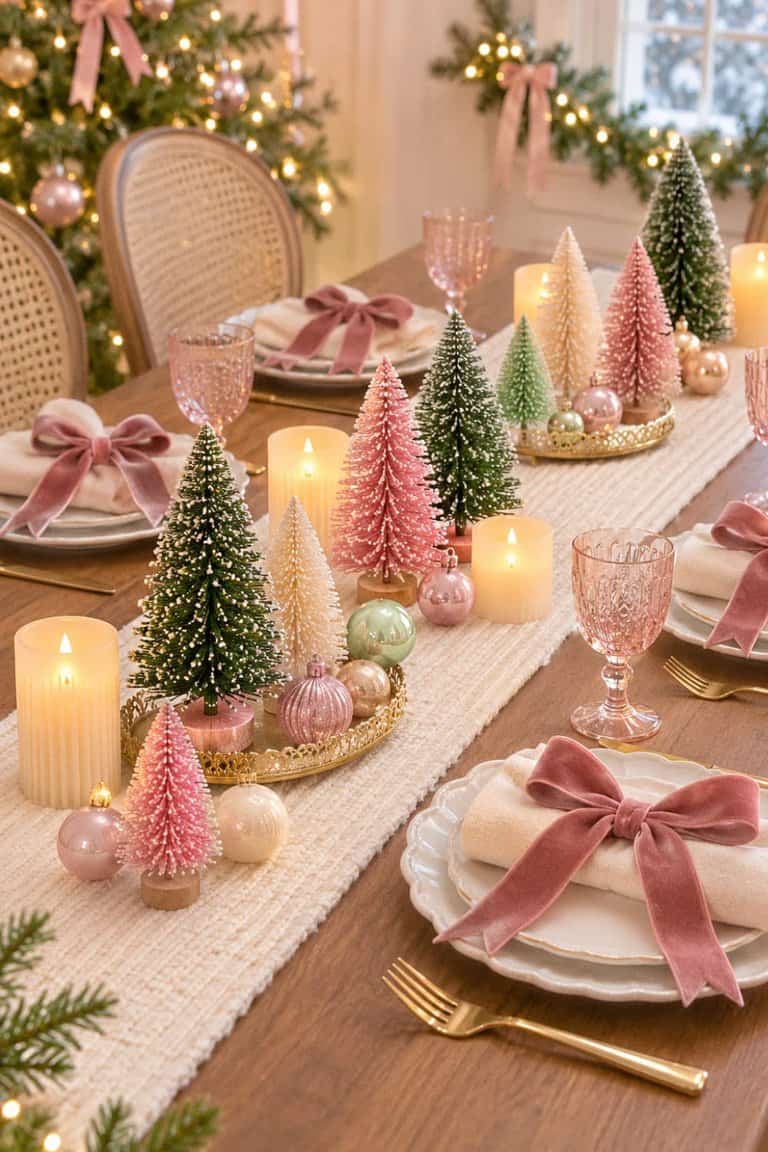
A Christmas table doesn’t have to be formal to look beautiful!
I love the idea of using colorful miniature Christmas trees, bows, and playful little ornaments.
What you’ll need:
- Mini bottle brush trees
- Pastel ornaments
- Velvet ribbon
- White or cream table runner
- Battery-operated LED candles
- Small decorative trays
How to decorate it:
- Lay a neutral table runner down the center of your table.
- Arrange bottle brush trees in different heights along the runner.
- Mix pink, cream, mint, and traditional green trees for a whimsical look.
- Add small ornaments between the trees.
- Tie velvet bows around folded napkins.
- Place battery-operated LED candles throughout the centerpiece.
- Keep the tallest decorations away from the center so guests can easily see one another.
This would be such a pretty setup for Christmas brunch!
25. Make a Whimsical Christmas Doorway With Hanging Ornaments
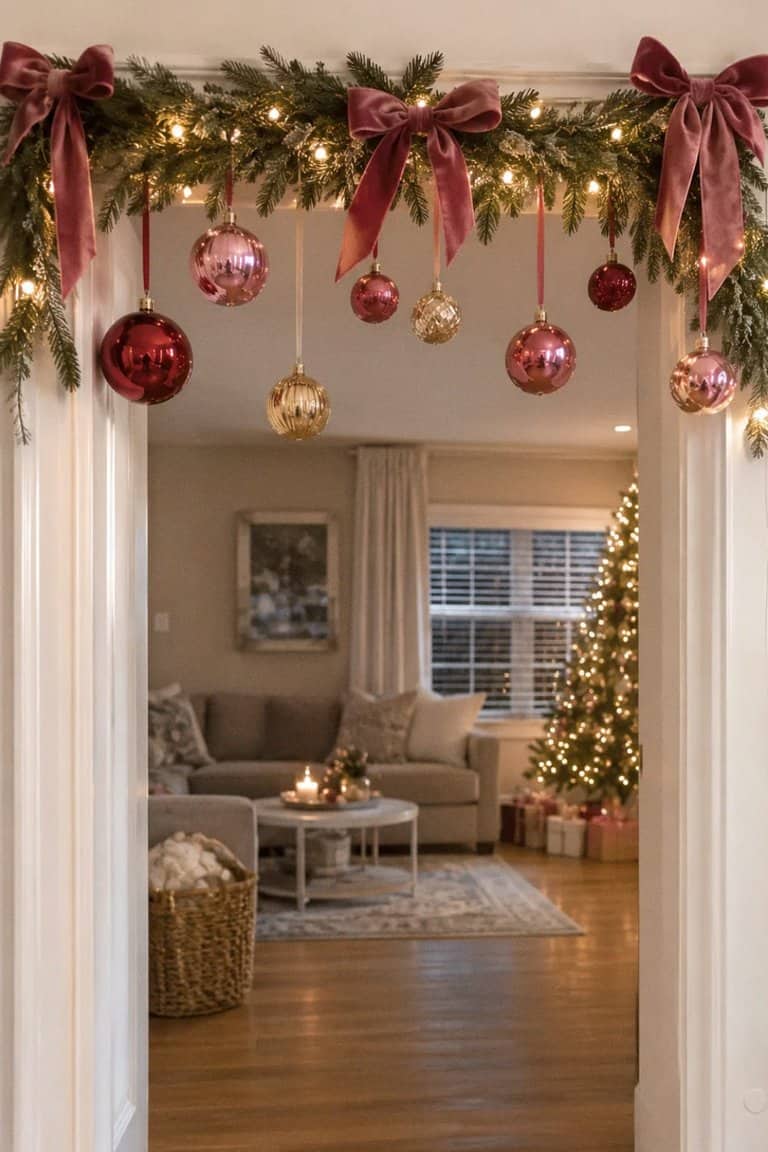
Turn an ordinary doorway into a magical Christmas entrance!
What you’ll need:
- Lightweight shatterproof ornaments
- Clear fishing line
- Removable ceiling hooks
- Velvet ribbon
- Optional faux greenery
How to make it:
- Choose a doorway or wide opening that has enough clearance for hanging decorations.
- Select lightweight ornaments in coordinating colors.
- Cut different lengths of fishing line.
- Tie each ornament securely to a length of fishing line.
- Attach the lines to removable hooks above the doorway.
- Hang the ornaments at varying heights to create a floating effect.
- Add a small amount of faux greenery or ribbon along the top.
Keep ornaments above head height and away from the door’s swing.
I think a mix of pink, red, and gold ornaments would look absolutely magical!
26. Create a Whimsical Vintage-Inspired Christmas Tree
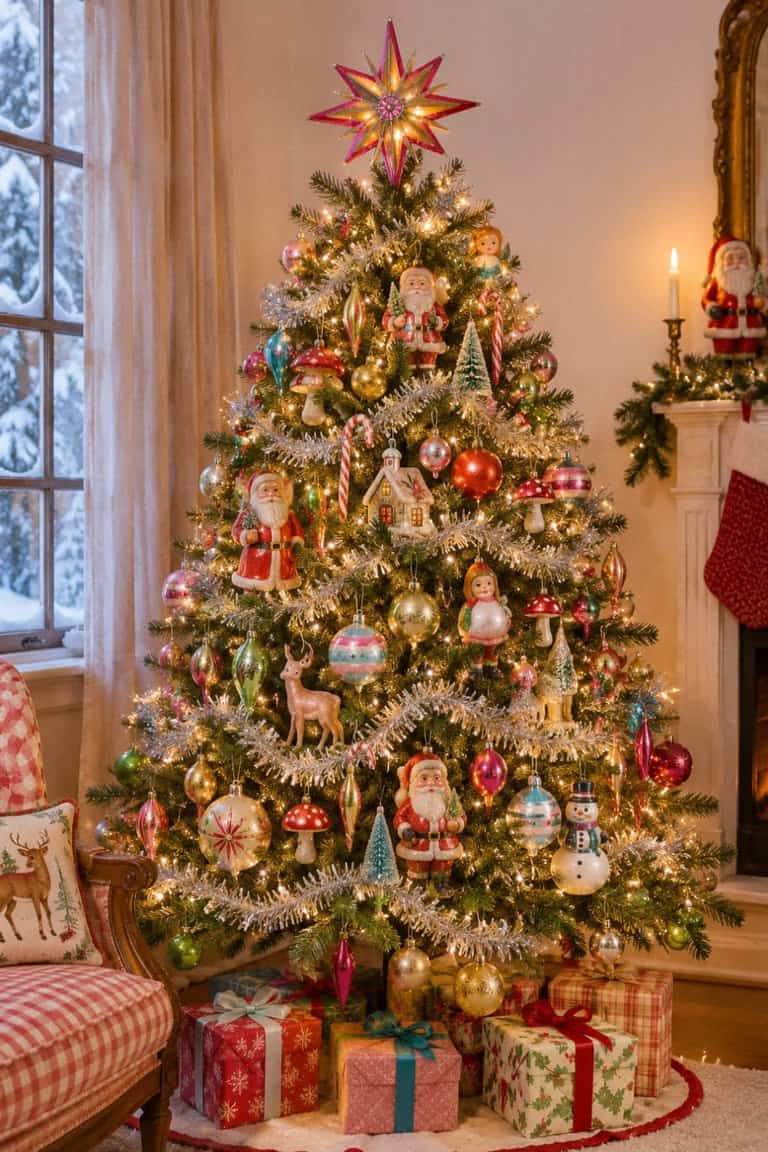
If you love nostalgic Christmas decorations, this idea is for you!
Think colorful glass-style ornaments, shiny tinsel, vintage Santas, and quirky little decorations.
What you’ll need:
- Artificial Christmas tree
- Vintage-inspired shatterproof ornaments
- Tinsel garland
- Retro Christmas figurine ornaments
- Warm white Christmas lights
- Colorful tree topper
How to decorate it:
- Fluff your Christmas tree and add warm white lights.
- Drape thin strands of tinsel garland loosely around the branches.
- Hang colorful vintage-inspired ornaments in different shapes and sizes.
- Add quirky ornaments like mushrooms, candy canes, miniature houses, and retro Santas.
- Mix shiny metallic finishes with soft pastel ornaments.
- Finish with a vintage-inspired star topper.
- Place a few wrapped presents in colorful paper underneath.
The fun part is that everything doesn’t have to match perfectly!
27. Make a DIY Whimsical Christmas Snow Globe Display
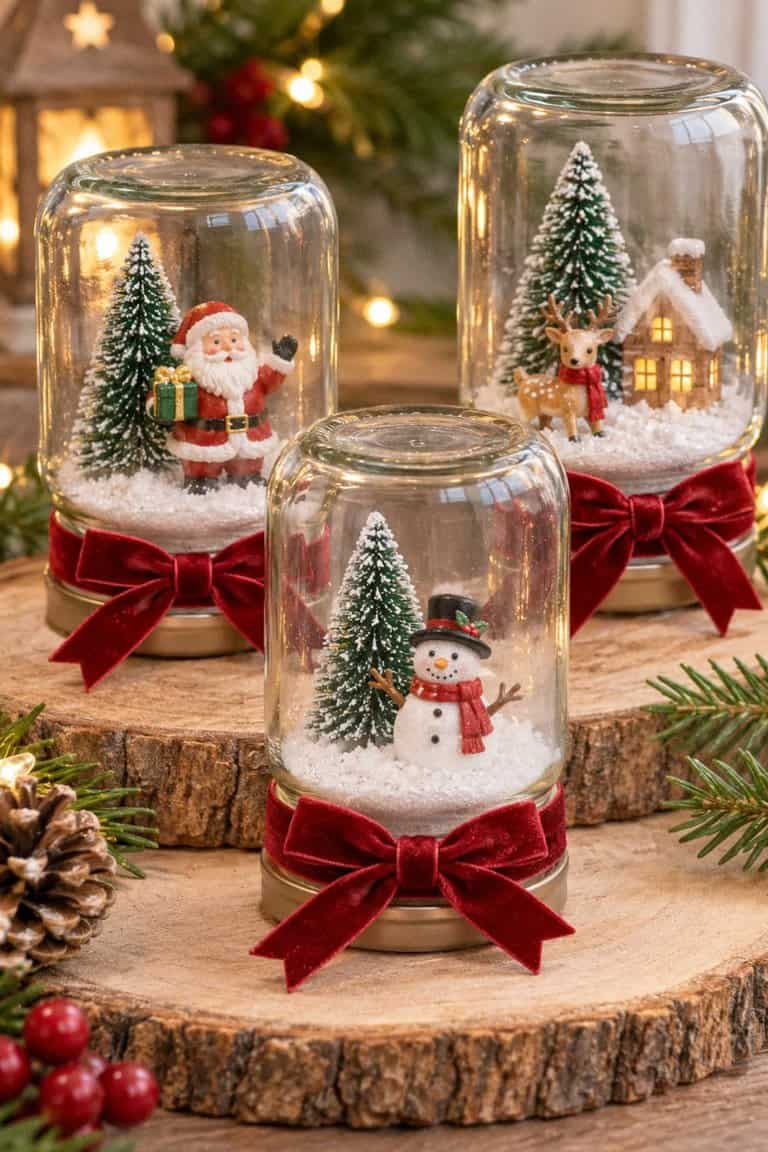
I think miniature snow globes are one of the sweetest Christmas decorations!
And you can make your own little magical scenes using clear jars.
What you’ll need:
- Clear glass jars with lids
- Miniature Christmas figurines
- Small bottle brush trees
- Faux snow
- Waterproof craft glue or strong adhesive
- Ribbon
How to make them:
- Clean and dry your glass jars.
- Arrange a tiny Christmas tree and figurine on the inside of each jar lid.
- Secure the decorations with strong adhesive and let it cure completely.
- Add a small amount of faux snow to the bottom of each jar.
- Carefully screw the lid onto the jar, keeping the decorations inside.
- Turn the jar upside down so the miniature scene stands upright.
- Tie a velvet ribbon around the base, which is now at the top of your display.
These are dry snow globes, so there’s no need to add water.
Make a little collection of different Christmas scenes for your mantel or bookshelf!
28. Create a Magical Whimsical Christmas Reading Nook
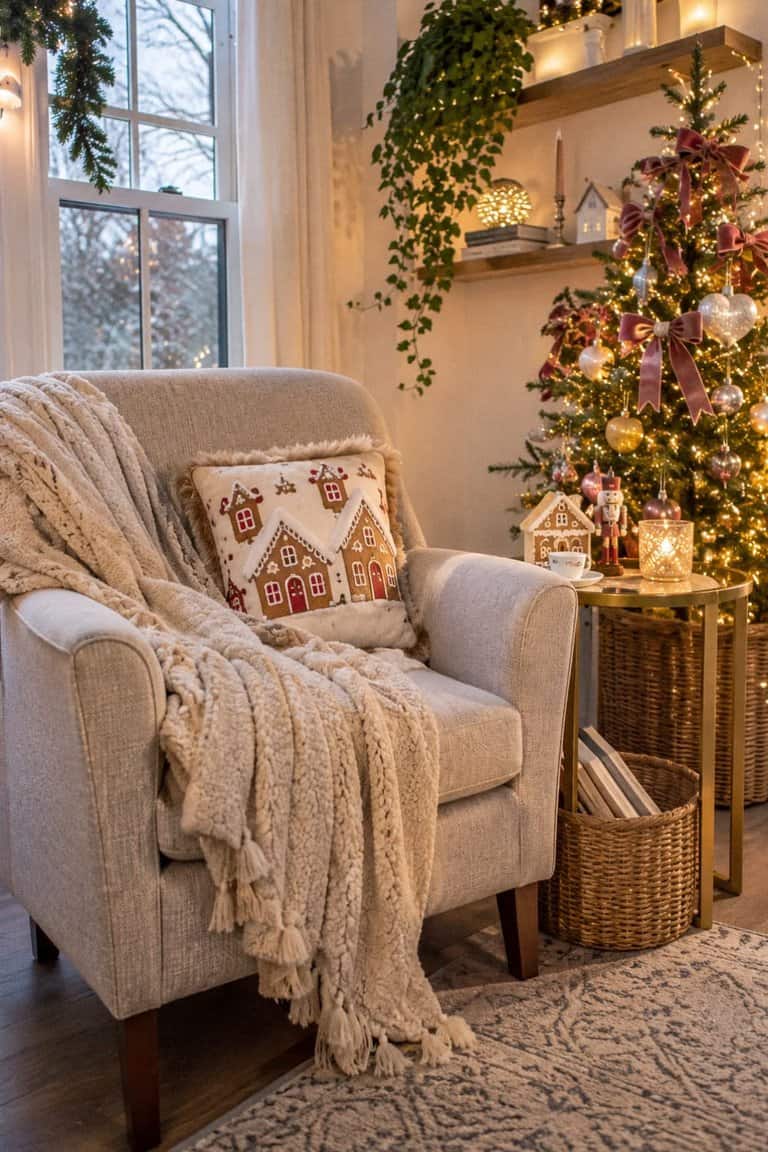
This might be my FAVORITE idea for making a little corner of the home feel extra cozy and magical!
Imagine a comfy chair, twinkling Christmas lights, a tiny tree, and the cutest whimsical decorations.
What you’ll need:
- Small Christmas tree
- Pastel or colorful ornaments
- Velvet bows
- Cozy Christmas pillow
- Soft throw blanket
- Battery-operated fairy lights
- Small side table
How to decorate it:
- Choose a quiet corner of your living room or bedroom.
- Position a comfortable chair beside a small side table.
- Place a miniature Christmas tree nearby.
- Decorate the tree with colorful ornaments, velvet bows, and warm white lights.
- Add a festive pillow and soft throw blanket to your chair.
- Place a small gingerbread house or Christmas figurine on the side table.
- Arrange battery-operated fairy lights around the display, keeping cords out of walkways.
- Finish with a basket of Christmas books or magazines.
I would absolutely love having a little spot like this to enjoy my morning coffee during the holiday season!
It’s Time for a Whimsical Christmas This Season
And there you have it! 28 whimsical Christmas decor ideas to bring a little extra magic into your home this year.
I know I’ll be trying a few of these with my daughter this Christmas. Sometimes it’s those little handmade touches that make decorating for the holidays feel even more special!



Leave a Reply