
There’s something about fall that makes me want to pull out all my craft supplies, grab a pumpkin spice latte, and start decorating EVERYTHING!
And this year, I’m loving all the cute decoupage ideas you can make with fabric!
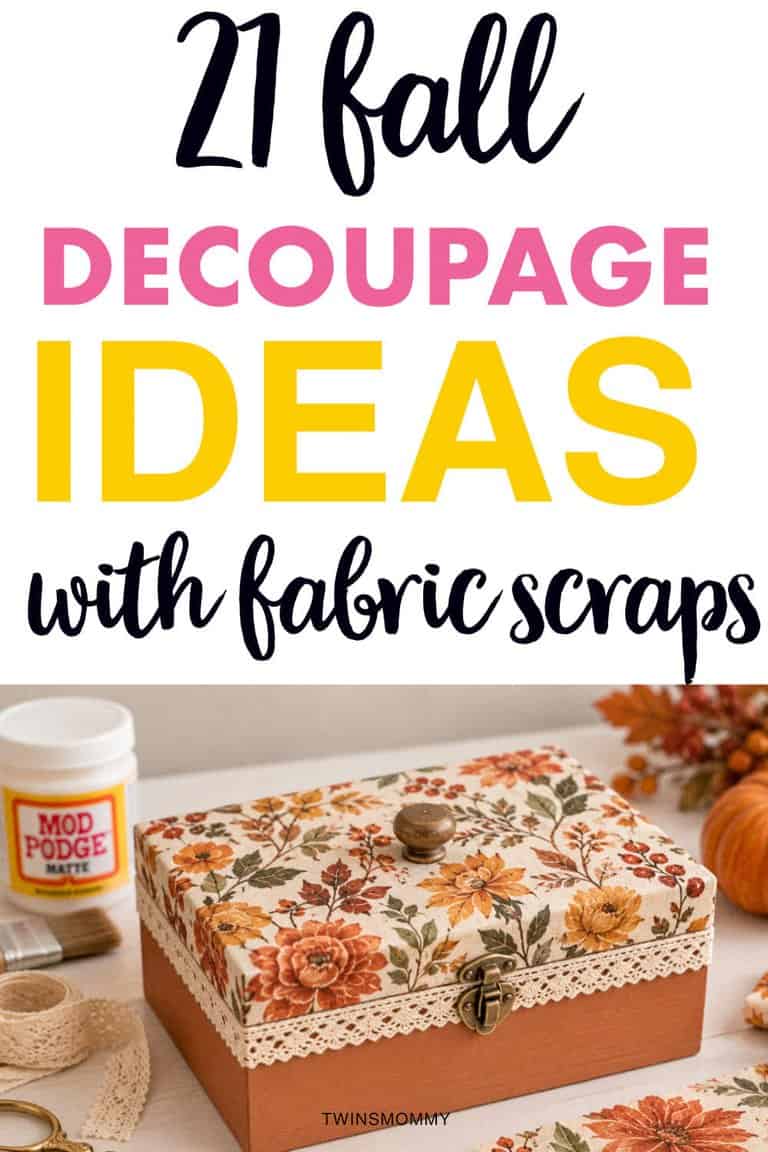
I mean, who knew that a few scraps of pretty floral fabric, some Mod Podge, and an old pumpkin could turn into the cutest fall decor ever?
I’m talking cozy plaid pumpkins, vintage-inspired fall decorations, pretty autumn leaf designs, and even thrift store finds that you can completely transform with fabric.
And the best part? You don’t have to be super crafty to make these!
As a busy mom, I love finding easy DIY projects that don’t take all weekend (or cost a fortune at the craft store!).
Plus, fabric decoupage is such a fun way to use up leftover fabric scraps or give something old a whole new look.
So, if you’re ready to make your home feel extra cozy this autumn, grab your favorite fall fabrics, a little Mod Podge, and let’s make some seriously adorable fall decorations!
These fall decoupage ideas are easy, budget-friendly, and SO pretty you’ll want to make more than one!
What You Need to Make Fall Fabric Decoupage Crafts
Before we get into all the cute fall decoupage ideas, let’s talk supplies!
The good news? You really don’t need a ton of fancy crafting materials to make these adorable fall decorations.
In fact, you might already have some of these things tucked away in your craft drawer (or that closet full of supplies you’ve been meaning to organize!).
And if you’re new to decoupage, don’t worry! It’s basically just gluing pretty fabric onto a surface and sealing it to create a smooth, decorative finish.
Here’s what you’ll want to grab before getting started:
- Mod Podge: This is the magic ingredient! It acts as both a glue and a sealer to help your fabric stick to pumpkins, wood, glass, and other surfaces. I love using the matte finish for that cozy, rustic fall look.
- Fall-inspired fabric: Think buffalo plaid, gingham, tiny florals, autumn leaves, vintage patterns, and warm fall colors like burnt orange, mustard yellow, cream, and sage green. Cotton fabric works especially well!
- Foam brushes: These are perfect for spreading Mod Podge evenly without leaving too many brush marks.
- Sharp fabric scissors: You’ll need these to cut your fabric into strips, squares, leaves, or whatever cute shapes you’re using.
- Craft pumpkins: Grab some inexpensive faux pumpkins from the dollar store or craft store. They’re perfect for making fabric-covered pumpkins you can reuse every fall.
- Wooden craft blanks: Wooden signs, trays, coasters, and little decorative shapes are all great for fabric decoupage projects.
- Glass jars or vases: Save those empty jars! They’re perfect for turning into pretty fall candle holders or decorative vases.
- Sandpaper: If you’re working with unfinished wood, a little sanding helps create a smoother surface for your fabric.
- Acrylic paint: This is optional, but painting your project white or cream before adding fabric can help lighter patterns stand out.
- Ribbon, twine, and embellishments: These little extras make your finished crafts look SO much cuter! Think raffia bows, wooden beads, lace, and tiny faux fall leaves.
21 Cute Fall Fabric Decoupage Ideas That Are Easy to Make
Okay, can we talk about how CUTE fabric decoupage crafts are right now?
I’m seeing so many adorable DIY pumpkins, vintage-inspired decorations, and thrift-flip projects that make me want to run straight to the craft store!
And what I love most is that you don’t need to spend a fortune to get that cozy, Pinterest-worthy fall look.
With some pretty fabric scraps, Mod Podge, and a few inexpensive supplies, you can turn ordinary dollar-store finds into fall decorations that look like something you’d buy at a cute little boutique.
I’ve rounded up 21 easy fall fabric decoupage projects inspired by the cozy, vintage, cottagecore, and budget-friendly DIY styles that are so popular on TikTok and Pinterest.
And yes, I’ll show you how to make each one!
1. Vintage Floral Decoupage Pumpkins
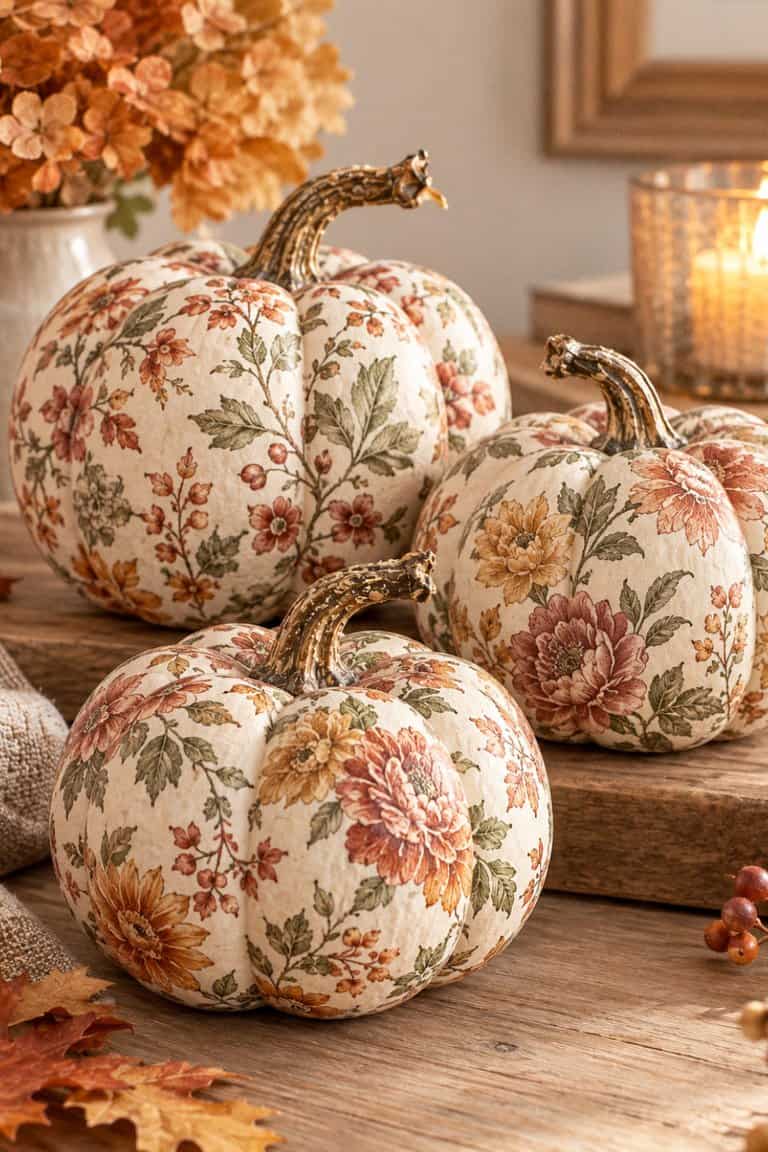
I am OBSESSED with those pretty little pumpkins covered in vintage floral fabric!
They’re giving cozy English cottage vibes, and they look absolutely adorable on a mantel, entryway table, or kitchen shelf.
To make them, grab a few faux pumpkins, some lightweight floral cotton fabric, and matte Mod Podge.
Cut your fabric into long, narrow strips, then brush a thin layer of Mod Podge onto the pumpkin. Lay each strip vertically from the stem to the bottom, gently smoothing it into the grooves as you go.
Overlap the strips slightly until the pumpkin is completely covered, then let everything dry before adding a final thin sealing coat.
Finish with a little velvet ribbon tied around the stem for that extra pretty fall touch!
2. Buffalo Plaid Fabric Pumpkins
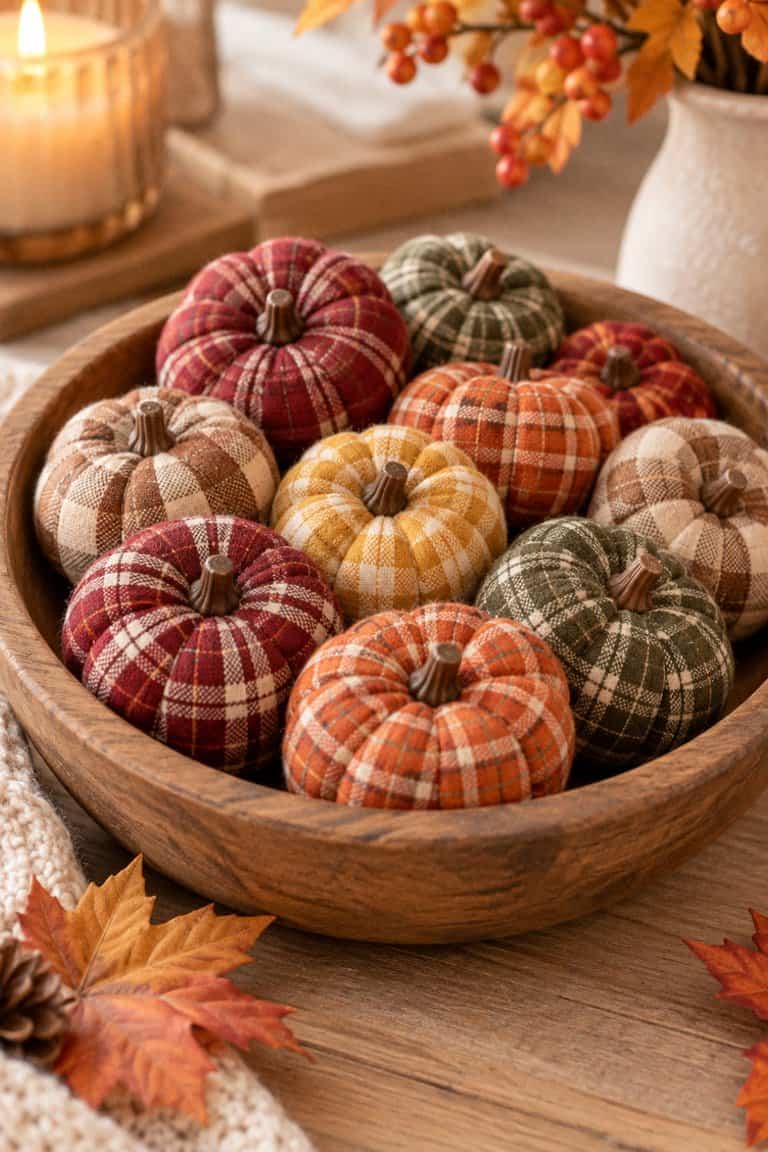
Nothing says fall quite like buffalo plaid!
And these little plaid pumpkins are SO easy to make that you could probably whip up an entire collection in one afternoon.
Start with small plastic or foam pumpkins and some orange, cream, or black-and-white plaid cotton fabric.
Cut the fabric into strips, brush Mod Podge onto the pumpkin, and carefully press the fabric into place.
Work around the pumpkin one section at a time, smoothing out wrinkles and trimming excess fabric near the stem.
Once dry, add a raffia bow or a little wooden leaf tag.
I love the idea of grouping three different-sized plaid pumpkins together in a wooden tray with some faux fall leaves.
3. Cottagecore Fabric Decoupage Mason Jars
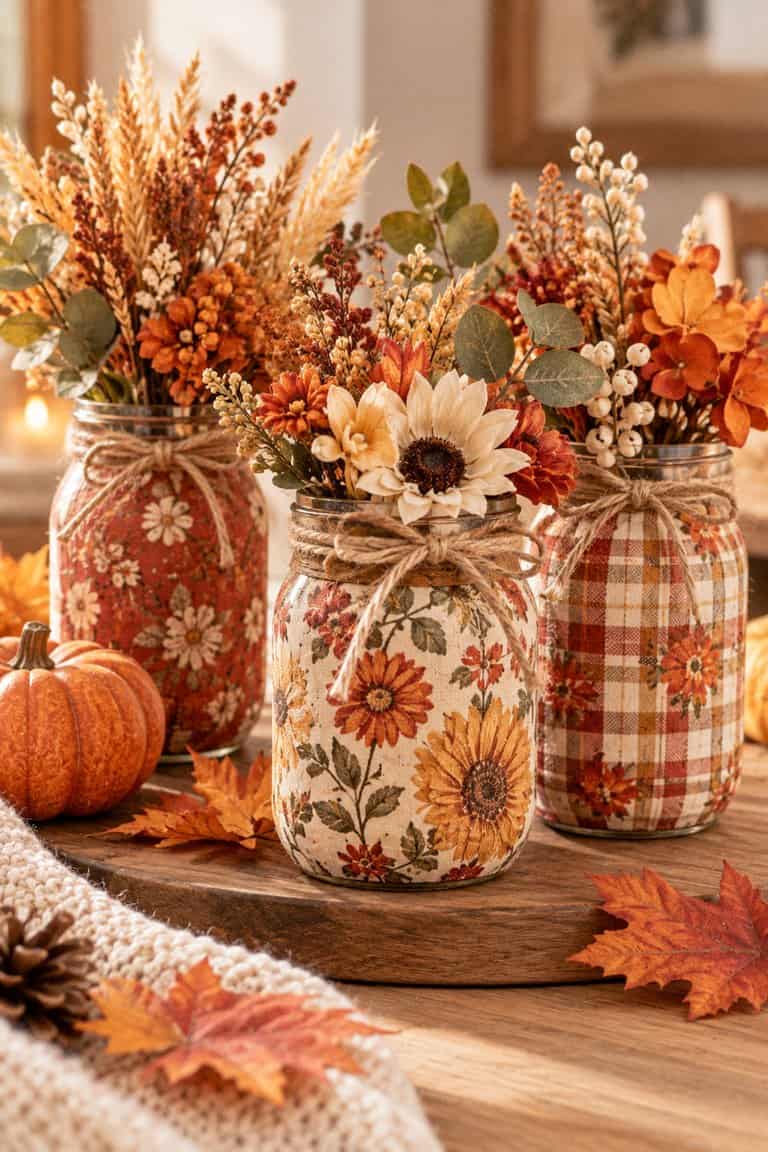
If you’ve got empty mason jars sitting around, don’t throw them away!
You can turn them into the sweetest fall vases using pretty floral fabric scraps.
First, wash and dry your jars, then cut lightweight cotton fabric into small rectangles or strips.
Brush Mod Podge onto the outside of the jar and press the fabric into place, smoothing out any bubbles.
You can cover the entire jar or leave little sections of glass showing for a more rustic look.
Let everything dry, then tie some twine around the top and fill your jar with dried wheat, faux eucalyptus, or little autumn flowers.
These would look SO cute on a farmhouse kitchen table!
4. Fabric-Covered Dollar Tree Pumpkins
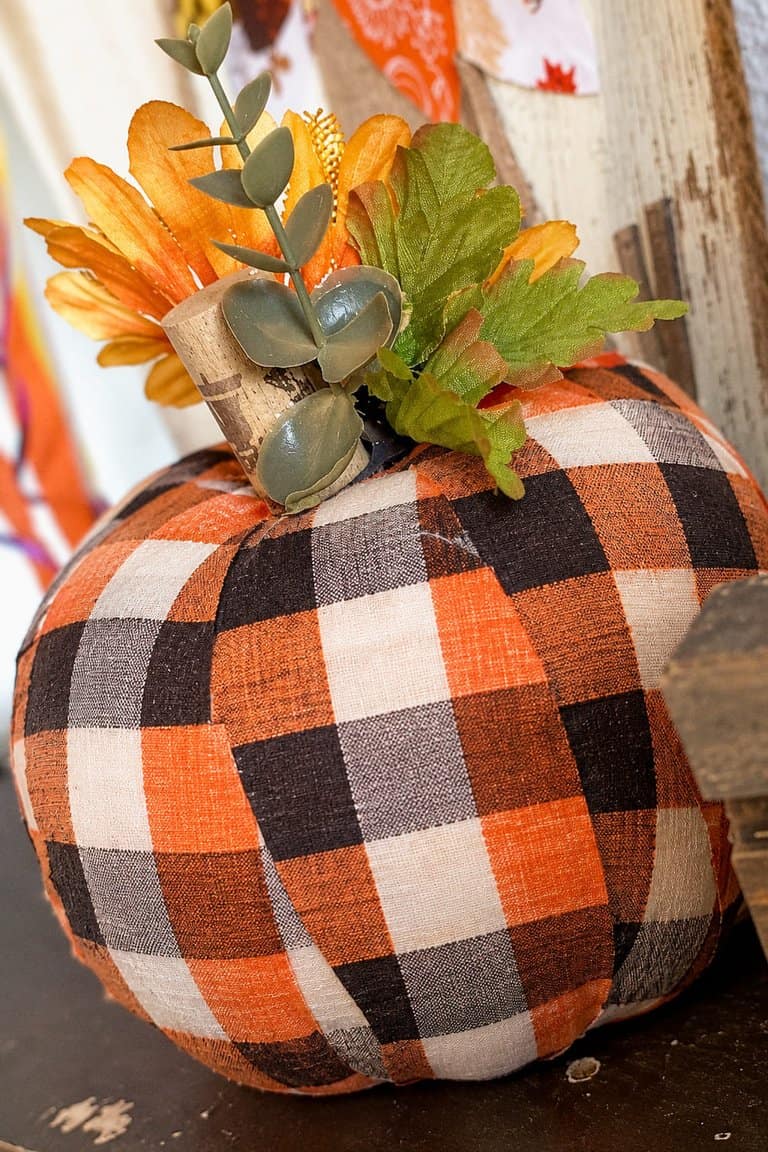
This is one of those DIY projects that makes me wonder why I’d ever pay full price for fall decorations!
Grab a few inexpensive foam pumpkins from the dollar store and transform them with fabric scraps.
I love using cream gingham, tiny orange florals, or muted sage-green patterns for this project.
Remove the pumpkin stem if possible, then cut your fabric into narrow strips that will follow the pumpkin’s curves.
Brush Mod Podge onto the foam, add the fabric strips, and smooth everything down with your fingers.
Once dry, reattach the stem and add a tiny bow.
Seriously, these look like something you’d find in a boutique fall decor collection!
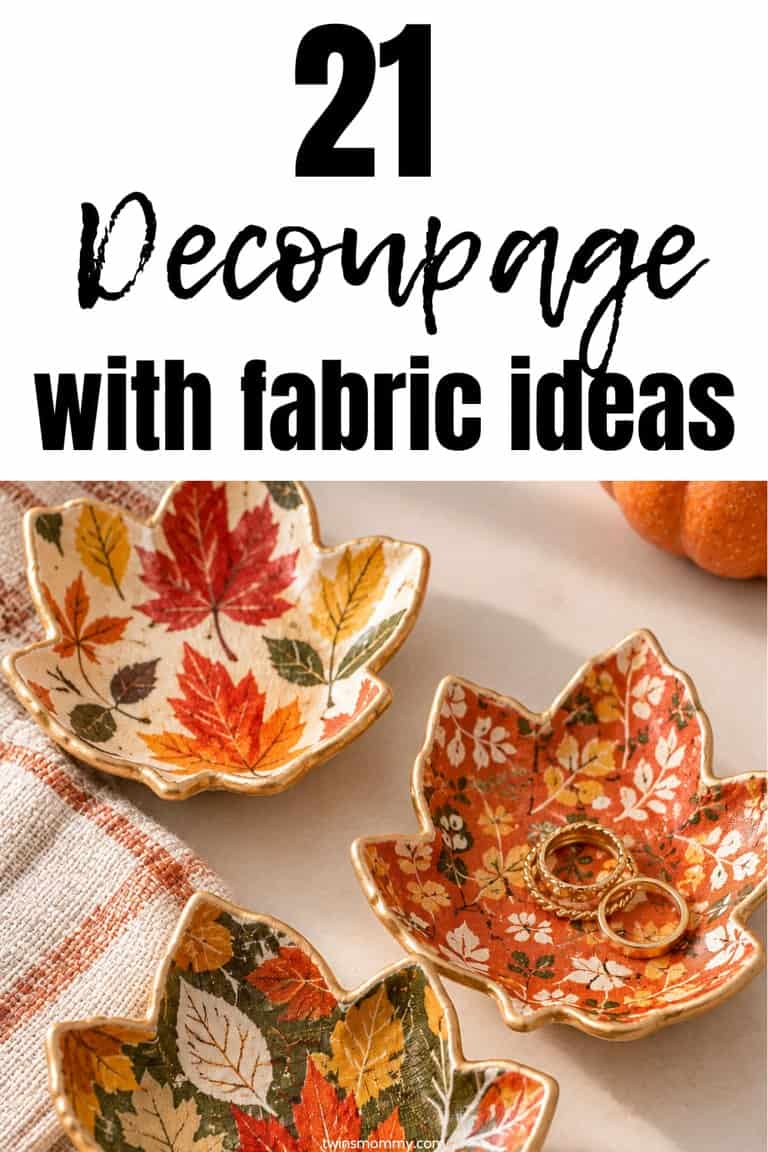
5. Decoupage Fall Leaf Trinket Dishes
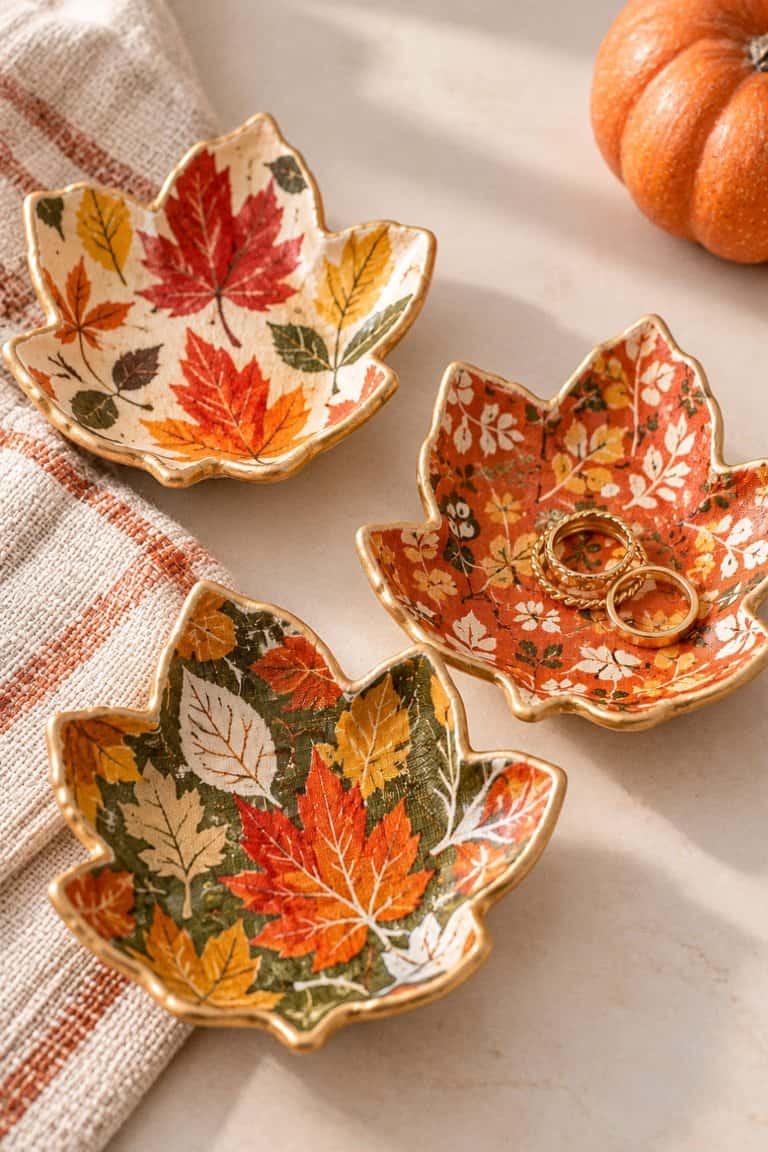
How adorable would these be sitting on your nightstand or entryway table?
You can make little fall leaf trinket dishes using inexpensive shallow ceramic dishes and fabric with autumn leaf patterns.
Start by cleaning your dish and cutting out individual leaves from lightweight cotton fabric.
Brush a thin layer of Mod Podge onto the inside of the dish, then carefully place your fabric leaves in a pretty arrangement.
Smooth them flat and apply another thin coat of Mod Podge over the top.
Let everything dry completely, following the product’s curing instructions.
Use your finished dish to hold rings, keys, or other little treasures. Just keep it for decorative use rather than serving food!
6. Vintage Fabric Decoupage Wooden Signs
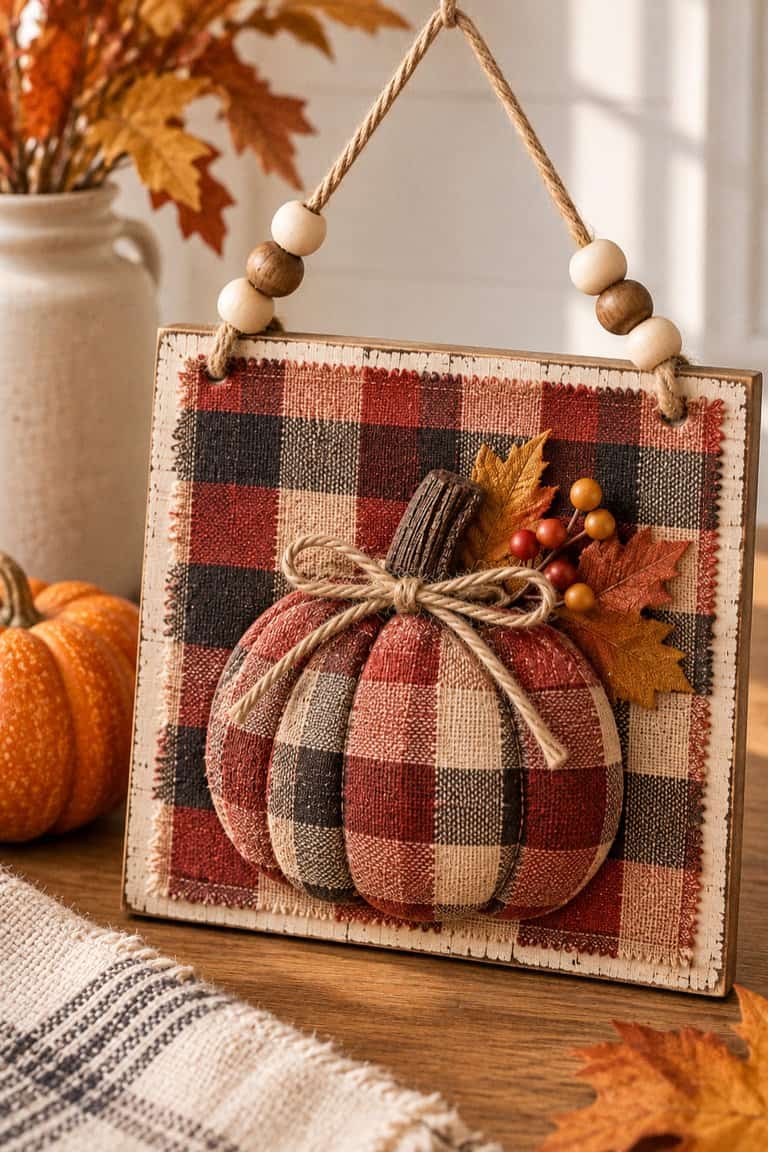
I love a good thrift-store makeover, especially when it involves turning an old wooden sign into something completely different!
For this project, grab a small wooden plaque or an outdated sign you no longer love.
Lightly sand the surface, wipe away the dust, and paint it cream or white if you want a lighter background.
Next, cut a piece of pretty fall fabric to fit the front of the sign.
Brush on Mod Podge, press the fabric down, and smooth it from the center outward.
Once it’s dry, trim the edges and add another thin coat of Mod Podge to seal it.
Finish with a little twine hanger or wooden bead detail.
You could even make several signs in coordinating fabrics for a cute fall gallery wall!
7. Patchwork Fabric Decoupage Pumpkins
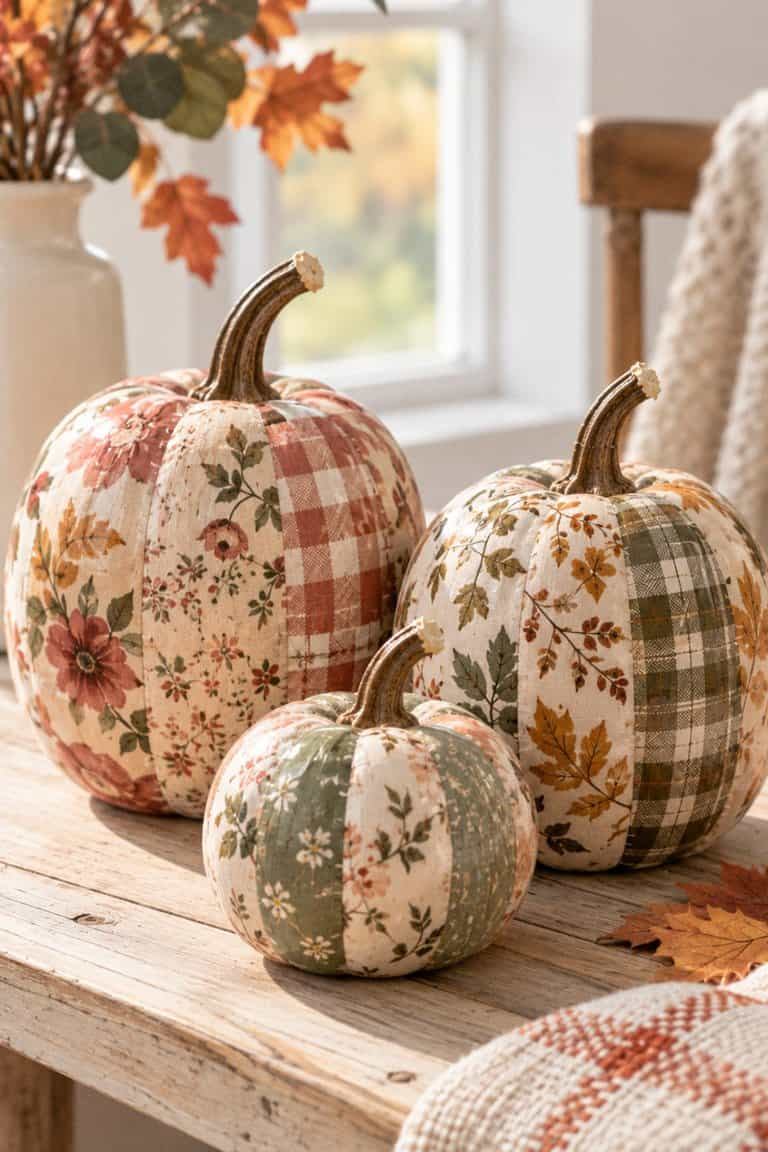
Okay, these are perfect if you’ve got a whole pile of leftover fabric scraps!
Instead of covering your pumpkin with one fabric pattern, you’re going to mix and match several.
Think tiny florals, gingham, stripes, and warm autumn colors.
Cut your fabrics into small squares or irregular shapes, then apply Mod Podge to a faux pumpkin one section at a time.
Overlap your fabric pieces slightly to create a cute patchwork effect.
Keep adding pieces until the pumpkin is covered, then let it dry and seal the surface.
I especially love mixing cream, dusty orange, mustard, and muted green for a soft vintage fall look.
8. Fall Fabric Decoupage Coasters
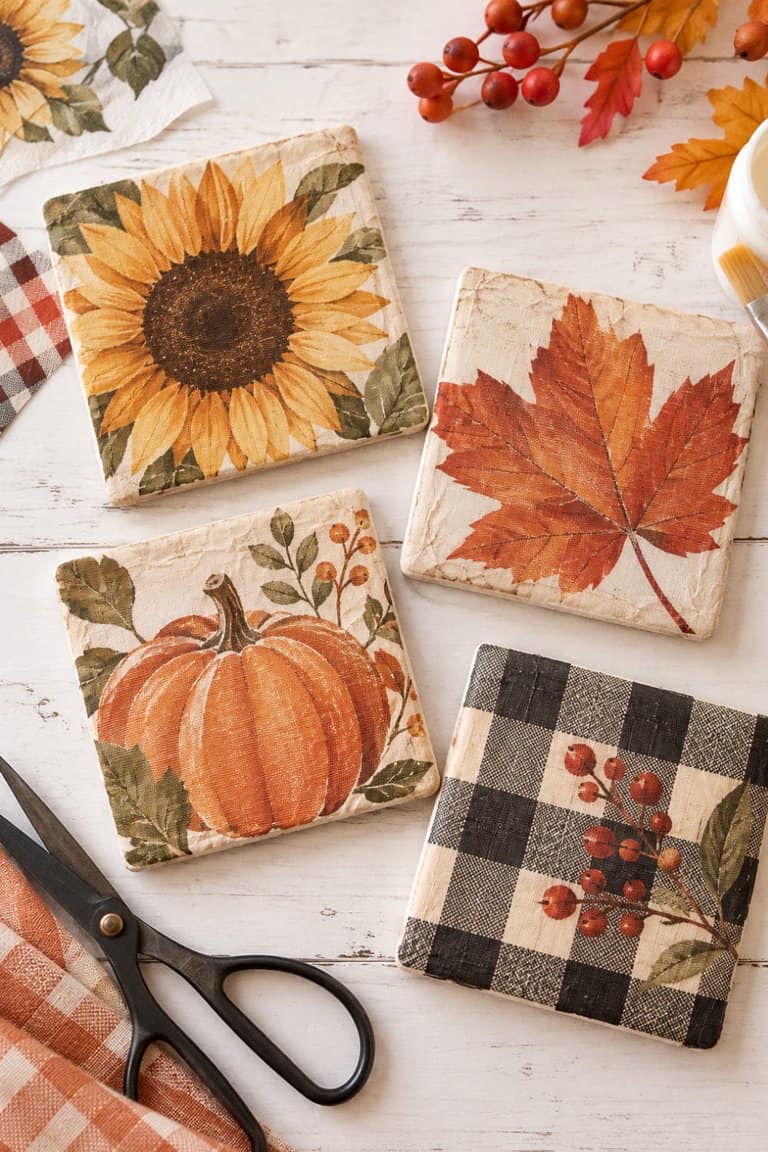
These are such a fun little craft to make for yourself or give as a homemade gift!
Grab some plain wooden coasters, lightweight fall-patterned fabric, Mod Podge, and a foam brush.
Trace each coaster onto the back of your fabric and cut out the shapes.
Brush a thin layer of Mod Podge onto the coaster, carefully lay the fabric on top, and smooth out any bubbles.
Once dry, trim the edges and add a few thin coats of a suitable water-resistant craft sealer, allowing drying time between coats.
Let the coasters fully cure before using them with your coffee mugs.
You can even make a matching set with different fall patterns and tie them together with a cute ribbon!
9. Fabric Decoupage Fall Serving Tray
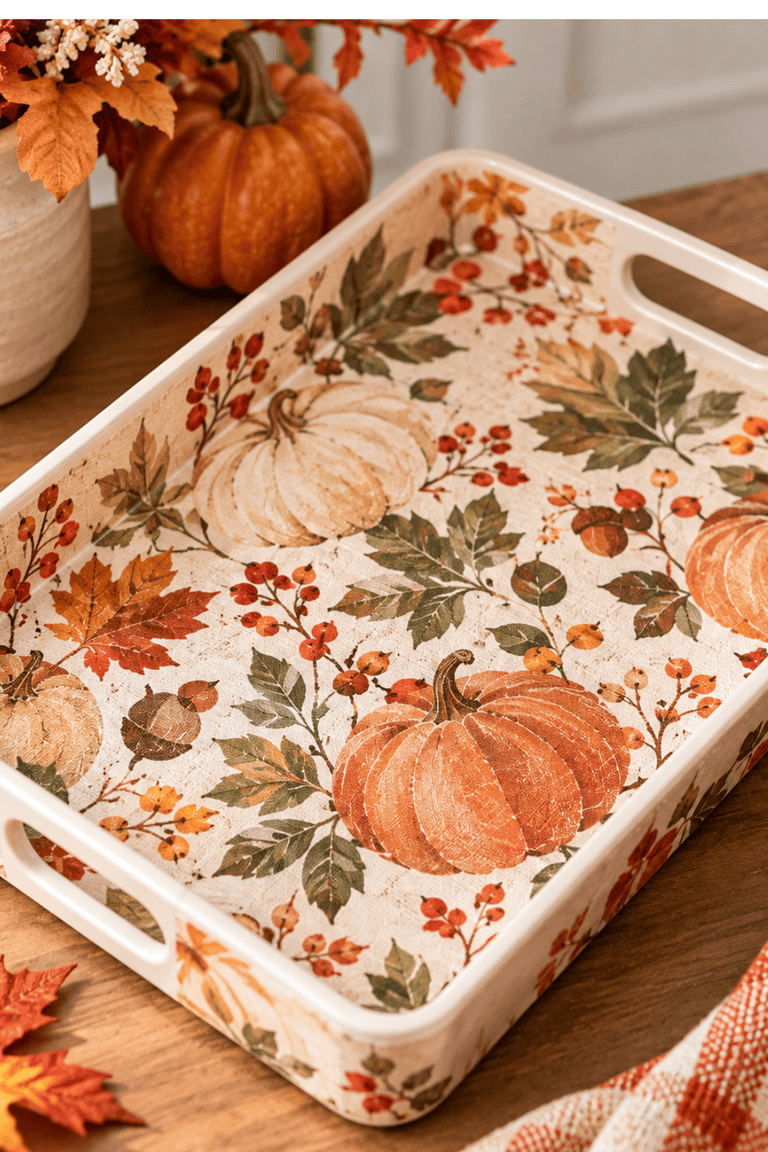
You know those plain wooden trays you see at thrift stores?
They’re practically begging for a fall makeover!
Find a shallow wooden tray and choose a pretty fabric with autumn florals, plaid, or a vintage botanical pattern.
Lightly sand the tray, clean it, and paint the sides a warm cream or sage green.
Measure the inside of the tray and cut your fabric to fit.
Brush Mod Podge onto the base, lay your fabric down, and smooth it carefully from the center toward the edges.
Once dry, seal it with a few thin coats of a suitable clear protective finish.
I would use this as a decorative tray for mini pumpkins, pinecones, and a cute little vase of fall flowers. So pretty!
10. French Country Toile Pumpkins
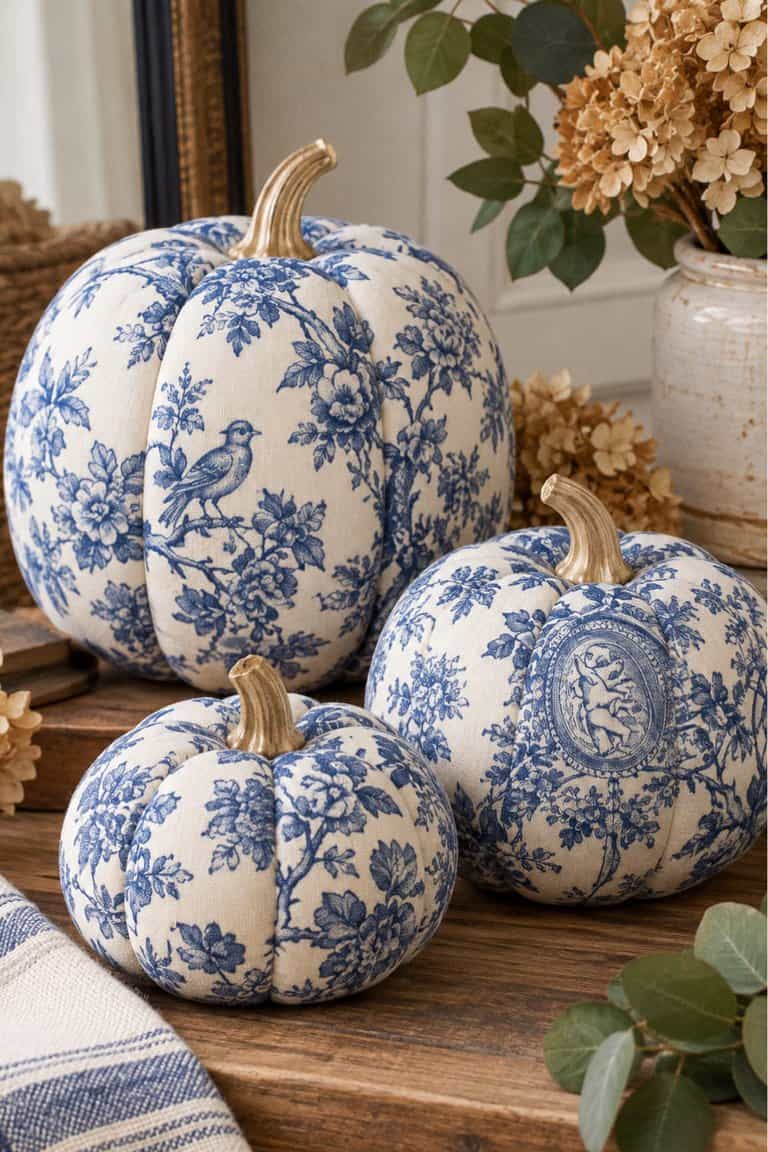
If you love that elegant, vintage-inspired fall decor look, you NEED to try these!
Blue-and-white toile pumpkins are especially pretty, but black-and-cream or muted brown toile would be gorgeous for autumn, too.
Grab a white faux pumpkin, toile-patterned cotton fabric, and matte Mod Podge.
Cut your fabric into narrow strips, making sure you include some of those beautiful little toile scenes.
Apply Mod Podge to one section of the pumpkin and gently press your fabric into the grooves.
Keep working around the pumpkin until it’s covered, then let everything dry.
Finish with a gold-painted stem or a simple velvet bow.
These are giving expensive home decor without the expensive price tag!
11. Decoupage Fabric Fall Candle Holders
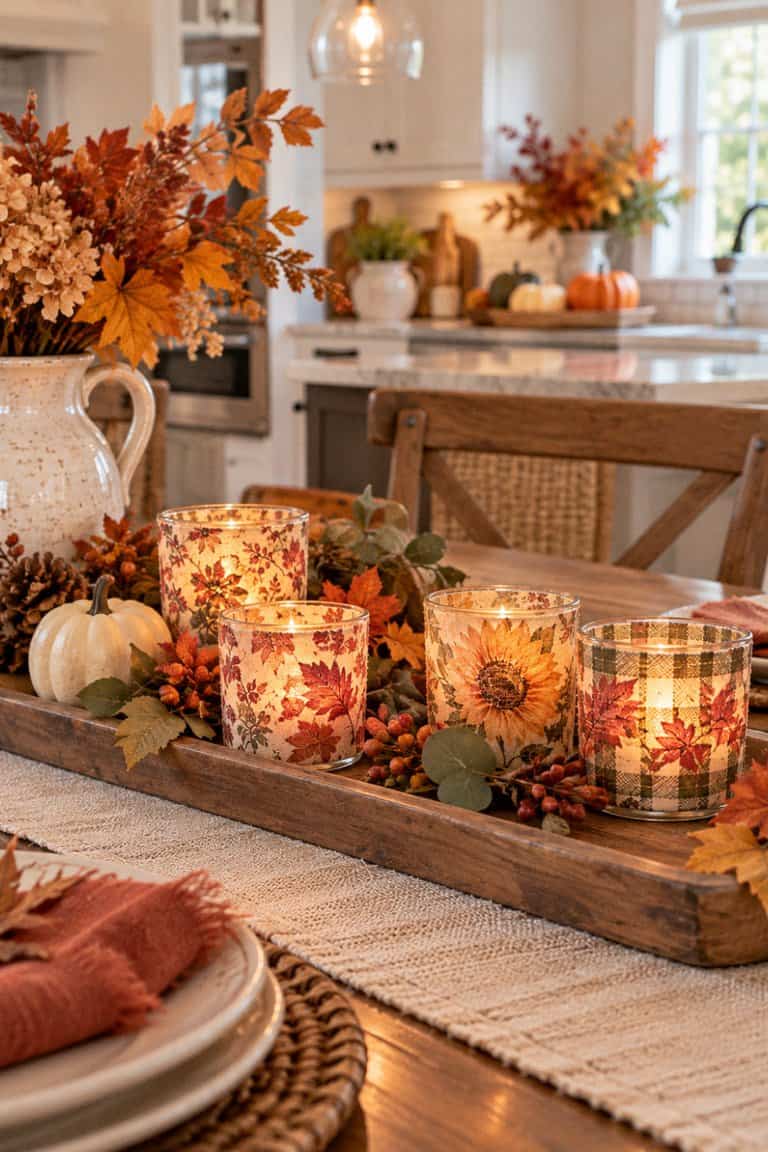
I love decorating with candles in the fall because they make everything feel so warm and cozy.
And these little fabric-covered candle holders are adorable!
Start with clean glass votive holders and some thin cotton fabric in autumn colors.
Cut your fabric into small leaf shapes or simple strips.
Apply Mod Podge to the outside of the glass and gently press your fabric into place.
Leave some of the glass uncovered if you want the light to shine through.
Once dry, add a thin sealing coat and let it cure completely.
Pop a battery-operated LED tea light inside, and you’ve got the prettiest little fall decoration!
Stick with flameless candles for this project since fabric and decoupage finishes shouldn’t be exposed to a flame.
12. Sunflower Fabric Decoupage Wooden Pumpkins
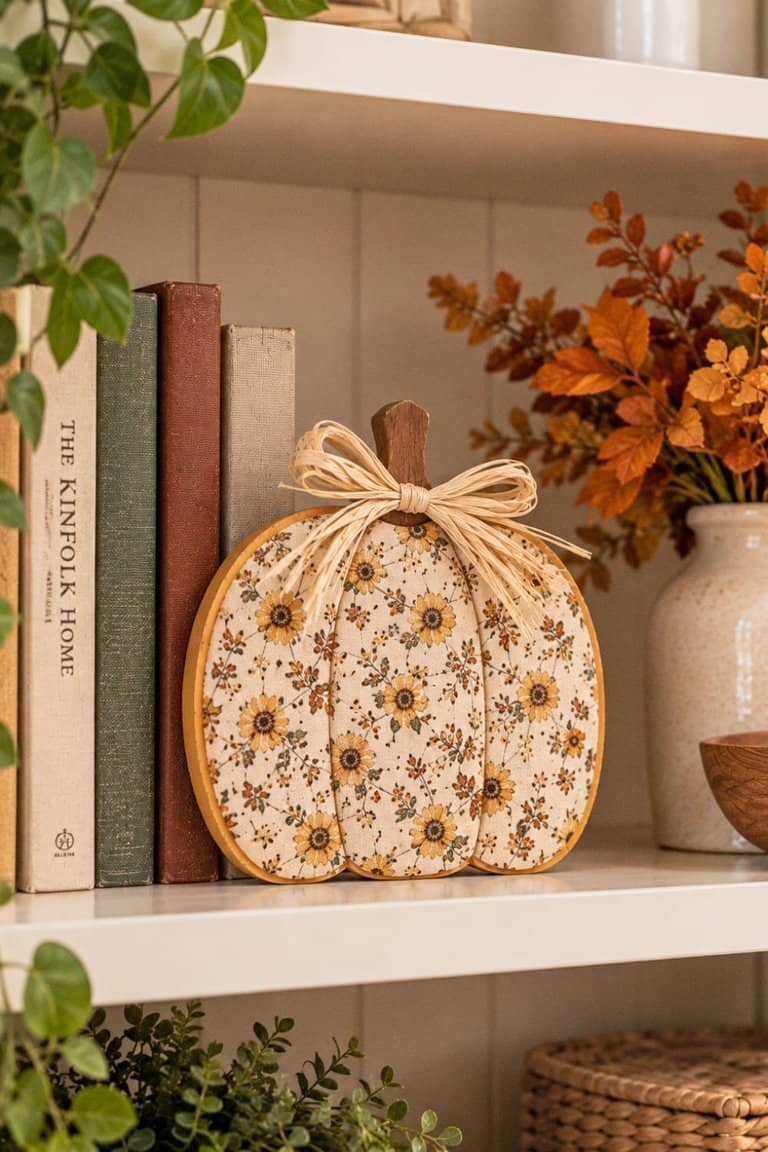
Sunflowers and fall just go together, don’t they?
And this is one of the easiest ways to make a plain wooden pumpkin look absolutely adorable.
Grab a flat wooden pumpkin cutout, sunflower-patterned cotton fabric, Mod Podge, and some acrylic paint.
Paint the pumpkin edges in a warm mustard yellow, cream, or burnt orange.
Once dry, trace the pumpkin shape onto the back of your fabric and cut it out, leaving a little extra around the edges.
Brush Mod Podge onto the wood, lay your fabric on top, and smooth everything flat.
After drying, carefully trim the excess fabric with scissors or a craft knife.
Add a little raffia bow to the stem, and you’re done!
This would be SO cute tucked into a fall tiered tray or displayed on a kitchen shelf.
13. Fabric Decoupage Autumn Leaf Garland
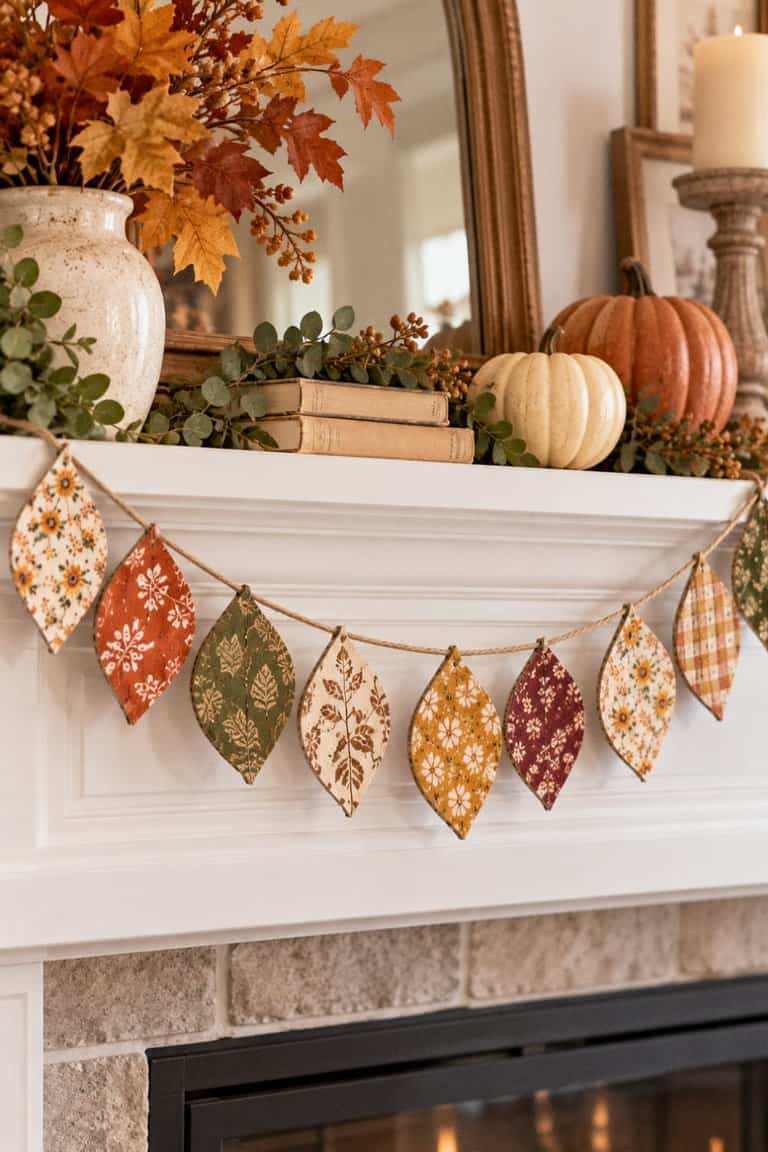
Okay, this is such a fun project to make with the kids!
Instead of buying another fall garland, you can make your own using cardboard, fabric scraps, and twine.
Start by drawing several leaf shapes onto sturdy cardboard and cutting them out.
Choose fall fabrics in orange, burgundy, mustard, and cream, then trace each cardboard leaf onto the fabric.
Brush Mod Podge onto the cardboard and attach your fabric pieces.
Once dry, trim the edges and seal the front of each leaf.
Punch a small hole near the top of every leaf and thread them onto a long piece of twine.
Hang your finished garland across a mantel, bookshelf, or doorway.
I love that you can make this as colorful or neutral as you want!
14. Thrifted Fabric Decoupage Picture Frames
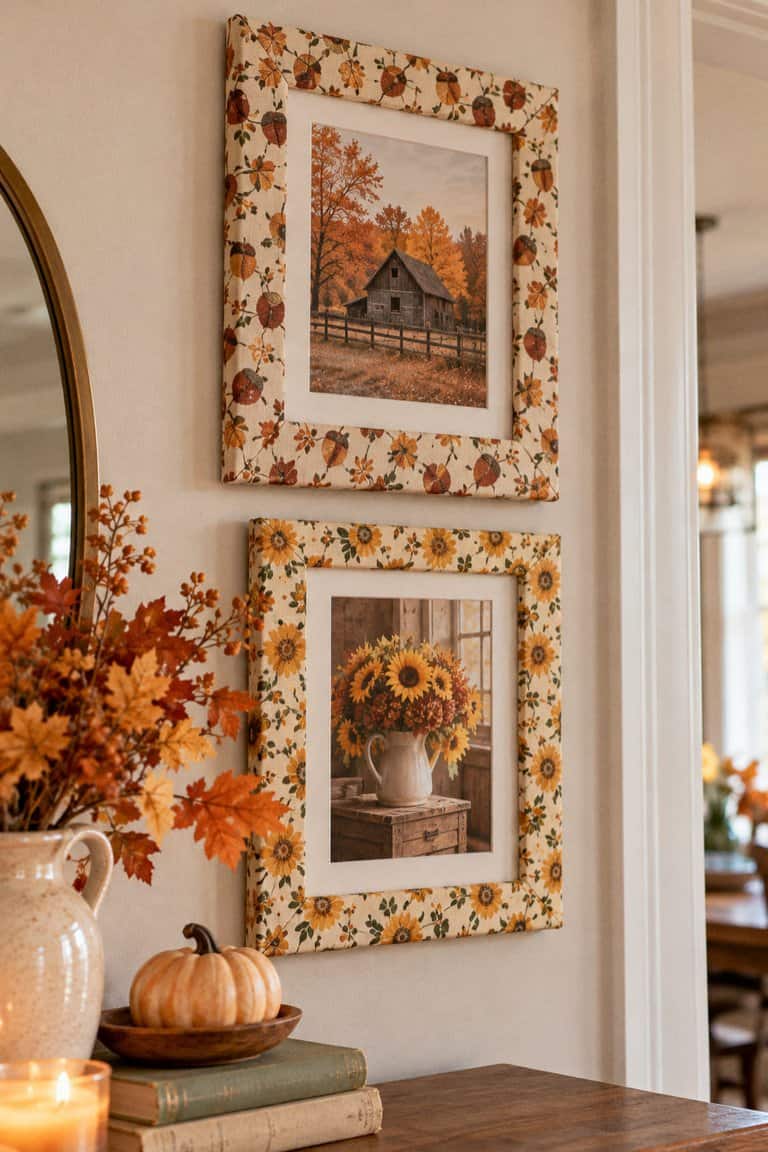
If you’ve ever walked past those old wooden picture frames at a thrift store, this is your sign to grab a few!
They’re perfect for an easy fall DIY makeover.
Remove the glass and backing from your frame, then clean and lightly sand the wooden surface.
Cut strips of floral, plaid, or gingham fabric wide enough to wrap around the front of the frame.
Brush Mod Podge onto one section at a time, press the fabric down, and fold the edges neatly around the sides.
For corners, make small cuts in the fabric so it folds without bunching.
Let the frame dry, trim any excess fabric, and reassemble it.
Add a cute autumn printable or a favorite family fall photo.
How sweet would a few of these look on a gallery wall?
15. Mini Fabric Decoupage Acorns
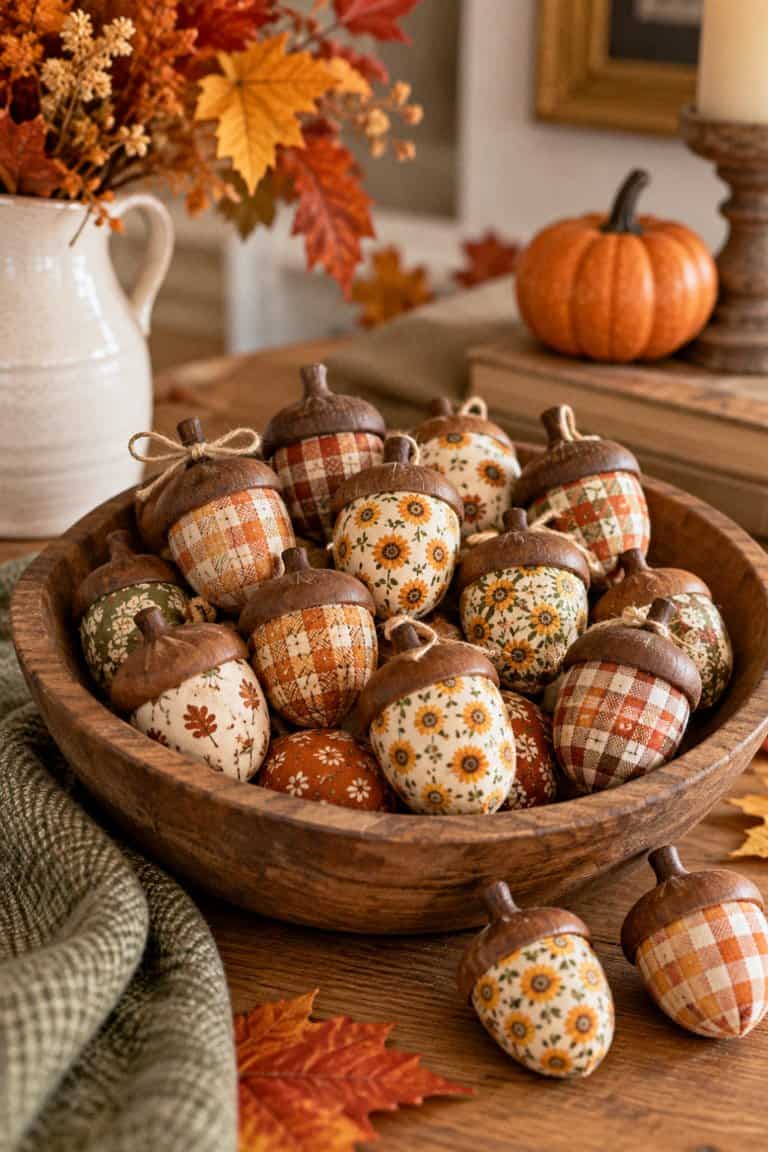
I seriously can’t get over how cute tiny acorn decorations are!
They’re perfect for filling little wooden bowls, decorating a tiered tray, or adding to a fall centerpiece.
Start with wooden craft acorns or small unfinished wooden acorn ornaments.
Paint the caps a chocolate brown and let them dry.
Next, cut little pieces of floral or plaid fabric to fit the bottom portion of each acorn.
Brush on Mod Podge and carefully press the fabric around the curved surface.
Overlap small pieces as needed, smooth them down, and let everything dry.
You can finish with a tiny twine bow or leave them plain for a more rustic look.
Make a whole bunch in different fabrics for an adorable little autumn collection!
16. Fabric Decoupage Fall Book Stack
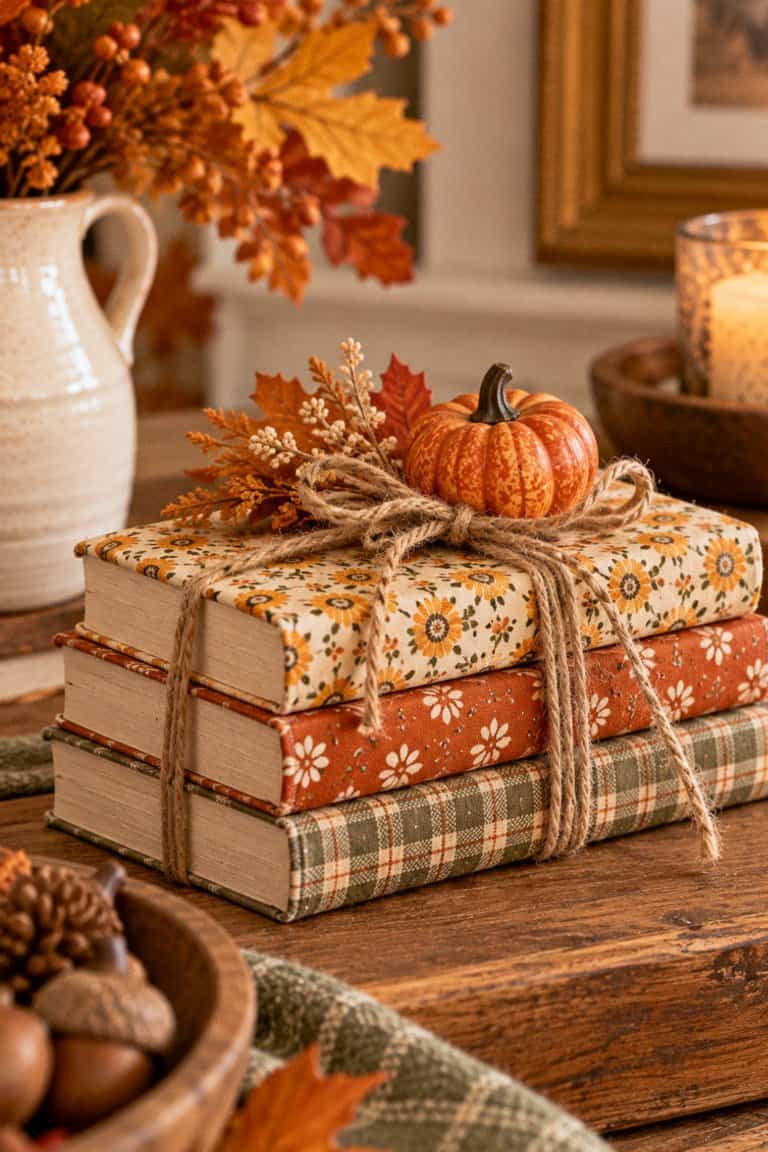
I LOVE those decorative book stacks people use for farmhouse decor!
And you can make your own fall version without ruining any actual books.
Grab three small wooden book-shaped blocks or inexpensive faux decorative books.
Paint the edges cream, brown, or muted orange.
Cut pieces of fabric to fit the front covers, leaving the painted edges showing.
Brush Mod Podge onto each surface and gently press the fabric into place.
Once everything is dry, stack your books together and wrap them with twine or a wide ribbon.
Add a little faux leaf, mini pumpkin, or dried flower on top.
This would look adorable on an entryway table next to a cozy fall candle!
17. Fabric Decoupage Wooden Mushroom Decor
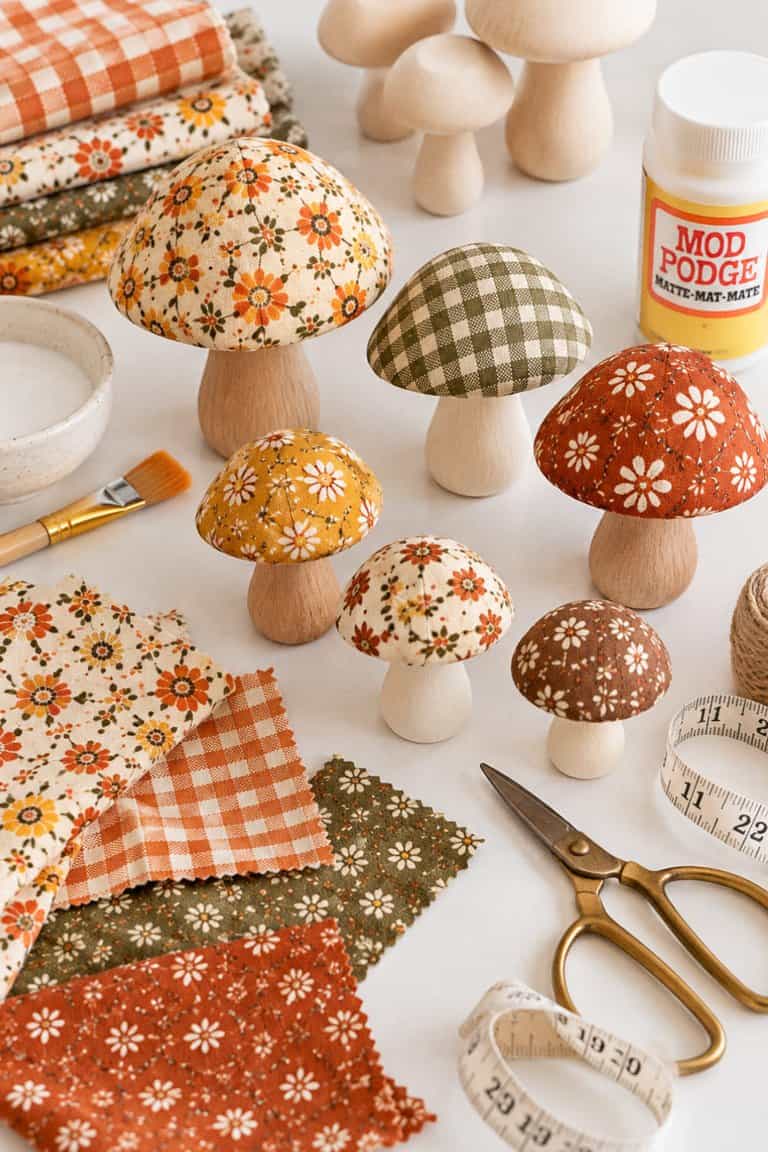
Mushroom decorations are SO cute for fall, especially if you love that whimsical cottagecore aesthetic!
For this craft, grab a few unfinished wooden mushrooms in different sizes.
Paint the stems cream or light brown and let them dry.
Choose fabric with tiny florals, gingham, or warm autumn patterns.
Cut your fabric into small pieces that can easily curve around the mushroom caps.
Brush Mod Podge onto the caps, press your fabric down, and overlap the pieces slightly until the tops are covered.
Let everything dry, then add a sealing coat.
Group your finished mushrooms on a wooden tray with moss, mini pumpkins, and pinecones.
It’s like creating a tiny enchanted autumn forest!
18. Fabric Decoupage Fall Napkin Rings
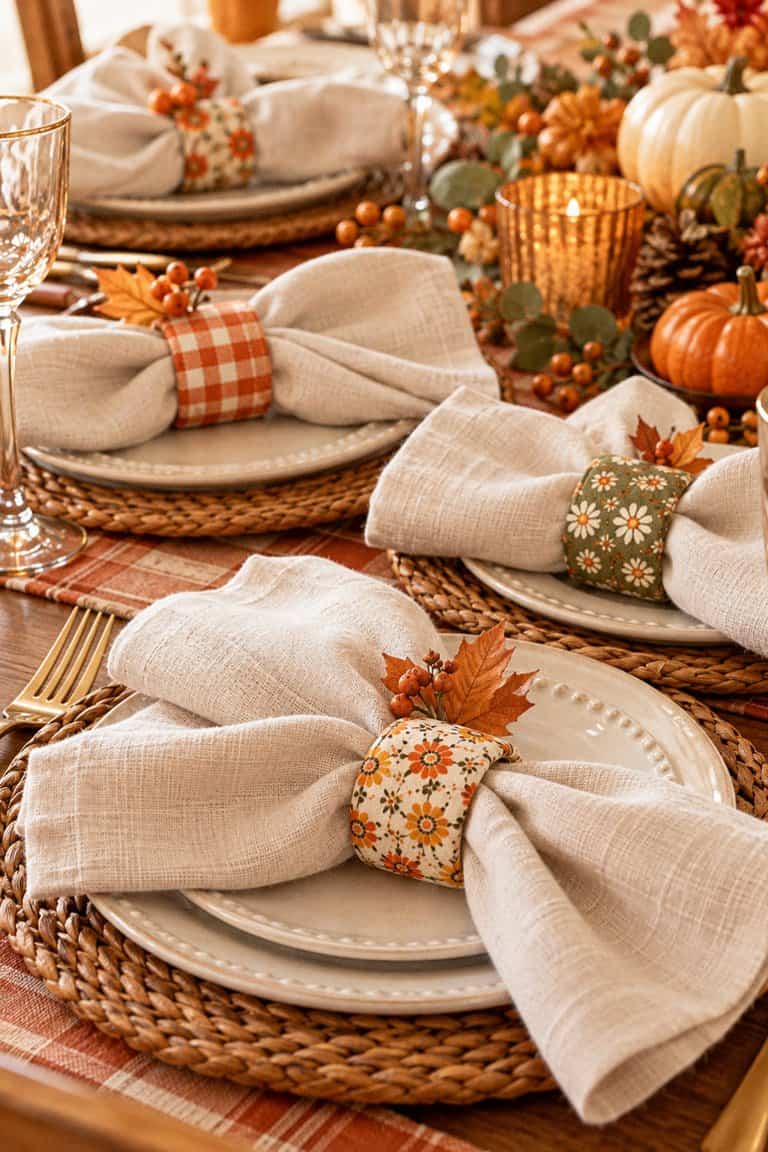
If you’re hosting Thanksgiving dinner, these would be such a cute addition to your table!
And they’re surprisingly easy to make.
Start with unfinished wooden napkin rings and some pretty fall cotton fabric.
Cut your fabric into narrow strips long enough to wrap around each ring.
Brush Mod Podge onto the outside of the ring and carefully wrap the fabric around it, smoothing as you go.
Fold the edges neatly toward the inside, securing them with a little more Mod Podge.
Let the rings dry completely before adding a final sealing coat.
Finish with a small faux leaf or tiny twine bow if you want something extra.
Pair them with cream linen napkins, and your Thanksgiving table will look SO pretty!
19. Boho Fabric Decoupage Fall Vases
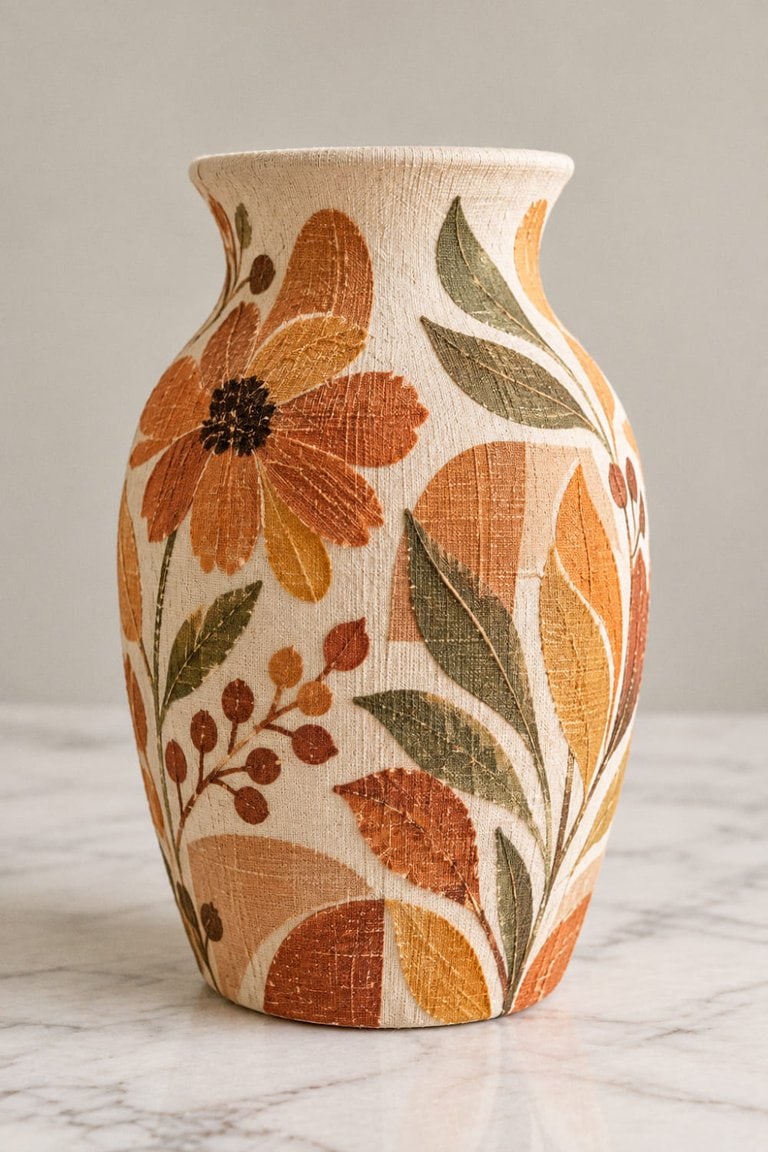
I’m always looking for inexpensive ways to make my home feel a little more cozy for fall.
And these boho-inspired vases are such an easy project!
Grab an old ceramic vase or a plain dollar-store vase and paint it a warm neutral color like cream, terracotta, or beige.
Once dry, cut out shapes from fabric with botanical prints, earthy florals, or abstract patterns.
Brush Mod Podge onto the vase and arrange your fabric pieces however you like.
You could create one large floral design on the front or scatter little fabric shapes around the entire vase.
Smooth everything down, let it dry, and add a thin sealing coat.
Fill your finished vase with dried grasses or faux fall stems.
Just keep the decoupage on the outside and use a separate waterproof insert if you’re adding fresh flowers.
20. Fabric Decoupage Pumpkin Door Hanger
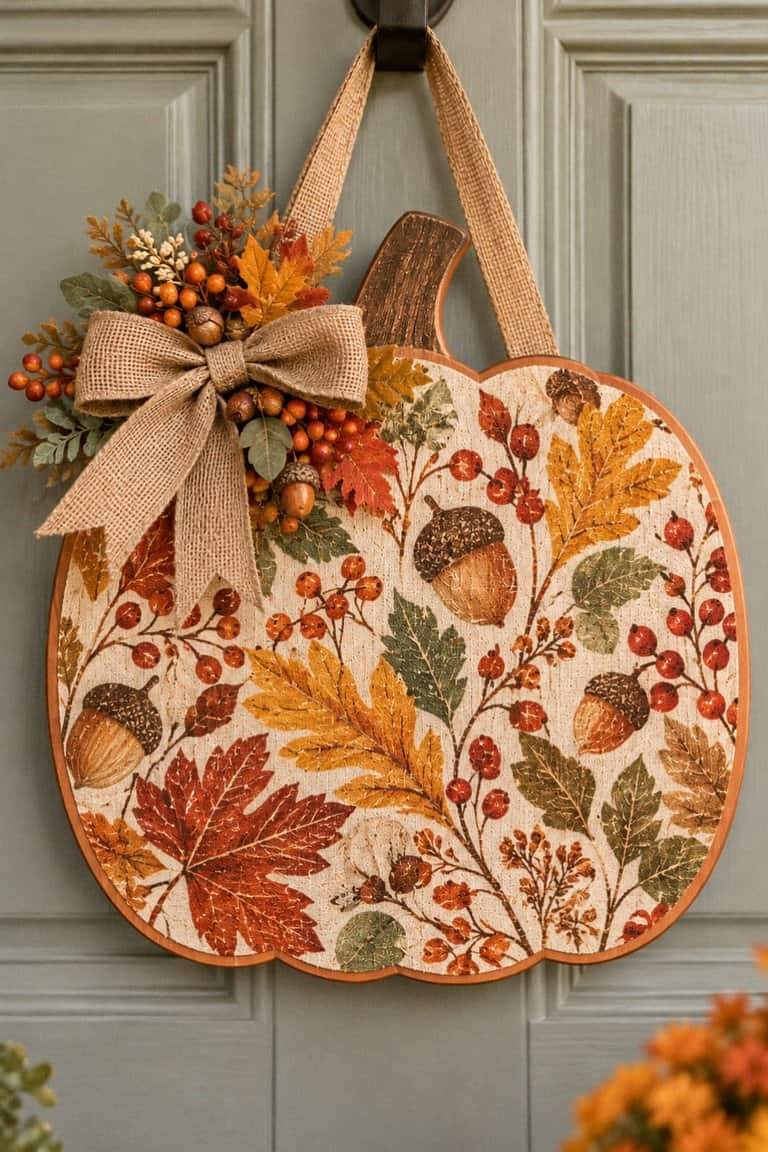
This is one of those fall crafts that looks way more complicated than it actually is!
And I love that you can customize it to match your front porch decor.
Start with a large flat wooden pumpkin cutout and some pretty autumn fabric.
Paint the sides and edges of the pumpkin in a coordinating color.
Once dry, trace the pumpkin onto your fabric and cut it to fit the front.
Apply Mod Podge to the wooden surface, press your fabric into place, and smooth away any bubbles.
After drying, trim the edges and add a protective outdoor-rated finish if the hanger will be exposed to the elements.
Attach a wide burlap ribbon or sturdy twine hanger to the back.
You can even add a little bow with faux fall greenery near the stem.
Hang it on a covered front door for an adorable handmade autumn welcome!
21. Vintage Fabric Decoupage Fall Memory Box
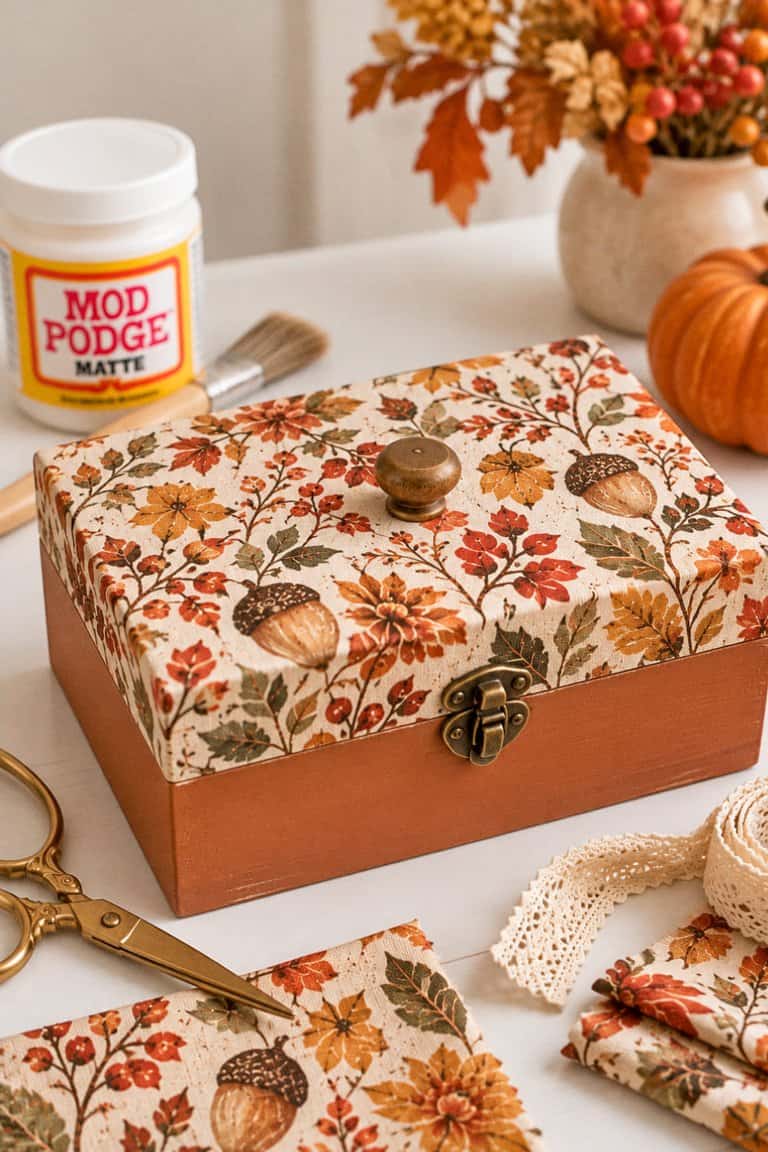
Okay, I saved one of my favorite ideas for last!
A little fabric-covered keepsake box would be such a sweet fall craft, and it could double as a homemade gift.
Find a small unfinished wooden box with a lid.
Choose a pretty vintage floral fabric, maybe something with muted orange roses, tiny leaves, or warm brown botanical prints.
Lightly sand the box and paint the sides in a coordinating color.
Measure the top of the lid, cut your fabric to fit, and brush Mod Podge onto the wood.
Press your fabric down carefully, smoothing out wrinkles as you go.
Let it dry, then seal the lid with another thin coat of Mod Podge.
You can even add a little wooden knob, lace trim, or ribbon for an extra feminine touch.
Use your finished box to store jewelry, little keepsakes, or those tiny things that always seem to get lost around the house!
Ready to Make Some Cozy Fall Crafts?
See? You don’t need to be a professional crafter or spend hundreds of dollars to create beautiful fall decorations!
Sometimes all it takes is a little fabric, a bottle of Mod Podge, and an afternoon when you feel like making something pretty.
I especially love projects like these because you can reuse supplies, give thrift-store finds a second life, and make decorations that actually feel personal to your home.
And don’t feel like you need to make all 21!
Start with a cute little pumpkin or a wooden sign, see how much fun fabric decoupage can be, and go from there.
Who knows? You might end up with an entire collection of handmade fall decor before the season is over!


Leave a Reply