When we moved into our first home, my MIL gave me a sewing machine as a housewarming gift.
At the time, I wasn’t interested in sewing—honestly, I wasn’t even sure I’d ever use it.
But a few years later, I’ve started to crave a break from the digital side of life.
Between freelance writing, editing, managing blog content, and answering emails, I needed something hands-on.
Something quiet. Something creative.
And sewing and knitting have filled that gap for me (Gardening too, when the weather cooperates!).
If you’re a mom blogger like me, you probably know what I mean.
Sometimes, you just need to step away from the screen and do something tangible, something that gives your brain a rest while still feeling productive.
They’re beginner-friendly, they don’t take much time or material, and they give you that sense of accomplishment we all need, especially on long days when nothing seems to go as planned.
The best part? You can turn some of these easy sewing projects into a small income stream.
So if your sewing machine has been collecting dust or you’ve been wanting to learn but didn’t know what to start with, I’ve got you.
These small sewing projects are simple, cute, and totally doable during naptime or after bedtime.
Plus, you can batch them out and even get ahead for the holidays.
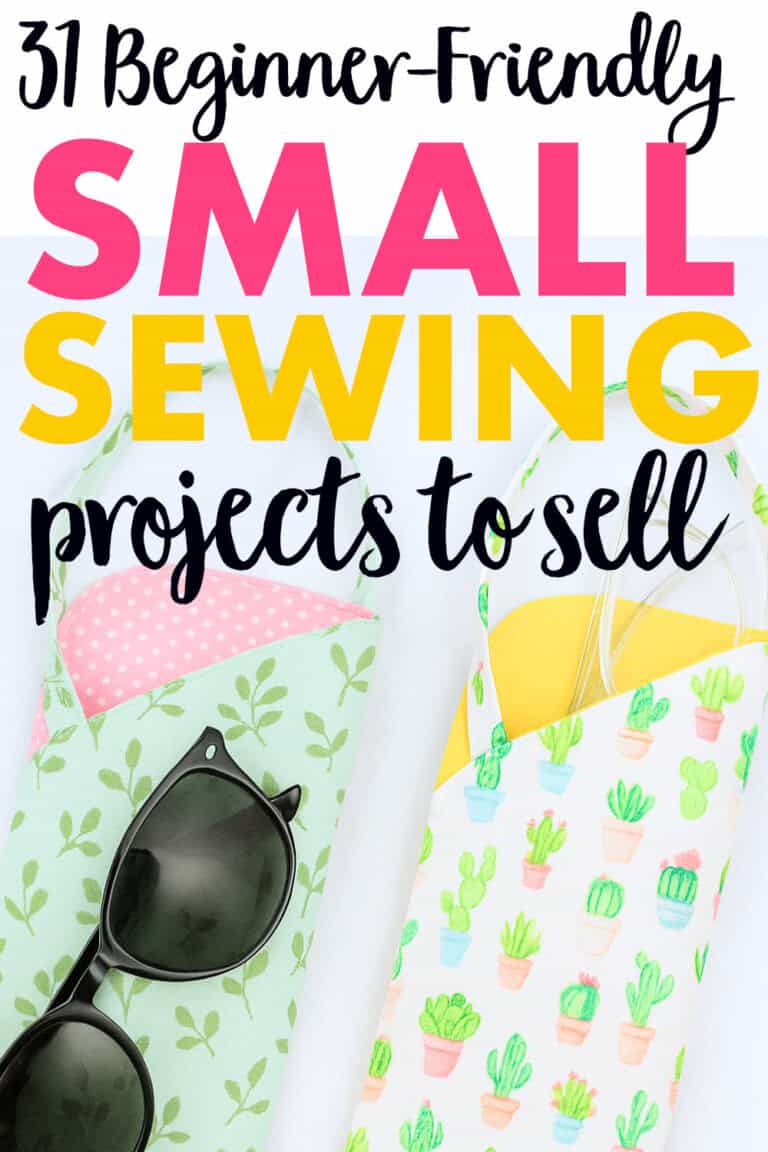
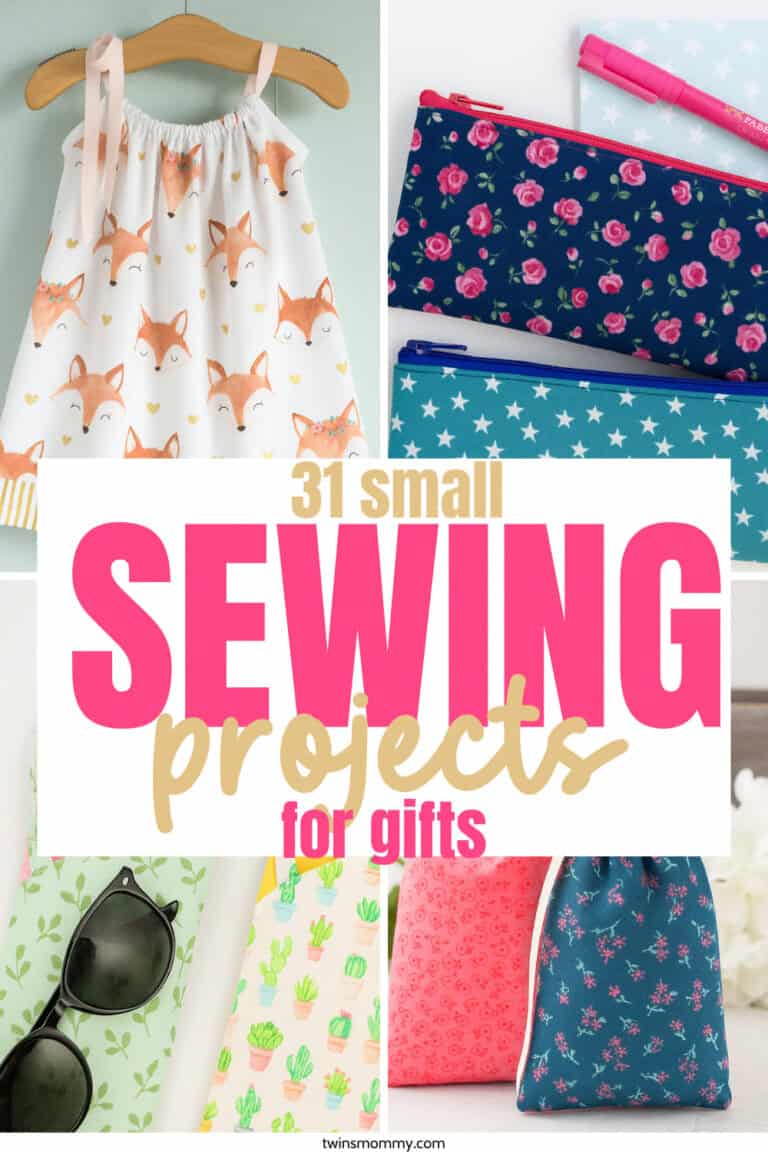
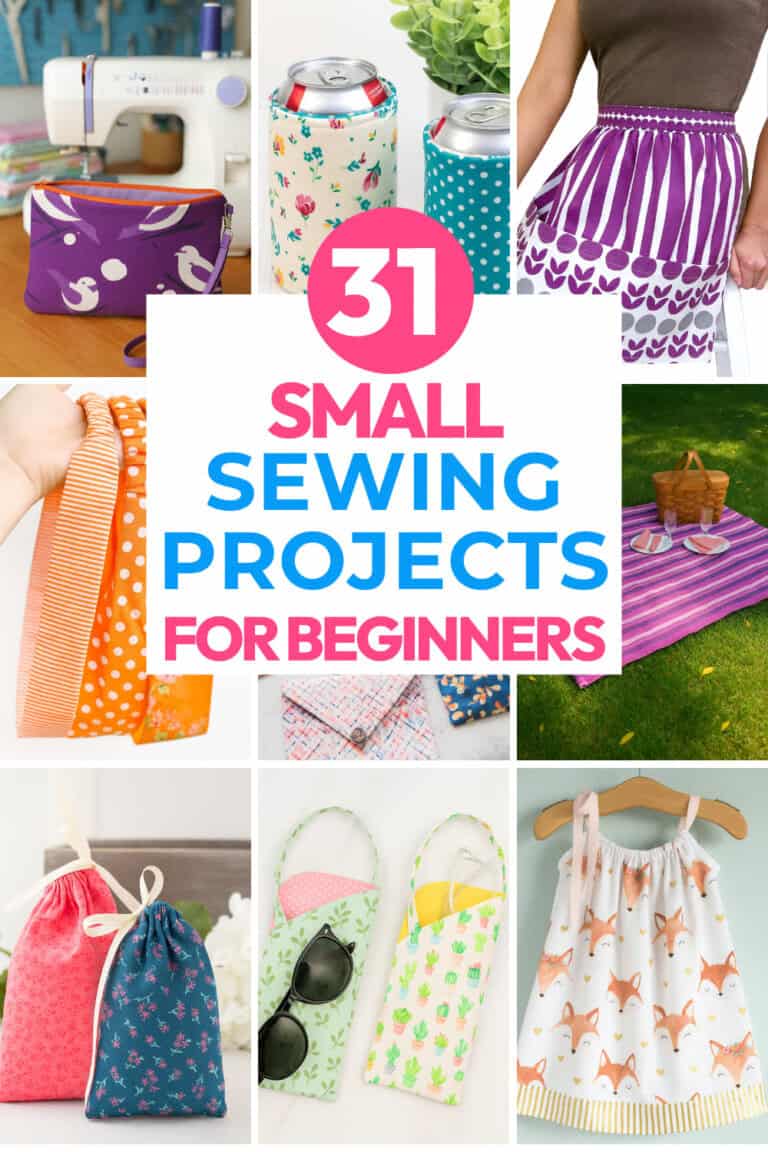
Easy Sewing Projects for Beginners
These small sewing projects are small in time or item! Find these easy sewing projects you can use at the end of the day to relax!
And….these can be a profitable on Etsy or on your blog.
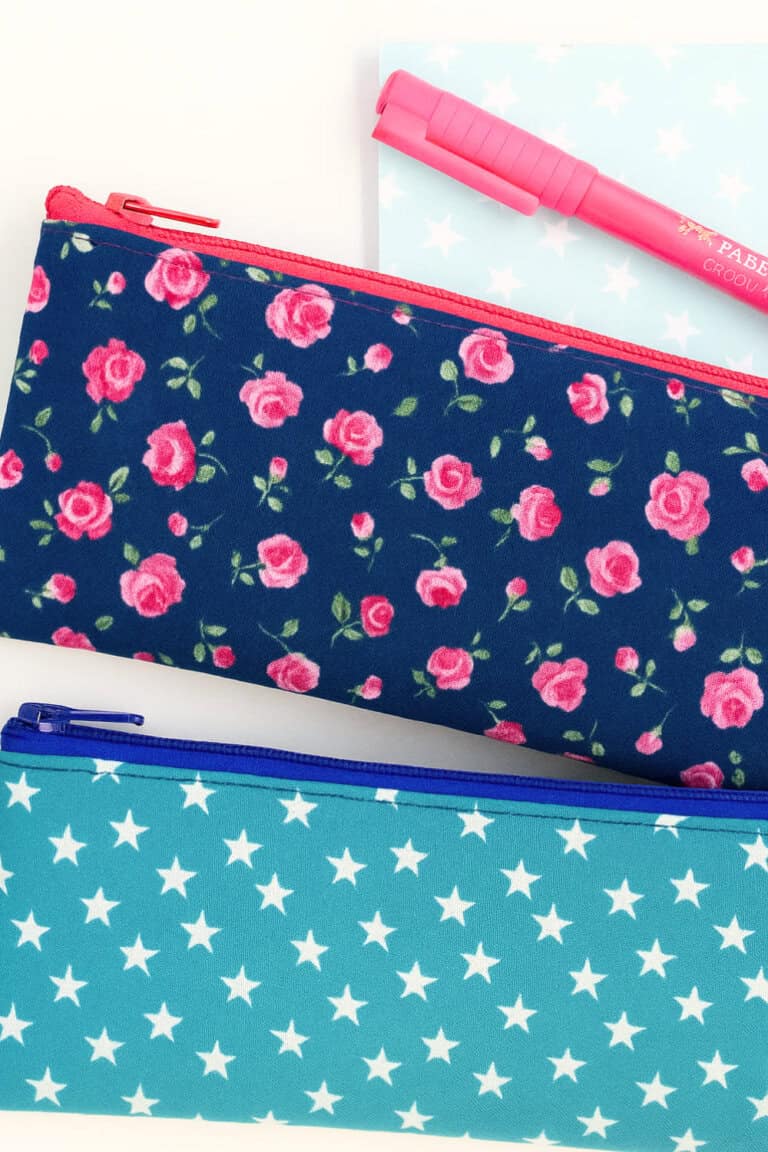
1. Zipper Pencil Pouch
Cut Your Fabric Cut one 7″ x 9″ piece of fabric and one small 3½” x 1½” piece for the pull tab. If your fabric frays, zigzag around the big piece first.
Sew the Zipper to One Side Lay the big piece right-side-up. Place the zipper face-down along the top edge. Clip and sew. Then flip it so the zipper is right-side-up.
Attach the Other Side of the Zipper Bring the other long edge of the fabric up to meet the zipper. Right sides should be together. Clip and sew again.
Unzip Halfway Before sewing the sides, unzip the pouch halfway. This makes it easier to turn later.
Make the Pull Tab (Optional) Fold the small piece like bias tape (edges in, then fold in half), and topstitch both sides. Fold it into a loop and tuck it into one side near the zipper.
Sew the Sides With the zipper centered on top, fold your case and pin the sides. Sew both edges shut. Make sure the zipper ends point inward so they don’t get caught.
Turn and You’re Done! Turn the pouch right-side-out through the zipper. Use a chopstick to poke out the corners. That’s it—your pencil case is ready!
2. Picnic Blanket
Choose Your Fabrics Pick which fabric you want as the top and which will be the bottom. Decide how big you want your blanket to be—ours is 47″ x 64″.
Cut the Layers Cut your bottom fabric and batting to the finished blanket size. Cut your top fabric a few inches larger on all sides (about 2¾” extra on each side) to create the border.
Stack the Pieces Lay your top fabric face-down. Then layer the batting, followed by the bottom fabric on top.
Make the Hem Run basting tape along the edges of the larger fabric. Fold it over to create a small hem.
Wrap the Edges Now fold that hem over the batting and smaller fabric to start forming the border.
Create Mitered Corners At each corner, fold the fabric neatly like a triangle and tuck it under so it forms a 90-degree angle. Pin it in place.
Stitch the Border Sew around the entire edge of the blanket, about ⅛” from the inside edge of the border.
Mark the Quilt Lines Find the center of each side and mark it. Use a ruler to connect the marks and draw a large diamond shape.
Quilt the Diamond Design Sew along the lines you drew. Then measure 6″ out from those lines and sew more diamonds inside and outside until you’re happy with the look.
Optional: Add Grommets If you want to stake your blanket down at the park or beach, add grommets in each corner.
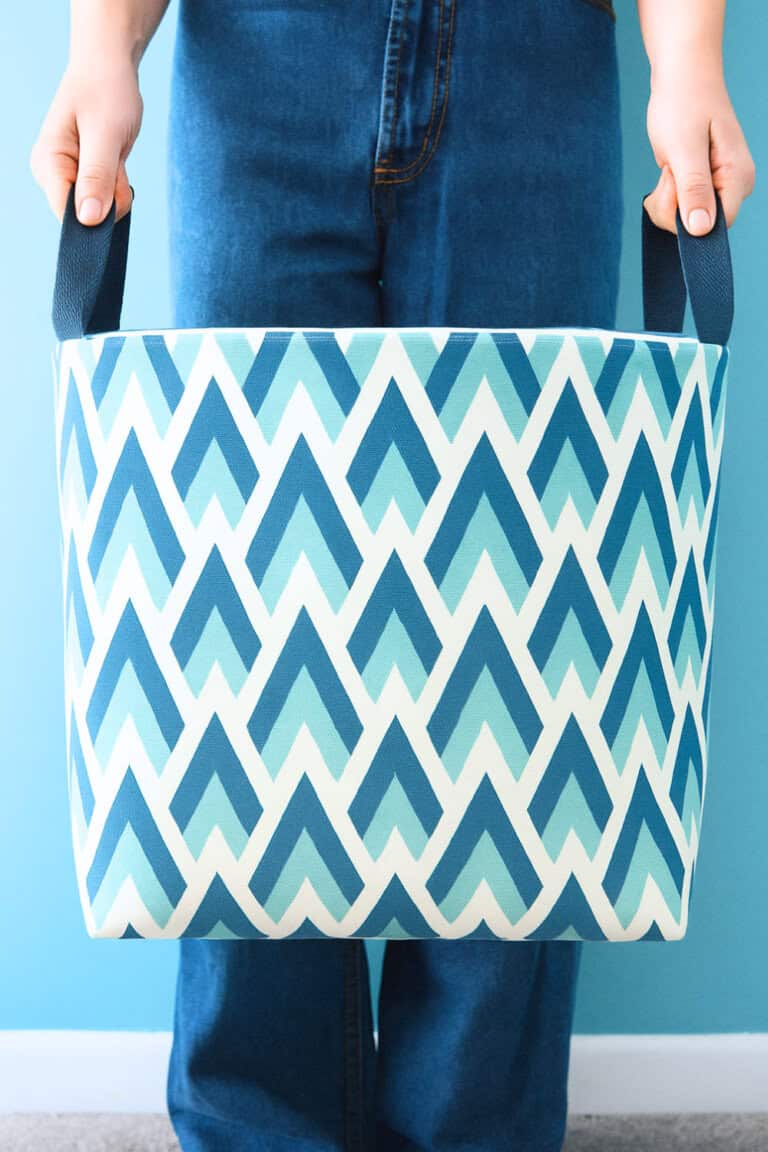
3. Fabric Basket
Cut Your Fabric Cut two 20” x 13.5” rectangles each of outer fabric, lining fabric, and interfacing. Cut two 9” pieces of cotton webbing for handles.
Attach Interfacing Iron the interfacing onto the wrong side of your outer fabric using a pressing cloth to protect your iron.
Sew the Outer Basket Place the two outer pieces right sides together. Sew the sides and bottom with a ½” seam. Press the seams open as best you can—it’s stiff with interfacing, but that’s okay.
Box the Corners Turn the piece so the open end is at the top. Pinch the bottom and side seams together to form a triangle at each corner. Measure and mark 7” across, then sew on that line. Trim off the extra fabric. Repeat for both corners.
Add the Handles Turn the basket right side out. Pin each handle end 2” away from the center seam. Sew in place ¼” from the top edge, stitching back and forth for strength.
Make the Lining Repeat steps 3–5 with the lining fabric but leave a 4–5” gap at the bottom for turning the basket later.
Join Lining and Basket Place the outer basket inside the lining (right sides together). Line up the edges and sew around the top with a ½” seam.
Turn It Right Side Out Pull the basket through the hole in the lining. Pin and stitch the opening closed.
Finish It Up Tuck the lining into the basket and press the top edge flat. And you’re done!
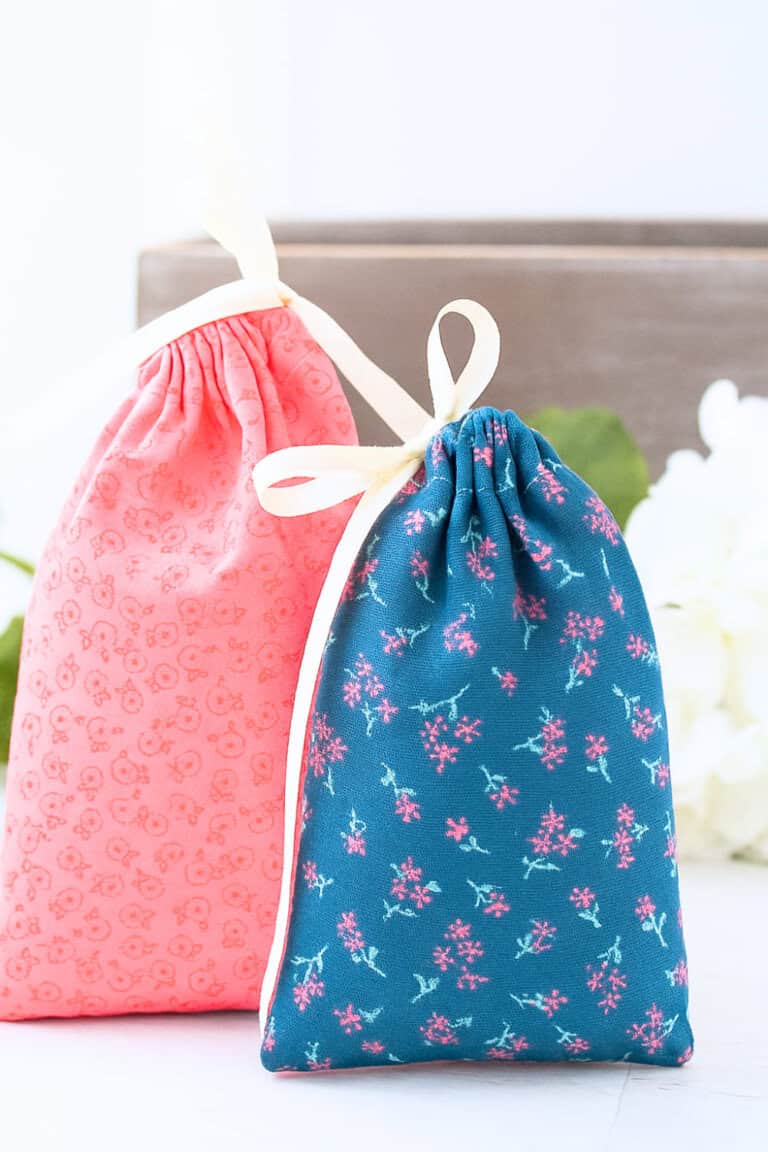
4. Fabric Gift Bags with Drawstring
Cut and Prep Your Fabric Grab one piece of cotton fabric—use a 7″ x 8″ cut for a small bag or 8″ x 10″ for a bigger one. I like using cute prints from Fat Quarter Shop because they always have fun seasonal options. Place the fabric wrong side up and fold the top edge down 1″. Press the fold with a hot iron to set a crease. This will become the ribbon casing.
Sew the Casing Stitch along that top fold using a ½″ seam allowance. This creates a clean channel for your ribbon later.
Fold and Stitch the Bag Together Fold the fabric in half right sides together, lining up the edges neatly. Start sewing just below the casing seam (so the ribbon channel stays open). Use a ¼″ seam allowance to sew down the side and then across the bottom.
Turn the Bag Right Side Out Flip your bag right side out and gently push out the corners with your fingers.
Thread the Ribbon Take a piece of ⅜″ satin ribbon—about 18–20 inches long—and attach a safety pin to one end. Thread it through the casing at the top of the bag, guiding it through with the pin until it comes out the other side. I usually grab ribbon variety packs on Amazon so I always have the perfect color for every bag!
Tie It Up Pull the ribbon tight and remove the safety pin. Fill your bag with something cute—candy, tiny gifts, anything!—and tie it off with a bow.
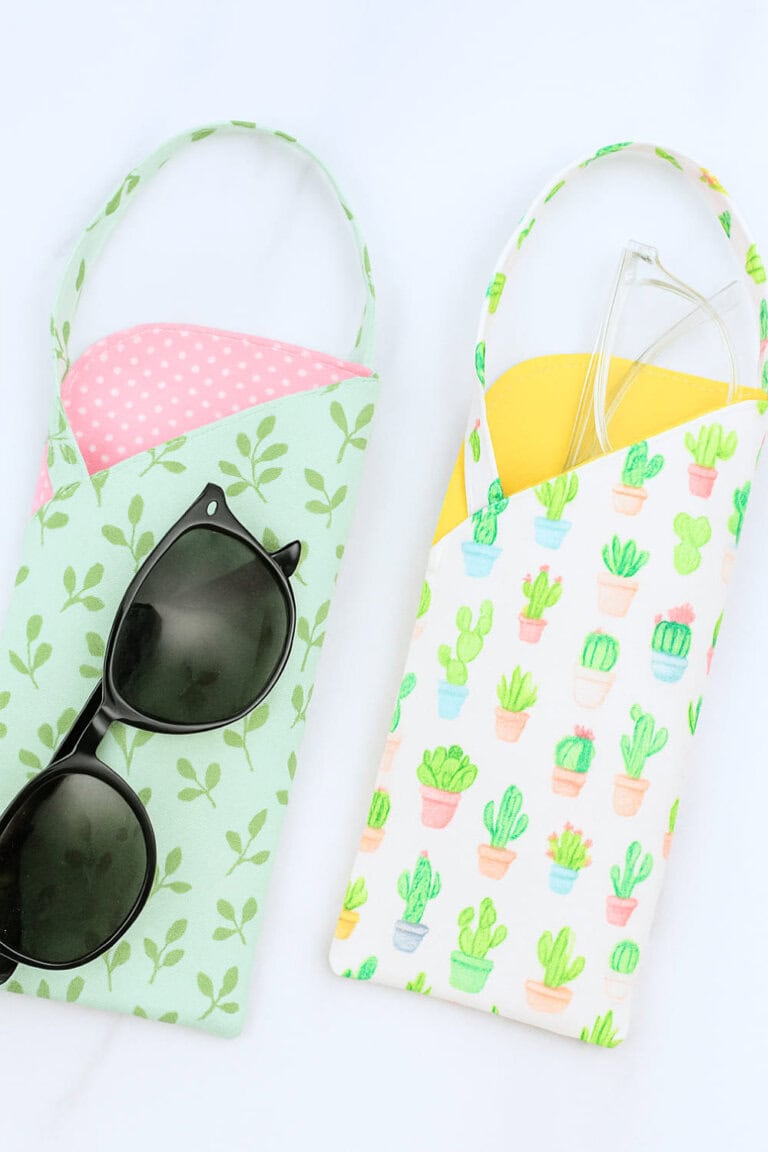
5. Sunglasses Case
Cut Your Fabric and Fleece For the outer layer, cut one piece of quilting cotton at 8¾″ x 8¼″ and another small piece for the handle at 1⅝″ x 8¾″. Cut your lining fabric (also quilting cotton) to 8¾″ x 8¼″. Then cut a piece of fusible fleece—like Pellon 987F or Vilene H630—to 8″ x 7½″. Trim the fleece to match your pattern shape.
Attach the Fleece Center the fusible fleece on the wrong side of your outer fabric piece and press to fuse. This gives your case a soft, padded feel. Next, trim the fabric around the fleece, leaving a ⅜” border all around.
Make the Handle Loop Take the 1⅝″ x 8¾″ fabric strip and fold it in half lengthwise wrong sides together to make a crease. Then fold each edge in toward the center and press again. Topstitch both long edges of the strip about ⅛″ from the edge to finish the handle.
Attach the Handle Place the handle on the outer fabric in your preferred position (about an inch below the top edge works well), and sew it down securely at both ends.
Sew Outer and Lining Together Place the outer piece and lining piece right sides together, with the handle tucked inside. Sew around all four edges with a ⅜″ seam allowance—but leave a 2″ gap on one side so you can turn it.
Turn and Press Clip the corners to reduce bulk, then turn your case right side out through the opening. Press all the edges flat and topstitch around the entire piece to close the gap and give it a clean finish.
Form the Case Shape Fold the whole piece in half with the lining on the inside, and sew down both sides to finish the pocket. Your sunglasses case is now ready to use!
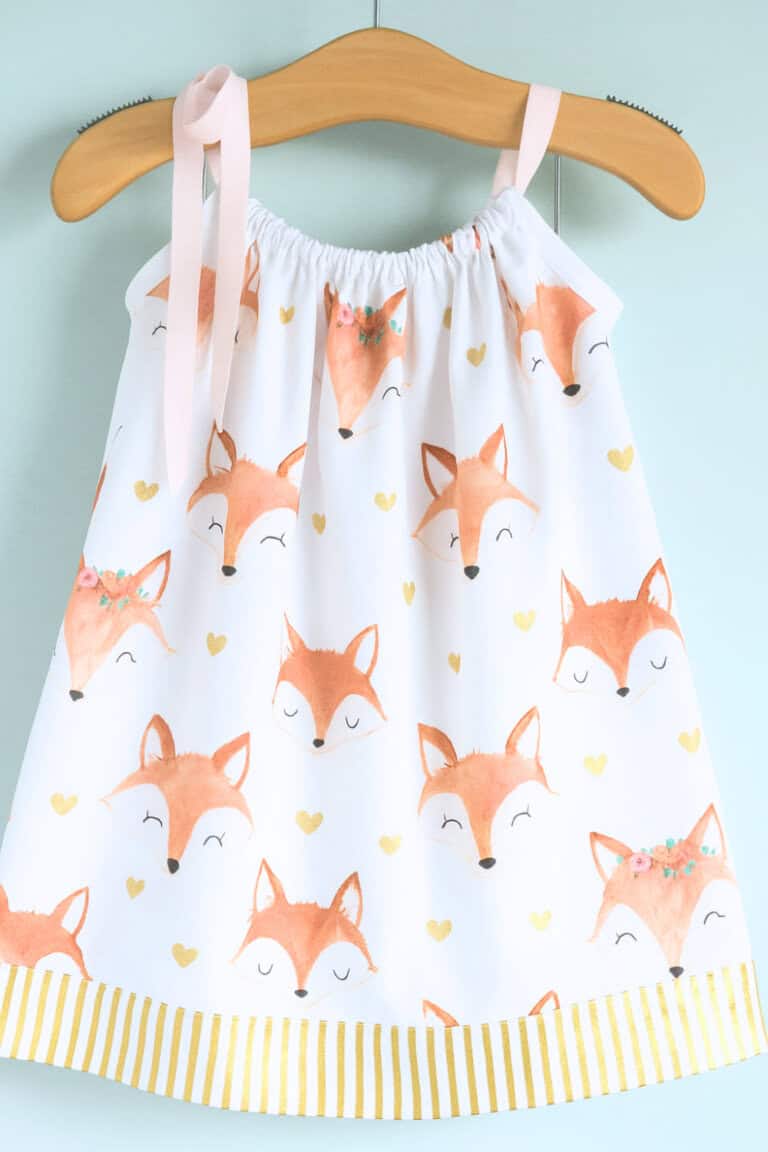
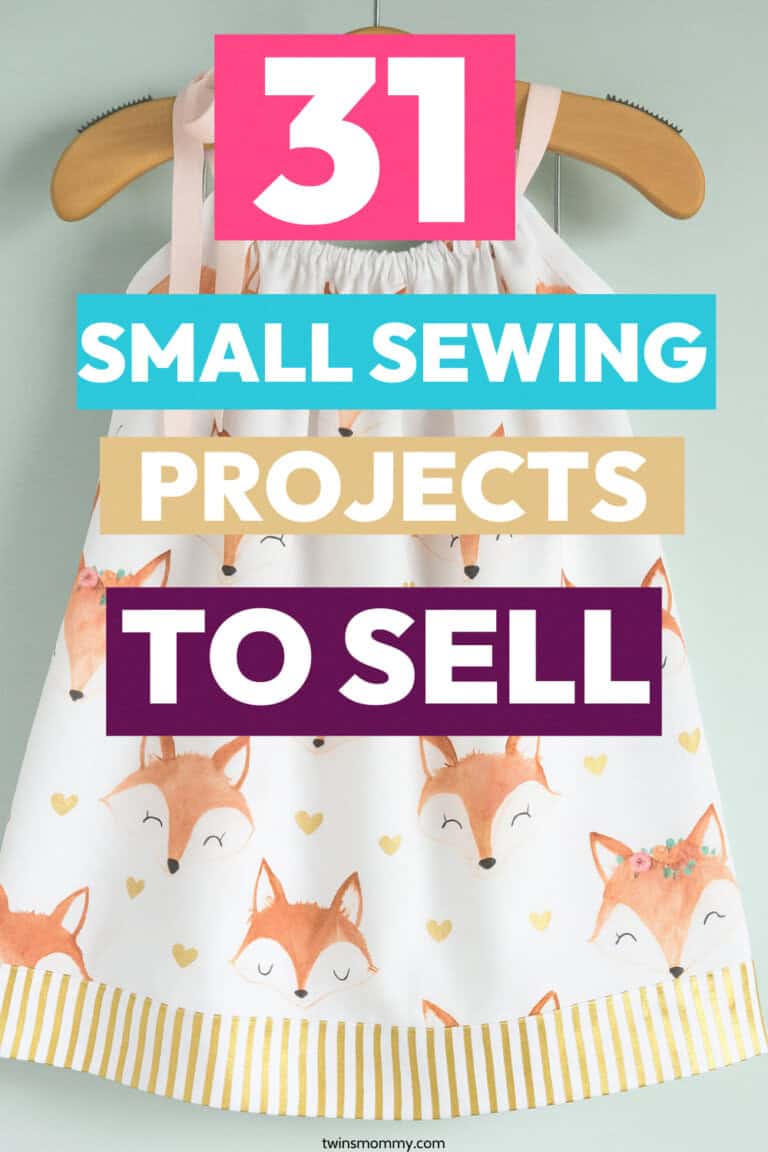
6. Girls Pillow Dress
Cut Your Fabric Pieces Grab ½ to 1 yard of cotton fabric (depending on your child’s size). Measure and cut two rectangles, each 21″ wide by the desired dress length. For the contrast band at the bottom, cut two pieces from ¼ yard of coordinating cotton fabric, also 21″ wide and about 2–3″ tall, depending on your style preference. This is a great way to use cute prints!
Cut the Armholes Along the short side (the 21″ width) of both dress pieces, measure 2″ in from the edge and 4″ down. Use something round—like a CD—to trace and cut a gentle J-shaped curve for the armhole. Fold the fabric in half and use the first cut as a guide to cut matching armholes on the other side.
Attach the Dress Band Place one band piece right sides together with the bottom of one dress piece. Sew with a ½” seam allowance. Repeat for the back. Then press the seam toward the band using your iron.
Sew the Dress Front and Back Together with French Seams Put the wrong sides of your dress pieces together and stitch along the side seams with a ½” seam allowance. Now trim that seam down to about ⅛” using scissors. Turn the dress inside out, press the seam, and sew again with a ¼” seam allowance to enclose the raw edges. This gives the inside a clean, finished look—no fraying!
Finish the Band Seam Take the raw edge of the dress band and fold it up ½” toward the wrong side, press, then fold it again so it lines up neatly with the dress-band seam. Pin in place, then topstitch just above the seam on the right side of the dress. If you have a walking foot or Dual Feed foot, it helps keep layers from shifting while you sew.
Finish the Armholes with Bias Tape Take a package of double-fold bias tape (I used extra wide because it’s what I had, but any width works). Unfold it and pin it along the raw edge of each armhole, matching the raw edge of the tape with the armhole edge. Stitch along the first fold, then fold the bias tape back over to the inside of the dress and stitch again along the fold, catching all layers. Press well with your iron.
Create the Ribbon Casing at the Top At the top edge of the dress, fold the raw edge under ¼” and press. Then fold again ¾” down and press to make the casing. Stitch along the lower edge of the fold to create a tunnel for the ribbon.
Add the Ribbon Ties Cut 2 yards of ½” satin ribbon (you can always trim excess later). Attach a safety pin to one end and guide it through the casing, starting at one armhole and coming out the other side. Pull the ribbon to gather the top, and adjust as needed. Trim the ends of the ribbon and dab on Fray Check to keep them from unraveling.
Secure the Ribbon (Optional but Recommended) To keep the ribbon from pulling out (especially for toddlers), stitch a small line through the casing at the center back to anchor it in place.
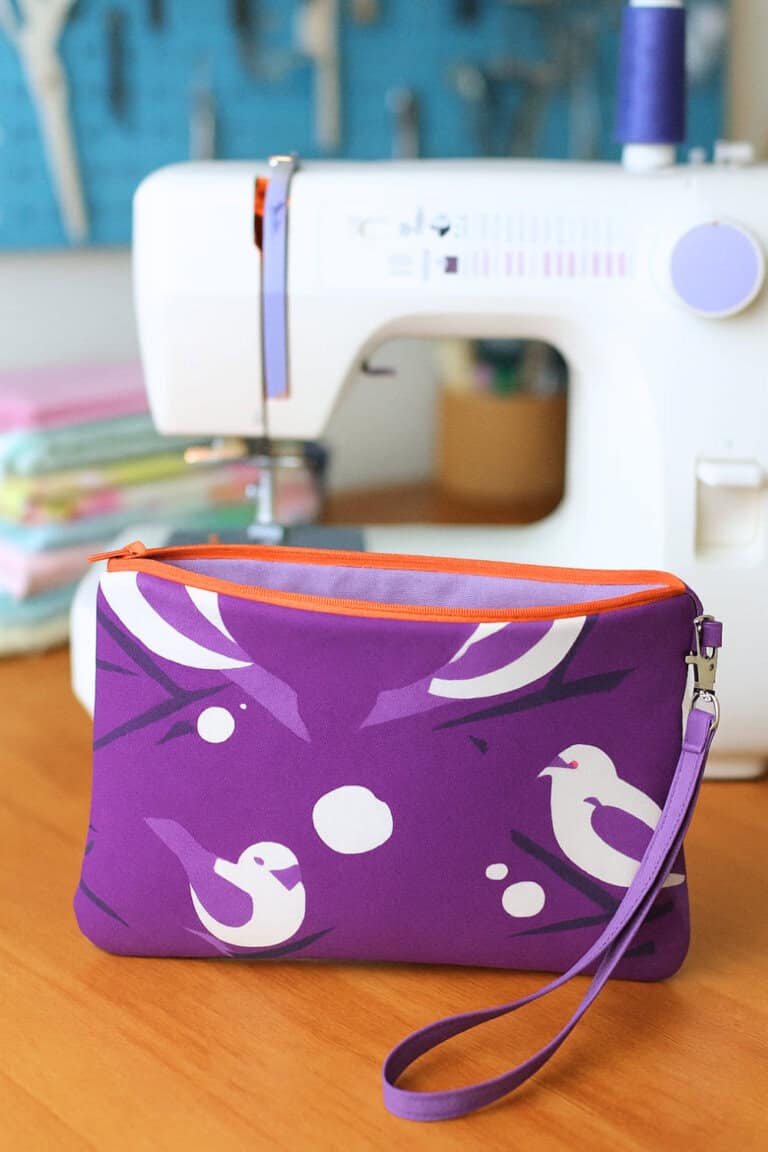
7. Wristlet Purse
Cut Your Fabric and Interfacing Start with ¼ yard of cotton fabric—or a fat quarter works perfectly. Cut two rectangles measuring 6″ x 10″ for the outside of your wristlet. Round the bottom corners of both pieces. Repeat the same with your lining fabric, cutting two more 6″ x 10″ pieces and rounding the corners to match. For structure, cut fusible fleece interfacing into two rectangles measuring 5.75″ x 9.75″ (just a bit smaller than the outer fabric). Fuse each piece to the wrong side of your outer fabric using your iron.
Prepare the Wristlet Strap and Pull Tab From the same fabric, cut one long strip 1.5″ x 14″. Fold it in half lengthwise, press, then fold the edges into the center and press again (like bias tape). Topstitch down both sides. Cut 2″ off the end of this strip for your zipper pull, and set the remaining 12″ piece aside for your wrist strap.
Sew in the Zipper Grab a 9″ zipper. With your outer fabric right-side up, place the zipper right-side down along the top edge. Pin and sew it in place, leaving about ½” free at each end. Repeat with the second outer fabric piece and the other side of the zipper. You should now have both outer pieces attached to the zipper. Take that 2″ pull tab, fold it, and sew it to the open end of the zipper, just underneath.
Sew the Outer Pieces Together Fold your wristlet so the outer fabric pieces are right sides together. Make sure the zipper is halfway open (this is important!). Pin around the edges and sew with a ¼” seam, going all around the sides and rounded bottom.
Sew the Lining Line up your two lining fabric pieces, right sides together. Sew the sides and bottom the same way, but leave a 2–3″ opening at the bottom so you can turn everything right-side out later.
Join the Lining to the Outer Purse Now sandwich the wristlet inside the lining (right sides together), and pin the top edge of the lining to the zipper tape. Sew around the top to attach the lining. Repeat this for both sides of the zipper.
Turn and Finish Carefully pull the wristlet through the opening in the lining. Push out the corners, then stitch the lining opening closed by hand or machine. Tuck the lining inside and give everything a good press with your iron.
Attach the Wrist Strap Take the 12″ fabric strip you made earlier and thread it through a nickel lobster claw. Fold the strap in half, sew the raw ends together, and you’re done!
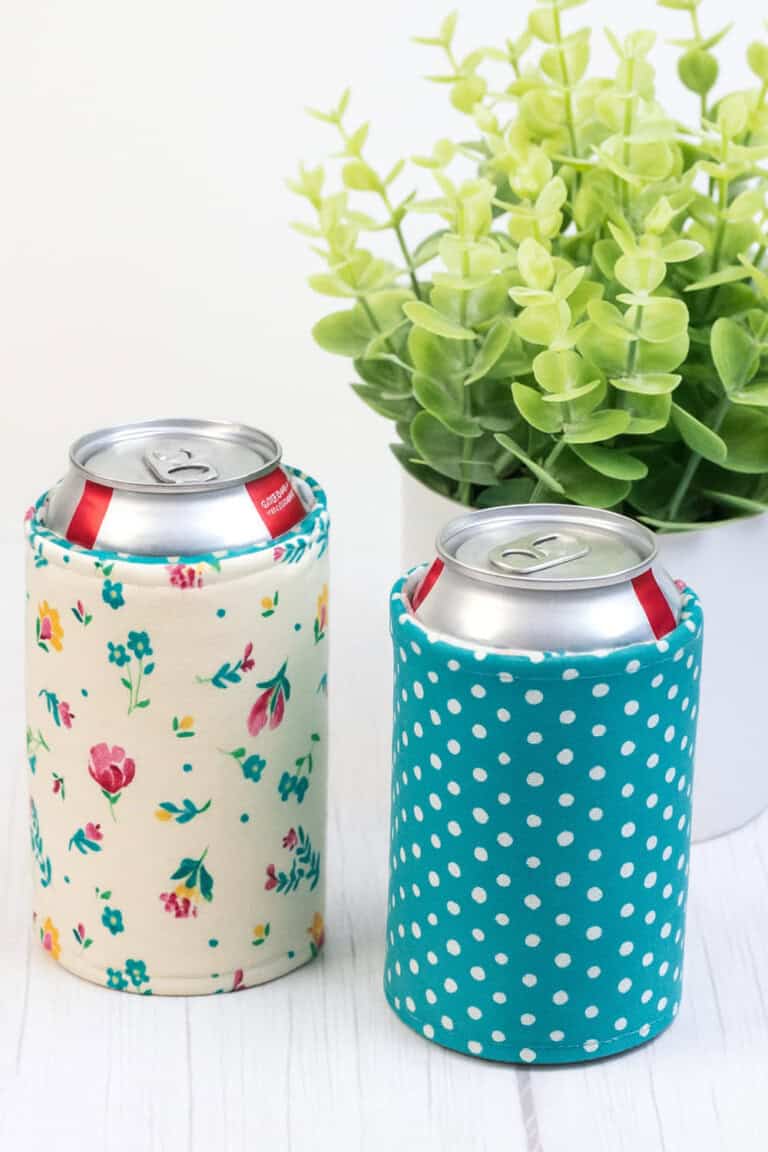
8. Fabric Beverage Holder (Koozie)
Cut Your Materials Start by cutting all your materials into 11” x 5” rectangles:
One piece of cotton fabric for the outside
One piece of cotton fabric for the lining
One piece of Insul-Brite (for insulation)
One piece of medium-weight fusible interfacing (to give it structure)
Attach the Interfacing Using a warm iron, fuse the interfacing to the wrong side of both your cotton fabric pieces—the outer and the lining.
Layer Your Pieces Lay your materials in this order:
Outer cotton fabric right side up
Lining cotton fabric right side down (so right sides are together)
Insul-Brite on top of that Pin or clip everything in place so the layers don’t shift.
Sew Around the Koozie Using ¼” seam allowance, sew around all sides—but leave a 3–4″ opening on one short side so you can turn it later.
Trim and Turn Clip the corners and trim about ⅛” off the seam allowance around the whole edge (except at the opening). Use a turning tool or chopstick to turn the koozie right side out through the gap.
Press and Topstitch Use your iron to press the seams flat. Make sure the raw edges at the opening are tucked in neatly. Then, topstitch around all four sides using a ¼” seam allowance—this gives it a nice finish and closes the turning hole.
Add the Velcro Take your 1–2″ set of Velcro.
With the outer fabric facing up, place the hook (scratchy) piece on the left edge.
Flip the koozie over so the lining is facing up, and place the loop (soft) piece on the right edge. Stick them down first (most Velcro has adhesive backing), then sew around all four sides of each Velcro piece using a ¼” seam.
Wrap It Up! Now your koozie is ready to use! Just wrap it around your favorite cold drink, secure the Velcro, and enjoy. It keeps your hands comfy and your drink chill—and looks way cuter than store-bought ones!
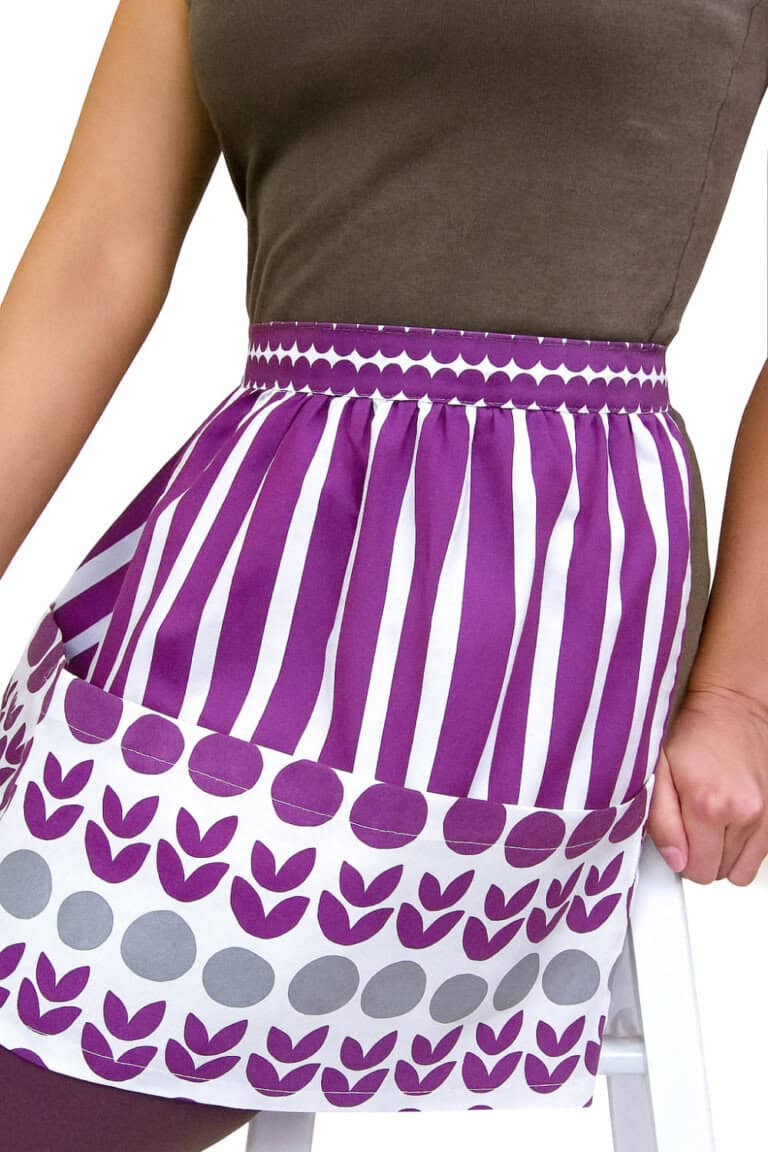
9. Simple Half Apron
Step 1: Prep & Cut Your Fabric
Start by prewashing 1 yard of lightweight cotton twill (about 58″ wide) to soften it and remove any shrinkage. You’ll also need 1 yard of coordinating cotton fabric for the pocket.
Trim off the white selvedge edges and then cut your pieces:
From the main twill fabric (the body of the apron), cut one piece 19″ x 31″
From the pocket fabric, cut one piece 10.5″ x 31″
For the waistband and ties (cut from your main fabric), cut two pieces 31″ x 4″ and one piece 19″ x 4″
Grab your other sewing supplies too:
Matching thread
Pins or sewing clips
Fabric scissors or rotary blade
Cutting mat + clear ruler
Disappearing ink sewing marker
Seam gauge
Iron
Step 2: Hem the Apron Body
Take your 19″ x 31″ apron panel and hem the two short sides and the bottom:
Use your seam gauge to measure ½”, fold the edge over, then fold again another ½” to make a clean double hem.
Press with your iron and pin in place.
Sew along the folded edges using your sewing machine and matching thread. This gives the apron a clean, sturdy edge.
Step 3: Make & Attach the Pocket
Grab your 10.5″ x 31″ pocket fabric and fold the top edge down ½”, then fold again another ½” to make a 1″ double hem. Press and pin, then edge-stitch along the top fold.
Align the bottom of the pocket panel with the bottom edge of your apron panel (right sides up), and sew across the bottom with a ½″ seam allowance. Press the seam upward.
Now fold the pocket up, align the sides, and sew up both sides to attach it fully to the apron body.
Step 4: Create Pocket Dividers
Using a disappearing ink fabric marker and your clear ruler, draw two vertical lines on the pocket: one 9″ in from the left, and another 9″ in from the right.
Sew along each line with a straight stitch, using a lock stitch or backstitch at the top and bottom. You now have three roomy pockets—perfect for wooden spoons, notepads, or even clothespins.
Step 5: Gather the Top of the Apron
Using your sewing machine, stitch two rows of basting stitches (long stitch length) across the top edge of your apron panel—both rows should fall within the top ½” of the fabric.
Leave long thread tails and gather the fabric until the top edge measures exactly 18″. Spread the gathers evenly. Set aside.
Step 6: Make the Waistband and Ties
Take your three waistband/tie pieces (31″ x 4″ and 19″ x 4″) and sew them together at the short ends using a ½″ seam allowance to create one long 4″ x 79″ strip. Press those seams open.
Fold the long strip right sides together lengthwise (so now it’s 2″ x 79″) and pin from the outer ends toward the center, leaving the middle 18″ section unpinned for now.
Sew both ends of the strip to form the ties—start at the center seam, stitch toward the end, pivot at the corner, and sew across the end. Use scissors or a chopstick to help turn the ties right side out through the open center.
Fold under the raw edges of the center opening by ¼”, press, and set aside.
Step 7: Attach the Apron to the Waistband
Take your gathered apron panel and slip the top gathered edge into the center opening of the waistband—right sides facing. Adjust the gathers if needed so it fits perfectly inside the 18″ opening.
Pin in place, then topstitch along the full length of the waistband close to the folded edge, enclosing the gathers and securing everything together.
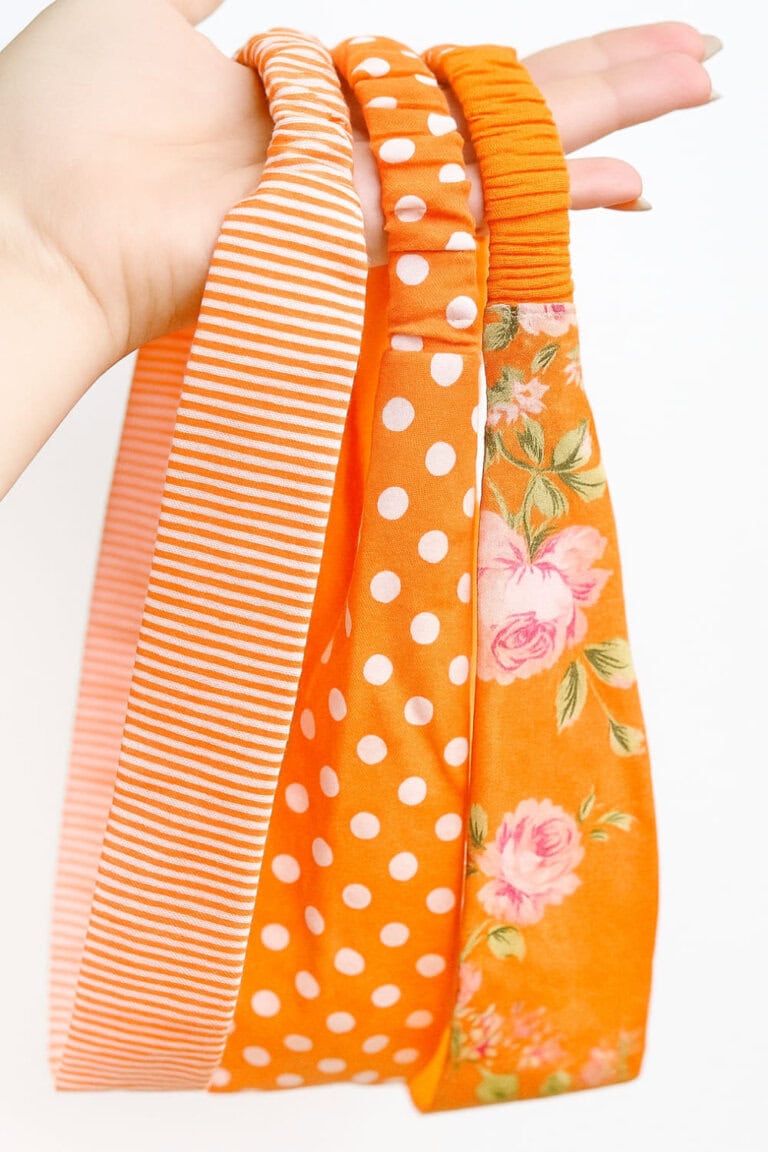
10. Cute Fabric Headband
Cut your fabric and elastic Cut a piece of cotton fabric to 5″ x 18″ for the main band and another piece to 2″ x 10″ for the elastic casing. Then cut a 5″ piece of ½” wide elastic.
Make two fabric tubes Fold both fabric pieces lengthwise with right sides together. Pin the edges to keep them aligned. Sew along the long edges—use a ¼” seam allowance for the larger piece and a ⅛” seam for the smaller one—to form tubes.
Turn and press Turn both tubes right side out. Use a loop turner or a safety pin for the smaller tube if it’s too narrow to flip by hand. Center the seams and press both tubes flat with an iron.
Insert the elastic into the small tube Attach a safety pin to one end of your 5″ elastic and slide it into the small tube. Stop when the first end of the elastic lines up with the fabric opening and pin in place. Continue pulling the rest of the elastic through, then pin the second end. Sew across both ends to secure the elastic inside the tube.
Attach elastic piece to the main band Lay the large tube seam-side down. Place one end of the elastic tube inside one end of the large band, with right sides together and elastic seam facing up. Fold the large tube’s edge around the elastic and pin. Repeat on the other side, making sure both folds match.
Sew and finish Sew across both ends of the band using a ¼” seam allowance. Gently tug the ends to pull the seams inside and twist the band so the seam sits on the inside.
Cute Small Sewing Projects
If you’re anything like me, sometimes you just need a quick win, something cute, simple, and satisfying to sew.
It just gives me a boost of confidence when I finish a project!
These small sewing projects are perfect when you want to make something useful without committing to a whole afternoon.
They’re beginner-friendly, fun to customize, and great for gifting or even selling.
11. Beginner-Friendly Scrunchie
12. Easy Reusable Sandwich Bag
13. 15-Minute Pillowcase
14. Sellable Fabric Bookmark
15. 10-Minute Fabric Coaster
16. Simple Potholders
17. Infinity Scarf
18. Easy Beanie Hat
19. Cloth Napkins
20. Superhero Cape
Quick Small Sewing Projects
Need a creative break but don’t have a lot of time?
These quick small sewing projects are perfect for using up fabric scraps and finishing in under an hour.
They’re cute, practical, and totally doable—even during nap time or a quiet evening.
21. Tote Bag
22. Reversible Placemats
23. Envelope Pillow Case
24. Drawstring Backpack
25. Easy Pincushion
26. Cute Coin Purse
27. Baby Bibs
28. Knotted Hairties
29. Chapstick Holders
30. Ipad Case
31. Book Bag
Small Sewing Projects Can Lead to Big Profits
I hope you found this list of easy beginner-friendly sewing projects helpful! These are fun to do on a break and can help you make more money as a mommy blogger!
Please pin this to help others learn about these creations!


Leave a Reply