Every year when Valentine’s Day starts creeping up, I get excited to add a little handmade touch to our home.
I’ve learned that the crafts I love most aren’t complicated or expensive, but the ones that feel personal and cozy once they’re finished.

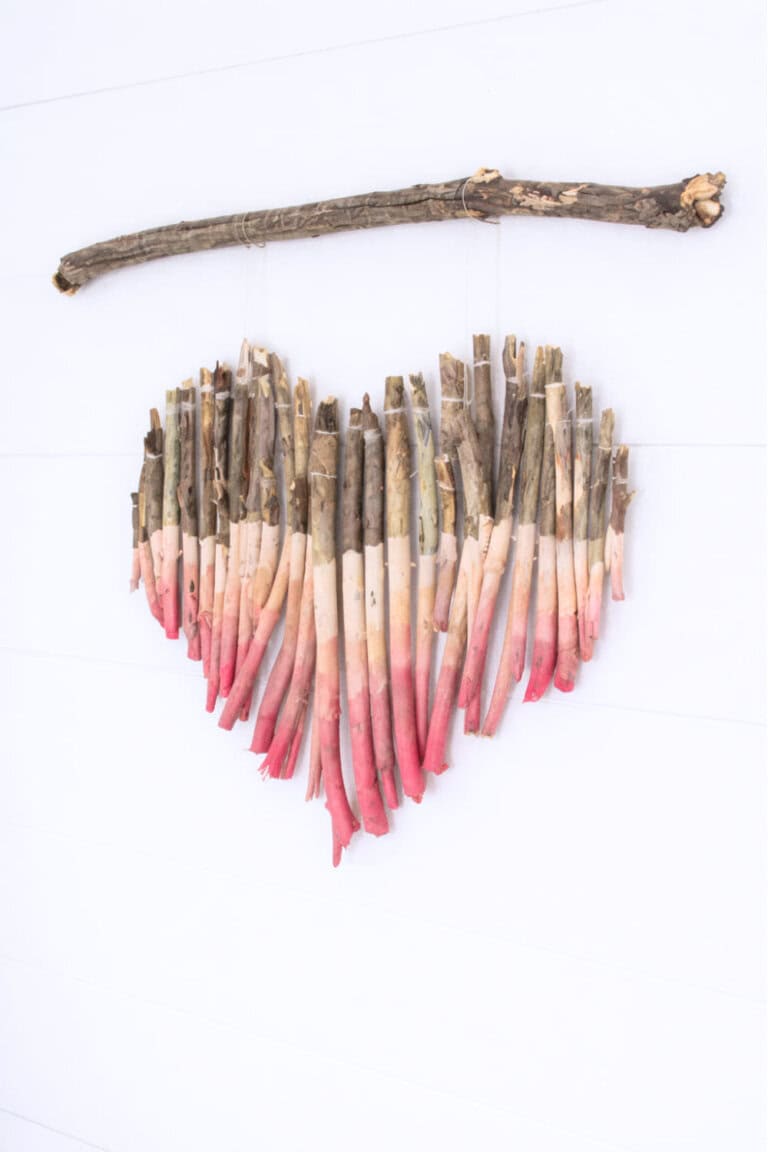
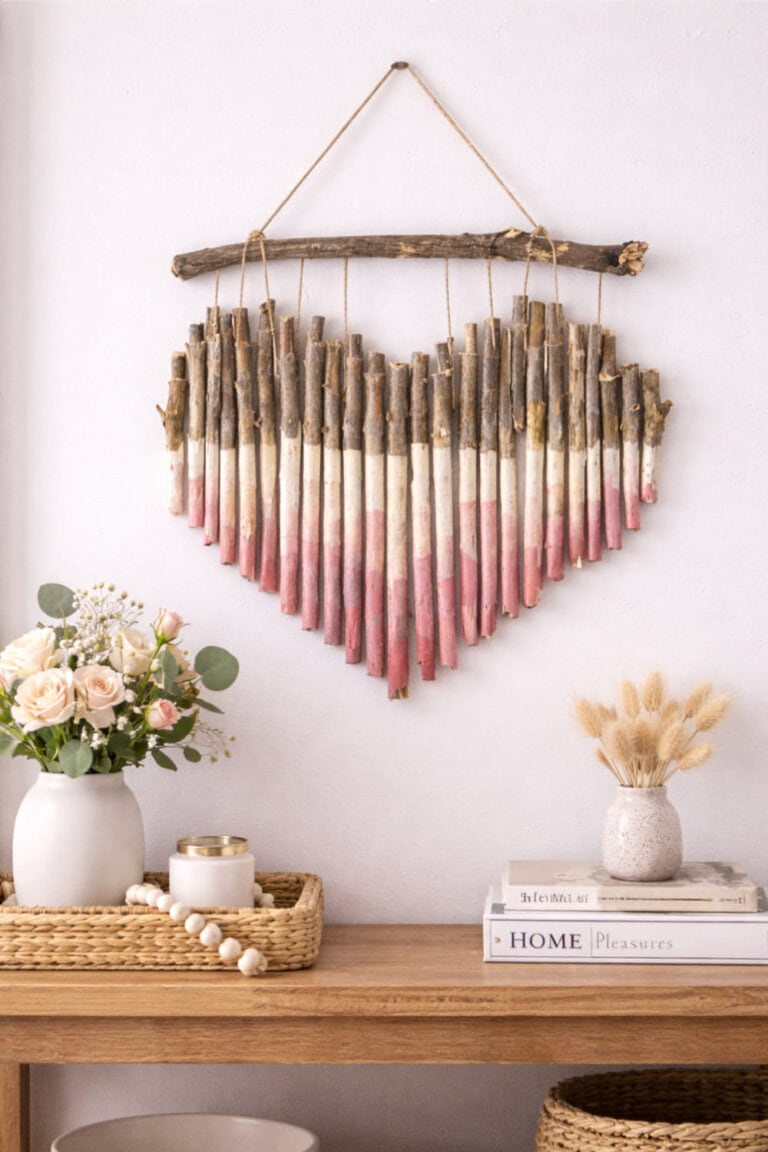
That’s exactly why I can’t wait to make this branch heart wall art hanging for my Valentine day craft.
It’s simple, natural, and has that soft Valentine’s feel without being overly themed or bright red everywhere.
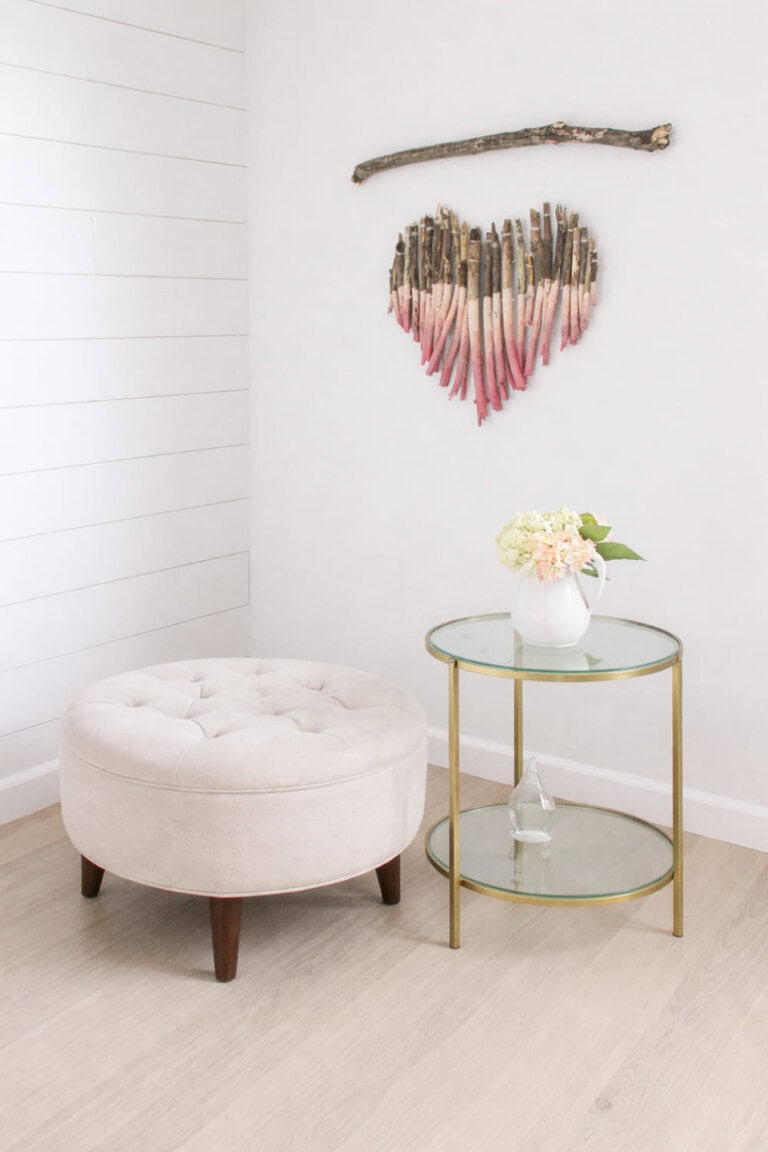
And, it’s chic and pretty enough that you can have it on your wall year round!
I love that this project uses branches, because it gives the whole piece a warm, collected look, like something you’d stumble across at a small market or see hanging in a cozy cottage.
It feels intentional but still relaxed, which is usually my goal when I decorate for holidays.
I can already picture it hanging on the wall, adding just enough charm without taking over the space.
This is also one of those Valentine’s crafts I know I’ll actually enjoy making, not rush through just to get it done.
It’s the kind of project that lets you slow down a bit, work with your hands, and create something meaningful that isn’t tied to a single day.
I have a feeling this branch heart will stay up long after Valentine’s Day is over, simply because it feels like home.
Easy Tutorial on How to Make a Branch Heart Wall Art Hanging
To make this wall art, you really don’t need anything fancy, which is part of why I love it so much.
Most of the materials are easy to find, and you might already have a few of them at home.
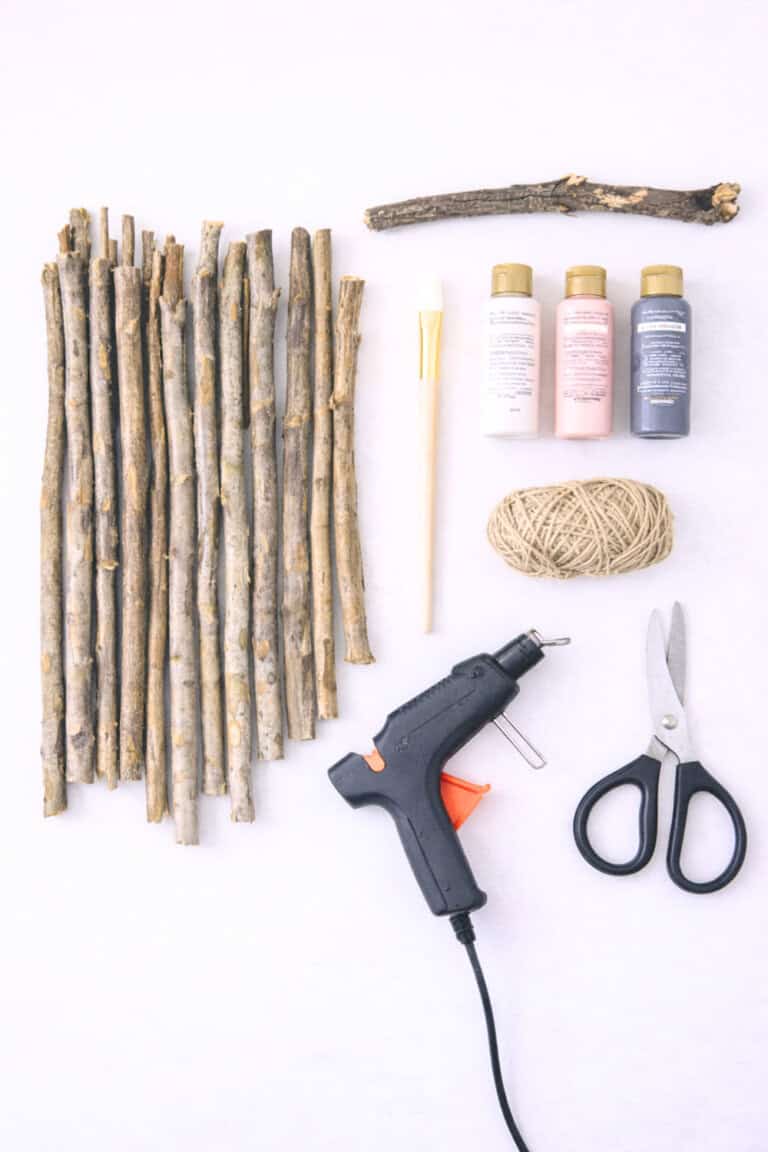
First, you’ll need a collection of twigs.
Try to gather twigs in different lengths and thicknesses so the heart shape looks organic instead of perfectly uniform.
You’ll also want one sturdy branch that’s a little longer than the finished heart. This will act as the top piece that everything hangs from.
For the color, grab a few acrylic paints.
A soft white or cream works well for the base, and then a couple of pink shades help create that gentle ombré effect at the bottom of the twigs.
A simple paintbrush is all you need to apply the paint—nothing detailed or precise.
To hang everything together, natural jute twine is ideal.
It adds to the rustic look and is strong enough to hold the twigs without feeling bulky.
You’ll use this to tie each twig and attach them to the branch.
Scissors are a must for trimming the twine, and pruning shears or strong scissors help cut the twigs to the right lengths.
Finally, a hot glue gun comes in handy for securing knots or keeping things from shifting once you’re happy with the layout.
It’s optional, but it definitely makes the whole piece feel more secure.
That’s it.
A handful of natural materials, a little paint, and some twine come together to create a wall piece that feels cozy, handmade, and really thoughtful.
Step By Step Branch Heart Wall Hanging Tutorial
1. Cute + Sort Twigs
This step is all about cutting and organizing your twigs so the heart shape comes together easily later.
Start by trimming your twigs into different lengths, keeping a few longer pieces for the center of the heart and shorter ones for the outer edges. As you cut, lay them out in size groups on a flat surface so you can clearly see what you have to work with.
Aim for clean, straight cuts and do a quick visual check by lining a few pieces up in a gentle curve. Having your twigs sorted now makes the rest of the project feel simple instead of frustrating.
2. Arrange the Heart Shape
Place the twigs on your work surface in a loose heart shape, with the longest pieces forming the bottom point and the shorter ones curving up the sides.
Adjust spacing until the shape feels natural and even. This is your chance to fine-tune the design before anything is tied or glued.
3. Paint the Twigs
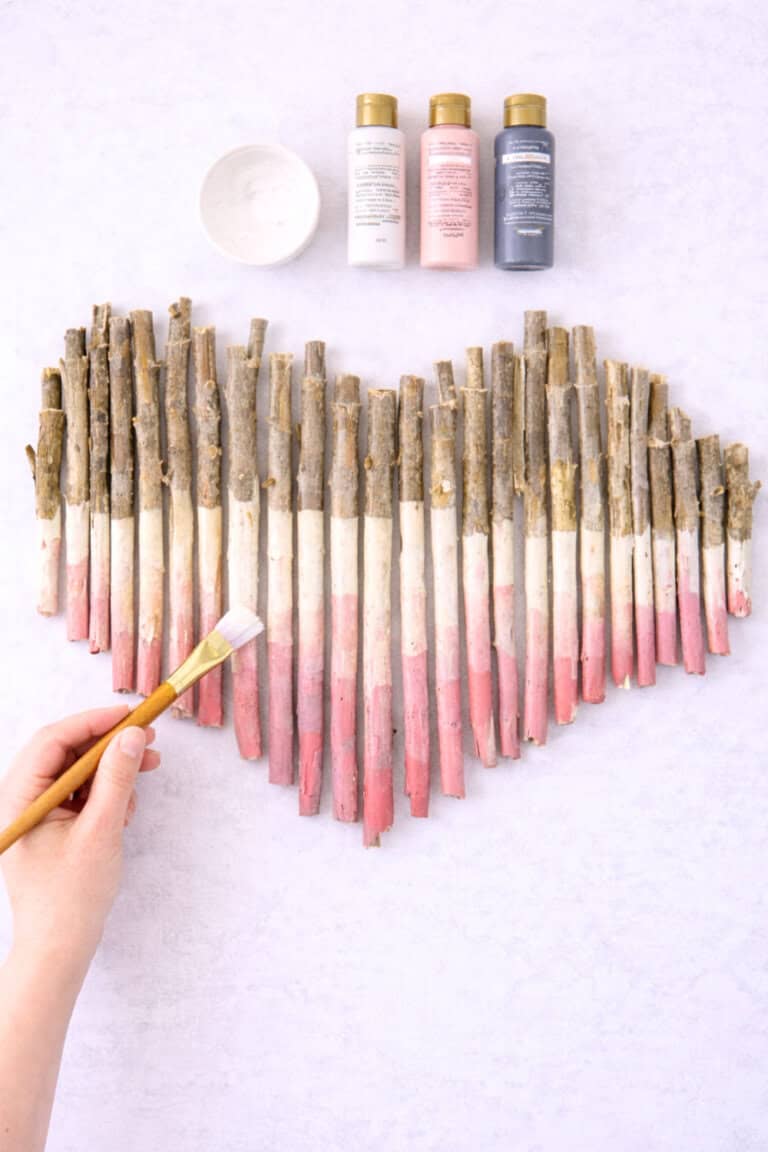
Paint the bottom portion of each twig using a soft ombré effect, starting with white and blending into light and deeper pink shades.
You don’t need perfect lines—slight variations add to the handmade look. Set the twigs aside and let them dry completely before moving on.
4. Attach the Twine
Cut pieces of jute twine and tie a loop at the top of each twig, keeping the knot placement consistent so the twigs hang evenly. This step takes a little patience, but neat, even loops make a big difference in the final look.
5. Secure Twigs to the Branch
Lay the branch flat and attach each twig by looping or tying the twine onto the branch, following your heart layout.
Adjust the spacing as you go to maintain the shape. If needed, use a small dab of hot glue on the knots to keep everything from shifting.
6. Add the Hanging Loop and Display
Tie a longer piece of twine to both ends of the branch to create a hanging loop.
Make any final adjustments to the twigs, then hang your wall art on the wall and step back to admire your finished piece.
A DIY Valentine Day Craft for You
I don’t know about you but I love subtle holiday elements in my home.
This rustic branch wall art is the PERFECT idea for a Valentine Day craft!
Let me know if you decided to try this project for yourself!


Leave a Reply