Every winter, my kitchen table turns into a full-on craft station the minute the holiday decorations come out.
My daughter and I pull out the glue, felt, paint, and all the little supplies we’ve saved throughout the year, and we settle in for long crafting sessions together.
Snowmen are always her favorite to make, and honestly, they’ve become one of my favorites too.
They’re simple, they’re cute, and they always make people smile.
What started as a fun way to spend time together slowly turned into something more.
A few years ago, we made a few extra snowman crafts just for fun, and I decided to try selling them.
I was surprised by how quickly they went.
Since then, snowman crafts have become one of our go-to holiday projects since it’s something we genuinely enjoy making and something that consistently brings in a little extra holiday income.
That’s what I love most about snowman crafts.
You get the joy of creating something with your kids, the memories that come with it, and the bonus of turning those handmade pieces into something people are excited to buy.
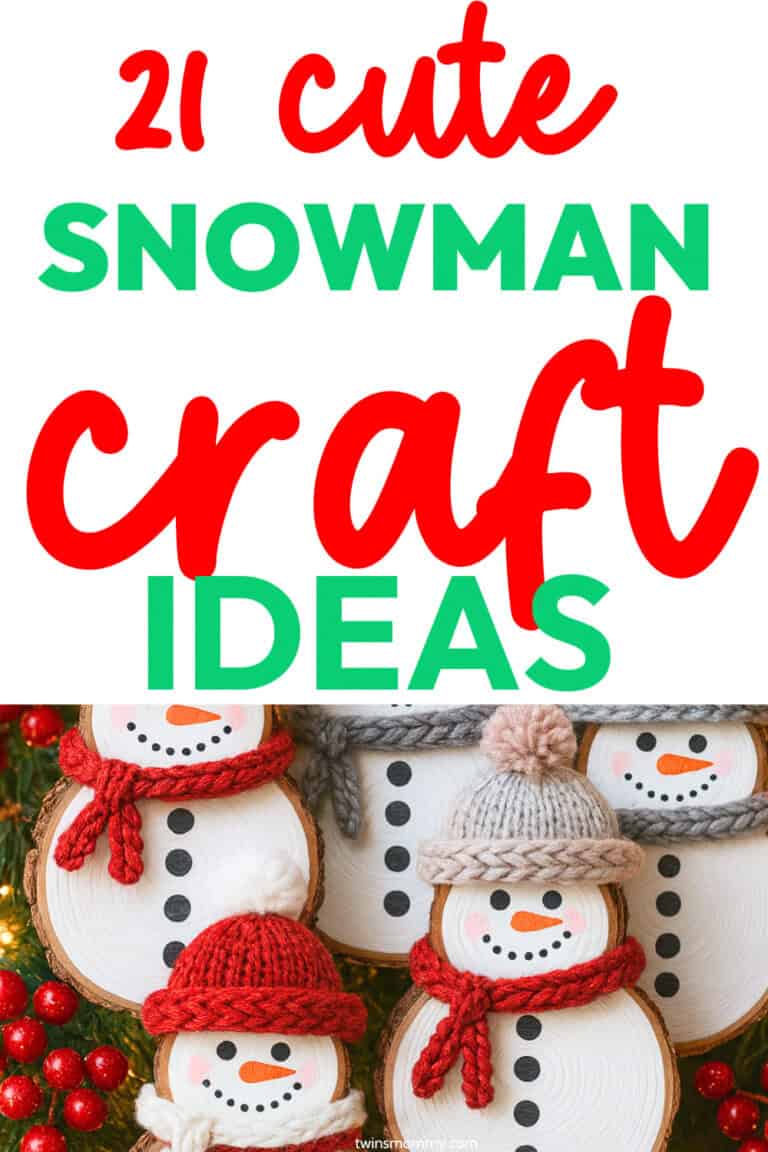
In this post, I’m sharing some of our favorite cute snowman crafts that you can make at home and sell during the holidays, whether you want to fund your Christmas shopping or just love the idea of turning your creativity into something profitable.
Profitable Snowman Crafts You Can Make
You don’t need fancy tools or expensive supplies to create snowman crafts that actually sell.
With the right designs and a little holiday planning, you can turn simple materials into products people happily buy each winter.
These profitable snowman crafts give you a fun way to create and bring in extra holiday income at the same time.
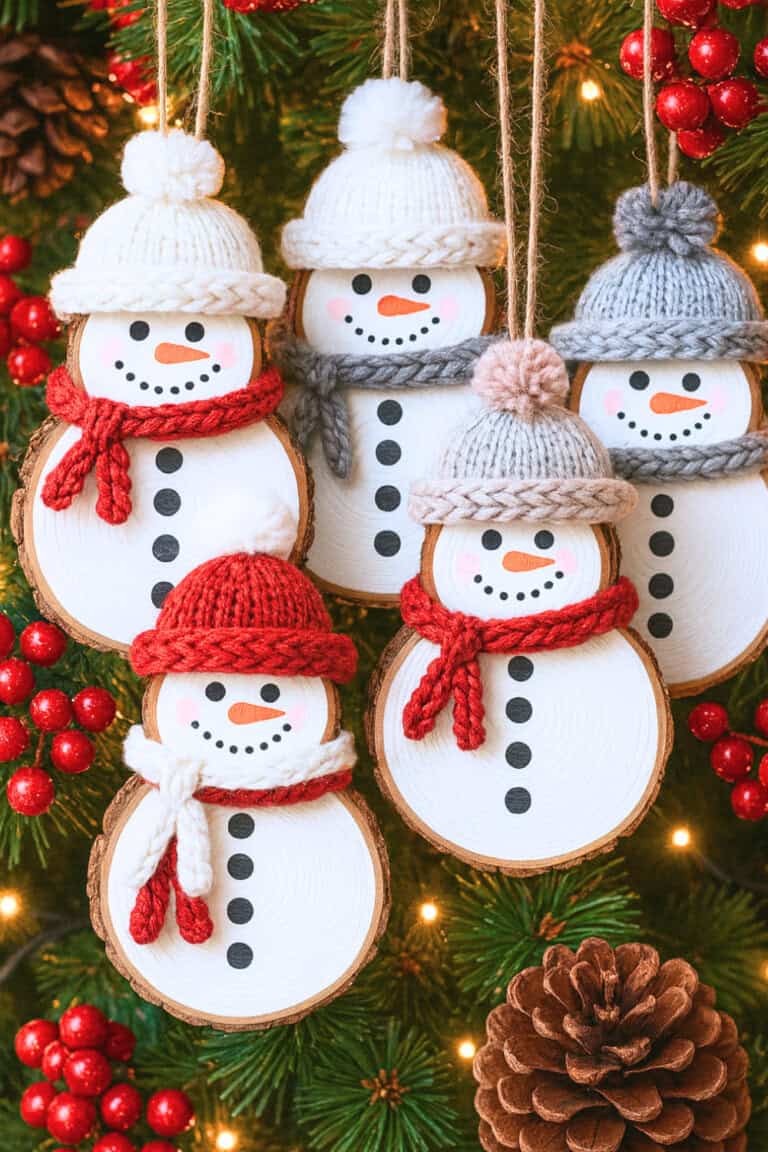
1. Wood Slice Snowman Ornaments
What You’ll Need
To make these wood-slice snowman ornaments, here’s what to gather first:
Small natural wood slices
White acrylic paint
Black and orange paint or paint pens
Small paintbrush
Clear sealer spray or brush-on sealer
Yarn or fabric scraps for scarves
Knit sweater cuff, sock, or felt for hats
Twine or jute string
Hot glue gun + glue sticks
Sandpaper
How to Make the Wood Slice Snowman Ornaments
Start by lightly sanding the front of each wood slice so the paint goes on smoothly. Paint the flat front with white acrylic paint and let it dry. You’ll usually need two coats to get a clean, bright snowman base.
Once the paint is fully dry, add the face using paint or paint pens. Two small black dots for the eyes, a dotted smile, and a simple orange triangle for the carrot nose is all you need. Let that dry, then seal the front with a clear sealer to protect the design.
For the hat, cut a small strip from a sweater cuff, sock, or felt. Fold the bottom edge up to create a brim, gather the top with twine, and hot-glue it right to the top of the wood slice.
Wrap yarn or a thin fabric strip around the lower part of the snowman for the scarf and tie it snug. To finish it off, hot-glue a loop of twine to the back so it’s ready to hang on the tree.
That’s it — simple steps, cozy results, and every snowman comes out with its own little personality.
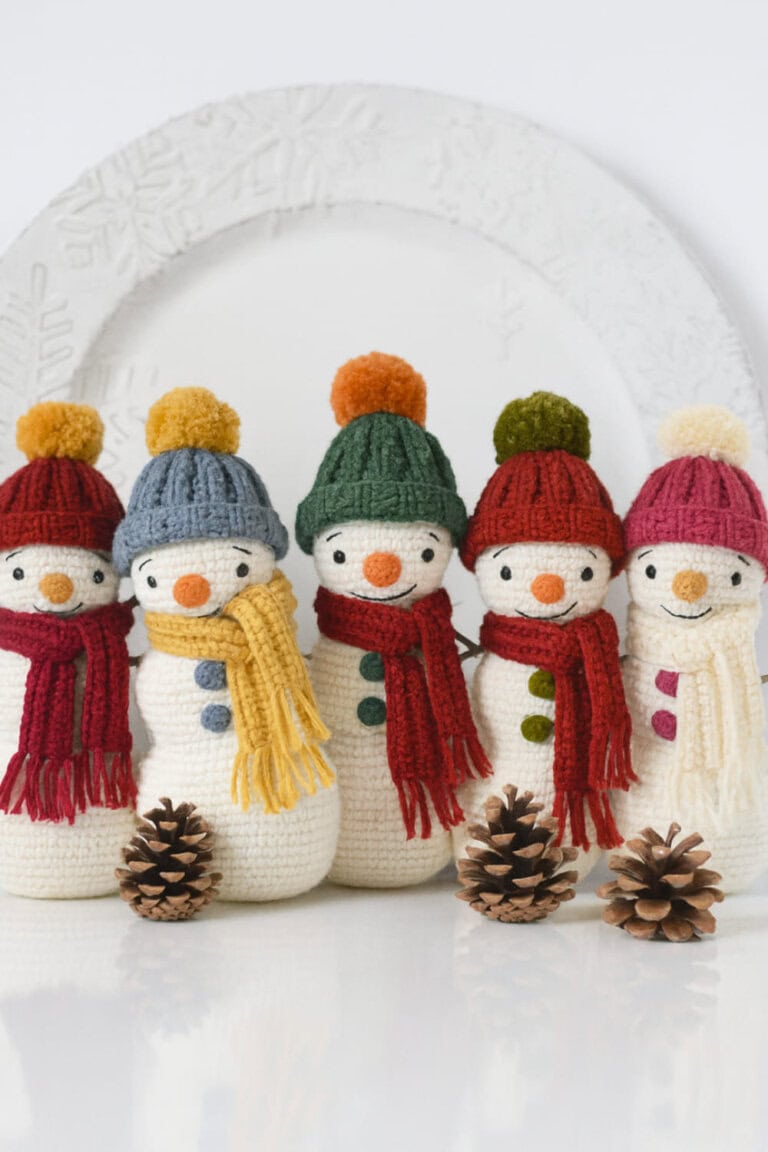
Crème cotton yarn (medium / worsted-weight), in white (or “cream”) — and a bit of orange (or pumpkin) yarn for the nose (per pattern).
Crochet hook size 3.25 mm (D)
Yarn needle (for sewing details and weaving in ends)
Polyester fiberfill stuffing (for body shape)
Two ~6 mm plastic safety eyes (or substitute with yarn / embroidery if you prefer)
A little bit of black yarn or thread (for embroidered eyebrows and mouth, if doing face by stitching instead of using eyes/buttons)
Optionally: small wooden twigs/branches (or any small art-branch-type pieces) for the snowman’s arms.
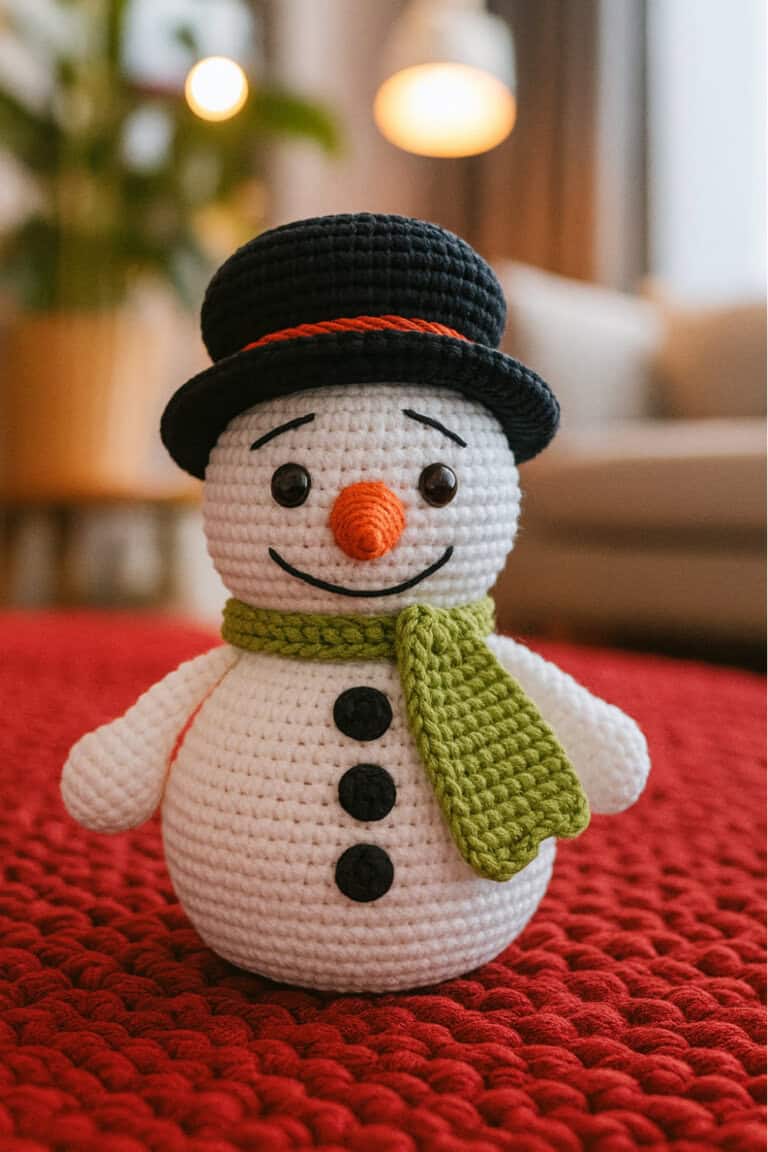
How to Make the Crochet Snowman
Begin crocheting the body/head in rounds using single crochet (sc), per the pattern. The pattern starts with a magic ring, increases to form a rounded shape, then works even rounds, then decreases.
When you reach around rounds 9–10, insert your safety eyes — spaced about 8 stitches apart.
Continue crocheting, stuffing the body as you go with fiberfill so the snowman keeps a nice plush shape.
Crochet the little carrot nose separately using the orange (or “pumpkin”) yarn: the pattern gives a small cone shape that gets sewn onto the front of the head between the eye rounds.
Using black yarn/thread, embroider eyebrows (between certain rounds), and the mouth (between other rounds) as per pattern directions — or use your own creative twist for expression.
For arms: attach two small wooden twigs/branches (or similar) to the body’s sides to mimic branch-arms — that little rustic detail makes the snowman extra charming.
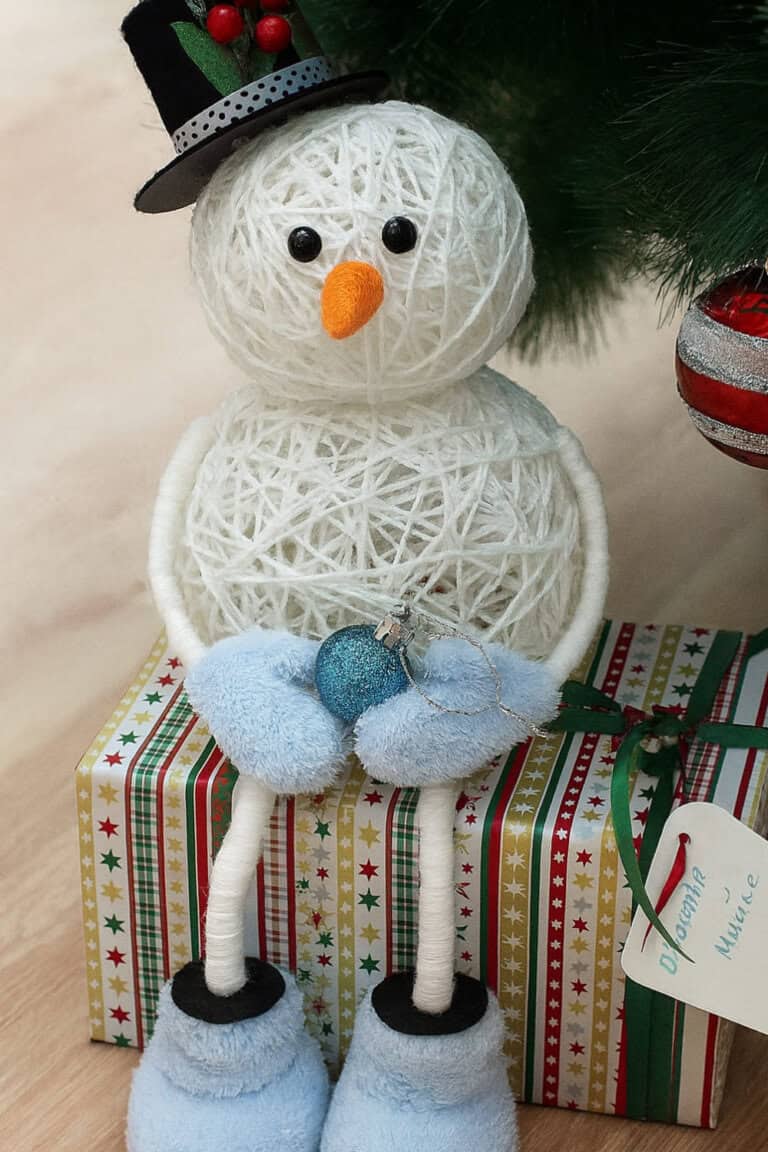
3. Yarn-Wrapped Snowman
What You’ll Need
White yarn (a good thick kind, enough to wrap two “balls”—body + head)
Two balloons — one for the body (bigger), one for the head (smaller)
Glue (like white craft glue) + a little bit of water + a bowl to mix it in
Black and orange foam paper (or felt/paper) for eyes, mouth/buttons, and a carrot-nose
Ribbon or gift paper / ribbon (optional, for scarf or decoration)
Two small twigs (for arms) — or you could use craft sticks or other small sticks if you don’t want real twigs.
Hot-glue gun + glue sticks + scissors
Extra for arms/legs (mittens & boots):
A second set of small twigs or craft sticks (for “legs/boots”) — or small sticks or even thick wire wrapped in yarn/cloth if you want them more solid
Black or dark-coloured felt/fabric or yarn (to wrap or glue around the “legs/boots” so they look like boots)
(Optional) extra yarn, fabric scraps, or felt for mittens/gloves if you want to decorate arms/hands
How to Make the Yarn Snowman
Blow up one large balloon for the body and one smaller balloon for the head.
Mix white glue with a little water in a bowl, dip your yarn into the mixture, and wrap each balloon until it’s mostly covered. Set them aside and let everything dry fully, usually overnight. Once dry, pop the balloons and gently pull them out so you’re left with two stiff yarn balls.
Use hot glue to attach the smaller yarn ball on top of the larger one to form your snowman.
Cut eyes, a mouth, buttons, and a carrot nose from felt or foam and glue them into place. Add a ribbon or fabric strip around the neck for a scarf to give it that finished holiday look.
For the arms, glue twigs or craft sticks into each side of the body.
If you want mittens, wrap the ends of the sticks with yarn or glue on small felt mitten shapes.
To add legs and boots, glue two short sticks or dowels to the bottom of the body, then wrap the lower part in dark yarn or felt to create the look of boots. Make sure they’re even so the snowman sits or stands properly.
Finish with any final details like a simple hat, extra scarf fringe, or a bow.
Once everything is dry and secure, your yarn snowman with arms, mittens, and boots is ready to decorate your space.
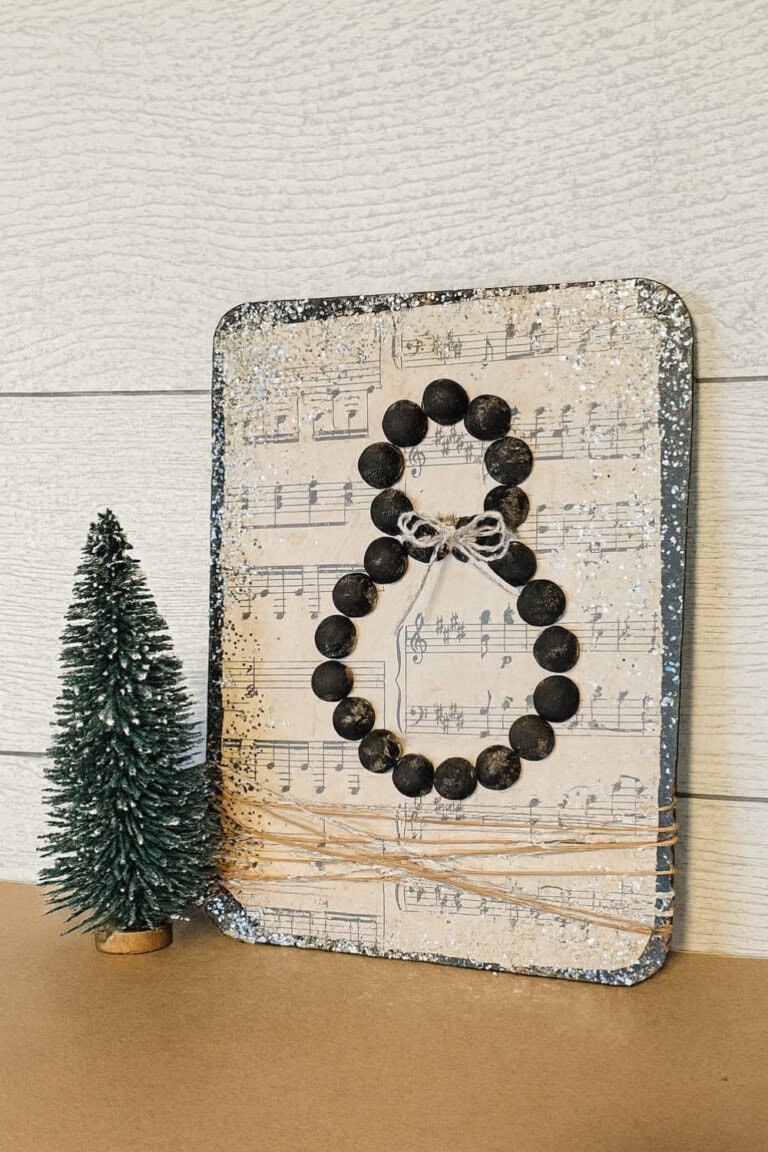
4. Rustic Sheet Music Snowman
What You’ll Need
A small wood cutting board (e.g. a bamboo board from a dollar store)
Sheet music or music-note scrapbook paper for the background
Matte Mod Podge (or any decoupage glue)
Black paint (e.g. chalk paint)
Silver glitter (for a festive border)
Half-wood balls or wood beads (to form the snowman’s body)
Wood glue (or hot-glue gun and glue sticks if preferred)
Twine or thin wire (for hanging + small embellishments)
And for tools:
A wide paint brush (about 1″) and a small flat or fine-tip brush
How to Make the Sheet Music Snowman Sign
First, paint the cutting board with a light, dry-brush coat of black paint, including the edges.
While that dries, tear or cut the music-note scrapbook paper so it’s slightly smaller than the board (leaving about a half-inch border).
Brush a thin layer of Mod Podge onto the front of the board, then carefully smooth down the sheet-music paper.
Once it’s in place, let it dry for about 15–20 minutes. After that, brush a second layer of Mod Podge over the top to seal it. Before this second layer dries, sprinkle silver glitter around the edges to give a frosty, wintery border.
While everything dries, paint the flat sides (tops) of your wood balls using the same dry-brush painting technique.
Once dry, play around with the arrangement — stack the wood balls roughly to look like a snowman (biggest on bottom, smallest on top) — until spacing looks right.
When you like the placement, glue each wood ball onto the board with wood glue (or hot-glue if you prefer).
Use a fine brush to apply glue under each piece so glue distributes evenly before sticking them down.
Finally — tie a bit of twine or wire around the bottom or back and secure it to hanging hooks (or glue it to the back), then add any extra touches like a little bow or ribbon around the snowman’s “neck” for charm.
Let everything fully dry and cure.
Once dry, your sheet-music snowman sign is ready to display, perfect for a cozy winter mantel or wall décor.
5. Cork Snowmen
What You’ll Need
A bunch of wine corks (use recycled ones or buy craft corks)
White acrylic craft paint
Orange craft foam, felt, or cardstock (for carrot nose)
Black-and-white check ribbon (or any ribbon you like) for a scarf
Hot glue gun + glue sticks (or regular craft glue if you prefer a kid-safe option)
Scissors and a paintbrush
How to Make the Wine Cork Snowman
Begin by assembling the “head”: hot-glue two corks side-by-side, then a row of three above them, then another two on top — that gives you the stacked shape for the head.
Next, build the “body” by gluing rows of corks: start with three corks on the bottom, then a row of four above that, then five corks, then back down with four, and finally three again. Glue those rows together so the stack looks like a snowman’s body.
Once glued, paint the flat ends (or exposed surfaces) of all the corks with white acrylic paint. You may want to do two coats for full coverage and a nice clean look.
After paint dries, glue the head onto the body. Then cut a small triangle from your orange foam/felt/cardstock to make a carrot-style nose and glue it to the snowman’s face.
Finish by tying a ribbon around the “neck” for a scarf. Use a dot of glue if needed to hold it in place. That simple ribbon scarf finishes the cozy winter look.
Let everything dry fully. Then place your cork snowman on a shelf, mantel, or wherever you want a little winter charm — and if you like, make a few in different sizes to mix up the display.
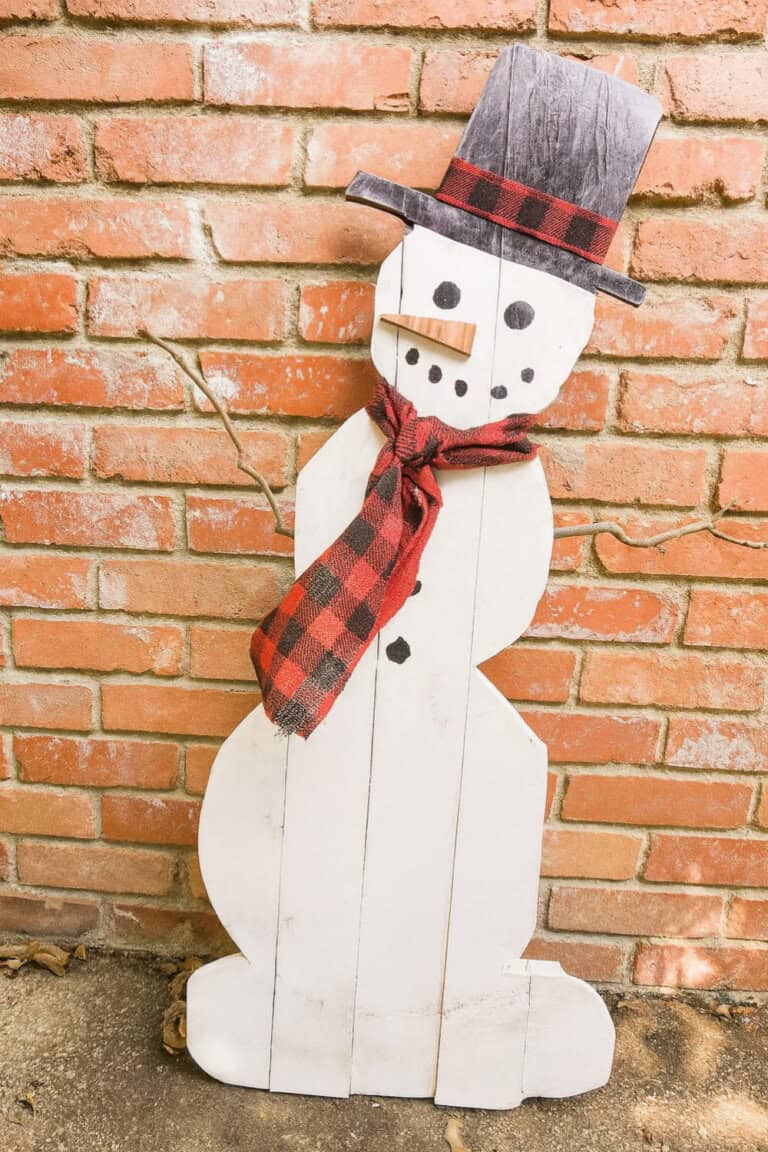
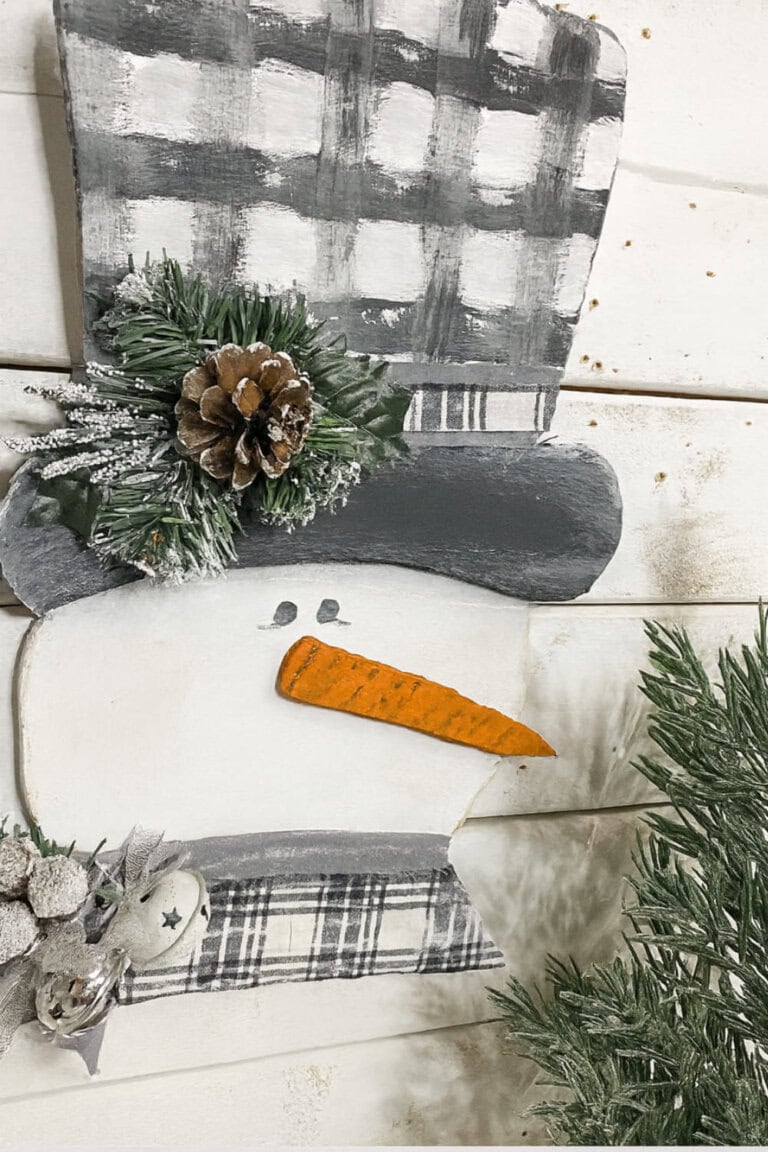
6. Outdoor Snowman Sign
What You’ll Need
3 pieces of fence planks or pallet wood (3½ inches wide — cheap, not fancy).
White paint (chalk-style or craft paint)
Black paint (for hat, eyes, mouth, buttons)
Orange paint (for the carrot nose)
Grey wood stain for a weathered/shadowed finish (optional but adds character)
Some scrap wood pieces — you’ll use these to brace the back so the snowman holds together.
A few sticks from your yard (for arms) — about 2–3 feet long.
2.5-inch wide buffalo-check ribbon (or any ribbon/scarf material you like) to wrap as a scarf.
Tools:
Scroll saw or jigsaw (or a hand saw if that’s what you have) to cut the snowman shape.
Sandpaper to smooth edges.
Paintbrushes.
Hot glue gun (or wood glue) for assembly
Start by trimming your three fence planks to around 42–45 inches in length. Save the leftover scrap pieces — you’ll need some for bracing the snowman later.
Lay the three long planks side by side and glue scrap wood pieces across the back in four to six spots. This helps hold all the planks together so they behave as one solid piece.
On the front, sketch your snowman outline with the hat at the top, then three overlapping circles under it (small, medium, large), and a snowbank-style base under the bottom circle. You can trace things like buckets or funnels to help with circles.
Cut out the shape with your saw (scroll saw, jigsaw, or hand saw). Once cut, sand all edges smooth around the hat and circular areas.
Paint the snowman with the white paint (including the hat and body). Let dry fully. Then use black paint for the hat, eyes, mouth, and buttons. Let that dry.
Cut a small triangle from scrap wood for the carrot nose, paint it orange (add a little line detail if you want), and glue it onto the snowman’s face.
Optional: give the whole snowman a light dry-brush of grey wood stain — especially around edges and seams — to give a little depth and rustic charm.
Wrap the buffalo-check ribbon around the “neck” area like a scarf and glue or tie it in place.
Attach a couple of yard sticks or branches to the back sides for arms and let them stick out so it looks like twig arms.
Once everything’s dry and secure, your wood snowman is ready to stand on or lean against your porch, wall, or yard.
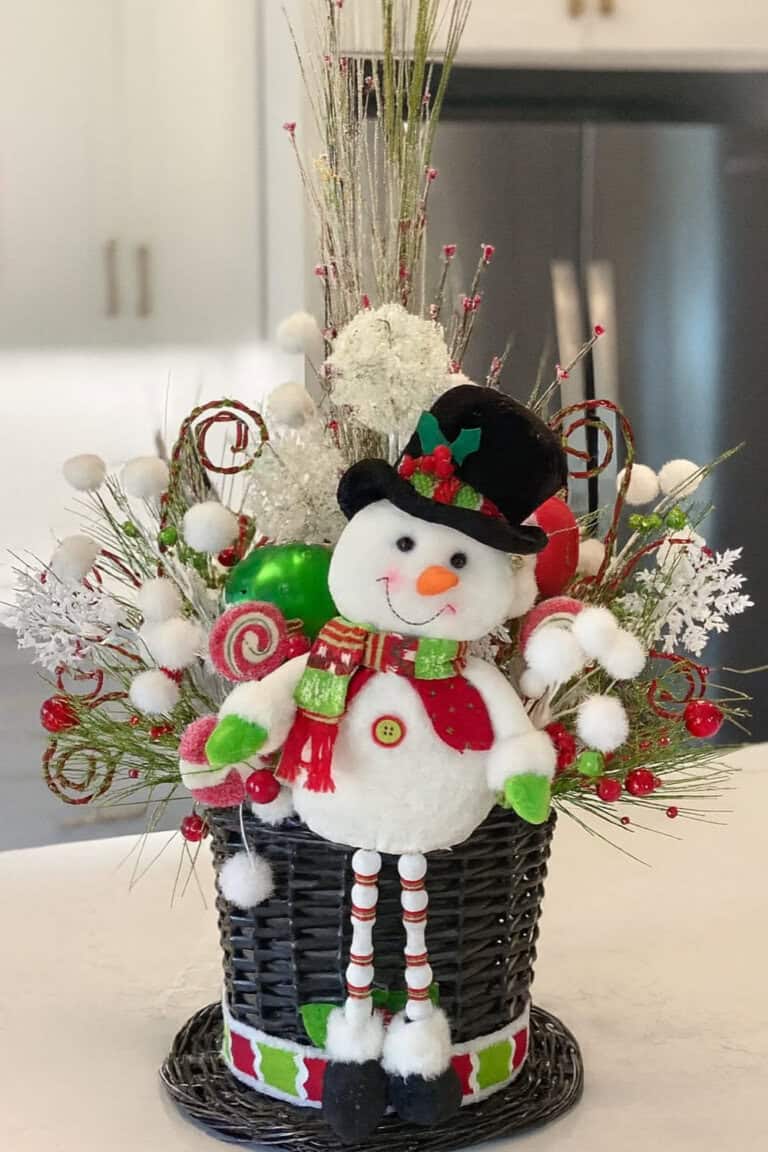
7. Snowman Centerpiece
What You’ll Need
A large snowman-style top hat basket (or any tall basket/hat-shaped container)
A foam block (to anchor your arrangement inside the basket)
A plush snowman figure (small) — that’s your snowman centrepiece “body”
Decorative snowflake ornaments or cutouts (to add wintery flair)
Wired ribbon or a pre-made bow (for accent — maybe around the basket or snowman)
Wire cutters + florist wire (to trim and secure stems/picks)
Hot glue gun (or strong craft glue) to secure elements if needed
How to Make the Snowman Table Arrangement
Start by placing the foam block inside your hat-basket container. Use this block as the base to anchor everything else. Next, set your plush snowman into the foam so it sits upright and becomes the center of attention.
Surround the snowman with assorted sprays, pine stems, and decorative picks — push or wire them into the foam so they arrange around and behind the snowman. Add snowflake ornaments or wintery picks throughout to give the arrangement a frosty, festive feel.
Use wired ribbon or a pretty bow to give the basket a finished, decorative touch, maybe wrap it around the rim or secure it at the front. If some stems or decorations don’t stay put well, use glue or florist wire to anchor them in place securely.
Once everything is set, fluff and adjust the stems and picks so the arrangement looks full and balanced, the snowman should be visible from the front and the greenery and snow accents fan out nicely around it.
Let the glue (if used) dry fully before placing the arrangement on your table. The end result: a cozy, whimsical snowman centerpiece that brings winter charm to your holiday table.
8. Foam Board Snowman
What You’ll Need
Foam board (or cardboard, or any lightweight board you can cut — the tutorial uses foam board).
Paint in a few colors (traditionally white, black, orange, maybe a coral-ish color — or whatever you want).
A template for the snowman shape (to trace your snowman outline onto the foam board).
Fabric scraps (for scarf, hat, or clothing accents, if desired)
Decorative holiday “picks” or faux greenery/branches, maybe little bells or seasonal embellishments — whatever vibe you’re going for.
Paintbrushes (or craft brushes), and a cutting tool suitable for foam board (craft knife, slice tool, or sharp utility blade)
Hot glue gun + glue sticks (or strong craft glue) — for attaching the different layers, fabric, and embellishments.
Twine or floral wire (if you want to hang it or add hanging ornaments/bells)
How to Make the Foam-Board Layered Snowman Cutout
Trace the snowman template onto your foam board (or cardboard). Cut out the snowman shape carefully using your craft knife or slice tool.
Once cut, grab your paints and paint the snowman front using your base color (white or whatever color you choose). Let it dry.
Then add details: eyes, carrot nose, buttons, hat, scarf, whatever you like, using contrasting paint or fabric.
If you want a layered, dimensional look: you can cut extra pieces (like a hat brim, scarf, mitten or branch arms, maybe a carrot nose) from foam board or fabric, paint/prepare them, then glue them onto the base snowman cutout to make the layers pop.
Next, decorate.
Use fabric scraps to make a scarf or hat. Glue on holiday picks, faux greenery, bells, or tiny ornaments using hot glue.
Add twine or wire if you want to hang it, or just glue a little stand or backing so it’ll lean against a wall or shelf.
Finally, touch up any edges with paint, add shading or extra detail if you like (think rosy cheeks, snow dust, or a little sign), let everything set fully, and your layered snowman cutout is ready to display.
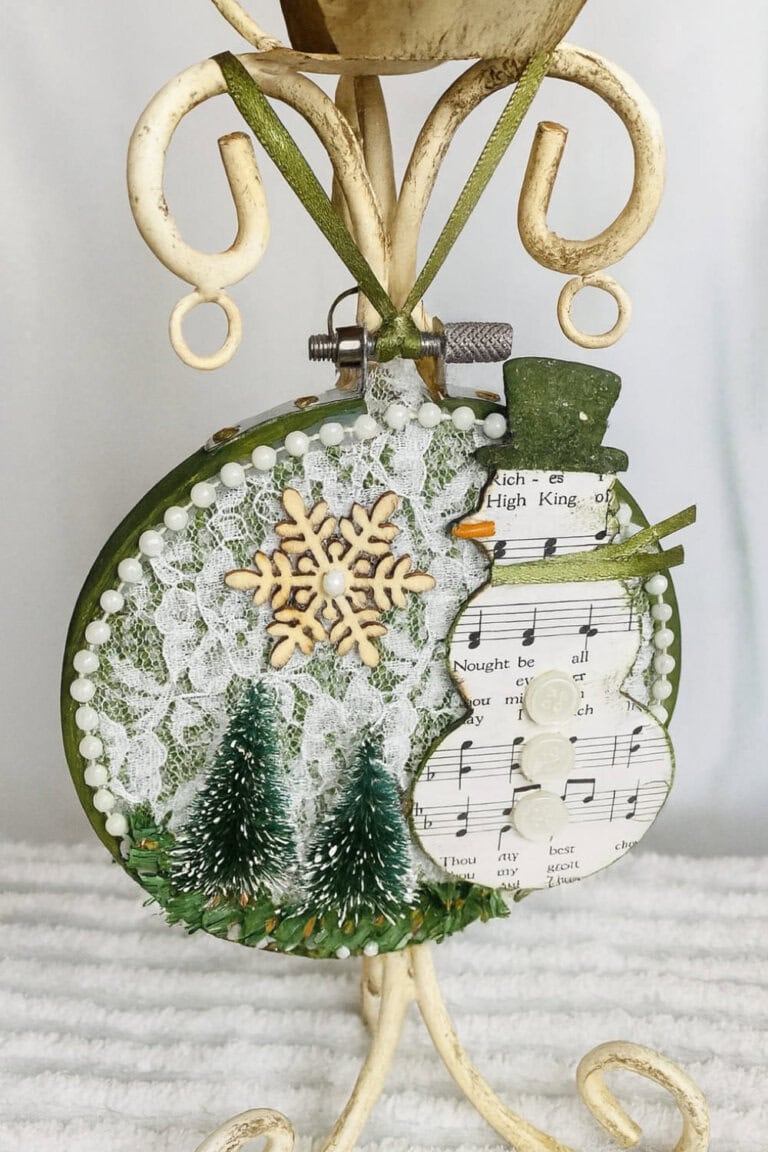
9. Vintage Embroidery Snowman Display
What You’ll Need
4″ embroidery hoop
A piece of burlap (or fabric backing) + lace (for background texture)
A small wooden snowman cut-out (or equivalent snowman shape)
A bit of old sheet-music paper (or music-note scrapbook paper) for decoupage on the snowman
Mod Podge (or decoupage glue) to adhere sheet music to snowman cut-out
Paint (green — for hoop & hat, plus orange if you want to paint the carrot nose)
Green ribbon (for snowman scarf)
Buttons (or small embellishments) for snowman’s body/buttons and maybe snowflake decoration
Small decorative items: bottle-brush mini trees, small pearl strand, snowflake cut-outs, greenery — optional but great for a vintage/holiday vibe
Hot glue gun + glue sticks (or craft glue) for assembly
Scissors (for trimming paper/fabric)
How to Make the Snowman Hoop Ornament
First, paint the outer hoop with your green paint (or whatever color you like). You don’t need to paint the inside ring or underside — just the visible outer hoop.
Next, decoupage the sheet-music paper onto your wooden snowman shape.
Brush a layer of Mod Podge on the back, press it face-down onto music-paper, smooth it out, then cut around the shape so the music-paper matches the snowman.
For tiny edges that scissors can’t reach cleanly, while glue is still wet, you can carefully use a lighter to burn away the excess, making a slightly burnt, rustic edge (this gives a nice vintage look).
Once your snowman is decoupaged and dry, assemble the background: stretch a piece of burlap inside your embroidery hoop, then layer a piece of lace over the burlap for a soft, textured backdrop.
Trim away excess fabric from the back and tighten the hoop. For a little vintage charm, glue a small pearl-strand around the inside edge of the hoop frame.
Now it’s time to decorate your snowman: glue or attach the decoupaged snowman cut-out to the front of the hoop background. Paint or attach details like hat, carrot-nose (painted with orange), and a little scarf made of green ribbon around the neck.
Add a few buttons to the front for the snowman’s coat, and tuck in a tiny bottle-brush tree or small greenery piece beside the snowman to give it a cozy, wintery vibe.
If you’ve got small snowflake cut-outs, glue one near the top to look like falling snow.
Finally, add a loop of ribbon or twine at the top of the hoop so you can hang the ornament.
Once everything is glued and dried, your vintage-inspired snowman embroidery hoop ornament is ready to bring a little handmade Christmas charm to your tree.
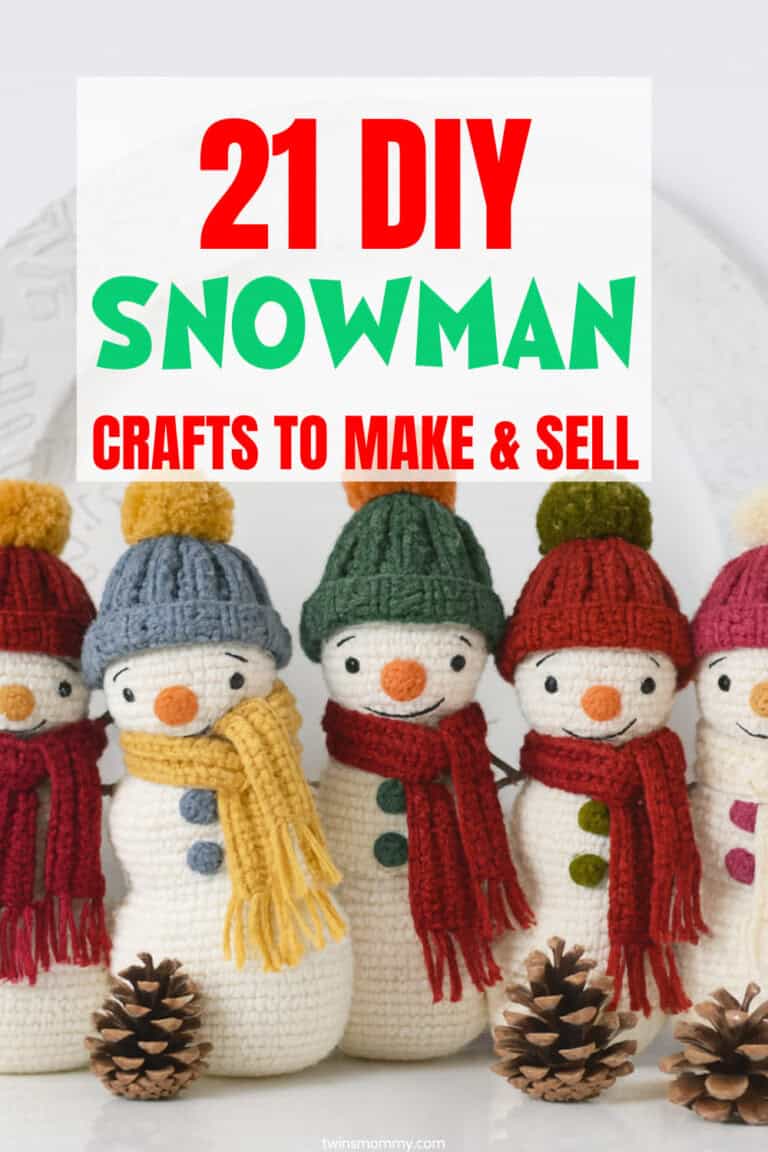
10. Snowman Amigurumi
What You’ll Need
Medium worsted-weight yarn (white for body + head; plus extra colors if you want a hat or scarf)
Crochet hook size C (2.75 mm)
10 mm safety eyes
A few small black buttons (for snowman’s “buttons” on the body)
Polyester fiberfill stuffing (to give the snowman shape)
Scissors and a yarn needle (for sewing pieces together + weaving in ends)
Optional (if pattern includes accessories): yarn for hat, scarf, maybe other colors for arms or embellishments.
How to Make Snowman Mike — Step by Step
1. Crochet the Head
Start with a magic ring and 6 single crochets inside it.
Once wide enough, work even rounds for the “face middle.” Between Rounds 13 & 14 place the safety eyes about 12 stitches apart.
Continue decreasing in rounds to close the head, leaving a tail for sewing. Stuff the head firmly with fiberfill.
2. Crochet the Body
Start again with a magic ring, then increase to shape a round base.
Work even rounds to build the body, then start decreasing when instructed to close and shape the bottom. Stuff the body with fiberfill before final decreases.
After finishing, sew the head onto the body — between the rounds as the pattern says (between body rounds labeled 3 & 4 in original instructions)
Attach the little black buttons onto the body with sewing or glue to create the snowman’s “buttons.”
3. Make Arms
Crochet small “mittens” for the arms, starting with a magic ring and working a few rounds, then switching yarn color (if pattern calls for it).
Finish off, leave a tail, stuff lightly (just enough so they hold shape), and sew the arms onto the sides of the body (pattern says around body rounds 5 & 6).
4. Create the Nose
With orange yarn, start in a magic ring, work a few rounds to form a small cone-like shape.
Stuff lightly, finish off, leave a long tail for sewing. Sew the nose onto the head so that its top sits roughly at the top of the eyes.
5. (Optional) Add Hat, Scarf or Accessories
The pattern may include a hat: crochet in rounds (using contrasting yarn), finish with a pom-pom if you like.
You can also crochet a scarf or use yarn scraps for scarf — wrap around the snowman’s neck after assembly.
Use your creativity: maybe add a little carrot-nose, arms, cute hat — make it yours.
11. Snowman Wreath
What You’ll Need
Two wreath forms (one larger for the body, one smaller for the head — grapevine or wire both work)
White loop yarn or chunky white yarn
A winter hat (kid-sized or décor hat works great)
A scarf or long ribbon for the neck
Hot glue gun + glue sticks
Floral wire or zip ties (for extra support)
Scissors
Optional: faux greenery, holly picks, or winter stems for decoration
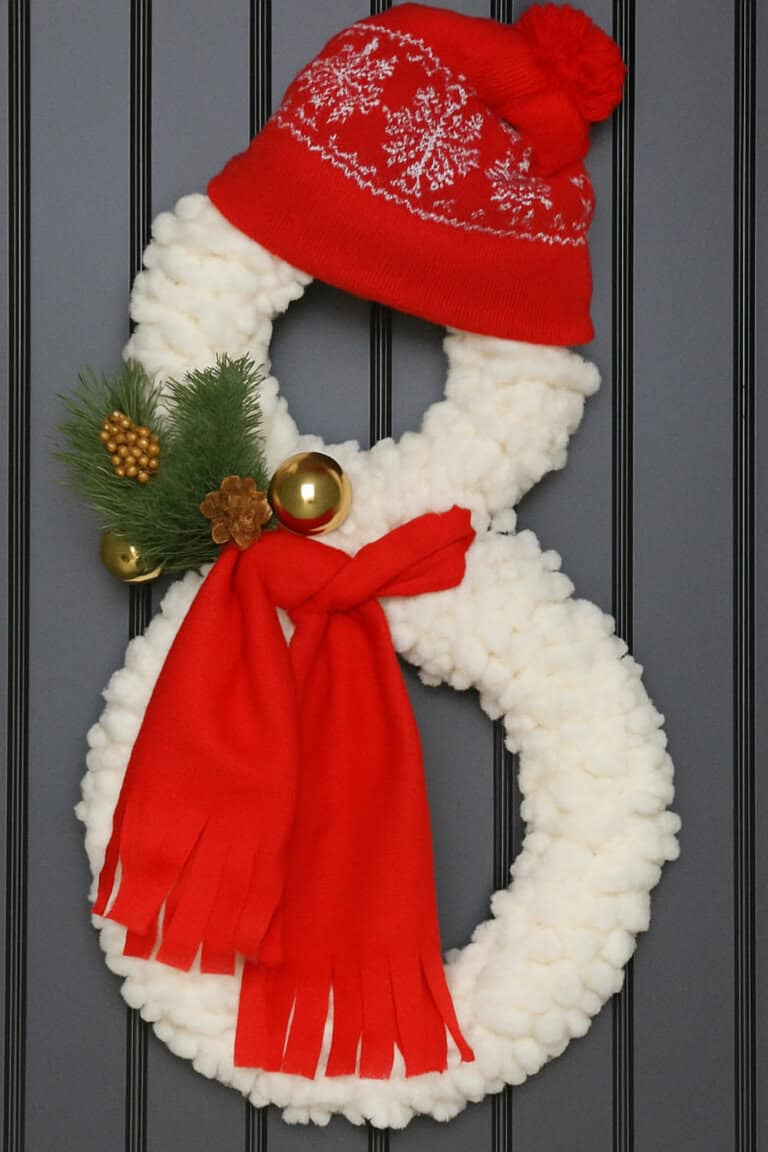
How to Make the Snowman Wreath
Wrap both wreath forms tightly with the white loop yarn until you can no longer see the base of the forms.
Once wrapped, stack the smaller wreath on top of the larger one to form the snowman shape, then secure them together with floral wire or zip ties for stability.
Place the hat on top of the smaller wreath and glue it in place so it looks like it’s resting on the snowman’s head.
Wrap the scarf or ribbon around the area where the two wreaths meet to create the “neck,” then tie or glue it so it stays put.
Add any extra greenery or winter picks above or on the scarf for a festive touch, securing everything with hot glue as needed.
Trim the scarf ends for a clean finish, and once everything is fully secure, your snowman wreath is ready to hang on the door or display indoors.
12. Small Ladder Snowman Display
What You’ll Need
A wooden ladder (old, decorative, or small leaning ladder)
Two or three white wreaths (for the snowman body)
A winter hat (for the head)
A scarf or long ribbon
Faux pine garland, pine needles, or greenery
Pinecones
Christmas ornaments (any color you like)
Twine or floral wire
Hot glue gun + glue sticks
Optional: battery fairy lights, small sign, or wooden “carrot” nose
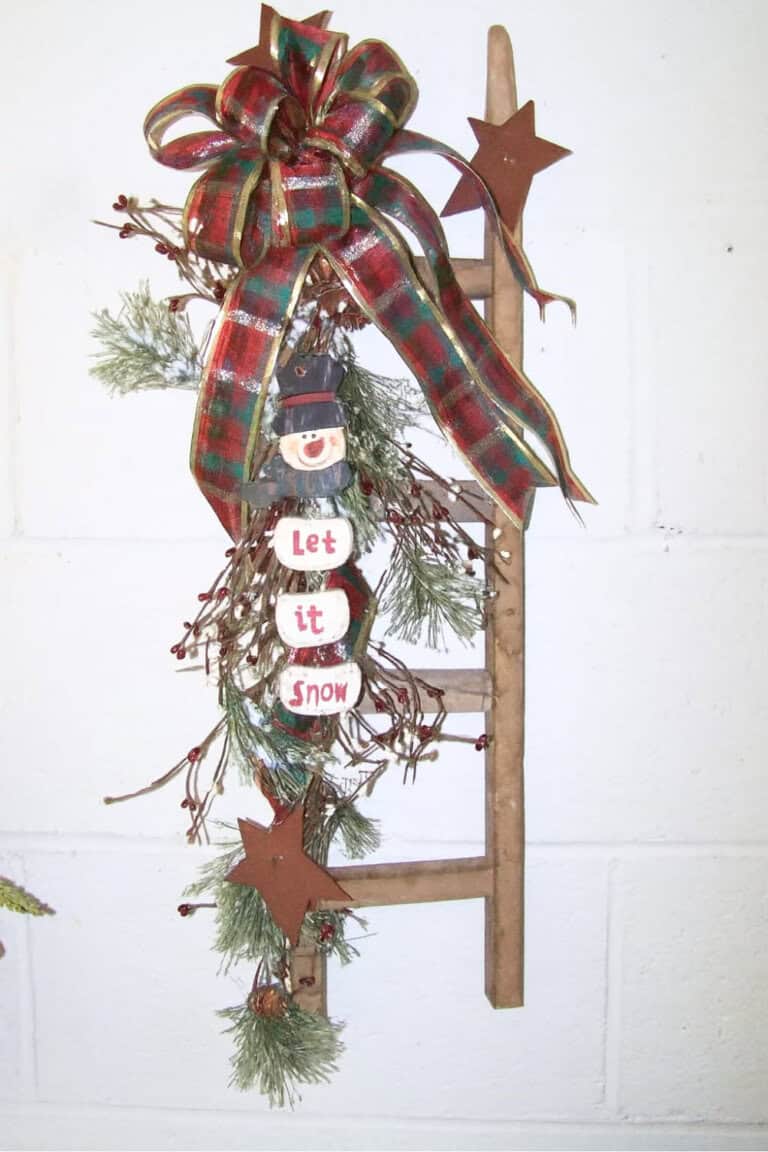
How to Make the Ladder Snowman Display
Start by positioning your ladder where you want the display to sit — leaning against a wall, by the front door, or on a covered porch works great. Attach two or three white wreaths vertically on the ladder rungs using twine or floral wire to form the snowman’s body, with the smallest wreath at the top for the head and the largest at the bottom.
Place a winter hat on the top wreath to create the snowman’s head, then wrap a scarf or ribbon around the space between the top and middle wreaths for the “neck.” Tuck faux pine garland or pine needles through the ladder rungs and around the wreaths to add fullness and a cozy holiday feel.
Add pinecones and Christmas ornaments throughout the greenery, securing them with floral wire or hot glue so they stay in place. If you want extra charm, weave in battery-powered fairy lights for a soft glow in the evenings.
Finish by adjusting everything so it feels balanced and full. Once everything is secure, your ladder snowman display is ready to wow anyone who walks into your home — simple, cozy, and full of Christmas character.
More Adorable Snowman Crafts to Make
Here are some more craft ideas to make so you can sell it and make some extra income over the holidays!
13. Cute Outdoor Snowmen
14. Wooden Snowman Craft
15. Cute Snowman Display
16. Snowman Coaster
17. Wooden Block Snowman
18. Resin Snowman Ornament
19. Mason Jar Snowman Craft
20. Vintage Snowman Lantern
21. Cute Frozen Snowman Display
Make Extra Cash for Christmas
There ya go!
I hope you found some craft ideas to make this holiday.
Having some extra cash this time of year really can make things feel a lot less stressful, and these projects are a fun way to add to your income without taking on something overwhelming.
Pick one, start small, and see where it takes you. You might be surprised how quickly it adds up!


Leave a Reply