I learned knitting on my own when I was pregnant with my twins. Fast forward a decade later and my daughter was interested in learning to crochet.
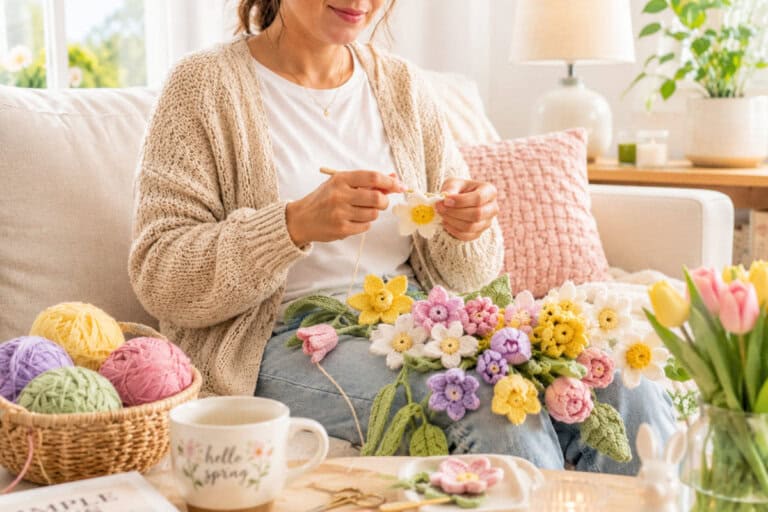
Now? A few years later I love and enjoy crocheting little projects especially when the weather warms up and I see soo many flowers growing.
There’s just something relaxing about sitting outside with a coffee, a ball of yarn, and making something cute in under a half hour.
Spring and summer always make me want lighter, happier projects instead of big blankets or heavy scarves that take weeks to finish.
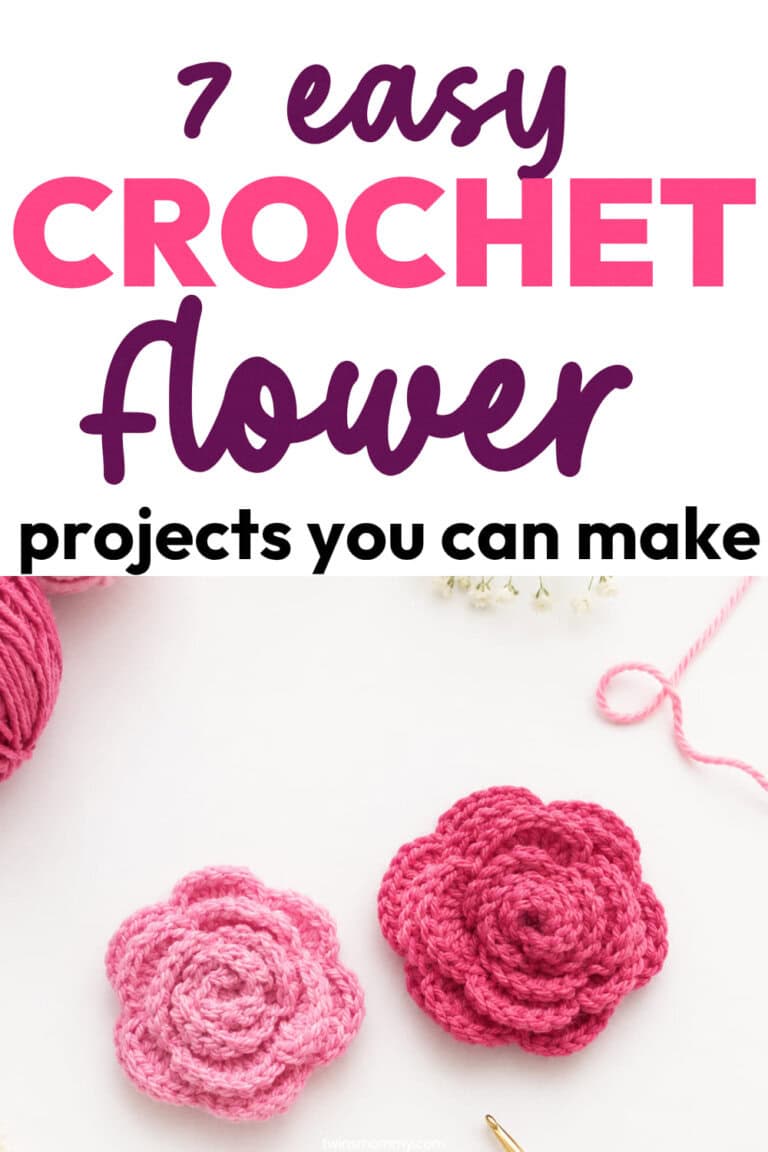
Crochet flowers are one of the easiest projects to start with if you’re still learning.
They’re small enough that they don’t feel overwhelming, which makes them perfect when you’re trying to practice new stitches without committing to a huge project.
You don’t need a huge yarn stash. You don’t need complicated stitches. And you can actually finish one before dinner.
The best part is these tiny blossom flowers can be used for so many things.
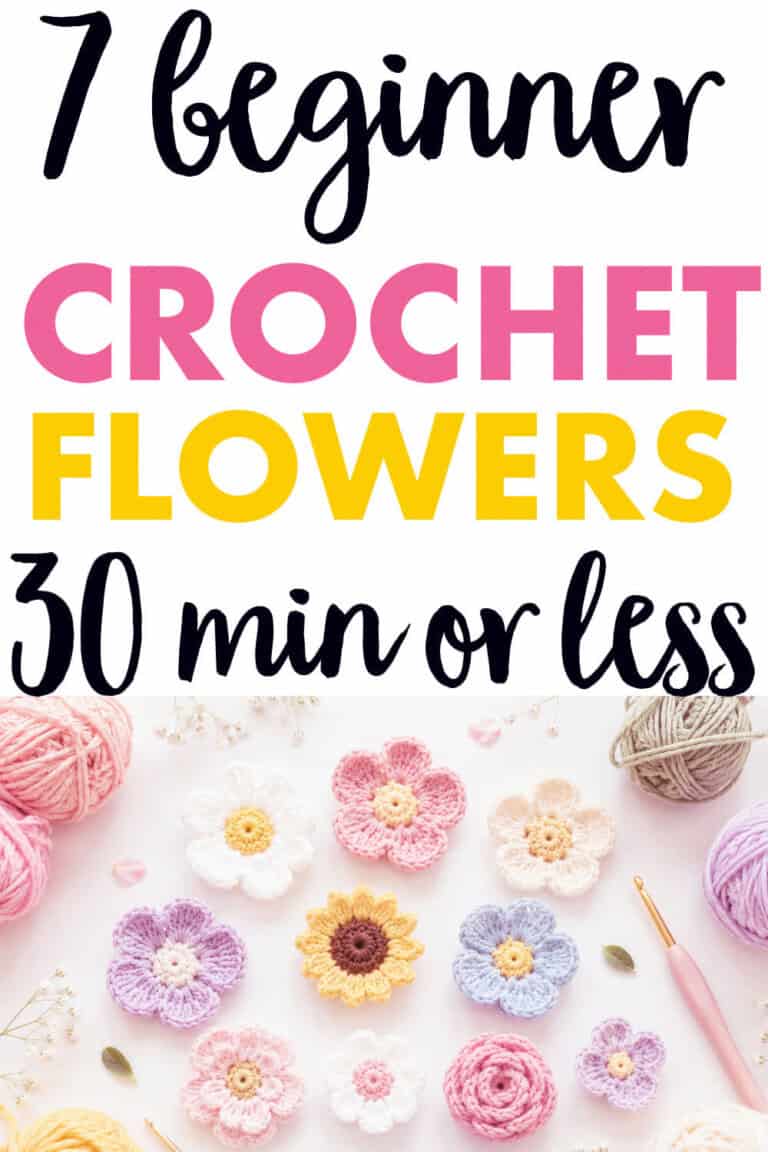
If you’ve been wanting easy crochet flower patterns for beginners that don’t take all weekend, these are perfect little projects to try.
Why Make Crochet Flowers for Spring and Summer?
Crochet flowers are one of those projects that feel useful and creative at the same time.
I’ve added them to tote bags, headbands, bookmarks, wreaths, and even wrapped a few into little teacher gifts at the end of the school year.
They also look adorable attached to gift wrapping, summer hats, market bags, or even displayed on your home office desk.
And if you’re someone who loves selling handmade items, crochet flowers are one of those easy products you can make fairly quickly without spending a fortune on supplies.
A lot of sellers bundle them into bouquets, keychains, hair clips, and garlands for spring craft fairs or their Etsy shop.
Materials and Tools for Crocheting Blossom Flowers
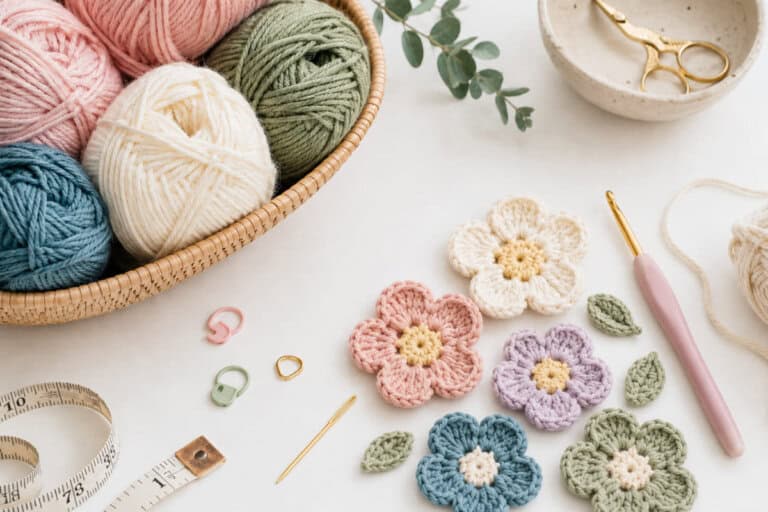
Here are the basic crochet supplies that work best for beginner flower patterns.
You don’t need fancy tools but they do need to feel good in your hands and not wear down either.
Clover Crochet Hooks
These are honestly my favorite hooks for beginners because they glide smoothly and are comfortable to hold for longer projects.
Best sizes for crochet flowers:
- 3.5 mm (E)
- 4 mm (G)
- 5 mm (H)
Susan Bates Crochet Hooks
These crochet hooks are affordable and easy to find if you’re just starting out.
Best Yarn for Crochet Flowers
Lily Sugar’n Cream
This yarn is one of my favorites for crochet flowers that need a little more structure and shape.
Since it’s made from cotton, the petals hold up really nicely instead of flopping over.
It’s especially pretty for home decor projects like garlands, wreaths, coasters, or flower bouquets sitting in a vase.
Red Heart
If you’re brand new to crochet, this is such an affordable yarn to practice with because you can grab multiple colors without spending a lot.
The acrylic texture makes it easy to work with for simple flower patterns, especially if you’re making lots of petals and experimenting with stitches.
I also like using this yarn for kids’ crafts, appliqués, and beginner projects where durability matters.
Bernat
Bernat yarn works beautifully if you want soft, chunky crochet flowers that feel cozy and oversized.
The plush texture gives flowers a fuller look, which makes them cute for nursery decor, pillows, or spring baskets.
I especially love this yarn for making larger statement flowers that look soft and fluffy instead of delicate.
Lion Brand
This yarn has really clean stitch definition, which means every petal and detail shows up beautifully once your flower is finished.
It gives crochet flowers a polished look that feels perfect for spring and summer crafts.
The colors are also gorgeous, especially the soft pastels and bright floral shades that make blossom patterns stand out.
Other Helpful Crochet Supplies
You honestly don’t need a huge craft room full of supplies to make beautiful crochet flowers.
Most beginner flower patterns only require a few small tools that make crocheting easier and help your finished flowers look cleaner and more polished.
These little extras are also helpful if you plan to turn your crochet flowers into gifts, hair clips, magnets, or home decor pieces.
- Small embroidery scissors
- Yarn needles
- Stitch markers
- Measuring tape
- Hot glue gun (optional for crafts)
- Felt backing for pins or magnets
Crochet Terminology for Beginners
Chain (ch)
The chain stitch is usually the very first stitch you’ll learn in crochet because it creates the foundation for most projects.
It looks like a small braided row and is used to start flowers, blankets, scarves, and almost everything else. In flower patterns, chains are often used to create loops that later become petals.
Slip Stitch (sl st)
A slip stitch is a very small stitch used to join rounds together or move your yarn across stitches without adding extra height.
You’ll use this constantly when making crochet flowers since most flower patterns are worked in circles. It also helps keep the edges neat and secure.
Single Crochet (sc)
Single crochet is one of the shortest and simplest crochet stitches, which makes it perfect for beginners.
It creates a tighter, more compact texture that works well for flower centers and smaller petals. Once you learn this stitch, many beginner flower patterns become much easier to follow.
Half Double Crochet (hdc)
The half double crochet stitch sits between a single crochet and double crochet in height.
It creates slightly fuller and softer petals without making the flower look too loose. This stitch is really common in blossom and daisy patterns because it gives flowers a rounded shape.
Double Crochet (dc)
Double crochet is a taller stitch that helps build larger petals more quickly.
Since the stitch has more height, flowers made with double crochet usually look softer and more open.
Beginners love this stitch because it works up fast and instantly makes projects feel bigger.
Magic Ring
A magic ring is a technique used to start circular crochet projects like flowers, granny squares, and coasters. Instead of leaving a hole in the center, the ring tightens closed once you pull the yarn tail.
It can feel tricky at first, but once you practice it a few times, it becomes much easier.
Stitch (st)
A stitch simply means one completed crochet movement or loop.
Patterns use stitch counts to help you keep track of where you are while crocheting. Learning how to count your stitches early on helps your flowers stay even and symmetrical.
Step-By-Step Crochet Flower Patterns
1. Simple Daisy Crochet Flower
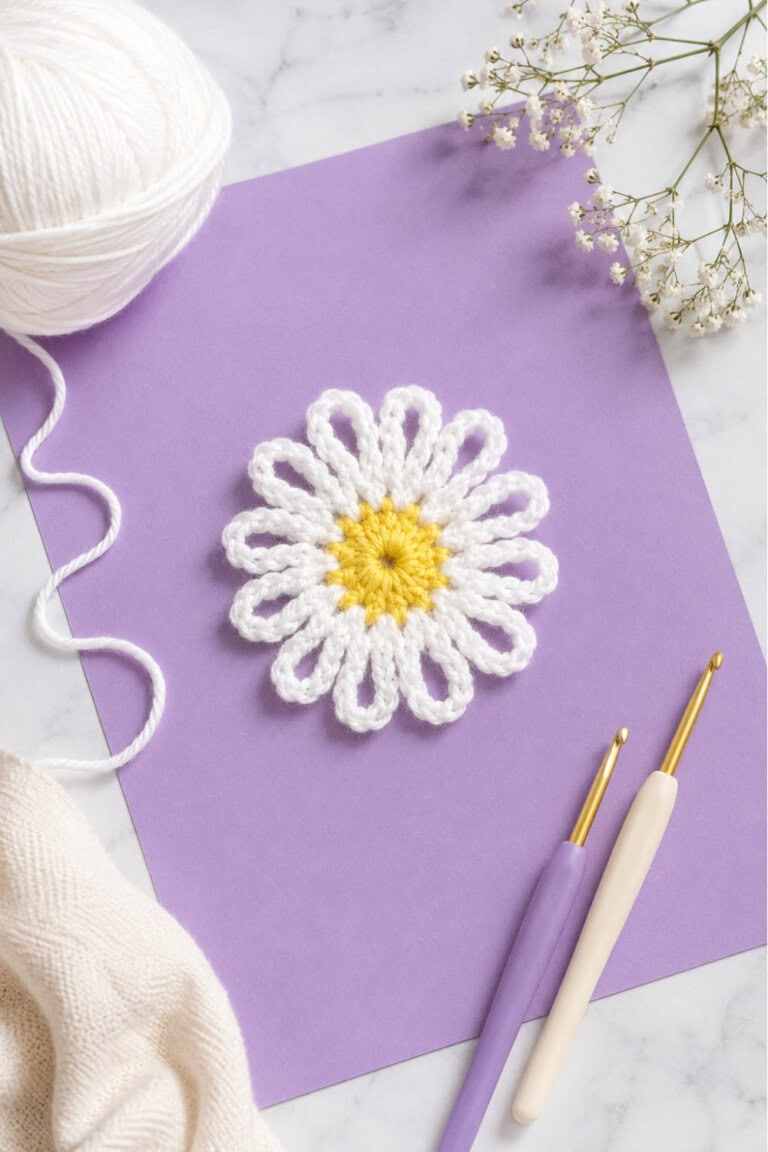
This is probably one of the easiest beginner flower patterns out there. The petals are repetitive, so it’s easy to memorize after the first round.
Step-by-Step Instructions
Create a magic ring
Start by making a magic ring with your yarn. This will become the center of your daisy, and you’ll be able to pull it tight later so there isn’t a big hole in the middle.
Crochet 10 single crochet stitches into the ring
Work 10 single crochet stitches directly into the magic ring. Try to keep your stitches even because this creates the base where all your petals will sit.
Join with a slip stitch
Once you have 10 stitches, join the round with a slip stitch into the first single crochet. This closes the center and gives your daisy a clean circular shape.
Chain 5
Chain 5 to start your first petal. This chain creates the height and loop shape for the daisy petal.
Slip stitch into the next stitch
Slip stitch into the next stitch around the circle to secure the petal down. This helps the chain loop stay in place and gives the flower that simple daisy shape.
Repeat all the way around to form petals
Keep chaining 5 and slip stitching into the next stitch until you’ve gone all the way around the center. By the end, you should have a full circle of little petals that look like a sweet beginner crochet daisy.
This flower works beautifully for bookmarks, hats, and spring garlands.
For more help, watch this video tutorial.
2. Puff Flower Crochet Pattern
Puff flowers look complicated but are surprisingly beginner-friendly once you learn the puff stitch.
And I love how they look for spring!
Step-by-Step Instructions
Start with a magic ring
Begin by creating a magic ring to form the center of your flower. This allows you to pull the middle tightly closed later so the flower looks neat and finished instead of leaving a large hole in the center.
Create puff stitches around the ring
Work puff stitches directly into the magic ring all the way around.
Puff stitches are made by pulling up several loops into one stitch, which creates soft, fluffy petals that make the flower look fuller and more textured.
Pull through loops carefully
Once all the loops are on your hook, slowly pull the yarn through everything at once to complete the puff stitch.
This part can feel a little bulky at first, so taking your time helps keep the stitches even and prevents the yarn from snagging.
Repeat until all petals form
Continue making puff stitches around the ring until your flower has a full circle of petals. As the petals build, the flower will start looking soft and dimensional, which is what makes puff flowers so pretty for spring projects.
Tighten the center ring
Gently pull the yarn tail to tighten the magic ring and close the center completely. This pulls all the petals together and gives the flower a polished finished look.
These are adorable for baby blankets and tote bags.
For more help, here’s a video tutorial.
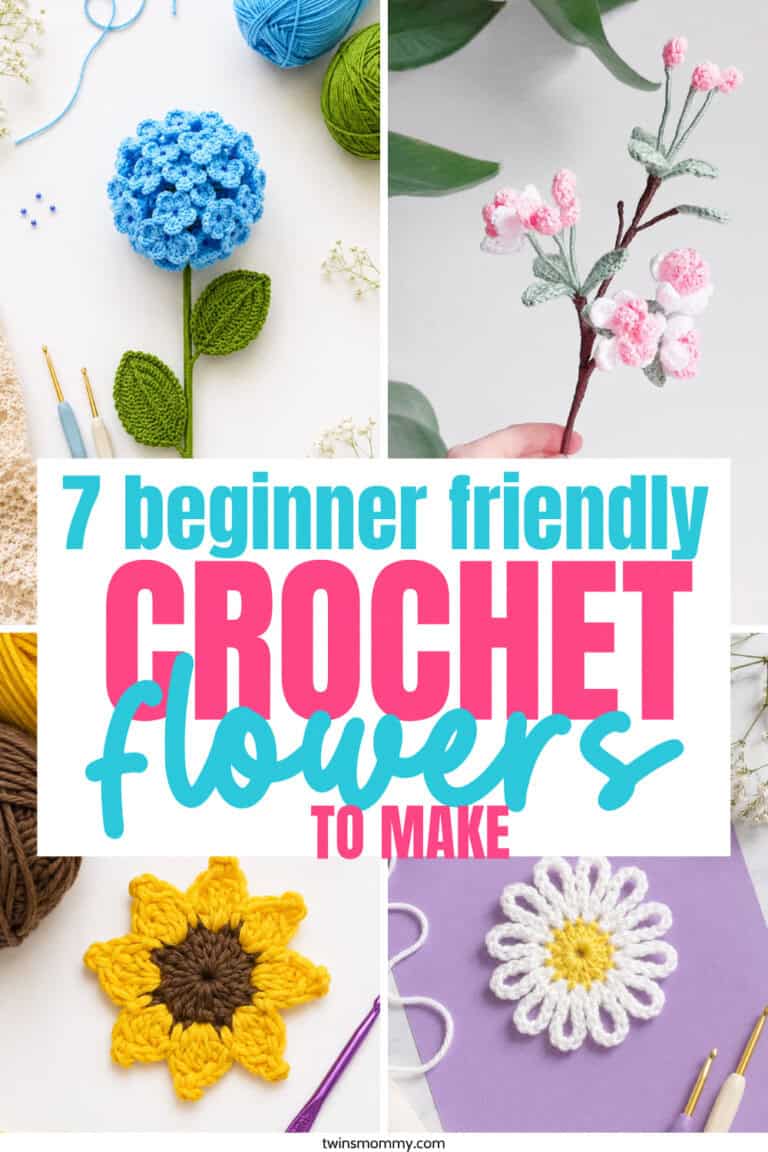
3. Tiny Cherry Blossom Flower
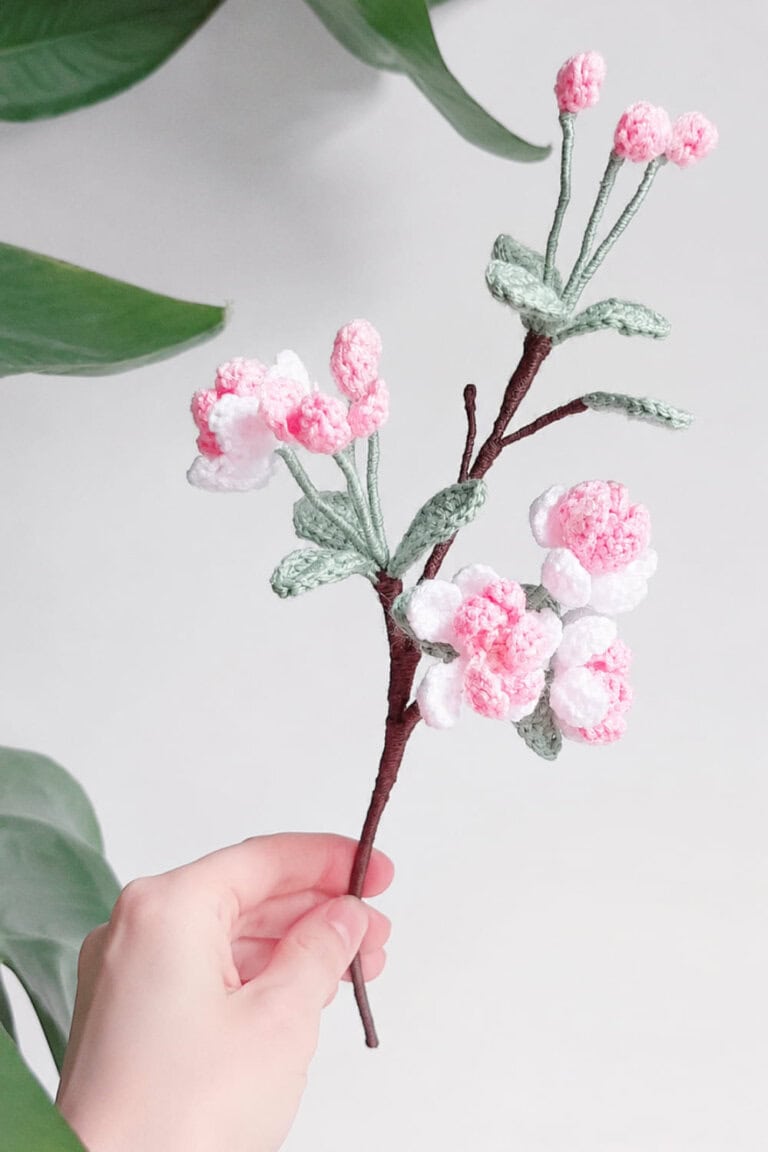
These tiny flowers are perfect if you want quick projects you can finish in under 20 minutes.
And this is something your son or daughter could try to make!
Step-by-Step Instructions
Chain 4 and join into a circle
Start by chaining 4 stitches and joining them together with a slip stitch to create a small circle.
This tiny center becomes the base for both the cherry blossom flowers and the little buds, giving the project that delicate spring look.
Crochet small petal clusters
Work small petal clusters into the center circle using simple stitches like single crochet, half double crochet, and chains.
For full blossoms, create several soft rounded petals around the center, while the buds only need a few smaller stitches to keep them tighter and partially closed-looking.
Repeat around the center
Continue repeating the petal pattern all the way around until the blossom looks full and balanced.
Make several flowers and buds in soft pink, blush, or white yarn so you can cluster them together later for a fuller cherry blossom branch effect.
Create the leaves
Using green yarn, crochet small leaf shapes separately with chain stitches and single crochet or half double crochet stitches.
The leaves help make the blossoms look more realistic and fill out wreaths, garlands, bouquets, or branch arrangements beautifully.
Attach flowers, buds, and leaves together
Once everything is finished, arrange the blossoms, tiny buds, and leaves together however you like.
You can sew or hot glue them onto branches, wreaths, tote bags, or spring home decor projects.
Fasten off and weave ends
Cut the yarn and fasten off each piece securely. Use a yarn needle to weave in all loose ends neatly so the flowers and leaves look polished and finished.
I love adding these to spring wreaths and gift tags.
Here’s a video tutorial on how to make these and then put them on branches to make them look more authentic and real! Love how this turned out.
4. Layered Rose Crochet Flower
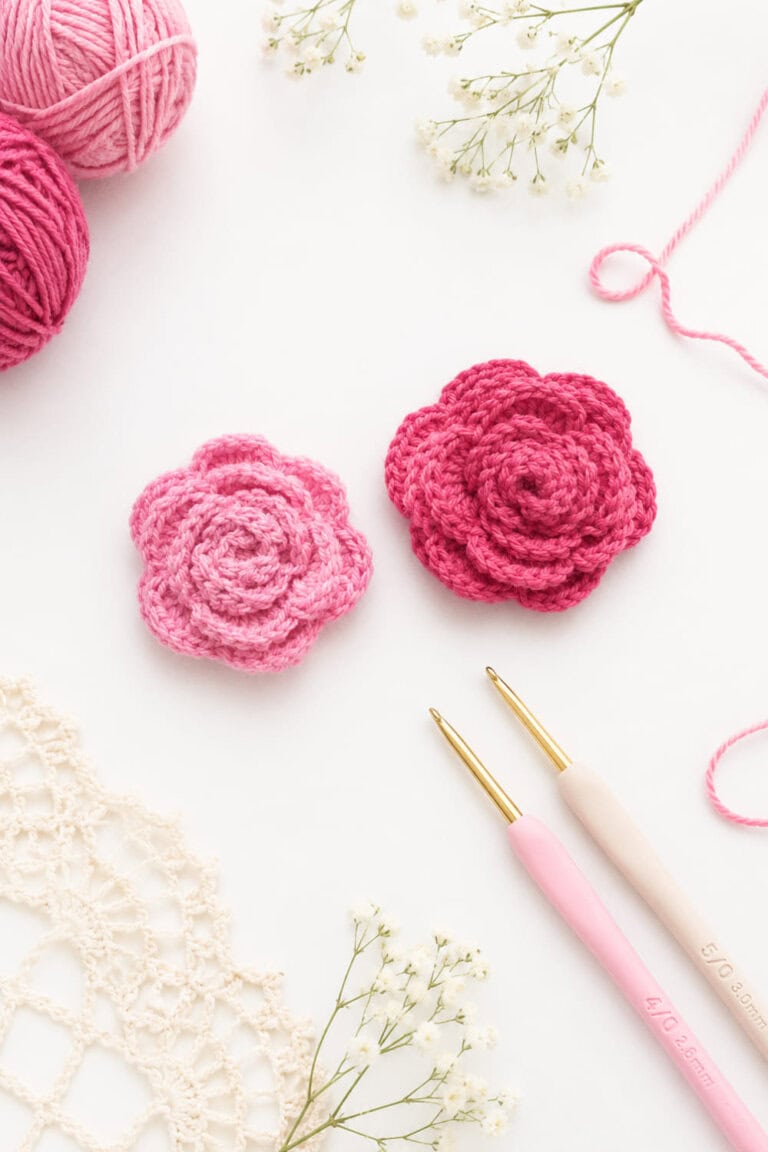
This pattern creates a rolled flower that looks beautiful attached to headbands or baskets.
Plus, it’s perfect for complete beginners to try.
Step-by-Step Instructions
Crochet a long strip with shell stitches
Begin by crocheting a long strip using shell stitches, which create the soft curved edges that look like flower petals.
As you work across the row, the shells naturally start giving the strip a ruffled look that will later form the layers of the flower.
Roll the strip inward carefully
Starting at one end, slowly roll the strip inward to begin shaping the flower center.
Keep the roll fairly tight in the middle so it looks like a realistic flower bud, then loosen it slightly as you continue rolling outward.
Stitch the base together
Once the flower shape looks full enough, use a yarn needle and matching yarn to stitch through the bottom layers to secure everything in place. This helps the flower keep its shape and prevents the petals from unraveling later.
Shape petals as you roll
As you continue rolling and stitching, gently adjust the shell stitches with your fingers to shape the petals outward.
Pulling some petals slightly forward and leaving others tucked inward gives the flower a fuller, more natural layered look.
These look much harder than they actually are. For more help, here’s a video tutorial.
5. Sunflower Crochet Pattern
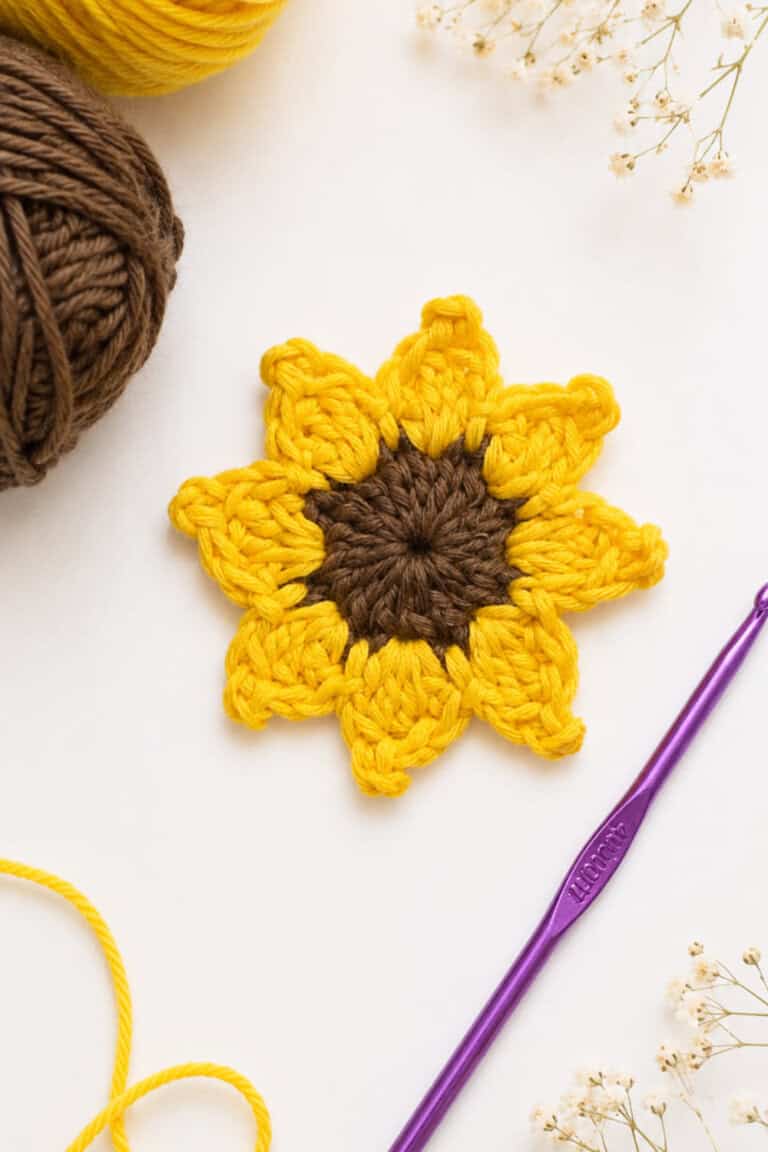
Sunflowers are perfect for summer decor and farmhouse crafts.
Step-by-Step Instructions
Crochet a brown center circle
Start by crocheting a small brown circle using a magic ring and simple stitches like single crochet. This forms the middle of the sunflower and gives the flower that classic realistic sunflower look.
Add yellow double crochet petals
Using yellow yarn, crochet double crochet stitches around the outer edge of the brown center to form the petals.
The taller stitches help create long sunflower petals that spread outward and make the flower look bright and full.
Create multiple petal layers
For a fuller sunflower, add another layer of petals behind the first round.
Slightly stagger the second layer so the petals peek through the gaps, which gives the flower more depth and a realistic layered appearance.
Finish with green leaves if desired
Using green yarn, crochet a few simple leaf shapes and attach them underneath the flower.
The leaves add extra detail and make the sunflower look beautiful for wreaths, bouquets, tote bags, or summer home decor projects.
I’ve seen people turn these into coasters and wall decor and they also make cute keychains too!
Here’s a video tutorial to help you make these cute crochet flowers!
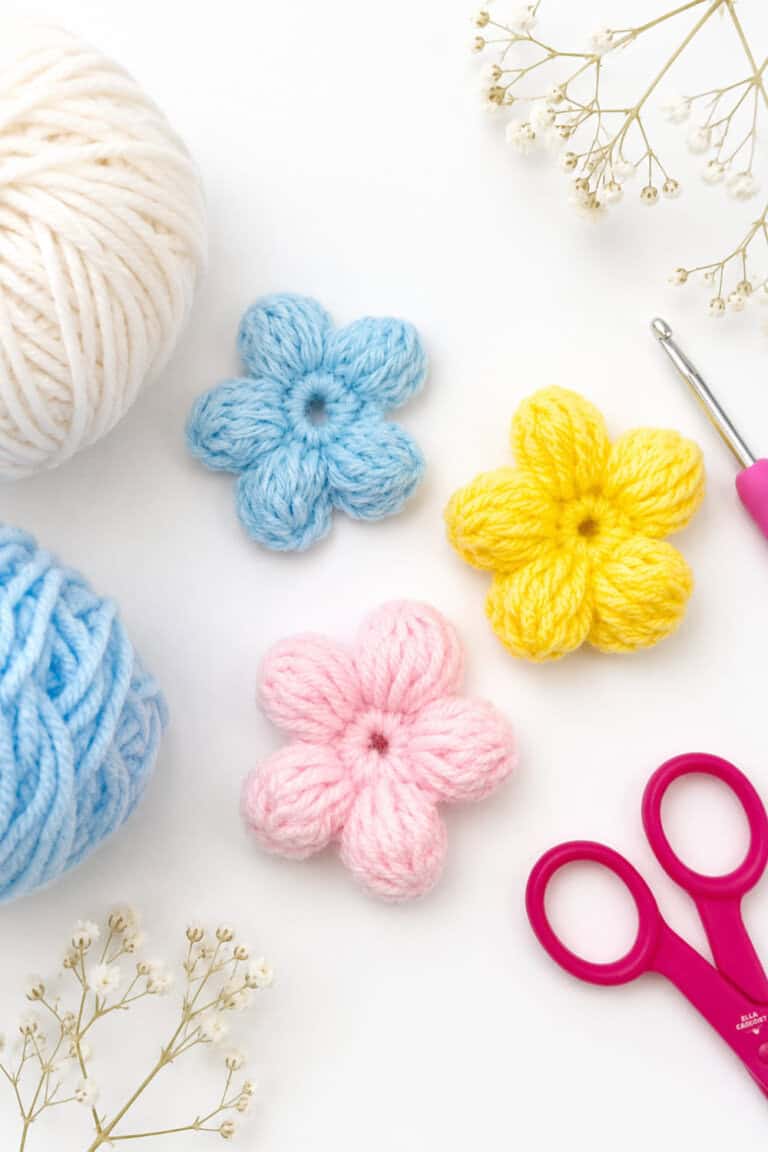
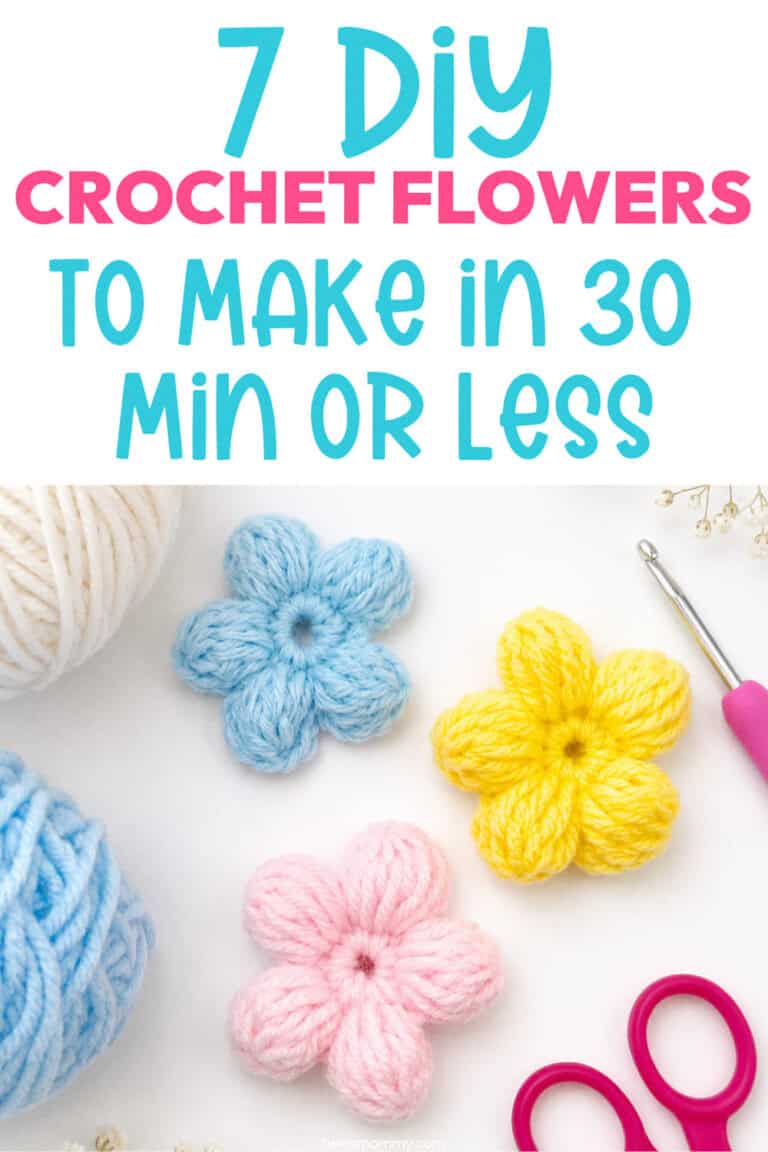
6. Five-Petal Beginner Flower
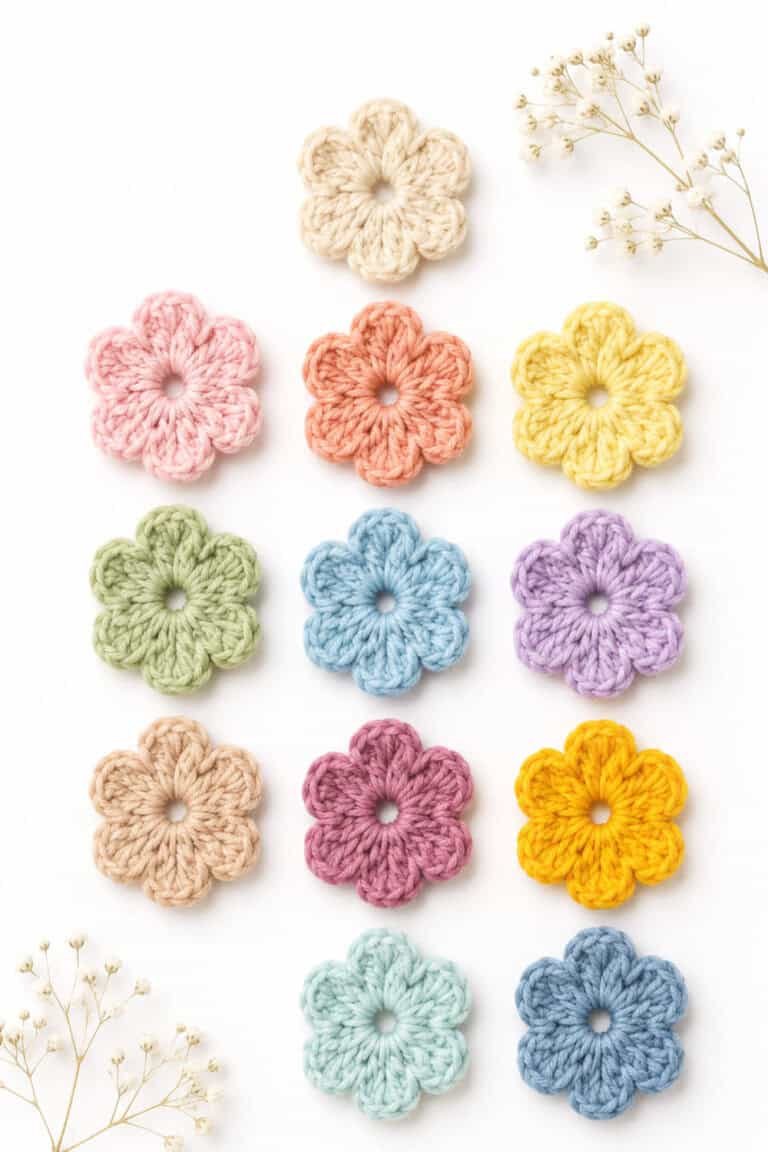
If you’re completely new to crochet, start with this easy beginner crochet flower.
This pattern only uses chains and double crochet stitches.
Step-by-Step Instructions
Create a center ring
Begin by making a small center ring using either a magic ring or a short chain joined into a circle.
This tiny center will hold all the flower petals together and gives the flower its rounded shape.
Chain 3
Chain 3 to start building the height for your first petal. This chain acts as part of the petal and helps create a softer, more open flower shape.
Add double crochet stitches into the ring
Work several double crochet stitches directly into the center ring to build out the petal.
The taller stitches help the petals look fuller and make the flower work up quickly, which is great for beginners.
Repeat five times for petals
Continue repeating the petal pattern around the center ring until you have five evenly spaced petals.
As you go, the flower will slowly start taking shape and looking fuller with each completed petal.
Join with slip stitch
Once all the petals are finished, join the last stitch to the beginning with a slip stitch to close the flower neatly.
This helps secure the shape and gives the flower a clean finished look ready for decorating bags, hats, bookmarks, or spring crafts.
This is one of the fastest crochet flowers you can make.
7. Hydrangea Inspired Crochet Flower
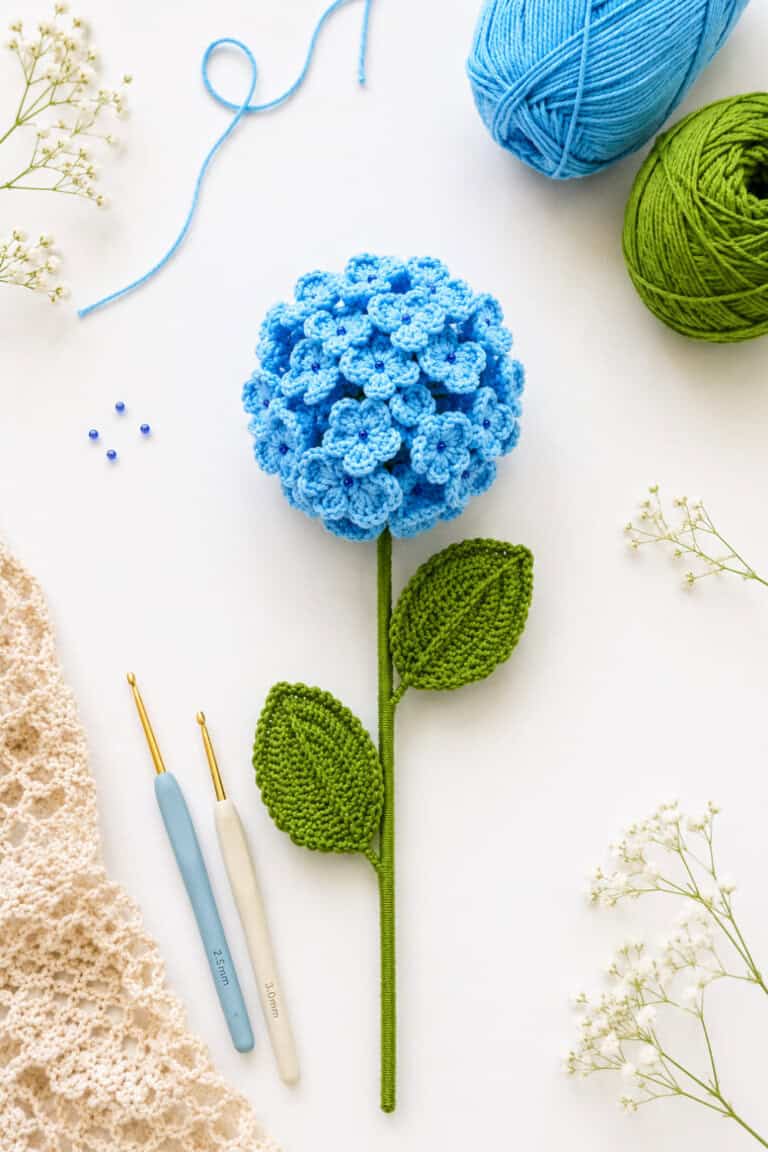
This flower pattern creates fuller clusters that look beautiful in bouquets.
Step-by-Step Instructions
Crochet multiple mini flowers
Start by crocheting several small flowers in the same pattern and color palette. Hydrangea flowers look best when made in soft clusters of blues, purples, pinks, or whites, so making multiple tiny blossoms helps create that full fluffy appearance.
Attach them together
Once the mini flowers are finished, begin attaching them side by side using a yarn needle or small stitches. Keep the flowers close together so the cluster starts looking full instead of flat.
Build a flower cluster shape
Continue layering and attaching flowers until they form a rounded hydrangea-style cluster. Turning the flowers slightly in different directions helps the arrangement look softer and more natural, just like real hydrangea blooms.
Add leaves or stems if desired
Finish the project by crocheting green leaves or attaching floral stems underneath the cluster. This makes the flowers perfect for bouquets, wreaths, spring centerpieces, or decorative crochet arrangements around the home.
These are gorgeous for spring centerpieces and are perfect for Mother’s Day or end-of-school teacher gift.
To help you out, check out this step-by-step video tutorial.
Tips for Making Crochet Flowers Look Better
One thing I learned early on is that flowers instantly look cleaner once you block them lightly.
To help you out if you are new to crocheting, here are more tips.
You can also:
- Stiffen them with fabric starch
- Sew beads into the center
- Layer multiple flower sizes together
- Use pastel cotton yarn for spring colors
- Attach clips or pins to the back
And honestly, don’t stress if the first few look messy.
Crochet flowers are one of those projects where your hands learn really quickly just by repeating the motions.
Cute & Easy Crochet Flowers You Can Make!
If you’ve been wanting a relaxing beginner crochet project, flower patterns are honestly one of the best places to start.
They’re fast. They use very little yarn. And you can actually use them afterward instead of tossing unfinished projects into a basket somewhere.
Plus, they make cute little gifts that people genuinely love getting during spring and summer.
Leave a Reply