When Valentine’s Day comes around, my twins are always eager to give their friends the cutest little gifts.
Of course they want a whole stash of candy to dole out but over the years, I always try to find some DIY craft I can make or make with my twins.
They’re at that age where handmade gifts feel extra special, and I love encouraging their creativity.
This year, we decided to make it a fun project and sew some adorable Valentine-themed gifts together.
These Valentine fabrics are perfect for crafting sweet, simple, and thoughtful presents.
Little fabric hearts, cute drawstring pouches, or festive keychains all carry a special charm that comes with giving a handmade gift crafted with love.
Let me share some easy Valentine sewing projects that your kids (and you) will enjoy making too!
Easy and Fun Valentine Crafts to Make
If you’re a stay-at-home mom, these handmade Valentine gifts can be a great way to show your loved ones some extra love or even turn your creativity into a little side income.
Get ready for some adorable fabric hearts to charming drawstring pouches you can make.
These projects are easy, thoughtful, and completely customizable.
So, let’s check them out.
DIY Cute Fabric Envelope
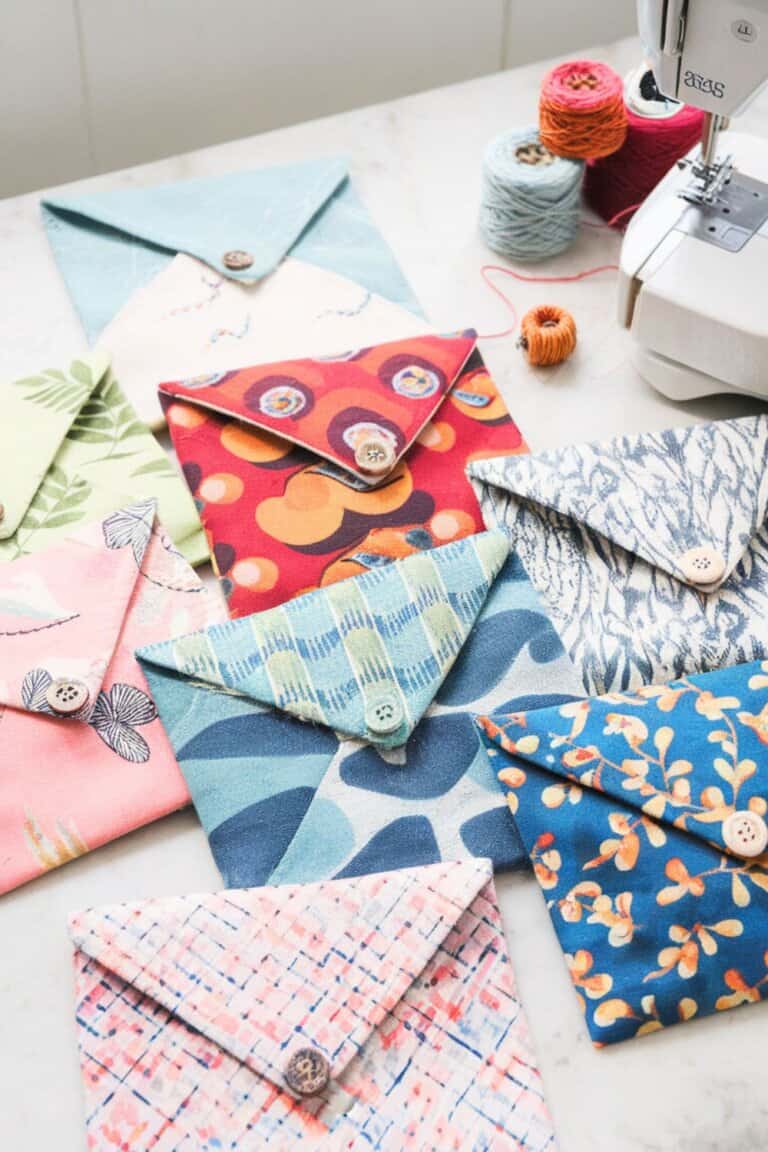
Create adorable fabric envelopes perfect for Valentine’s Day gifts, love notes, or even as small pouches for trinkets. This easy sewing project is beginner-friendly and can be customized with different fabrics to suit your style.
Materials Needed: Valentine-themed or fun creative fabric (cotton works best), sewing machine or needle and thread, scissors or rotary cutter, pins or clips, ruler or measuring tape, fabric marker or chalk, iron, and Velcro, snaps, or buttons for closure.
Instructions:
Step 1: Cut Your Fabric. Cut a rectangle from your fabric, about 8″ x 12″, but adjust as needed for your desired size. Iron the fabric to remove any wrinkles for easier sewing.
Step 2: Fold and Shape the Envelope. Lay the fabric rectangle flat with the wrong side facing up. Fold one short end up about 5 inches to form the envelope’s pocket, leaving the remaining fabric at the top for the flap. Press the fold with an iron to create a sharp crease.
Step 3: Sew the Sides. Pin or clip the sides of the folded pocket to keep it in place. Sew along both sides of the pocket with a ¼-inch seam allowance, making sure to backstitch at the beginning and end for durability.
Step 4: Create the Flap. Fold down the top section (the remaining fabric) into a triangular or rounded flap shape. Use a ruler to measure and ensure symmetry if desired. Trim the edges of the flap to create your desired shape, then hem the edges with a narrow folded seam or a zigzag stitch to prevent fraying.
Step 5: Add a Closure. Attach Velcro, a snap, or a button to the tip of the flap and the pocket to keep the envelope closed. Sew the closure securely in place, ensuring it aligns properly when closed.
Step 6: Finish and Embellish. Trim any loose threads and give your envelope a final press with the iron. Add decorative touches like ribbon, lace, or fabric paint if desired.
Fill your fabric envelope with a heartfelt note, candy, or small trinkets.
If you’re selling them, consider bundling them in sets with different fabric patterns to make them irresistible for Valentine shoppers or for your children’s Valentine’s friends.
Now you have a charming fabric envelope that’s ready to impress!
DIY Ruffle Heart Coasters
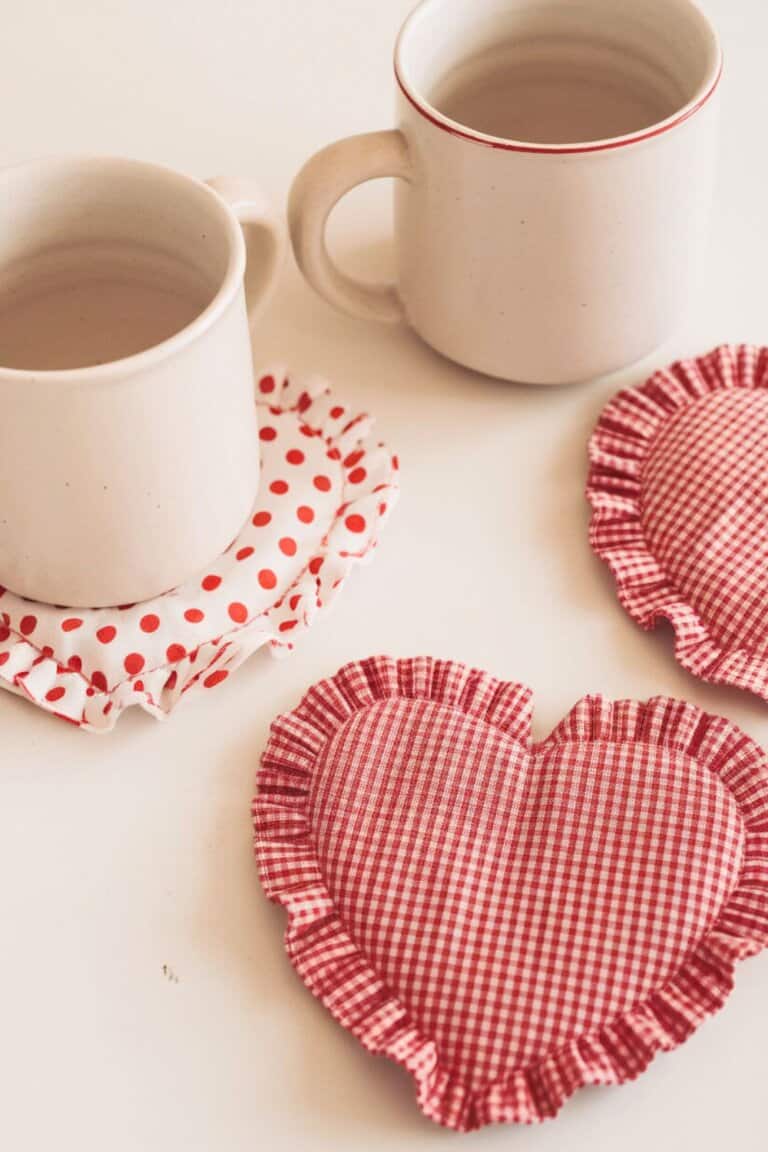
These ruffle heart coasters are the perfect blend of cute and functional, making them great for Valentine’s Day gifts or to sell as charming handmade items.
They’re easy to sew and add a sweet, whimsical touch to any table setting.
Materials Needed: Valentine-themed cotton fabric (for the hearts), contrasting fabric (for the ruffles), lightweight interfacing, sewing machine or needle and thread, scissors or rotary cutter, fabric marker or chalk, pins or clips, and iron.
Instructions:
Step 1: Cut the Heart Shapes. Use a heart-shaped template (you can print one or draw it) to cut two heart pieces from your main fabric for each coaster. Also, cut one heart from lightweight interfacing for each coaster to add stability.
Step 2: Cut the Ruffle Fabric. Cut strips of your contrasting fabric about 2 inches wide and long enough to gather around the perimeter of the heart shape. You can piece together strips if needed.
Step 3: Prepare the Ruffles. Fold the ruffle strips in half lengthwise with the wrong sides together and press with an iron. Sew a basting stitch along the raw edge and gently gather the fabric to create ruffles. Adjust the ruffle length to fit around the heart’s edge.
Step 4: Attach the Ruffles. Pin or clip the gathered ruffle to the right side of one heart piece, aligning the raw edges. Make sure the folded edge of the ruffle faces inward toward the center of the heart. Sew the ruffle in place using a ¼-inch seam allowance.
Step 5: Assemble the Coaster. Layer the second heart piece on top of the ruffled heart piece with right sides facing each other. Place the interfacing on the bottom. Pin or clip the layers together, leaving a small opening (about 2 inches) for turning.
Step 6: Sew the Coaster. Sew around the edges of the heart using a ¼-inch seam allowance, making sure to backstitch at the opening. Be careful not to sew over the folded edge of the ruffle.
Step 7: Turn and Press. Turn the coaster right-side out through the opening. Use a pointed tool to gently push out the edges of the heart for a clean shape. Press the coaster with an iron to flatten it.
Step 8: Finish the Coaster. Hand-stitch or machine-sew the opening closed. Give the coaster a final press to smooth out any wrinkles.
These ruffle heart coasters are not only adorable but also practical. Use them to brighten your home for Valentine’s Day or package them in sets to sell or gift.
They’re sure to make any cup of coffee or tea feel extra special!
DIY Fabric Heart Gift Pouch
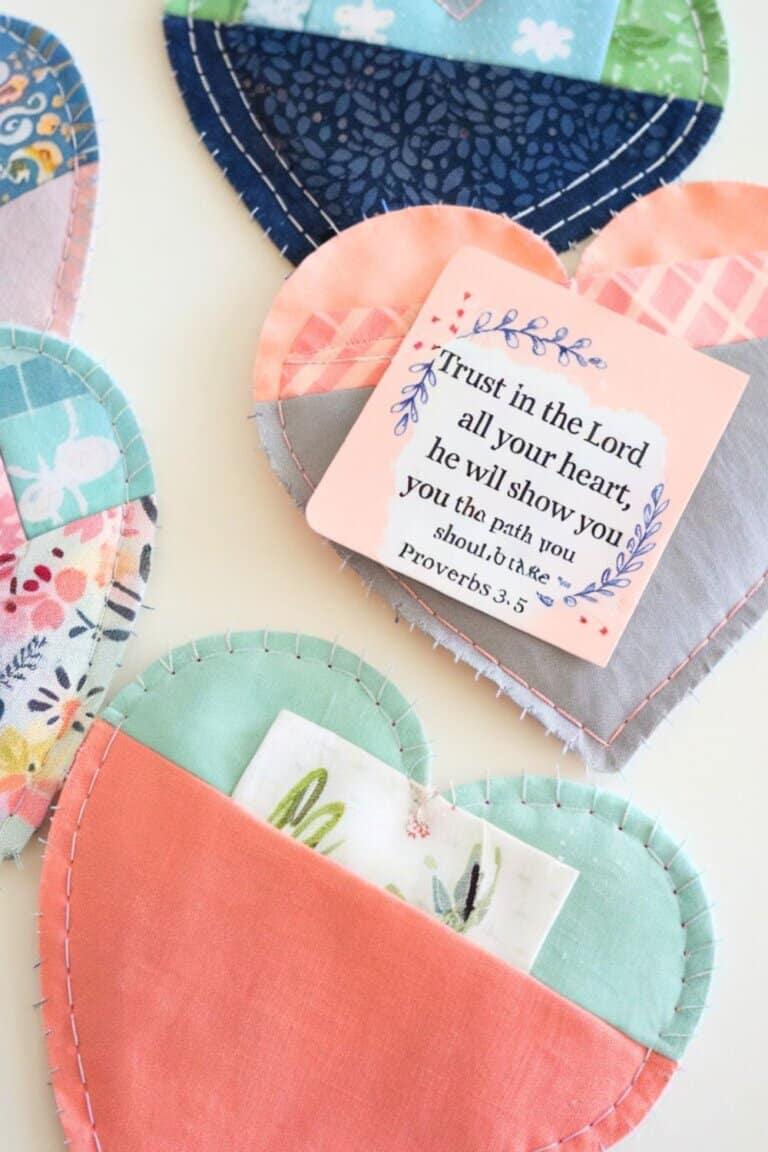
A fabric heart gift pouch is an adorable and practical way to wrap small Valentine’s gifts like candies, jewelry, or love notes.
These pouches are simple to make and can be reused, making them a sustainable alternative to disposable gift wrap.
Materials Needed: Valentine-themed cotton fabric (two coordinating patterns work well), sewing machine or needle and thread, scissors or rotary cutter, ruler or measuring tape, fabric marker or chalk, pins or clips, ribbon, twine, or cord (for the drawstring), and an iron.
Instructions:
Step 1: Cut the Heart Shapes. Use a heart-shaped template to cut two fabric hearts for each pouch. You can make them as large or small as you want, but 6″ to 8″ in width is a good starting size.
Step 2: Cut the Drawstring Casing. From a coordinating fabric, cut two small rectangles about 1.5″ x 3.” These will serve as the casing for your drawstring.
Step 3: Sew the Drawstring Casing. Fold each rectangle in half lengthwise with the wrong sides facing. Press with an iron, then fold under ¼ inch on each short end and press again. Sew along the short ends to create a clean edge.
Step 4: Attach the Casing to the Heart. Place each casing rectangle on the right side of one heart piece, about 1 inch below the top curve of the heart. Pin them in place and sew along the long edges to attach, leaving the center open to thread the drawstring later.
Step 5: Assemble the Pouch. Place the two heart pieces together with the right sides facing and pin or clip around the edges. Sew around the heart with a ¼-inch seam allowance, leaving the top open for the drawstring casing. Backstitch at the beginning and end for durability.
Step 6: Turn and Press. Turn the pouch right-side out through the open top. Use a pointed tool to gently push out the edges for a clean heart shape. Press with an iron to smooth out the fabric.
Step 7: Add the Drawstring. Thread your ribbon, twine, or cord through the casing using a safety pin or threading tool. Pull the drawstring so it gathers the top of the pouch, and tie a bow to secure it.
Optional Embellishments: Add lace trim, fabric paint, or small buttons to personalize your pouch even more.
Now your fabric heart gift pouch is ready to hold sweet surprises or small treasures!
Perfect for Valentine’s Day or any special occasion, these pouches are a heartfelt way to package gifts with a handmade touch.
DIY Felt Valentine Cookies
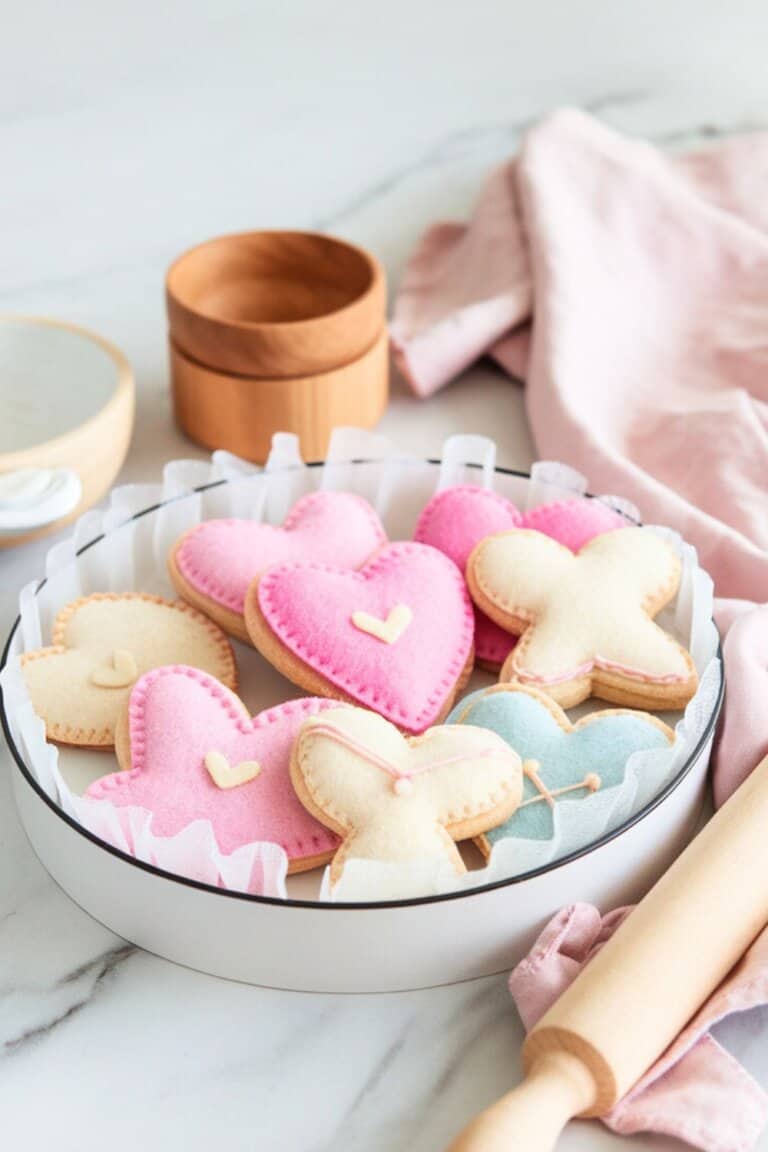
These felt Valentine cookies are an adorable and mess-free alternative to the real thing.
Perfect as pretend play toys for kids, decorative pieces, or even sweet little gifts, this sewing project is beginner-friendly and fun to make.
Materials Needed: Felt in brown, pink, white, and red; needle and thread or a sewing machine; fabric scissors; fabric glue (optional); stuffing (polyfill or scrap felt); fabric marker or chalk; pins or clips.
Instructions:
Step 1: Cut the Cookie Shapes. Use a circular template (like a cup or lid) to cut two brown felt circles for the base of each cookie. For the frosting, cut a smaller circle from pink or white felt, adding wavy edges to mimic real frosting. Cut small red or white felt hearts for sprinkles or toppings.
Step 2: Assemble the Cookie Layers. Place the frosting piece on top of one brown circle and arrange the small felt hearts or sprinkles on the frosting. Use fabric glue or small stitches to secure the hearts to the frosting.
Step 3: Sew the Cookie Base. Place the second brown circle under the frosted circle to create the cookie base. Pin or clip the layers together to hold them in place.
Step 4: Stuff the Cookie. Begin sewing around the edge of the cookie with a blanket stitch or a simple running stitch, leaving a small opening. Stuff the cookie lightly with polyfill or scrap felt to give it a plush, realistic look.
Step 5: Close the Cookie. Continue sewing around the edge to close the opening, making sure to backstitch for a secure finish.
Now your felt Valentine cookies are ready to gift, display, or enjoy as part of a fun pretend play set. These charming little creations are a delightful way to celebrate Valentine’s Day with a handmade touch!
DIY Valentine Heart Coffee Cozy
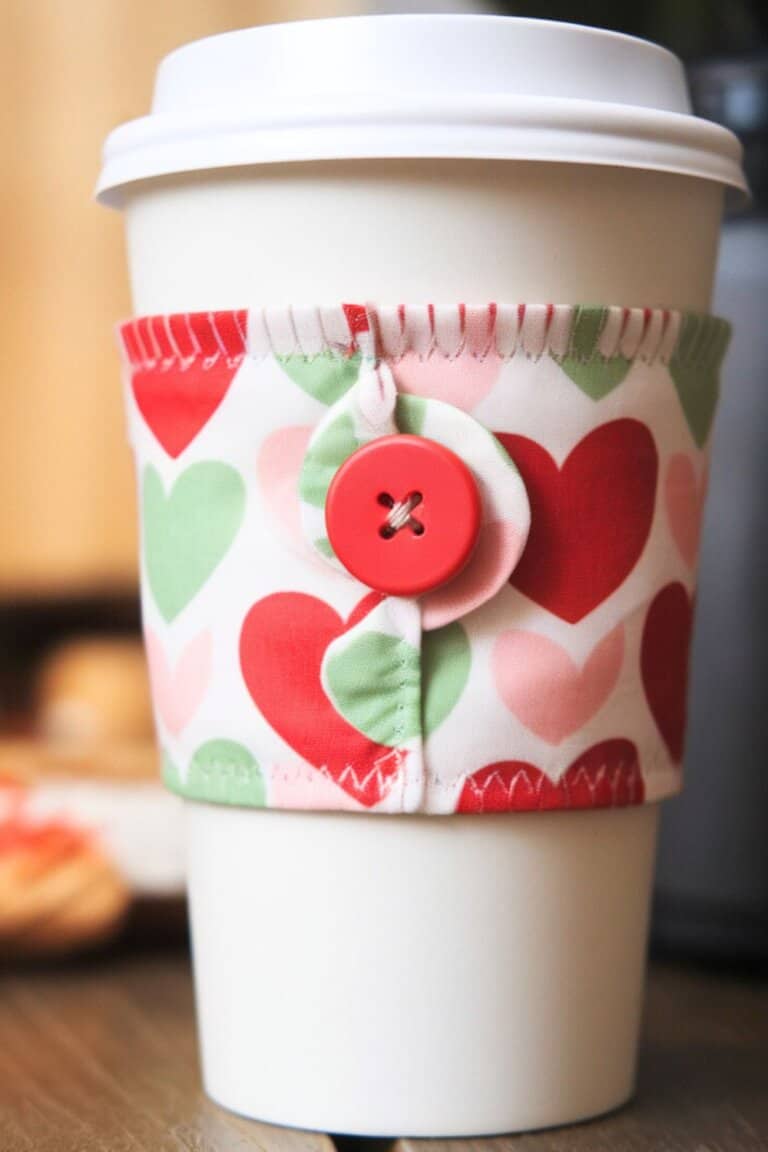
Nothing says “I love you” like a handmade gift, and this DIY Valentine heart coffee cozy is the perfect project!
It’s cute, reusable, and keeps your hands comfortable while sipping on your favorite drink.
Plus, the button closure adds a charming touch.
Supplies Needed: Felt or cotton fabric in Valentine colors (red, pink, white), scrap fabric for the heart embellishment, a button (choose one in a fun shape or color for extra flair), elastic hair tie or small loop of elastic cord, sewing thread in coordinating colors, scissors or rotary cutter, fabric marker or chalk, sewing machine or needle for hand-stitching, a coffee cup for measuring.
Step 1: Wrap your fabric around a coffee cup to measure the size of the cozy. Add 1 inch to the length and ½ inch to the height for seam allowances. Cut a rectangle from the fabric based on these dimensions.
Step 2: Cut a heart shape from your scrap fabric or felt. Position it in the center of your fabric rectangle. Sew the heart in place using a zigzag or running stitch. For extra texture, layer smaller hearts on top of the main heart and sew them down.
Step 3: Fold the fabric rectangle in half lengthwise, with the right sides facing each other. Sew along the long edge and one short edge, leaving the other short edge open. Turn the cozy right side out and press the seams with an iron for a polished finish.
Step 4: Take a small elastic hair tie or a loop of elastic cord, fold it in half, and insert the ends into the open short edge of the cozy. The loop should extend outward from the edge. Pin it in place and sew the edge closed, securing the elastic loop.
Step 5: Wrap the cozy around your coffee cup to determine where the button should go. Mark the spot with a fabric marker. Sew the button onto the fabric securely using coordinating thread.
Step 6: Trim any loose threads and use pinking shears or a decorative stitch along the edges for a finished look. You can also add extra embellishments like mini felt hearts or fabric paint for more Valentine charm.
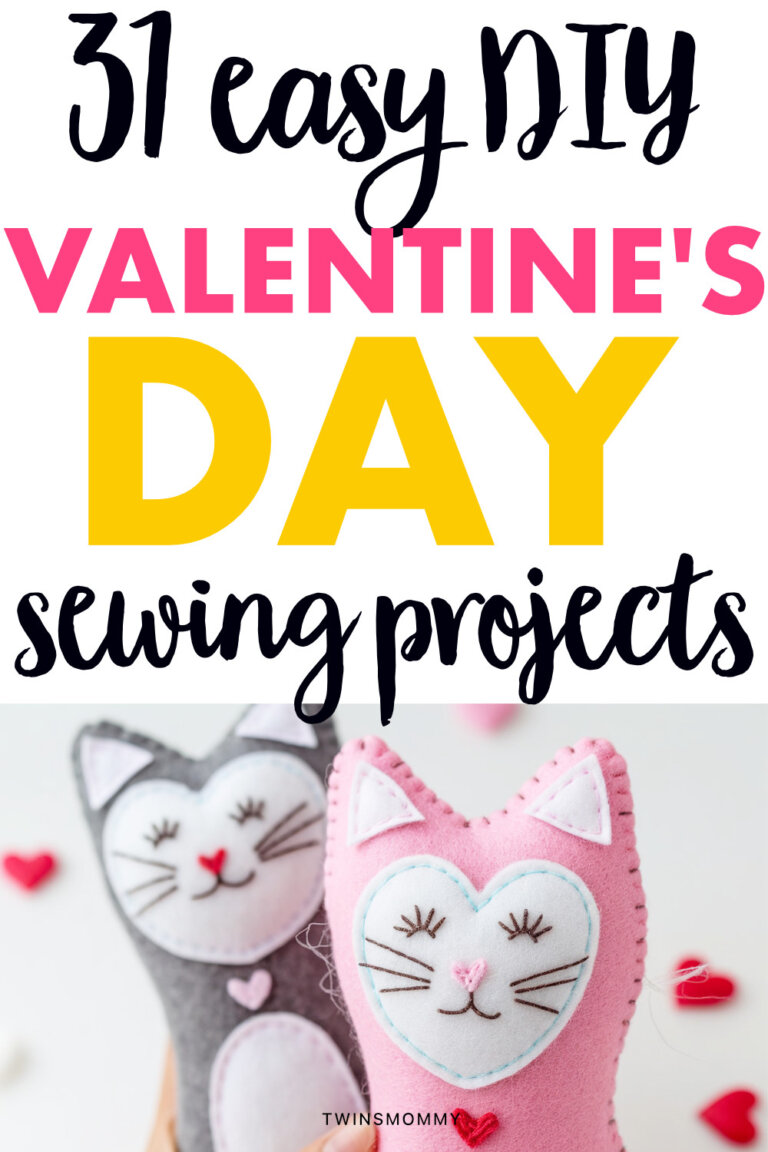
DIY Pocket Kitty
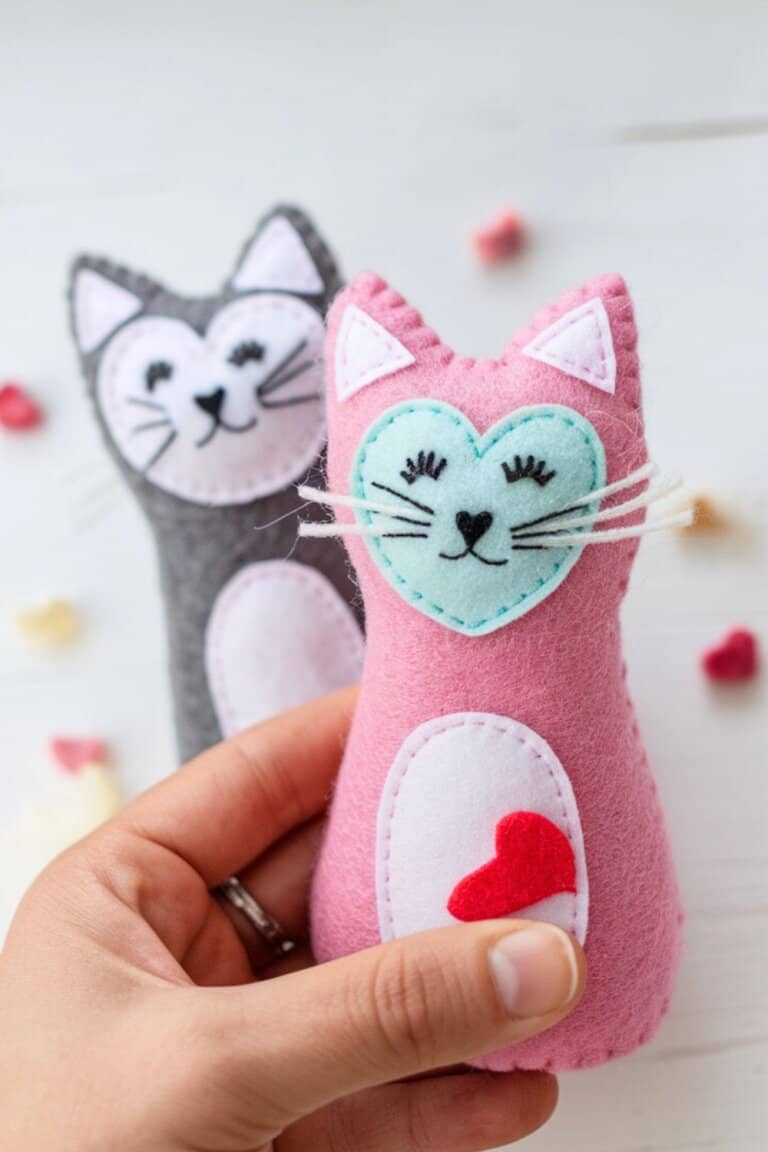
This felt cat pocket is the perfect project for cat lovers or anyone who enjoys handmade crafts.
Plus it’s small enough to hand out to classmates!
It’s a cute, functional, and creative way to store little items like notes, coins, or trinkets.
The design is simple enough for beginners but leaves plenty of room for customization.
Let’s get started on this fun and unique sewing project!
Supplies Needed: Small amount of polyfill stuffing or cotton batting, fabric marker or chalk for pattern transfer, sharp needle suitable for embroidery, embroidery floss or thread in coordinating or contrasting colors, precision scissors or small craft scissors, a blunt tool like a wooden skewer or knitting needle for stuffing, wool blend felt: Two 9″x12″ sheets for the body and a small scrap for the face and details.
Instructions:
Step 1: Cut out your pieces: two body shapes and one heart-shaped face piece. Use a fabric marker or chalk to transfer your pattern onto the felt. Stitch the eyes and nose onto the face piece before attaching it to the body. A backstitch works beautifully for the eyes, while a satin stitch gives the nose a clean, polished look. Feel free to add personality to your cat by playing with the shape or placement of the eyes—make it look curious, sleepy, or mischievous!
Step 2: Center the heart-shaped face piece on one of the body shapes and secure it with a neat running stitch. This step is where the magic happens, as the heart shape makes your cat extra adorable and unique.
Step 3: For the whiskers, use a thicker thread or even thin yarn. One bold stitch for each whisker gives a whimsical and charming touch. If you’re feeling creative, try experimenting with curved or asymmetrical whiskers for a playful look.
Step 4: Place the two body pieces together, wrong sides facing each other. Sew around the edges using a running stitch about 1/8″ from the edge. Leave a small opening at the bottom for stuffing.
Step 5: Gently stuff your felt cat pocket with polyfill or cotton batting, using a wooden skewer or knitting needle to get into the corners. Add just enough stuffing to give it a slightly puffy look without overfilling. Once you’re satisfied, close the opening with the same running stitch, making sure your stitches blend seamlessly.
Step 6: You can make each cat pocket unique by adding a tail, a little bow tie, or stitching initials on the back. Use contrasting felt scraps to create extra details like tiny ears or paws for added cuteness.
These felt cat pockets are perfect as Valentine’s gifts, party favors, or even mini storage for your desk or bag.
If you’re looking to sell them, try making a collection with different colors or facial expressions to offer variety.
Enjoy sewing your adorable felt cat pockets—your creativity is the limit!
DIY Arrow Bean Bags
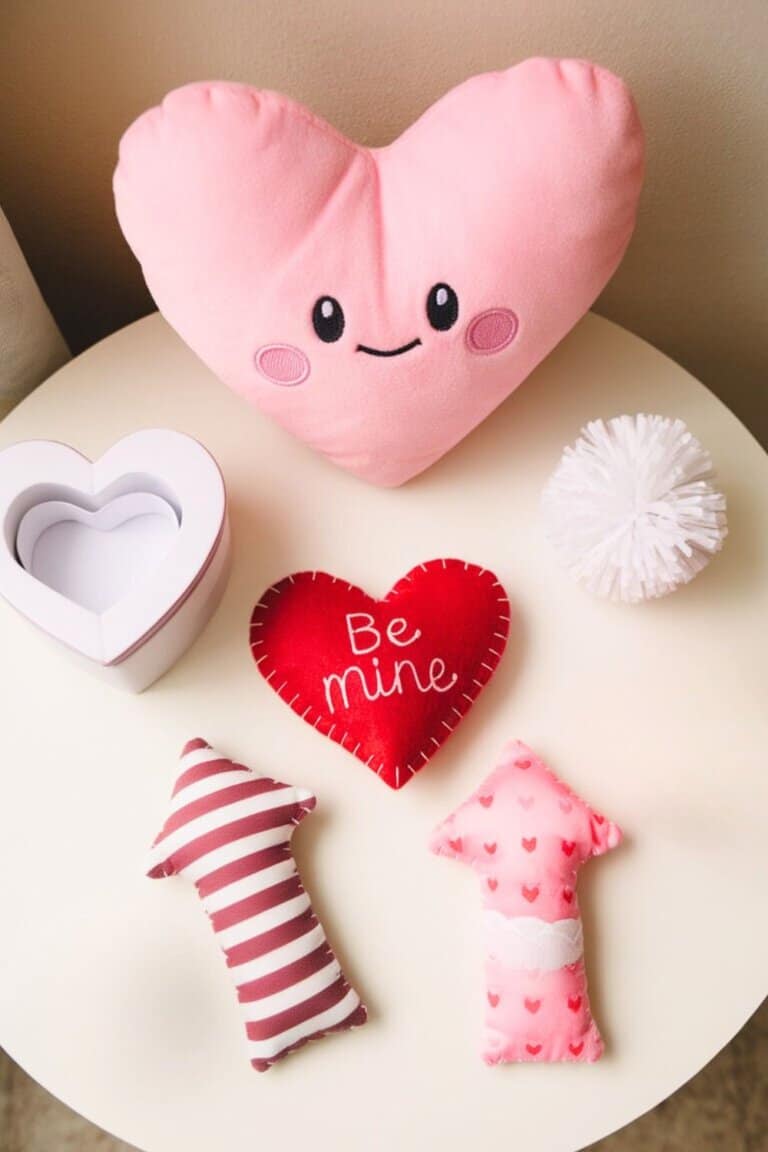
Bring a playful twist to your crafting with this adorable arrow bean bag project.
It’s perfect for games, decorations, or even as a quirky gift.
With just a few simple supplies and a little creativity, you’ll have a set of handmade arrows that are functional and full of charm.
Supplies Needed: Microbeads or Poly-Pellets for the arrowhead, cotton or wool stuffing for the arrow body, a small funnel or rolled-up paper for filling, woven cotton fabric scraps, approximately 10” x 8” per arrow (great for repurposing scrap fabric!), sewing thread in coordinating or contrasting colors, fabric scissors and pinking shears for finishing touches, sewing machine or needle for hand-stitching, washi tape or colored cardstock to create a fun target for the arrows, arrow pattern template
Instructions:
Step 1: Use the arrow pattern to cut two identical arrow shapes from your fabric scraps. Choose bold or playful patterns for a unique look—mix and match colors for the head and tail if you want to make them stand out.
Step 2: Place the two arrow pieces together with the wrong sides facing each other. Sew around the edges using a ¼” seam allowance, leaving a small opening near the tail for filling.
Step 3: Using a small funnel or rolled-up paper, fill the arrowhead (the pointy end) with microbeads or Poly-Pellets. These add weight and structure to your arrow, making it great for tossing or decoration. Be careful not to overfill—leave a little room near the seam for stitching.
Step 4: Use hemostats, a chopstick, or even the blunt end of a paintbrush to firmly pack cotton or wool stuffing into the body of the arrow. Make sure it’s evenly stuffed, especially near the tail, to maintain the arrow’s shape.
Step 5: Once filled, stitch the opening closed with neat, even stitches. If you’re using a sewing machine, reinforce the seam to ensure durability.
Step 6: Use pinking shears to trim around the edges of the arrow, giving it a fun, zigzag finish. Be sure to stay clear of the stitching line to avoid weakening the seams.
Let your creativity fly with these one-of-a-kind bean bag arrows—they’re sure to hit the mark!
DIY Heart Hand Warmers

Keep your hands warm this winter with these adorable DIY heart hand warmers.
And, where we live – up North where it snows in Februrary – it will make the perfect Valentine’s gift for kids.
They’re not just practical; they’re also a sweet and thoughtful gift for Valentine’s Day or any chilly occasion.
Plus, you can make them from upcycled fabrics, giving them a unique and eco-friendly touch.
Supplies Needed: A prewashed wool sweater or felted scarf for the outer heart (the cozier, the better!), a soft cotton t-shirt or knit scraps for the inner heart (something stretchy works best), 100% cotton thread (important for microwave safety), long-grain rice, flaxseed, or dried cherry pits for the filling, small wonder clips, alligator clips, or pins, sharp scissors, fabric marker or chalk, and a sewing machine, a tiny funnel, straw, or rolled-up paper for filling the hearts, heart hand warmer pattern (or draw your own template!)
Step 1: Using the heart pattern, cut two hearts from the wool fabric for the outer layer and two hearts from the knit fabric for the inner layer. For a unique twist, mix and match colors or textures for the layers.
Step 2: Place two knit hearts together, right sides facing each other. Sew around the edges with a ¼” seam allowance, leaving a small opening for filling. Backstitch at the beginning and end to secure the seam. Repeat for the second set of knit hearts.
Step 3: Using a tiny funnel or rolled-up paper, fill each inner heart with long-grain rice or your chosen filler. Don’t overfill—leave enough room for the heart to be flexible and comfortable in your hands. Sew the opening closed with a tight stitch.
Step 4: Hem the straight edges of the overlapping wool heart pieces by folding them over ¼” and stitching them down. These overlapping pieces will form an envelope-style opening for the inner heart insert.
Step 5: Layer the overlapping wool pieces, right sides together, on top of the whole wool heart piece. The top overlapping piece should be in front. Pin or clip the layers together to hold them in place.
Step 6: Sew around the edges of the wool heart with a ⅜” seam allowance, ensuring all layers are securely stitched. Trim the seam allowance if needed and carefully flip the heart right side out through the envelope opening.
Step 7: Gently squish the filled inner heart into the outer wool heart through the opening. Adjust it until it fits snugly.
DIY Heart Zipper Pouch
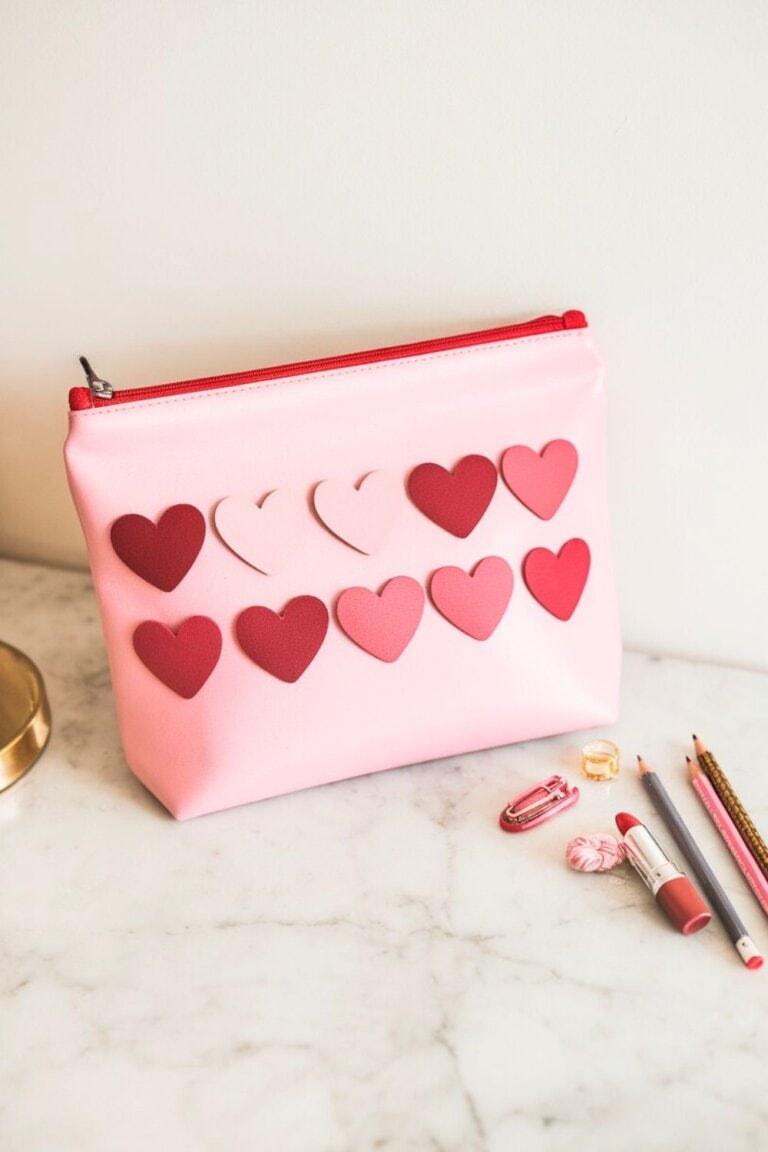
Add a little extra charm to your accessories with this heart-themed zipper pouch.
This project is as functional as it is beautiful, offering plenty of space for storing makeup, craft supplies, or keepsakes.
Supplies Needed: 2 pieces of durable fabric like canvas or duck cloth, 12″ x 8″ (prewashed for softness), 2 pieces of cotton or lightweight fabric, 12″ x 8″, 2 pieces of fusible Shape Flex interfacing, 12″ x 8,” 4 colors (two pinks, two reds), cut into small hearts, Use a heart stencil, punch, or draw your own, 12″ long, polyester preferred for easy trimming, coordinating or contrasting colors, sewing machine, scissors, fabric marker, ruler, pins or clips, zipper foot.
Step 1: Select your felt colors and cut out 12 small hearts using your stencil or template. Arrange them in a gradient from darkest to lightest or mix and match for a playful look.
Step 2: On one piece of the outer fabric, draw a grid with a fabric marker or chalk. The grid size will depend on the size of your hearts, but aim for even spacing with at least 1 ½” from the top and bottom edges.
Step 3: Pin the hearts onto the grid in your desired arrangement. Stitch down the center of each heart using a straight stitch and a longer stitch length (3.5–4) to give a quilted effect. This will allow the hearts to “flutter” slightly on the sides, adding texture.
Step 4: Cut a 1″ x 1″ square out of the bottom two corners of both outer fabric pieces. Repeat for the lining pieces. Press the Shape Flex interfacing onto the wrong side of the lining fabric to add structure.
Step 5: Pin the front outer fabric piece (with the hearts) to the right side of the zipper, aligning the edges. Then pin one lining piece to the wrong side of the zipper. Using a zipper foot, sew along the edge. Repeat for the other side of the zipper with the back outer fabric piece and remaining lining piece.
Step 6: Press the fabric away from the zipper and topstitch along both sides for a professional finish. Trim any excess zipper if you used a polyester zipper (avoid trimming metal zippers).
Step 7: Unzip the zipper ¾ of the way. Pin the outer fabric pieces together with right sides facing and the lining pieces together with right sides facing. Fold the zipper seam allowance toward the lining.
Step 8: Stitch around the edges of the pouch with a ½” seam allowance, leaving a 2″ opening in the lining. Skip the corners for now. To box the corners, pinch the raw edges of the cut squares together and align the seams. Stitch across each corner with a ½” seam allowance.
Step 9: Turn the pouch right side out through the opening in the lining. Gently push out the corners for a crisp shape. Stitch the lining opening closed by hand or machine.
DIY Candy Heart Pillow
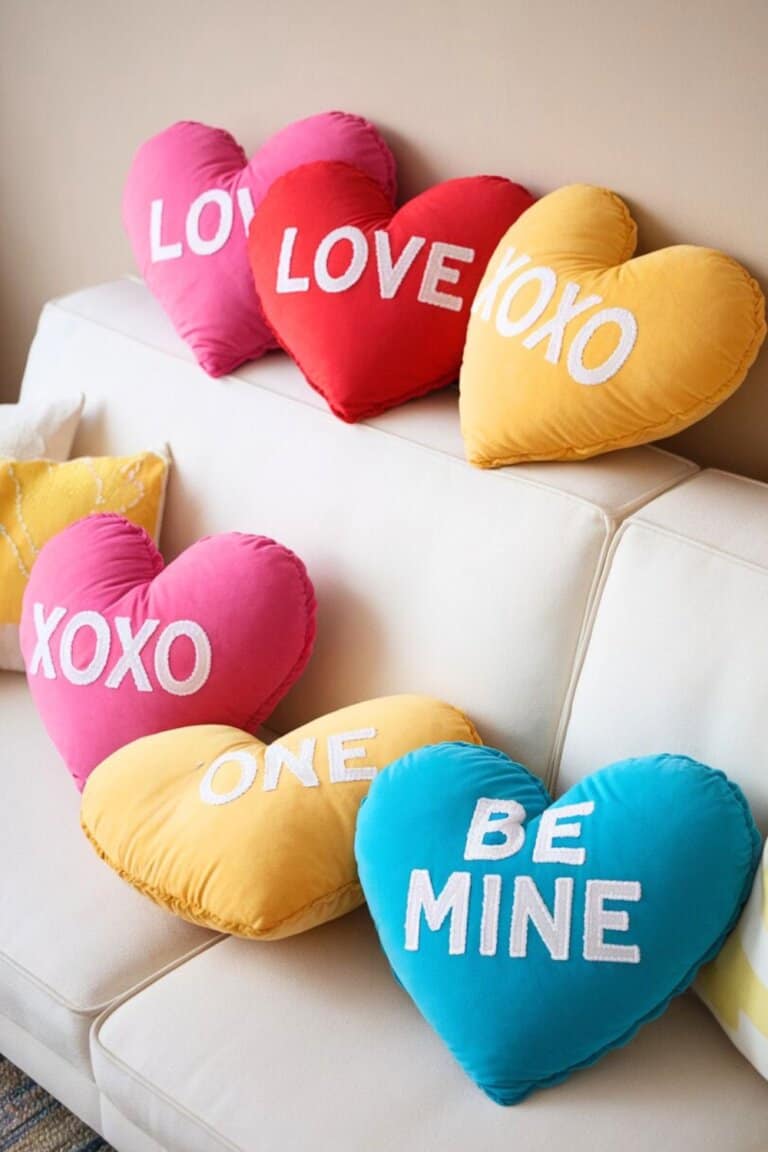
Sure, your kids can’t bring these Valentine sewing project to school for all their friends, but for that special friend why not?
My daughter would love to give these candy heart pillows to her two best friends for Valentine’s Day.
Supplies Needed: Soft cotton, flannel, or fleece in pastel colors like pink, yellow, lavender, green, and white (1/2 yard per pillow), felt or fabric scraps For the candy heart messages (choose contrasting colors), polyfill or your preferred pillow stuffing, coordinating or contrasting thread for the seams and lettering, large heart shape template (about 18” wide), fabric marker or chalk, heat-n-bond or fabric glue, scissors, pins or clips, sewing machine, and an iron.
Instructions:
Step 1: Using your heart template, trace and cut two large heart shapes from your fabric for each pillow. If you want a more whimsical look, hand-draw the heart shape for a slightly imperfect charm.
Step 2: Cut out letters from felt or fabric scraps to spell classic candy heart sayings like “Be Mine,” “XOXO,” or “Love You.” For clean edges, use Heat-n-Bond to stabilize the fabric before cutting.
Step 3: Arrange the letters on the front heart piece. Once you’re happy with the layout, use fabric glue or an iron to adhere them in place with Heat-n-Bond. For extra durability and a polished look, stitch around the edges of each letter with a small zigzag or straight stitch.
Step 4: Place the two heart pieces right sides together and pin or clip around the edges. Sew around the heart with a ½” seam allowance, leaving a 4” gap along one side for stuffing. Backstitch at the beginning and end to secure the seam.
Step 5: Turn the pillow right side out through the opening. Gently push out the edges of the heart using a blunt tool like a knitting needle or chopstick for clean lines. Fill the pillow with polyfill until it’s soft and plump.
Step 6: Fold the raw edges of the opening inward and sew it closed using an invisible ladder stitch by hand or a straight stitch on your machine for a quick finish.
Leather Heart Keychain
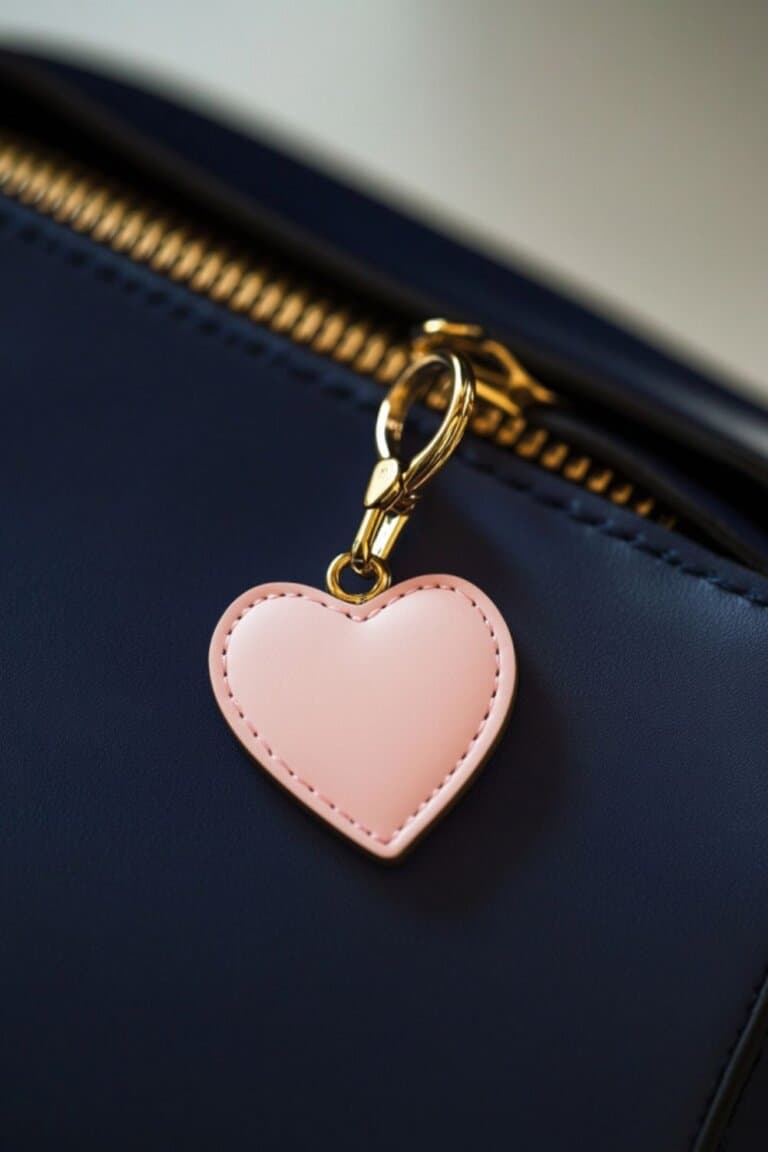
To make a leather heart keychain, cut two hearts and two strips from your leather. Sew the strips together with a topstitch ⅛” from the edge.
Place the loop between the hearts at your preferred spot (center top works well) with wrong sides together.
Topstitch around the heart, leaving a ½” gap. Fill the heart evenly with craft filling, then close the gap and knot the threads.
Attach a keyring to the loop, and your keychain is ready—a perfect handmade Valentine’s gift!
DIY Heart Dog Scarf

Here’s a Valentine’s dog scarf you can make to celebrate Valentine’s Day or do make and sell, start with cotton fabric and Valentine scraps.
Cut the pattern pieces, pinning straps (piece “B”) with right sides together.
Sew around the straps at ¼”, leaving one side open.
Trim corners, turn them inside out, and press flat. Attach the straps to the center of the bandana’s body (piece “A”), matching open edges to the bandana’s sides. Fold the bandana in half, pin, and sew around the edges, leaving a small gap.
Turn it right side out through the gap, press flat, and close the opening with an invisible stitch.
Your pup’s Valentine scarf is ready!
DIY Heart Hoops
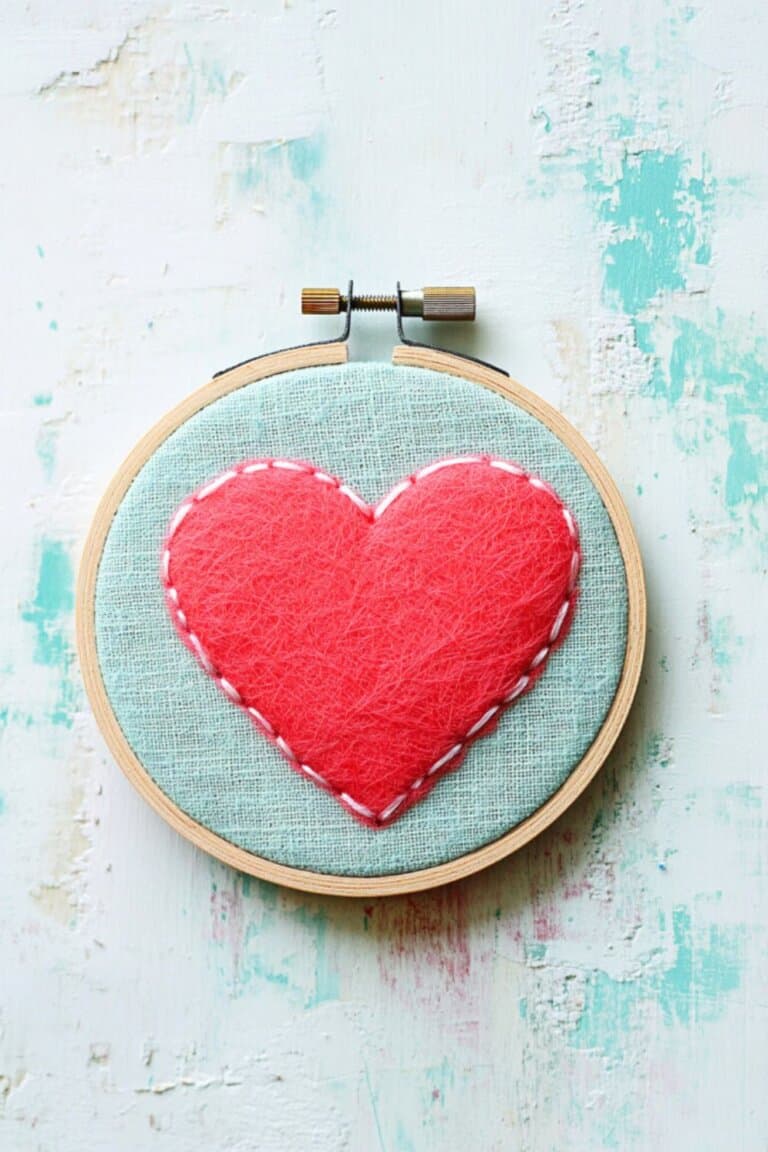
Aren’t these just adorable for a Valentine’s Day craft idea?
To make heart embroidery hoops, start by securing a small piece of fabric into the hoop.
Trace and cut out a heart from felt or coordinating fabric. Stitch the heart onto the fabric using embroidery thread.
Trim the excess fabric around the hoop’s edge.
For a polished finish, hot glue the fabric edge to the inside of the hoop, or simply trim it neatly if you prefer. Your adorable heart hoop is ready to display or gift!
Heart Quilt
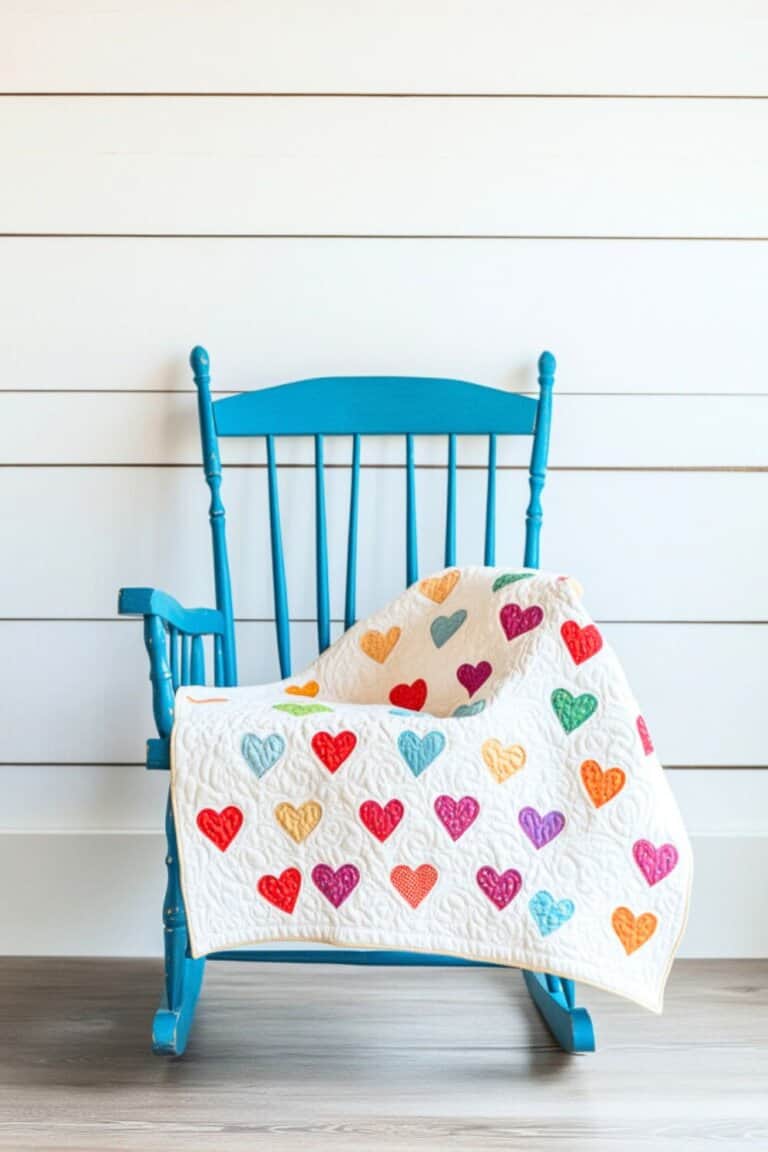
To make this adorable heart quilt for Valentine’s Day, start with 20 print squares (or strips) and background fabric.
Cut print squares into 2 strips (2 ½” x 4 ½”).
Cut background fabric into squares and strips based on the pattern instructions.
For each block, sew diagonal lines on background squares to create the heart shape. Attach side and top/bottom strips to frame the block, which should measure 7 ½” when finished.
Make 20 blocks, arrange them in 5 rows of 4, and sew the blocks together into rows.
Attach borders, press seams, and add binding to finish. This quilt finishes at 36” x 43” and is perfect for cozy Valentine vibes!
DIY Valentine Heart Tote
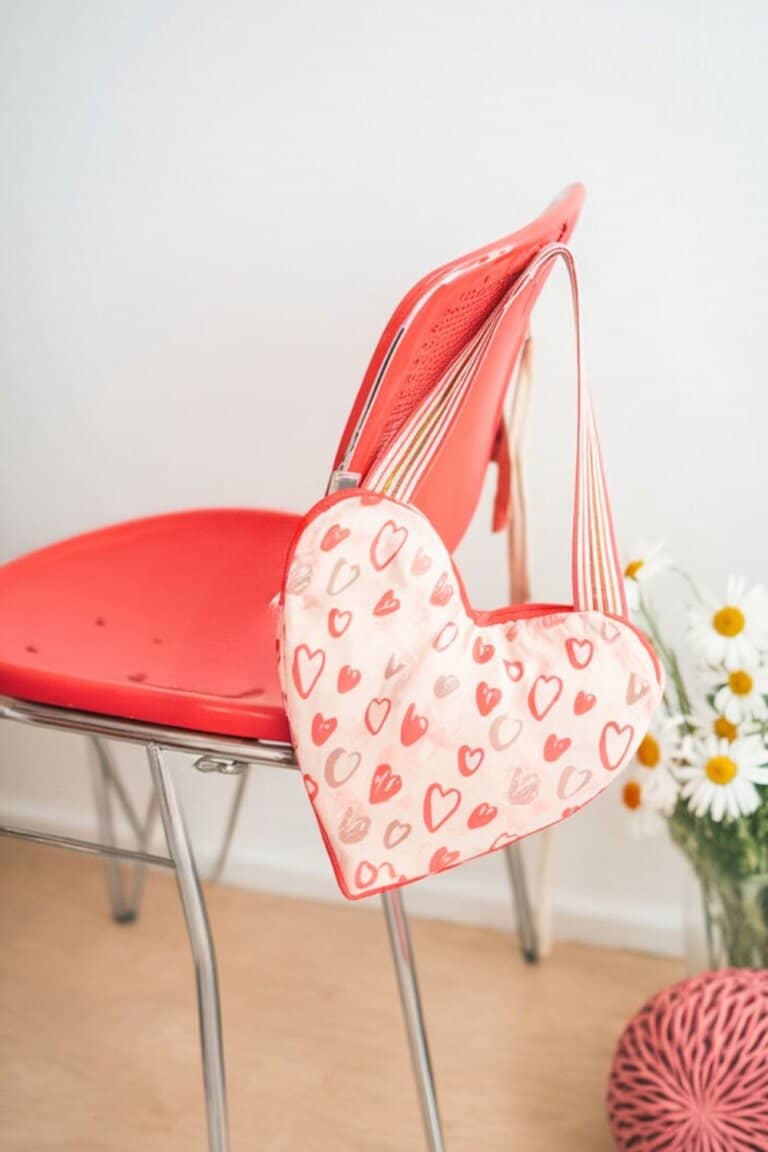
To make a heart-shaped tote, cut two hearts each from exterior and lining fabric.
Sew the bottom triangle of the hearts, leaving the top open and a gap in the lining for turning.
Add ribbon loops for handles between layers, sew the top, and reinforce the handles. Turn right side out, close the gap, and press.
A cute Valentine’s bag is ready!
More Wonderful DIY Valentine Sewing Projects You Can Make (and Sell)
Here are even more creative ways to celebrate Valentine’s Day.
These sewing projects are perfect for adding a personal touch to your gifts or decor.
Valentine Heart Bookmark
Valentine Cones for Gifts
Tic Tac Toe Game
Frayed Heart Garland
Heart Wands
Valentine Card Holder
Heart Pencil Toppers
Quilted Heart Door Hangers
DIY Heart Shaped Tea Bags
Heart Backpack
Treat Bag
Felt Calendar
Valentine’s Day Chairbacker
Mini Heart Banners
Fabric Hearts on Wooden Stands
Fabric Heart Ornaments
Lady Lug Bug
Best Sewing Projects for Valentine’s Day
I hope you found some good sewing projects for Valentine’s Day! I know I have for sure!
The little projects are perfect for your kids to take to school for V-day and the bigger items can be some great gifts for teachers! Win-win!
Make sure to Pin this and follow me on Pinterest!


Leave a Reply