When I was pregnant, I needed something calming to keep my hands busy and my mind relaxed, so I picked up knitting.
And I loved it!
It started as a way to unwind at the end of the day, but it quickly became this comforting little world of soft yarn, tiny stitches, and the excitement of making something for my twins.
I remember sitting on the couch with my swollen feet propped up, carefully working on little baby hats and blankets, imagining what life would be like once my twins were finally here.
Now that my daughter’s a bit older, she’s been watching me craft and asking if I can teach her how to knit and crochet.
There’s something so sweet about seeing her curiosity and creativity spark, the same way mine did back then.
It feels like coming full circle—me passing down something that once brought me so much comfort and joy, and her discovering how fun it is to make something completely from scratch with her own two hands.
That’s what inspired me to round up some of the cutest crochet gift ideas.
These are projects that are simple enough for beginners like her, but still beautiful and thoughtful enough to make anyone smile.
Whether you want to whip up something cozy for a friend, a handmade surprise for a family member, or just a fun weekend project to do together, these crochet gifts are guaranteed to light up anyone’s day—and maybe even spark a new creative hobby, just like they did for us.
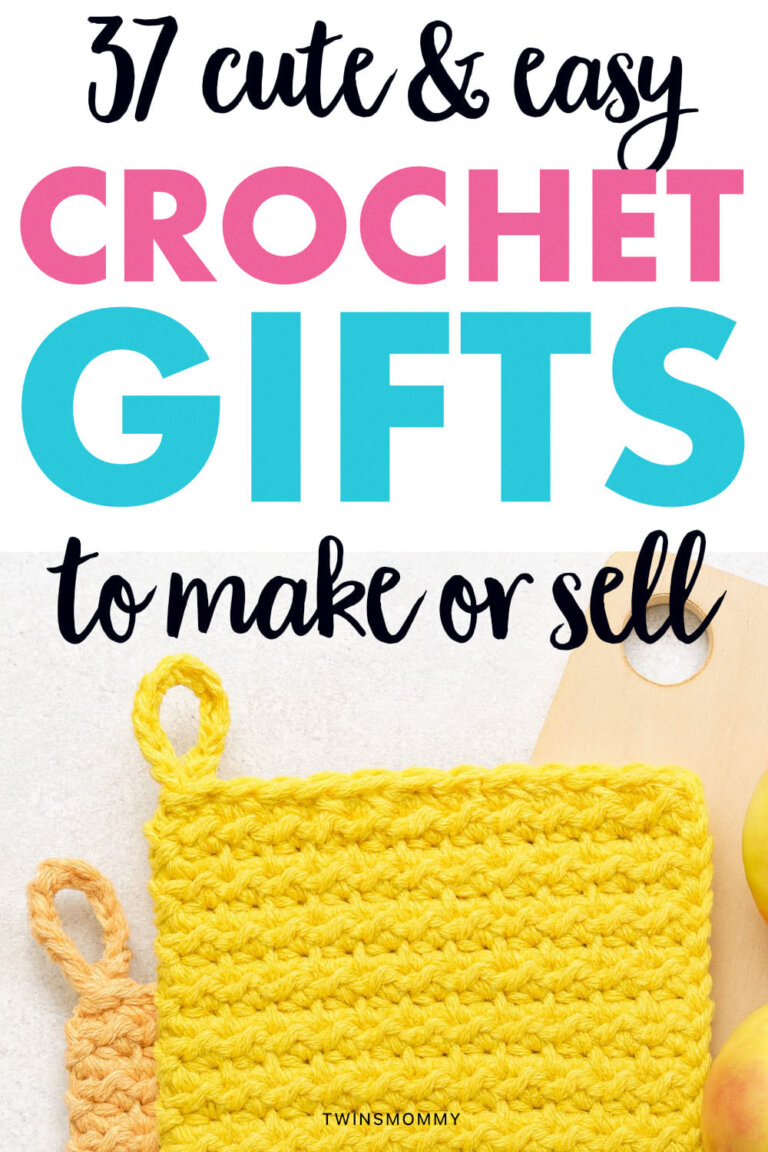
Fun & Cute Crochet Gift Ideas
These fun and cute crochet gift ideas are perfect for fall and the holidays.
For example, if you’re getting a head start on Christmas presents, whipping up something heartfelt for a birthday or baby shower, or adding a handmade touch to milestones like weddings, anniversaries, or graduations.
They’re also great for more personal moments, like making a sweet little something for Mother’s Day or Father’s Day, surprising someone with a thoughtful housewarming gift, or celebrating love on Valentine’s Day and engagements.
With the chilly weather rolling in, these handmade pieces will feel even more warm and meaningful—perfect for showing just how much you care.
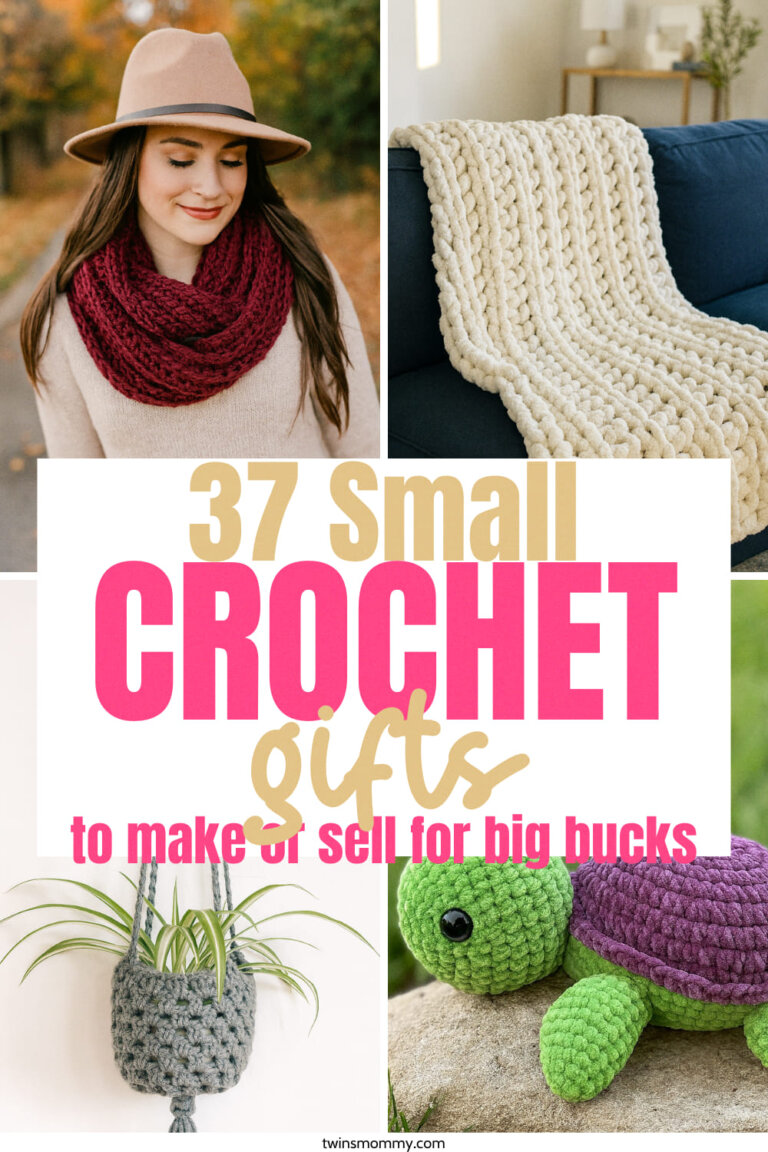
1. Crochet Shoulder Bag
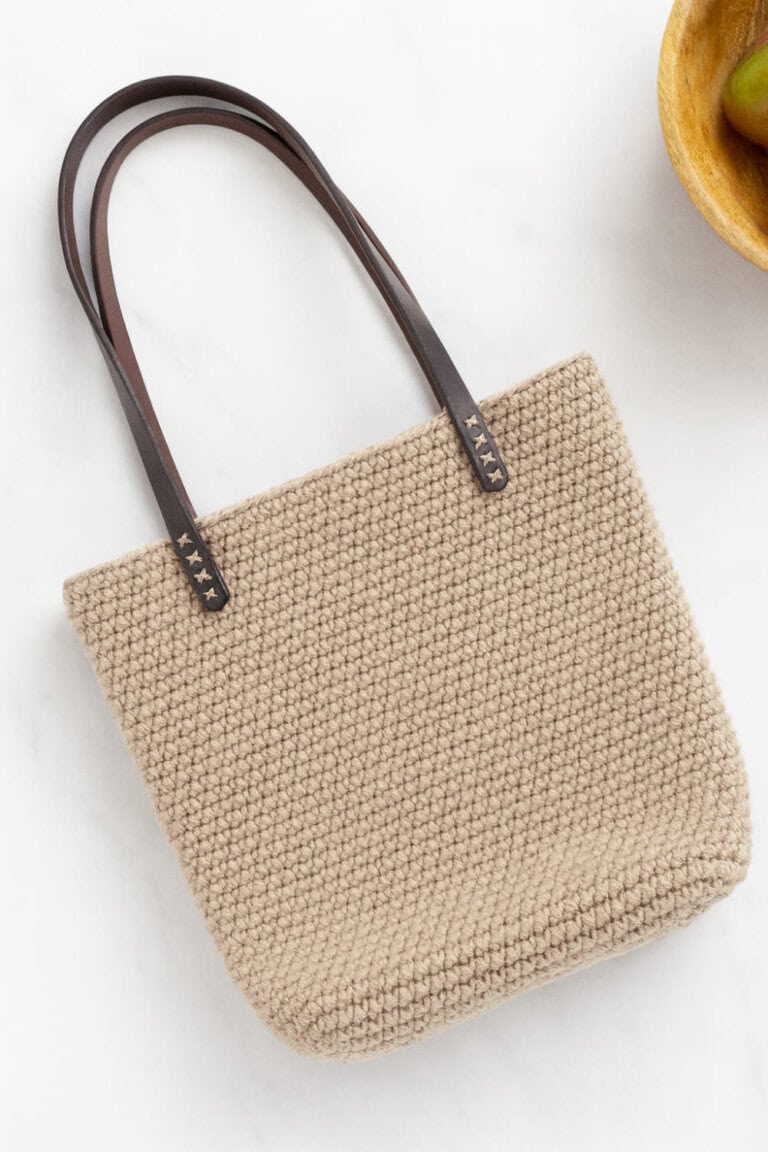
To make this cute crochet shoulder bag, start by chaining 9 and single crocheting across to create a base that’s 8 stitches wide, then continue working 32 rows.
Crochet single stitches all the way around the rectangle base, adding extra stitches at the corners so it lays flat.
Begin the body of the bag by working in joined rounds using the modified half double crochet (mhdc) stitch—round one goes in each stitch around, and round two skips the first stitch and adds a stitch into the slip stitch from the previous round.
Keep alternating these two rounds until you’ve completed about 28 rounds to build the height of the bag.
Finish by fastening off, weaving in the ends, and attaching faux leather or crocheted straps about 3.25 inches in from each side.
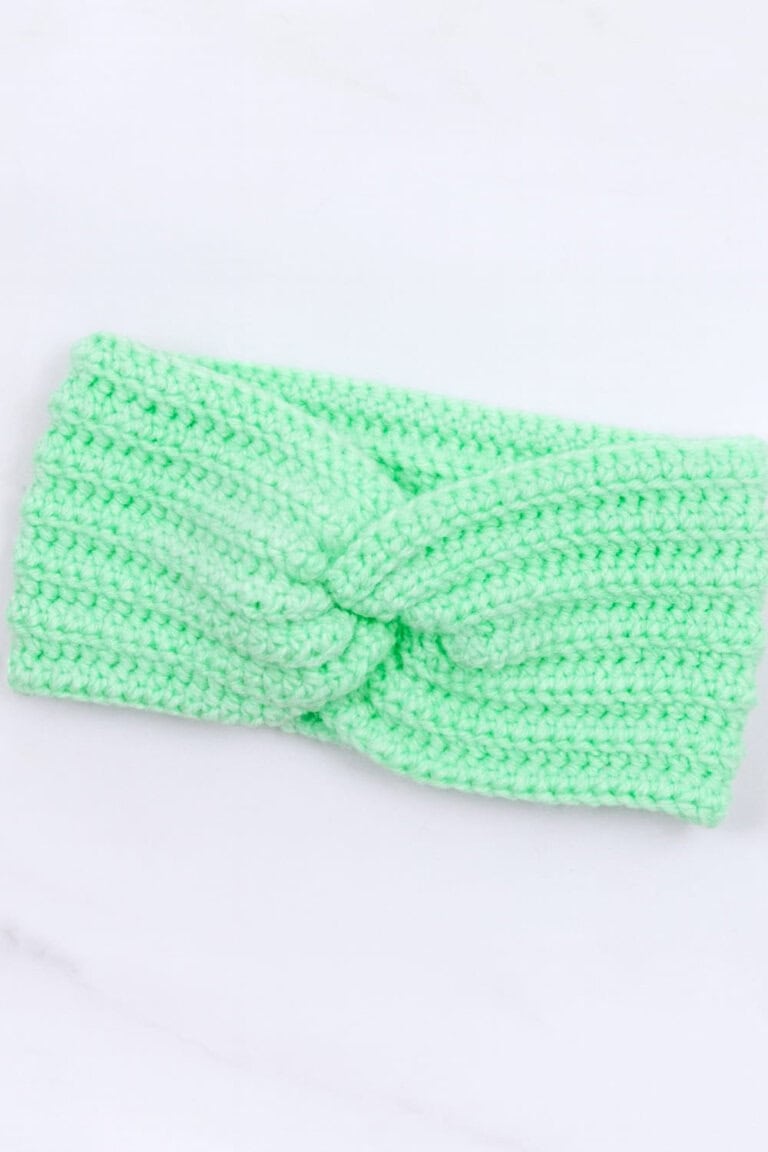
2. Beanies
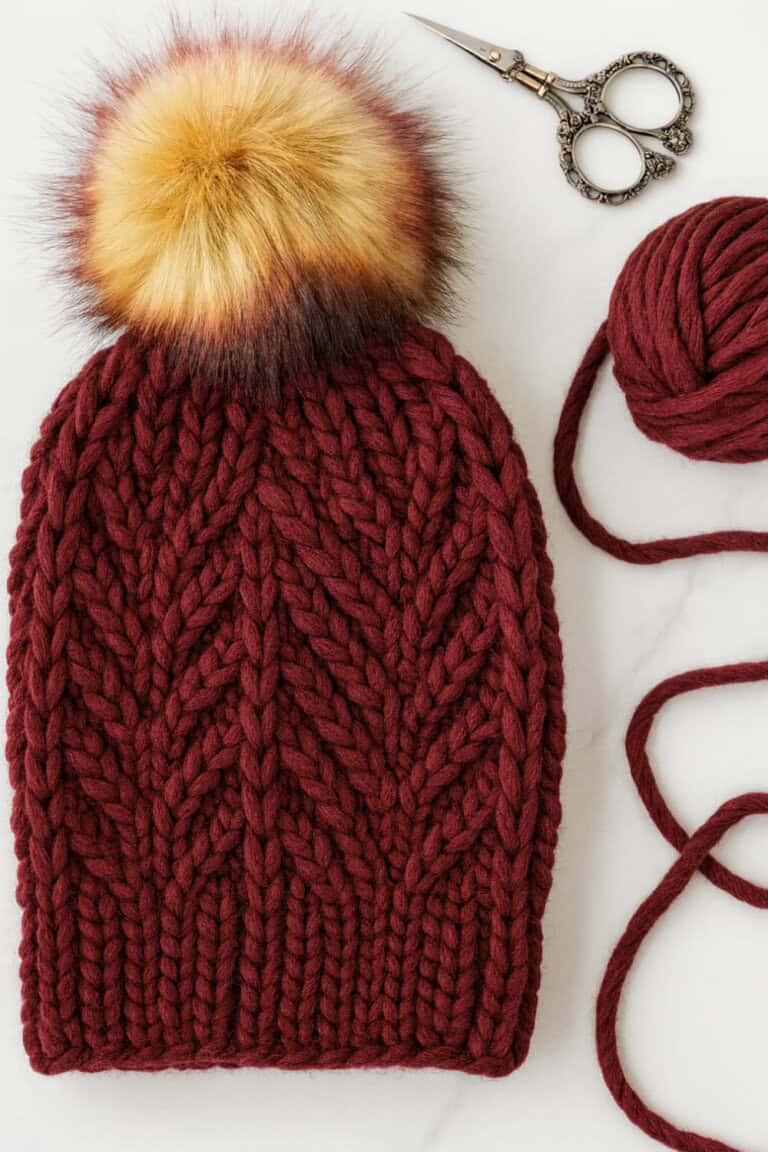
To make this super cute fall beanie, use super bulky yarn and begin knitting in the round on US 13 circular needles, switching to US 15 needles once the brim is complete.
Work in stockinette stitch while incorporating the chevron pattern, which combines right- and left-leaning twisted stitches and slipped-stitch columns to create a textured Art Deco look.
As the hat grows, follow the pattern’s decreases using knit two together (k2tog) and slip-slip-knit (ssk) to shape the crown, switching to double-pointed needles when the stitches become too few for circulars.
Finish by weaving in the ends with a tapestry needle and adding an optional pom-pom on top.
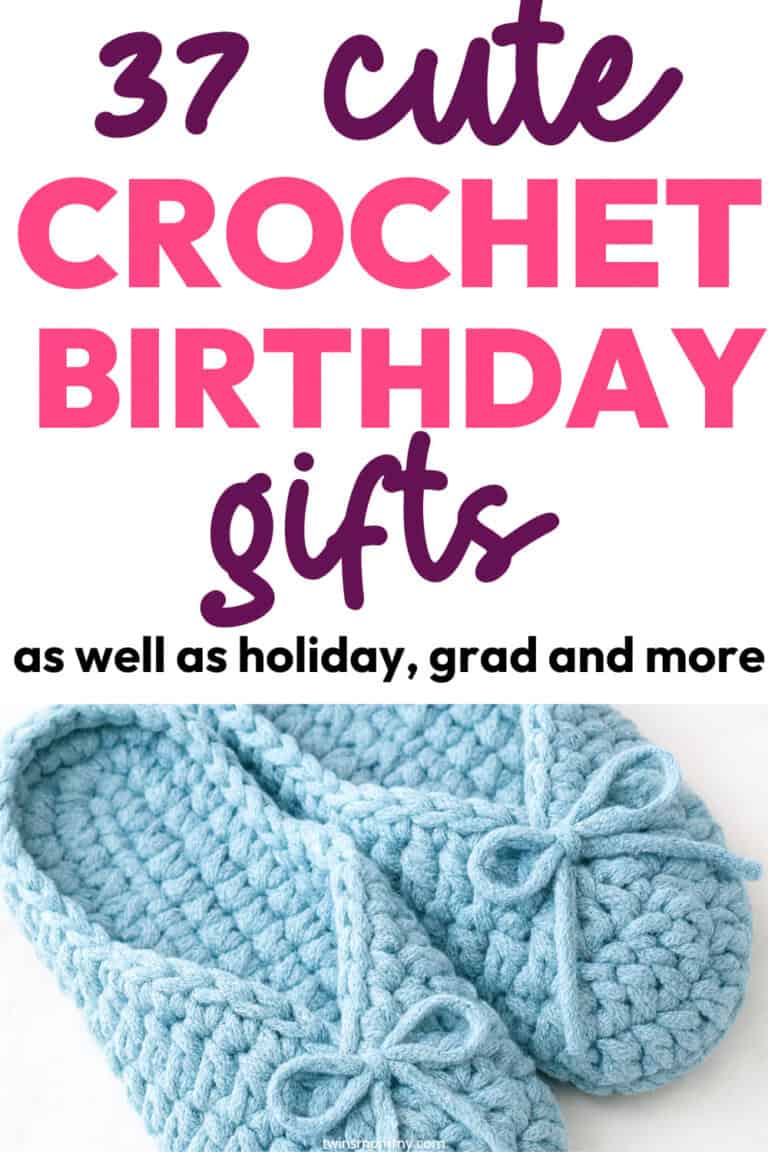
3. Crochet Slippers
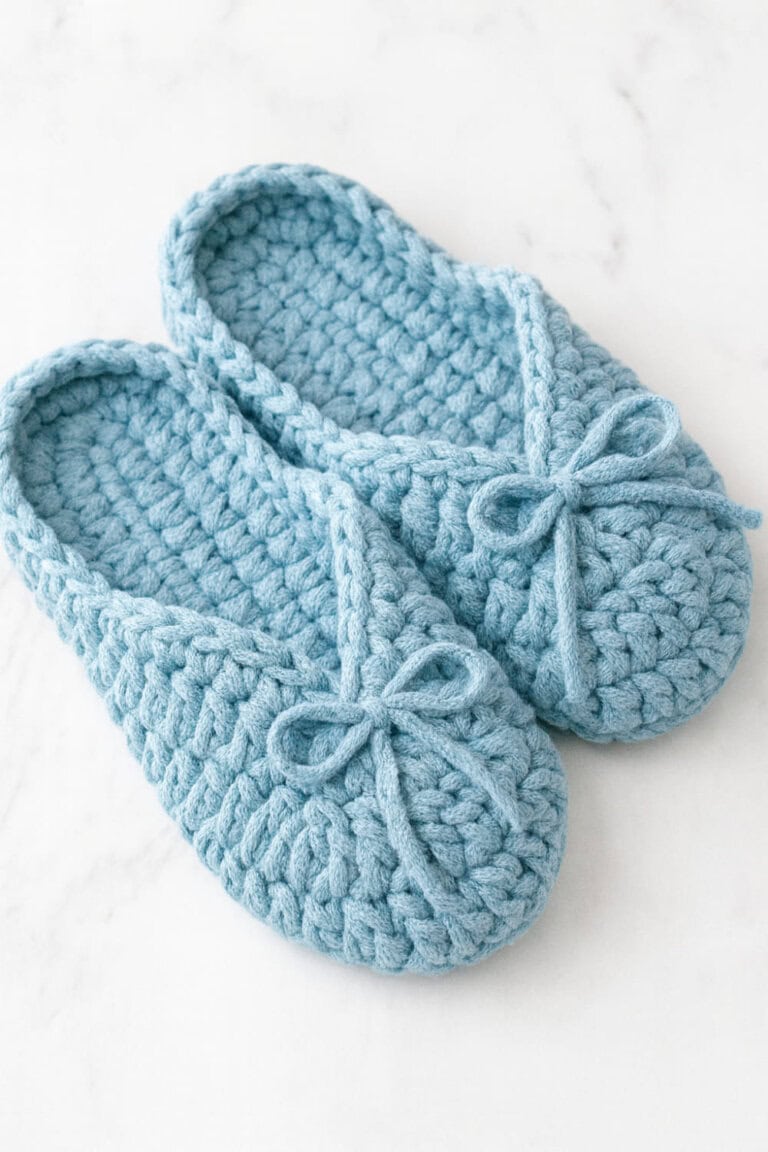
To make cozy winter slippers by following the Design Peak method, you begin with a crochet “flip flop” base—basically working the bottom sole like you would for a sandal’s footbed—and then build up the back of the slipper to cover the heel, turning it into a full winter slipper.
The steps include crocheting the sole to fit your foot length, then adding rows around the sides to raise up the instep and heel, shaping things so the fit is snug but comfortable.
Once the basic slipper shape is formed, you finish by weaving in all loose ends, making sure edges are clean, and optionally adding decorative or protective elements (like lining or extra edging).
4. Mug Cozy
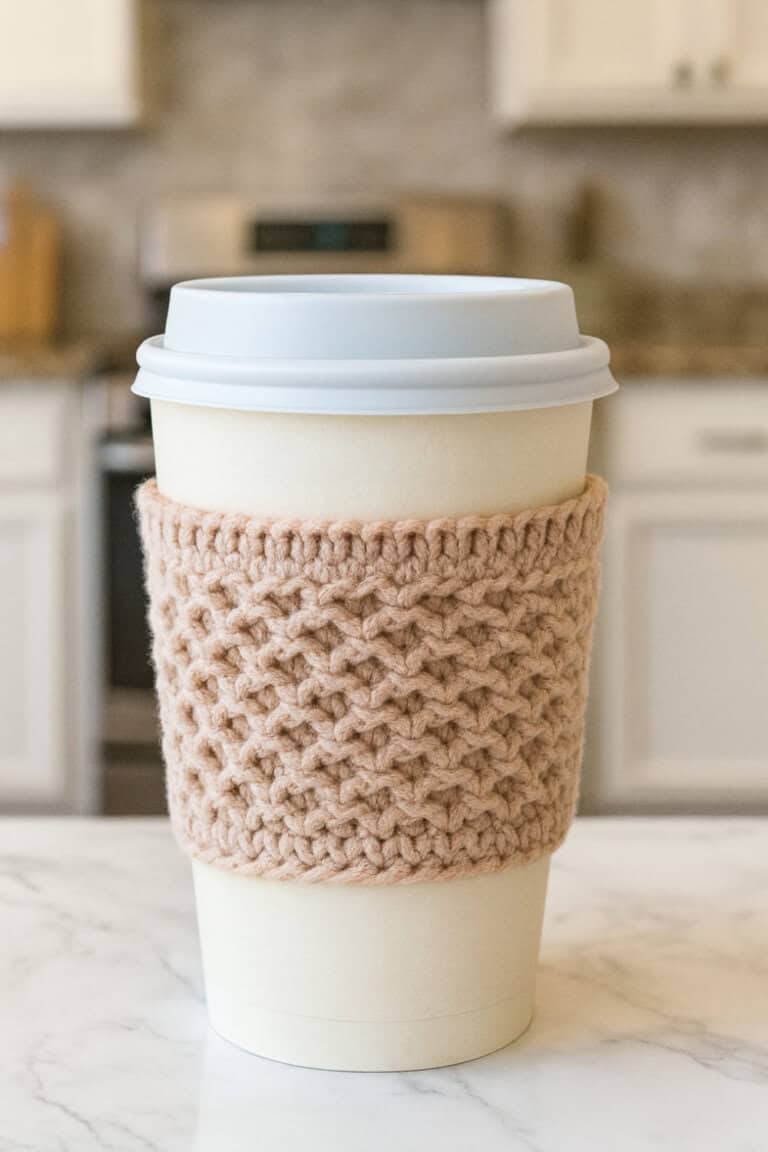
Begin by choosing a worsted weight or similar yarn and hook size suitable for your tension.
Chain enough stitches to span the base width of your cup sleeve, then work in rows of half-double crochet (hdc) or single crochet (sc) until you reach the height you want.
Shape the top edge by decreasing stitches toward the center so it fits around the cup better, or make a straight edge if fit isn’t critical. Once the panel is done, fold or wrap it around your cup and stitch the side seams together (or use a single continuous seam) so it forms a sleeve.
Optional additions include adding a decorative border (like scallops or picots) to the exposed top edge, or making a handle-strap/tab to attach a lid, or a loop for hanging.
Weave in all loose ends, block lightly if desired to even out stitches, and slip it on over your cup.
5. Coasters
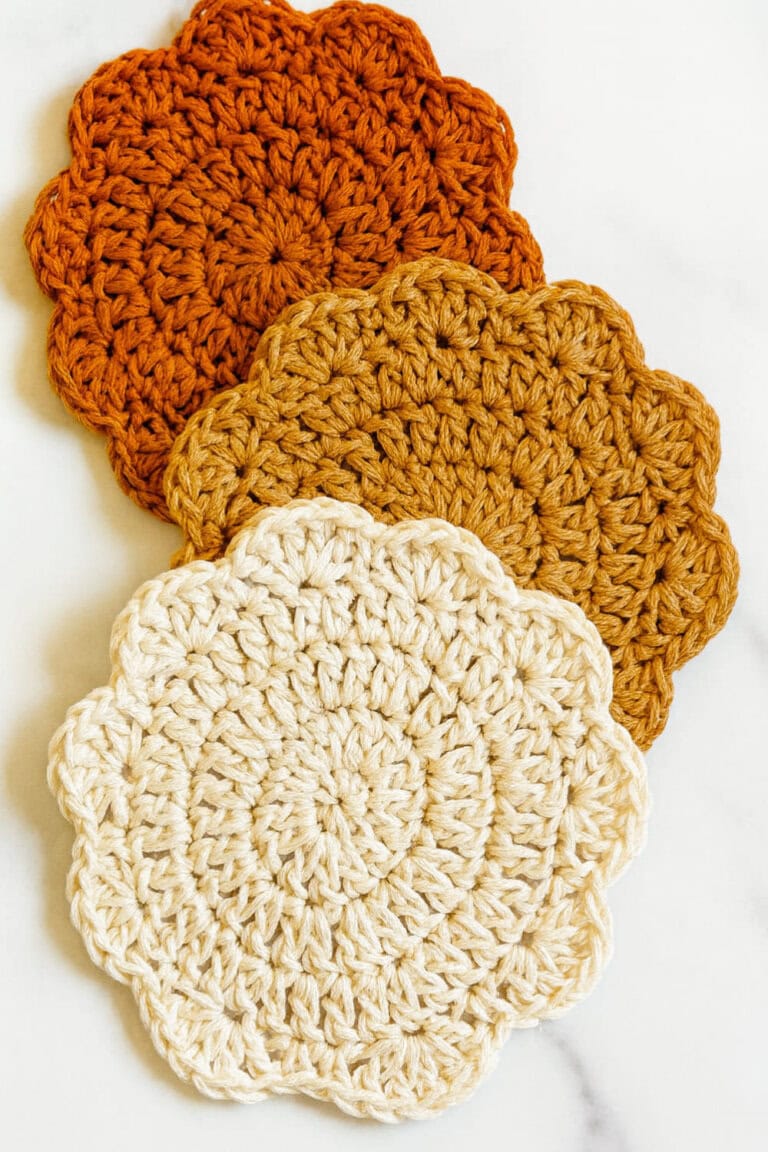
You’ll start by choosing a worsted or DK weight cotton yarn (or another sturdy fiber good for coasters) plus a crochet hook size appropriate (often around 4.0-5.5 mm depending on yarn).
Begin with a magic circle (or adjustable ring) to make the center round.
Then work rounds of stitches increasing evenly—commonly double crochet or half-double crochet (depending on the pattern’s style) in each round, putting two stitches in certain rounds to maintain flatness and avoid curling.
As you progress, you might introduce color changes to get that sunrise look—radiating stripes or segments of different colors. You may also add textured stitches (like puff stitches, clusters, shells) to add interest.
Continue until the coaster reaches the desired diameter, then finish with a neat border (single crochet rounds, or perhaps a decorative picot or scalloped edge).
Weave in all ends, block lightly or dampen and shape so it lays flat.
6. Turtle
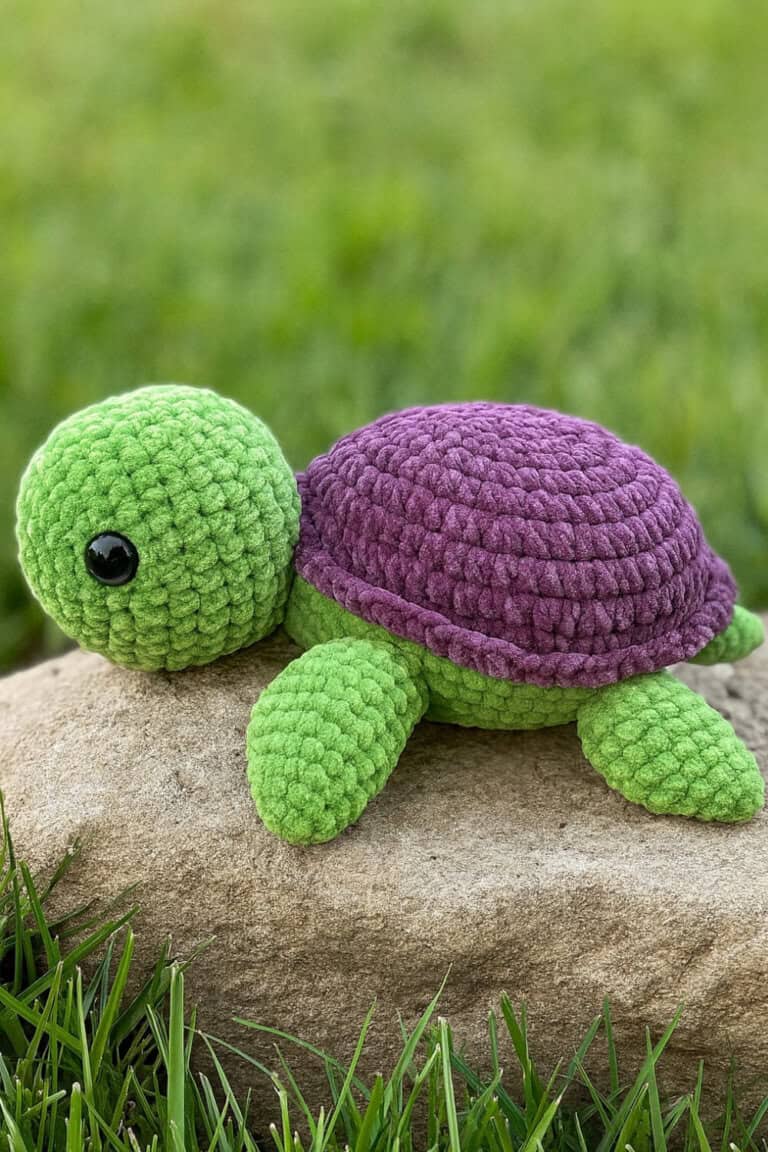
To make this crochet turtle, you’ll use three colors of medium-weight yarn, a 4.25 mm hook, safety eyes, stuffing, and a stitch marker.
You begin by crocheting the head in rounds: start with 6 single crochets in a magic ring, then increase gradually over six rounds to get a full spherical head.
Add a few rounds of even single crochet to build height, then begin decreasing to close up the head. Next make the top part of the shell through rounds of increases until the desired size, continuing with even rounds, and switch to working in the front loops in one round to create an edge.
Then change color and work the bottom shell in back loops, shaping and decreasing over rounds until you can close it. Create two front flippers and two back flippers (folded semi-circles for the legs), and a tail (increasing, a few rounds of even stitch, then decreasing).
Finally, assemble by stuffing each piece, sewing all parts (shell, head, flippers, tail) together using the long tails left for sewing, then weave in any loose ends.
7. Mini Crochet Plant
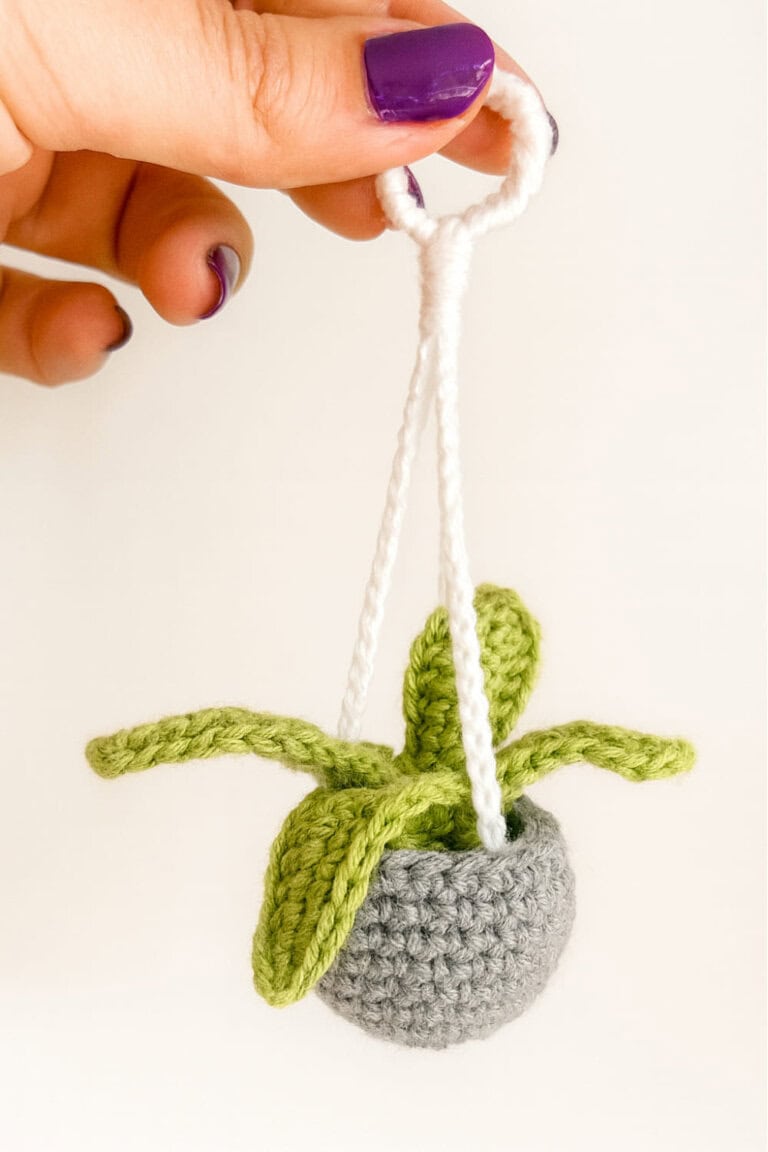
For this crochet project you’ll need cotton or other sturdy yarn (worsted or DK weight usually works well), a crochet hook suited to the yarn, scissors, and a ring (wooden or metal) if you want to use one for the top.
Start by making a small circle or base with a magic ring or chain-and-join method. Work in rounds of single- or double-crochet to form a flat bottom that will hold the plant pot.
Then begin building up the sides: work rounds or rows, possibly with increases to shape, until the base diameter of your pot is covered.
After that, switch to creating vertical panels or sections (chains or spaces) to form the hanger portion, spacing them evenly around the piece. When you’ve reached the needed height, you’ll join the top around a ring (or create a gathered top edge) to hang.
Weave in all ends, secure all joints, and hang your mini pot carefully.
8. Crochet Hand Towel
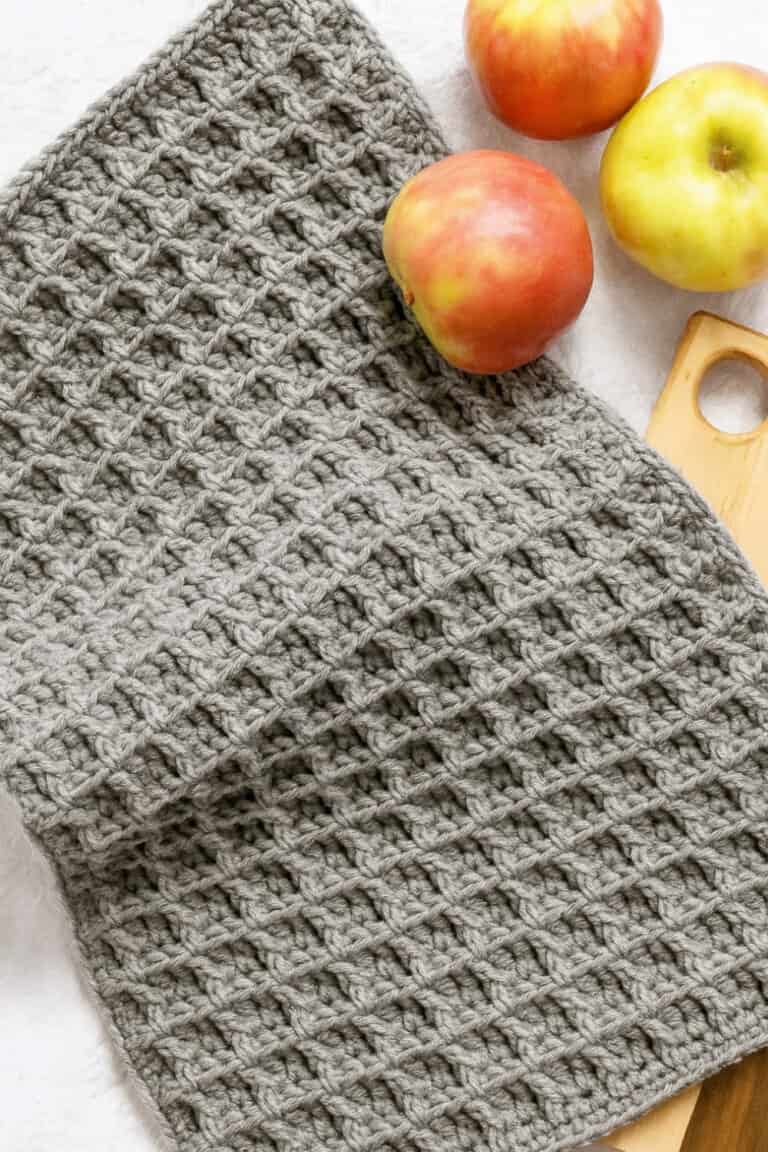
You’ll use cotton yarn (or another absorbent yarn suited for towels) and a crochet hook matching the yarn weight.
Start by chaining a number of stitches that gives you the desired width of the towel.
Work rows in a stitch pattern—often basic stitches like double crochet, half-double crochet, or cluster stitches—to build the body of the towel.
If the pattern includes texture or waffle-like stitch sections for extra absorbency.
Continue until you reach the length you want. For finishing touches, add a border or edging around all sides (single crochet or decorative scallops), and perhaps a hanging loop in one corner.
Then weave in all loose ends neatly.
9. Pot Holders
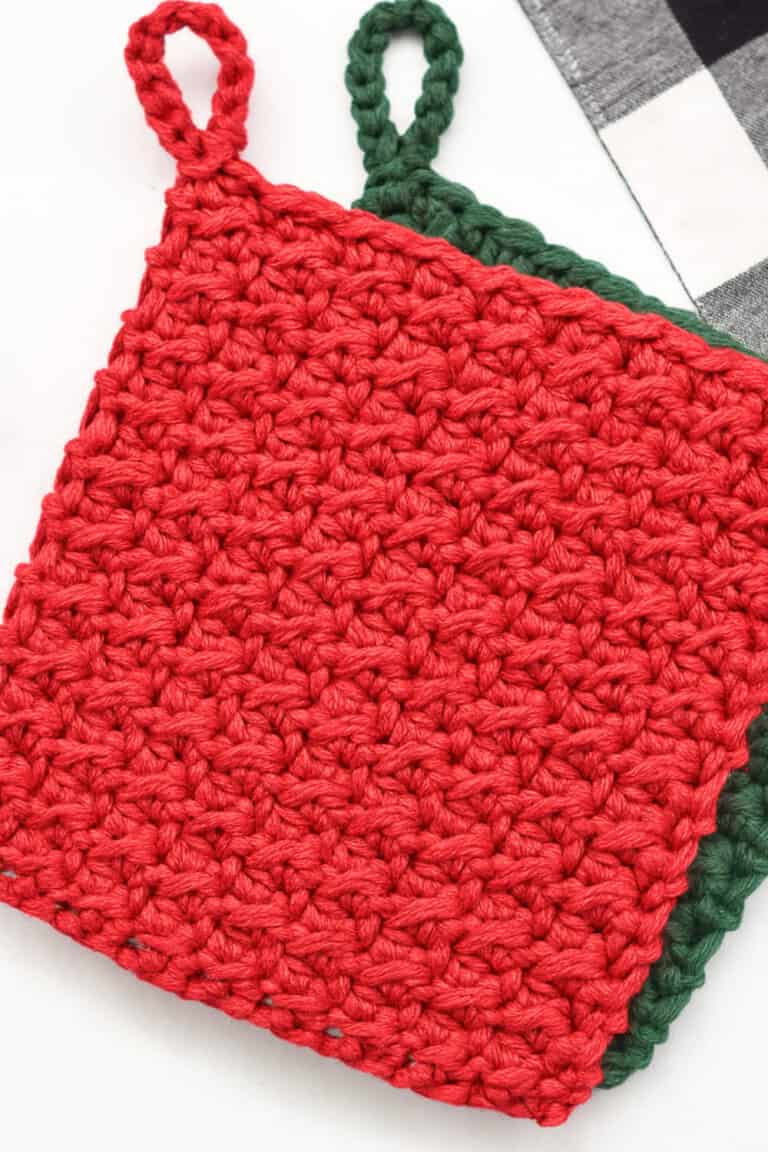
To make this crochet potholder, you’ll need worsted weight cotton yarn, a 5 mm (H) hook, scissors, and a yarn needle. Start by chaining an even number of stitches to reach your desired width.
Work the main fabric using the suzette stitch: single crochet and double crochet in the same stitch, skip one stitch, then repeat across the row.
Chain one and turn at the end of each row, continuing this stitch pattern until your piece forms a square. To add the loop, chain about 12 stitches from one corner and slip stitch back into the same corner.
Finally, fasten off, weave in the ends, and block it flat if needed.
10. Hair Scrunchie
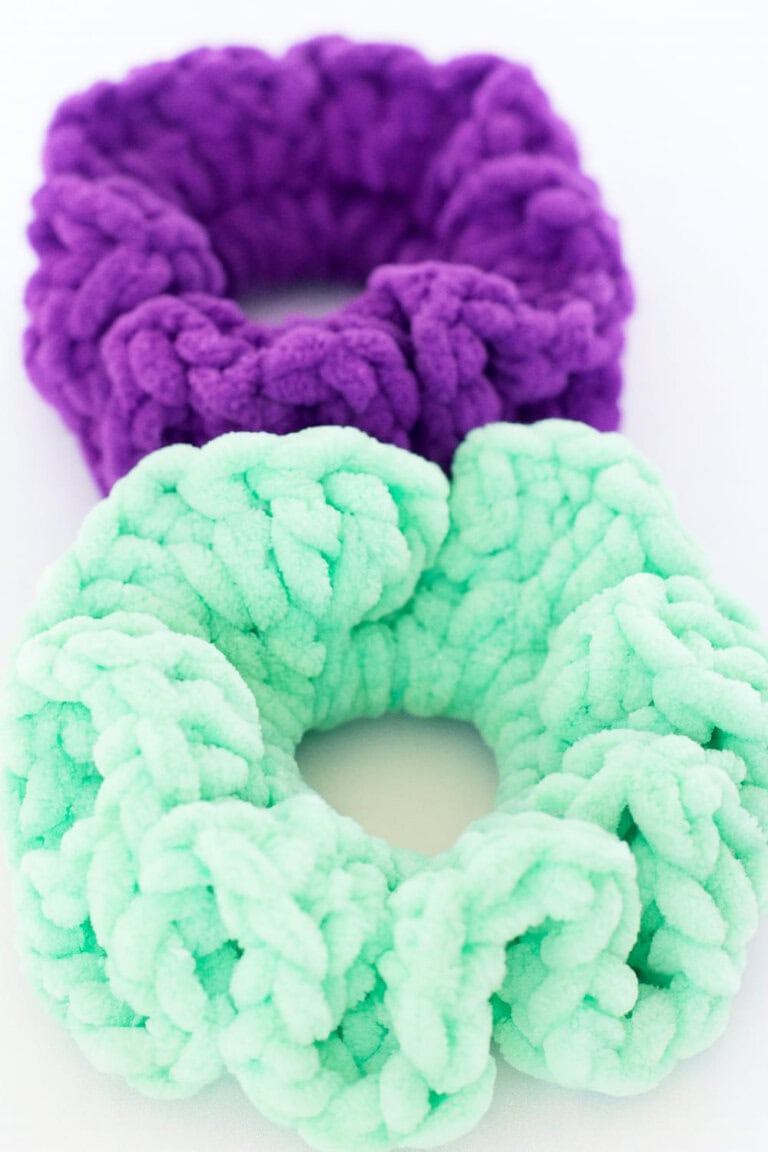
For this easy crochet gift idea, you’ll need plush chenille or velvet-style bulky yarn, a 6.5–8 mm crochet hook, a standard hair elastic, and a yarn needle.
Begin by attaching your yarn to the hair elastic with a slip knot, then single crochet tightly around the elastic until it’s fully covered.
Next, work two or three double crochets into each stitch around to create the ruffled texture, which will naturally cause the scrunchie to curl and look full.
Once you’ve worked all the way around, join with a slip stitch, fasten off, and weave in the ends securely.
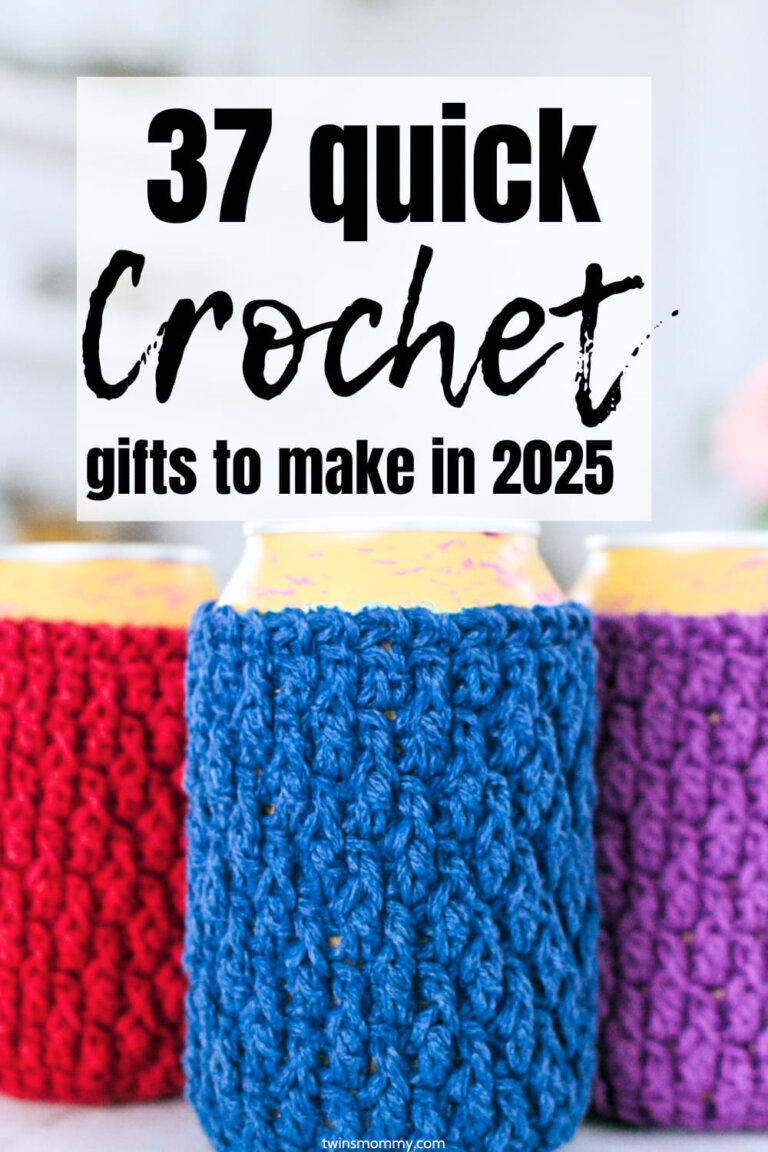
11. Pop Can Cozy
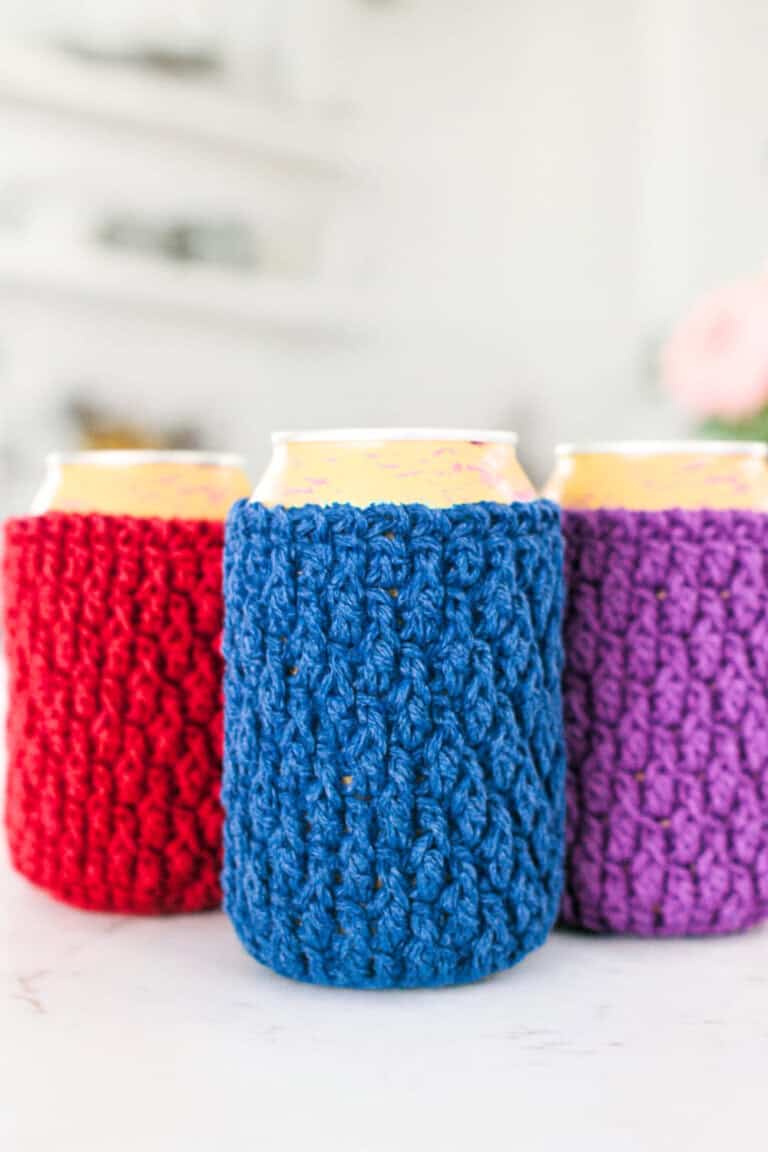
For these, you’ll need worsted weight cotton yarn, a 4–5 mm crochet hook, and a yarn needle. Start with a magic ring and work single crochets in rounds, increasing each round until the circle matches the size of the can’s bottom.
Once the base is done, stop increasing and work in the round up the sides using a textured stitch like the suzette stitch (single crochet and double crochet in the same stitch, skip one, repeat).
Continue until the cozy is tall enough to cover the can, then finish with a round of single crochet to create a neat edge. Fasten off, weave in your ends, and slip it on your can.
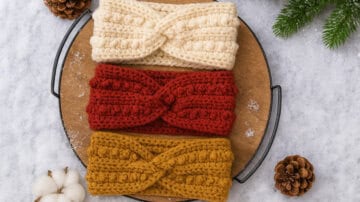
12. Ear Warmer
To make this crochet ear warmer, you’ll need worsted weight yarn, a 5 mm crochet hook, scissors, and a yarn needle.
Start by chaining enough stitches to match the circumference of your head (slightly snug for stretch), then work back-and-forth rows of half double crochet (hdc) in the back loops only to create a stretchy ribbed texture.
Continue until the strip is wide enough to cover your ears, then fasten off and leave a long tail for sewing.
Fold the strip in half, twist the two ends together once, then fold that twist in half again so the ends sandwich together. Sew through all layers to secure the twist, then weave in the yarn ends to finish.
13. Chunky Blanket
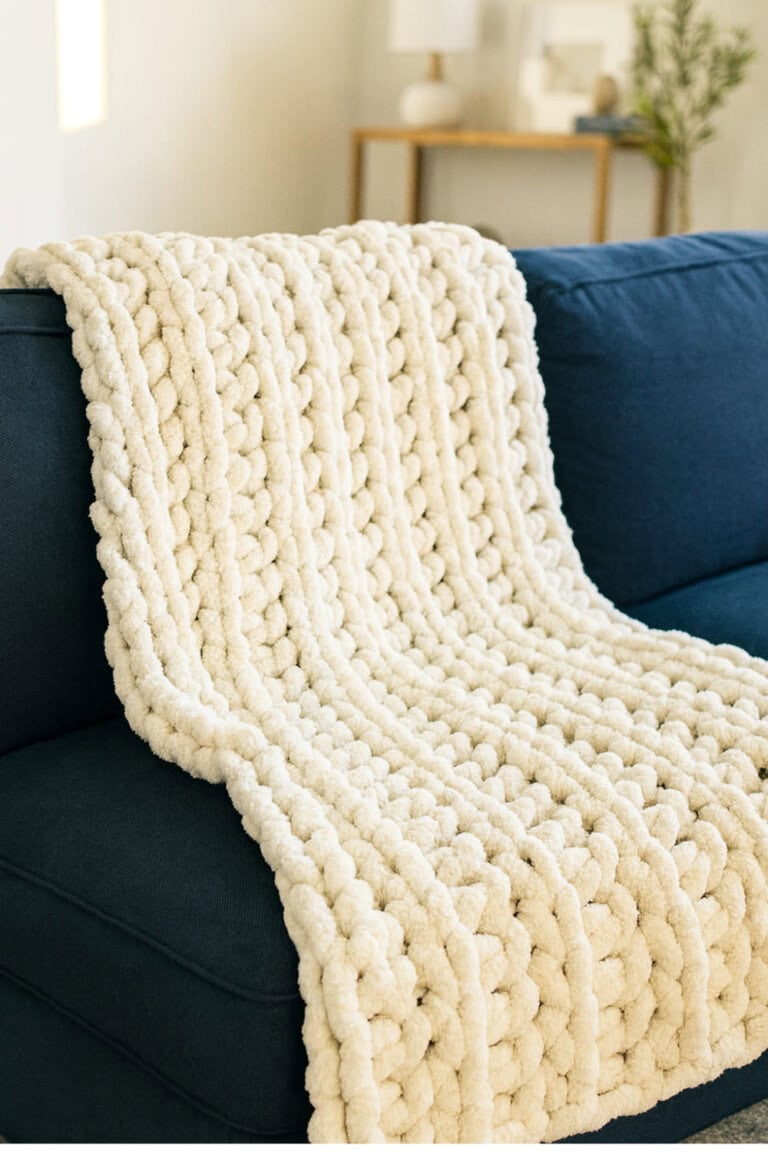
To make this house warming gift idea you’ll need jumbo or super bulky chenille yarn and an oversized crochet hook (around 15–20 mm) or you can finger crochet.
Start by chaining to your desired width, keeping the chain loose to prevent curling.
Work rows of half double crochet (hdc) or double crochet (dc) stitches, placing each stitch into the back loop only to create the ribbed texture seen in the blanket.
Continue adding rows until you reach the length you want, keeping your tension loose so the stitches stay soft and fluffy. When done, fasten off, weave in the yarn ends with your fingers or a large yarn needle, and gently shake out the blanket to fluff it up.
14. Crochet Plant Hanger
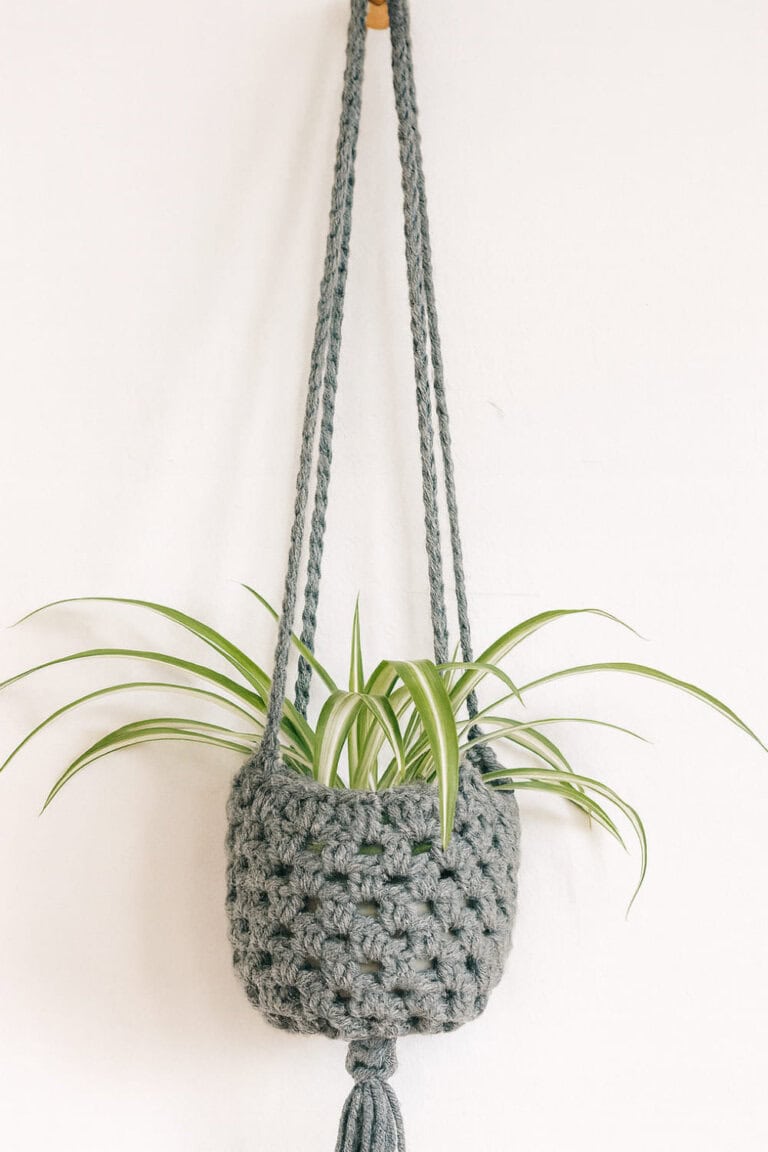
For this crochet plant hanger, you’ll need bulky yarn, a 6–7 mm crochet hook, scissors, and a yarn needle.
Start by creating a magic ring and crocheting rounds of double crochet (dc), increasing each round until the base is slightly larger than the bottom of your plant pot.
Then stop increasing and work even rounds in the same stitch to build the sides into a small basket shape, leaving open spaces if you want a lacy look.
Once it’s tall enough to hold the pot, chain three long straps of equal length directly from the rim of the basket, then join them together at the top to form a hanging loop.
Finish by tying the bottom center into a knot or tassel for decoration, and weave in all ends securely.
15. Infinity Scarf
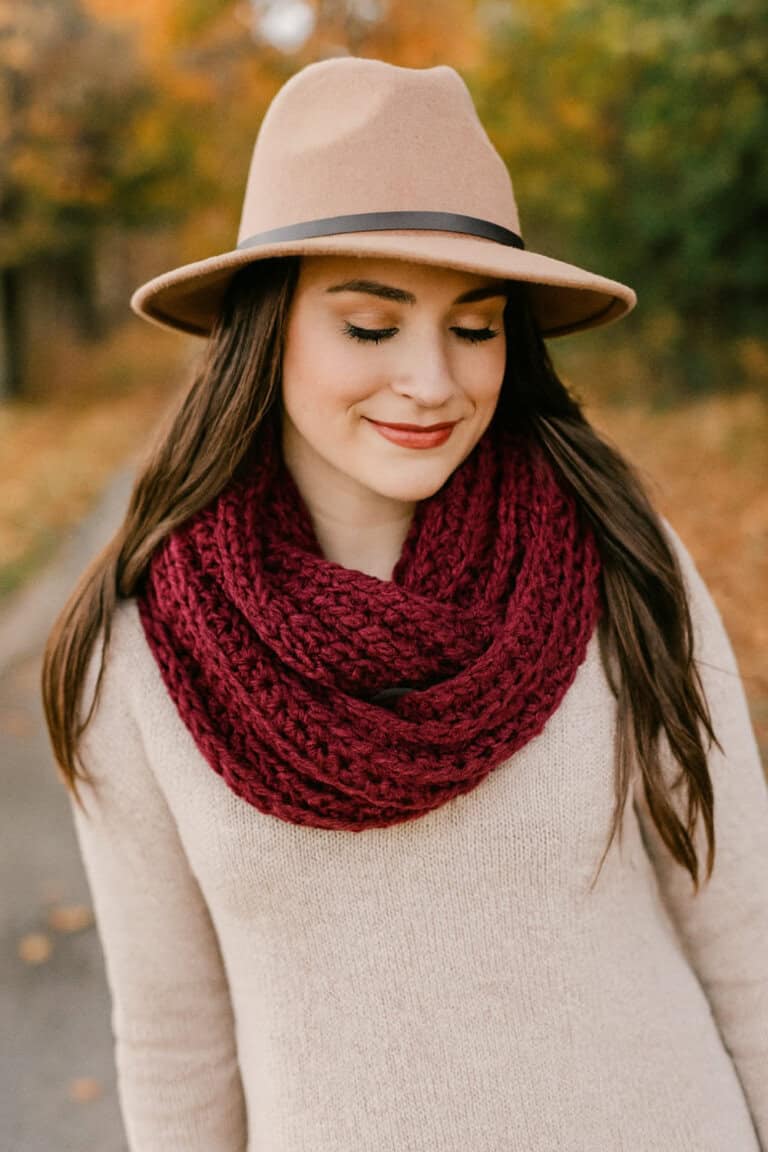
To make this cozy crochet infinity scarf, you’ll need bulky yarn, a 6–8 mm crochet hook, scissors, and a yarn needle.
Start by chaining about 150–180 stitches (depending on your preferred length), then join the chain with a slip stitch to form a large loop—be careful not to twist it.
Work rounds of half double crochet (hdc) or double crochet (dc) stitches, going into the back loops only to create a ribbed texture.
Continue adding rounds until the scarf is as wide as you like, then finish with a slip stitch, fasten off, and weave in all yarn ends.
This creates a stretchy, textured infinity scarf you can wrap around your neck twice for extra warmth.
More Wonderful Crochet Gifts to Make (with Patterns)
Here are my top favorite crochet gifts to make this season. Each one comes with a free pattern to use too!
16. Crochet Bucket Hat
17. Water Bottle Holder
18. Mrs. Murdock’s Mittons
19. Jar Cozy
20. Granny Placemat
21. Coffee Cozy
22. Flower Bookmark
23. Simple Crochet Bookmark
24. Market Bag
25. Amigurumi Weebee Doll
26. Cute Mini Cats
27. Sunflower Coaster
28. Nesting Baskets
29. Fingerless Mitts
30. Fleece Crochet Rabbit
31. Drawstring Bag
32. Yoga Mat Holder
33. Christmas Ornaments
34. Cute Boho Bag
35. Baby Blanket
36. Classic Teddy Bear
37. Crochet Christmas Wine Holder
Wonderful and Easy Crochet Gifts to Give this Season
I hope you found some inspiration for your crafting project! I know I have!
I’m sure my daughter would love to make a cute turtle or cat and with more experience she may then make some for her friends as gifts!
If you are more interested in selling these crochet projects, make sure to check out my guide here.

Leave a Reply